Every time I flip a pineapple upside down cake out of its pan, I’m transported back to my grandmother’s sunny kitchen in the 1980s. She had this ritual of making this exact cake whenever family visited, and I can still remember the collective gasp of delight when she’d dramatically invert the pan to reveal those perfectly caramelized pineapple rings nestled in their golden brown sugar glaze. The anticipation was almost unbearable as we waited for her to lift the pan, wondering if this time the fruit would stick or if we’d be rewarded with that picture-perfect arrangement.
Years later, I discovered that her secret wasn’t just in the recipe – it was in the love and confidence she brought to every step. This wasn’t just dessert; it was theater, tradition, and pure comfort all rolled into one stunning presentation. Now, whenever I make this cake for my own family and friends, I carry on that same sense of anticipation and joy, knowing that some recipes are truly timeless for a reason.
Why This Recipe Will Become Your Go-To Showstopper
This isn’t just any pineapple upside down cake – it’s the perfect balance of nostalgic comfort and impressive presentation that works for both casual family dinners and special celebrations. What sets this version apart is the incredible moistness achieved through the combination of vanilla yogurt and reserved pineapple juice, creating a tender crumb that soaks up all those caramelized flavors beautifully.
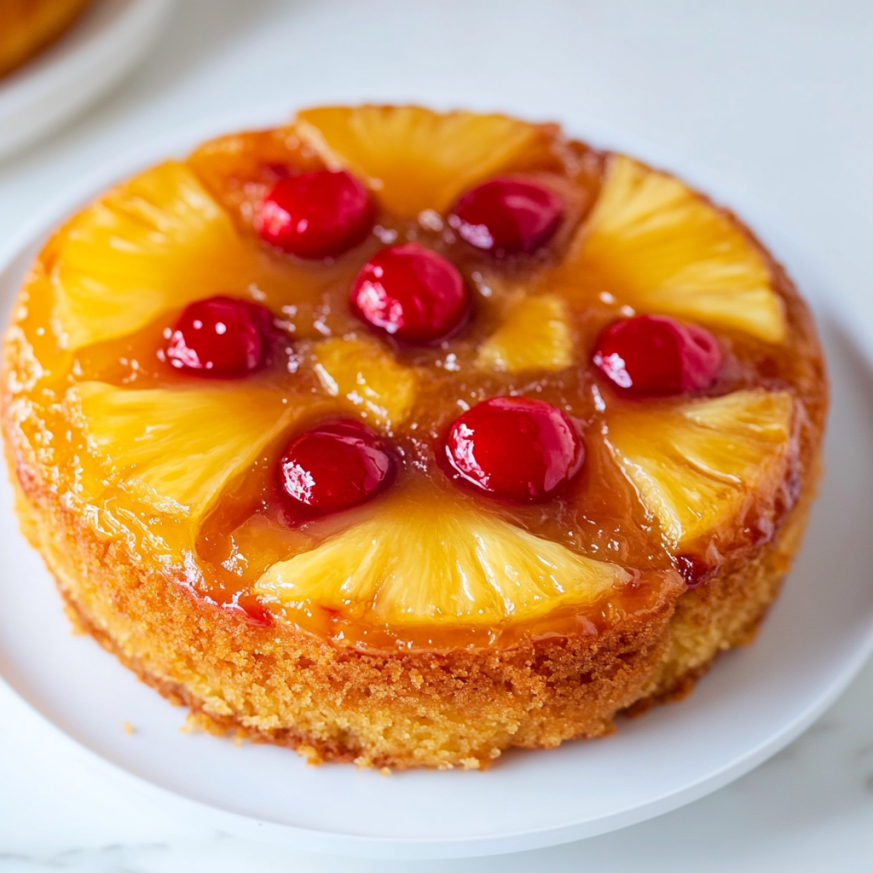
Moreover, the visual impact never fails to amaze guests. There’s something magical about that moment when you flip the cake and reveal the gorgeous pattern of golden pineapple rings and ruby-red cherries, all glistening with their caramelized brown sugar coating. It looks like something from a professional bakery, yet the technique is surprisingly straightforward.
Additionally, this cake strikes the perfect balance between sweet and tangy. The natural acidity of the pineapple cuts through the rich brown sugar and butter base, while the subtle almond extract adds a sophisticated depth that elevates this classic beyond ordinary. Each bite delivers multiple layers of flavor and texture that keep people coming back for seconds.
The genius of this recipe lies in its reliability – once you master the basic technique, you’ll have a dessert that consistently delivers stunning results with ingredients you can find at any grocery store.
Essential Ingredients & Timing Information
Prep Time: 25 minutes
Cook Time: 45 minutes
Cooling Time: 20 minutes
Total Time: 1 hour 10 minutes
Serves: 9 generous portions
For the Caramelized Topping
- 4 tablespoons unsalted butter, melted
- ½ cup brown sugar, packed
- 1 (20-ounce) can pineapple slices in juice (reserve the juice)
- 1 (10-ounce) jar maraschino cherries
For the Tender Cake Batter
- 1½ cups all-purpose flour
- 1 teaspoon baking powder
- ¼ teaspoon baking soda
- ¼ teaspoon salt
- 8 tablespoons unsalted butter, softened
- ¾ cup granulated sugar
- 3 large eggs, room temperature
- ⅓ cup vanilla yogurt
- 6 tablespoons reserved pineapple juice
- 1 teaspoon vanilla extract
- ¼ teaspoon almond extract
Perfect Accompaniments: Vanilla ice cream, freshly whipped cream, or a drizzle of the remaining pineapple juice for extra tropical flavor.
Step-by-Step Instructions
Setting Up for Success
Begin by preheating your oven to 350°F and selecting a 9-inch round cake pan that’s at least 2 inches high – this depth is crucial for containing all the delicious juices that develop during baking.
Generously brush the entire interior of your cake pan with the 4 tablespoons of melted butter, making sure to coat both the bottom and sides thoroughly. This butter layer serves as both a release agent and contributes to the caramelization process.
Evenly sprinkle the packed brown sugar over the melted butter, focusing primarily on the bottom of the pan where it will create that signature caramelized base that makes this cake so special.
Creating the Stunning Fruit Pattern
Carefully remove the pineapple slices from their can, reserving 6 tablespoons of the juice for your cake batter. Pat both the pineapple slices and maraschino cherries completely dry with paper towels – excess moisture can interfere with proper caramelization.
Arrange the pineapple slices in an overlapping pattern across the bottom of your prepared pan, ensuring they fit snugly together. Don’t worry if they overlap slightly; this actually creates a more interesting final presentation.
Next, nestle the maraschino cherries both inside the center holes of the pineapple rings and in any gaps around the edges. Gently press all the fruit into the brown sugar mixture to ensure good contact, then refrigerate the pan while you prepare the batter. This chilling step helps set the fruit arrangement and prevents shifting when you add the batter.
Crafting the Perfect Cake Batter
In a medium bowl, whisk together the flour, baking powder, baking soda, and salt until evenly combined. This dry mixture will provide the structure for your tender cake.
Using an electric mixer, cream the softened butter and granulated sugar in a large bowl on high speed until the mixture becomes light and fluffy – this usually takes about 3-4 minutes and is crucial for creating the cake’s tender texture.
Reduce the mixer speed to medium and add the eggs one at a time, beating well after each addition. This gradual incorporation prevents the batter from curdling and ensures smooth results.
Add the vanilla yogurt, reserved pineapple juice, vanilla extract, and almond extract to the butter mixture, continuing to beat until just combined. The yogurt adds incredible moisture while the pineapple juice enhances the tropical flavor throughout the cake.
Bringing It All Together
Gradually add the flour mixture to the wet ingredients, mixing on medium speed just until the batter becomes smooth and no flour streaks remain. Overmixing at this stage can result in a tough cake, so stop as soon as everything is incorporated.
Carefully pour the batter over your chilled fruit arrangement, spreading it gently with a spatula to ensure even coverage without disturbing the beautiful pattern you’ve created beneath.
Cover the entire pan tightly with aluminum foil – this initial covered baking period helps the cake cook evenly while preventing the top from browning too quickly.
Baking to Golden Perfection
Bake covered for 25 minutes, then remove the foil and continue baking for another 20 minutes, or until the cake springs back when lightly touched and a toothpick inserted into the cake portion (not the fruit) comes out clean or with just a few moist crumbs.
Allow the cake to cool in the pan for exactly 20 minutes – this timing is critical. Too short and the cake may fall apart; too long and it might stick to the pan.
The Grand Finale
Run a knife around the edges to ensure the cake releases cleanly, then place your serving plate upside down over the cake pan. In one confident motion, flip both the plate and pan together, then gently tap all over the bottom of the pan before slowly lifting it away.
If any fruit pieces stick to the pan, simply arrange them back on the cake – this happens occasionally and is easily fixed.
Creative Serving Suggestions
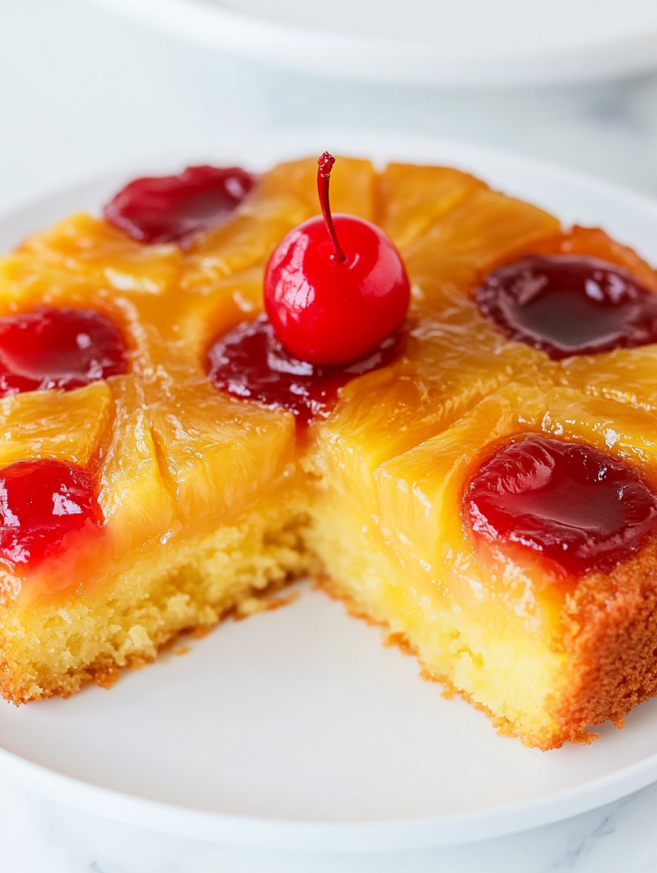
This stunning cake serves beautifully as the centerpiece of any dessert table, with its vibrant colors and glossy caramelized surface catching the light beautifully. For elegant dinner parties, serve warm slices with a small scoop of vanilla bean ice cream that slowly melts into the caramelized juices.
During casual family gatherings, present the whole cake on a decorative stand and let guests admire the gorgeous fruit pattern before cutting. The cake’s impressive appearance makes conversation easy and creates those memorable “wow” moments that people talk about long after the meal ends.
Consider pairing with freshly brewed coffee or tropical fruit punch for themed parties, or serve alongside other retro desserts for a nostalgic menu that celebrates classic American baking traditions.
Delicious Recipe Variations
Tropical Paradise Version
Replace some pineapple slices with mango chunks and add toasted coconut flakes to the brown sugar mixture for an enhanced tropical experience that transports you to island destinations.
Rum-Spiked Adult Version
Add 2 tablespoons of dark rum to the brown sugar mixture and replace the vanilla yogurt with rum-flavored yogurt for a sophisticated twist perfect for adult gatherings.
Seasonal Fresh Fruit Variation
During summer months, substitute fresh pineapple slices and add sliced peaches or apricots for a farmer’s market-fresh version that showcases seasonal produce beautifully.
Mini Individual Cakes
Divide the recipe among 12 muffin cups for perfectly portioned individual desserts that make elegant presentation effortless for dinner parties or special occasions.
Make-Ahead Tips
This cake actually benefits from resting time, making it an excellent make-ahead dessert option. Once completely cooled, wrap the entire cake tightly in plastic wrap and store at room temperature for up to 2 days. The flavors continue to develop and the cake becomes even more moist as it sits.
For longer storage, refrigerate the wrapped cake for up to 5 days. Bring to room temperature before serving, or warm individual slices briefly in the microwave for that fresh-from-the-oven experience.
The fruit arrangement can be prepared several hours ahead and refrigerated while you attend to other cooking tasks. This advance preparation actually helps the flavors meld and makes assembly even easier when you’re ready to bake.
You can also prepare the dry ingredients mixture up to a week ahead and store it in an airtight container, streamlining your baking day preparation significantly.
Important Notes
Pan selection is crucial for success – ensure your 9-inch pan is at least 2 inches deep to accommodate the fruit layer, batter, and any bubble-up that occurs during baking. Shallow pans may overflow and create oven messes.
Room temperature eggs incorporate more easily and create better texture, so remove them from the refrigerator about 30 minutes before beginning. Cold eggs can cause the butter mixture to seize and create a less tender final product.
Don’t skip the drying step for the fruit – excess moisture prevents proper caramelization and can make the cake soggy. Taking time to pat everything dry ensures that beautiful golden finish we’re after.
The 20-minute cooling time before flipping is critical for structural integrity. Setting a timer helps resist the temptation to flip too early and risk a messy presentation.
Nutritional Information (per serving):
- Calories: 359
- Carbohydrates: 48g
- Fat: 17g
- Protein: 5g
Frequently Asked Questions
Q: What should I do if some fruit sticks to the pan when I flip the cake? A: Don’t panic! Simply remove the stuck pieces and arrange them back on the cake where they belong. A small offset spatula helps with this repair work, and once in place, no one will ever know there was an issue.
Q: Can I use fresh pineapple instead of canned? A: While fresh pineapple works, canned pineapple in juice provides better results because it’s already at the optimal sweetness level and the reserved juice enhances the cake batter. Fresh pineapple can be more acidic and may not caramelize as beautifully.
Q: Why did my cake turn out dense instead of light and fluffy? A: This usually results from overmixing the batter once the flour is added, which develops too much gluten. Mix just until ingredients are combined, and ensure your butter and eggs are at room temperature for easier incorporation.
Q: Can I make this cake without the cherries? A: Absolutely! You can omit the cherries entirely, use fresh berries, or substitute with other small fruits like cranberries or blueberries. The cherries are primarily decorative, though they do add a nice color contrast.
Q: How do I prevent the brown sugar from clumping in the pan? A: Make sure your melted butter is evenly distributed before adding the brown sugar, and use a fork to break up any clumps as you sprinkle it in. Packed brown sugar should be used, but break it up as needed for even distribution.
Q: Can I double this recipe for a larger crowd? A: It’s better to make two separate cakes rather than doubling into one large pan. The fruit arrangement becomes difficult to manage in larger pans, and baking times become unpredictable. Two 9-inch cakes provide better results and more impressive presentation.
Q: What’s the best way to store leftover cake? A: Cover tightly with plastic wrap and store at room temperature for up to 2 days, or refrigerate for up to 5 days. The cake remains moist and delicious, though the caramelized topping may soften slightly over time.
Q: Can I use a different type of yogurt? A: Plain Greek yogurt works well, though it may make the cake slightly denser. Avoid flavored yogurts other than vanilla, as they can interfere with the delicate flavor balance. Sour cream can substitute in equal amounts if yogurt isn’t available.


