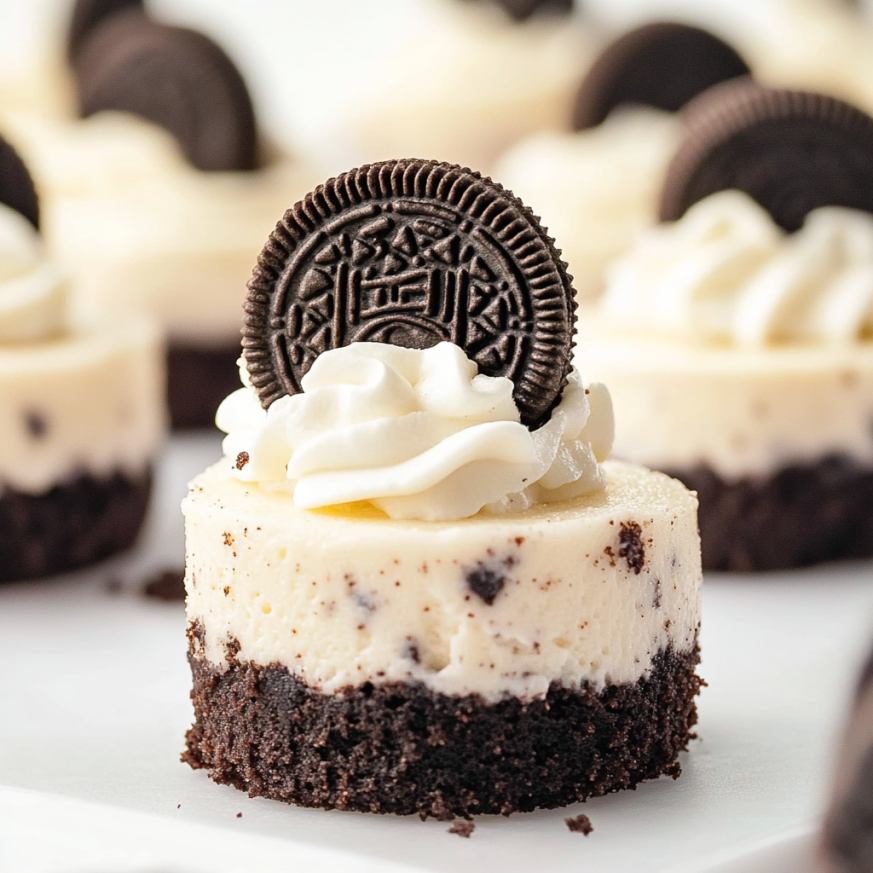
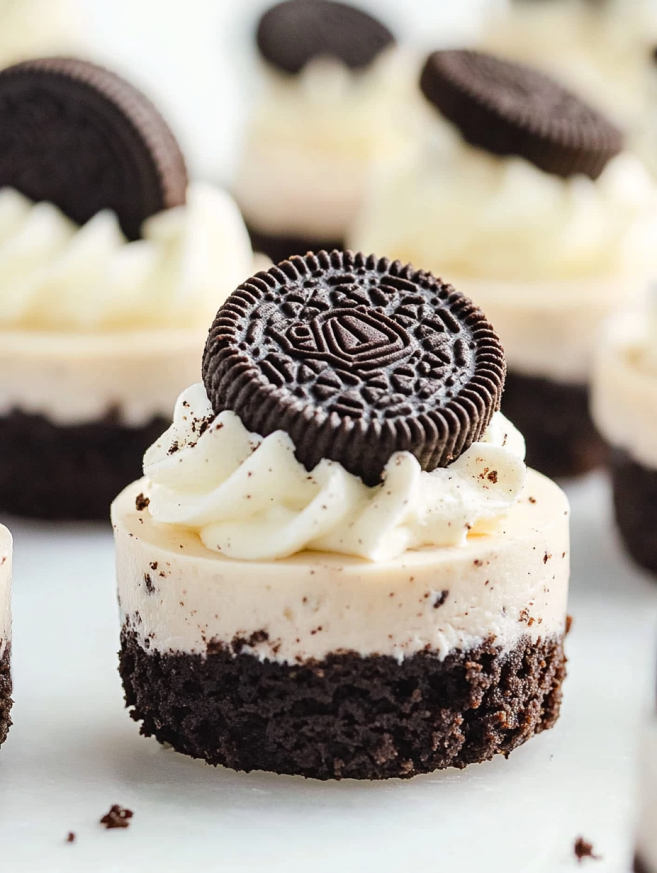
When I need a dessert that guarantees smiles and empty plates, these Oreo Cheesecake Bites are my secret weapon. The first time I made them for a neighborhood potluck, I watched as both kids and adults gravitated toward these perfectly portioned treats. There’s something irresistible about the combination of creamy cheesecake and crunchy Oreo cookies, all packaged in adorable bite-sized portions that disappear faster than I can make them.
Why These Cheesecake Bites Will Become Your Go-To Dessert
No-Bake Convenience
The beauty of this recipe lies in its simplicity – no oven required! Since these treats set up perfectly in the freezer, you can make them even on the hottest summer days without heating up your kitchen. Moreover, the hands-on time is minimal, leaving you free to focus on other party preparations.
Perfect Portion Control
Individual servings mean no messy cutting or serving decisions. Each bite delivers the ideal ratio of crust to creamy filling, ensuring every guest gets the perfect experience. Additionally, the uniform presentation makes these treats look professionally made with minimal effort.
Make-Ahead Magic
These cheesecake bites actually improve with time, making them ideal for busy schedules. Prepare them up to three days in advance, and they’ll be ready whenever you need an impressive dessert. Furthermore, they can be served directly from the freezer or allowed to soften slightly at room temperature.
Crowd-Pleasing Appeal
The combination of America’s favorite cookie with rich cheesecake creates a dessert that appeals to all ages. Even picky eaters who might shy away from traditional cheesecake find these irresistible due to the familiar Oreo flavor profile.
Essential Ingredients and Equipment
For the Base and Filling
- 33 Oreo cookies, divided (22 for crust, 11 for filling)
- ¼ cup unsalted butter, melted
- 16 ounces cream cheese, room temperature
- 1½ cups powdered sugar
- 1 teaspoon vanilla extract
- ¼ teaspoon salt
- 1½ cups heavy whipping cream
Optional Garnishes
- Mini Oreos for decoration
- Additional whipped cream for topping
Essential Equipment
You’ll need silicone molds for this recipe – mini muffin molds, round chocolate molds, or specialty cheesecake bite molds all work beautifully. Silicone is crucial for easy removal once frozen.
Serving Suggestions: Present on elegant serving platters with fresh berries, serve alongside coffee or milk, or create a dessert bar with various toppings for customization.
Step-by-Step Instructions
Creating the Perfect Crust Base
Place 22 Oreo cookies in a food processor and pulse until they form fine, even crumbs. The goal is uniform pieces that will pack well and hold together. Transfer the crumbs to a large bowl, add the melted butter, and stir until the mixture resembles wet sand and holds together when pressed.
Forming Individual Crusts
Add exactly one teaspoon of the cookie crumb mixture into each cavity of your silicone mold. Using your fingertips or the back of a spoon, press the mixture firmly into the bottom of each mold, creating a compact base. Place the filled mold on a cookie sheet and refrigerate while preparing the filling.
Preparing the Cream Cheese Base
In a large bowl, beat the room-temperature cream cheese, powdered sugar, vanilla extract, and salt using an electric mixer. Start on low speed to prevent powdered sugar clouds, then gradually increase to medium-high speed. Continue beating until the mixture is completely smooth and free of lumps.
Creating Light and Airy Whipped Cream
In a separate clean bowl, beat the heavy whipping cream on high speed until stiff peaks form. Watch carefully to avoid over-whipping, which can result in a grainy texture that won’t fold smoothly into the cream cheese mixture.
Combining for Perfect Texture
Crush the remaining 11 Oreo cookies into chunky pieces – you want some texture variation for interest. Gently fold the whipped cream into the cream cheese mixture using a spatula, then carefully incorporate the crushed cookies to maintain the light, airy texture.
Assembly and Final Steps
Filling the Molds
Spoon approximately 2 tablespoons of the cheesecake filling into each prepared mold cavity, filling them completely. Gently tap the mold on the counter several times to release air bubbles and ensure even distribution.
Achieving Clean Edges
Using an offset spatula or the back of a knife, scrape away any excess filling from the top of the mold. This step ensures clean, professional-looking edges once the bites are removed.
The Freezing Process
Place the filled molds on a cookie sheet and freeze for at least 2 hours, or until completely solid. The treats should feel firm to the touch and release easily from the molds when ready.
Creative Serving and Presentation Ideas
Elegant Party Presentation
Arrange the frozen bites on a chilled serving platter, allowing slight softening for easier eating. Garnish each bite with a small dollop of whipped cream and a mini Oreo for professional appeal.
Casual Family Style
Serve directly from the freezer in small bowls with spoons, allowing guests to enjoy them like mini ice cream treats on warm days.
Special Occasion Styling
Create themed presentations using colored molds for holidays, or drizzle with melted chocolate for extra indulgence.
Delicious Recipe Variations
Chocolate Lover’s Dream
Replace regular Oreos with Double Stuf or chocolate-filled varieties, and add 2 tablespoons of cocoa powder to the cream cheese mixture for intense chocolate flavor.
Berry Blast Version
Fold in ½ cup of freeze-dried strawberries or raspberries with the crushed cookies for a fruity twist that adds beautiful color and tangy flavor.
Peanut Butter Paradise
Add ¼ cup of smooth peanut butter to the cream cheese mixture and use peanut butter Oreos for the crust and filling components.
Mint Chocolate Delight
Use mint Oreos and add ½ teaspoon of mint extract to the cream cheese mixture for a refreshing variation that’s perfect for summer entertaining.
Make-Ahead Tips and Storage
Advanced Preparation
These treats can be made up to one week ahead of time when stored properly in airtight containers in the freezer. Layer them between parchment paper to prevent sticking.
Component Prep
The Oreo crust can be prepared and pressed into molds up to two days ahead. Cover tightly and refrigerate until ready to add the filling.
Serving Timeline
Remove from freezer 5-10 minutes before serving for slightly softer texture, or serve frozen for a firmer, ice cream-like experience.
Important Preparation Notes
Temperature Matters
Room temperature cream cheese is crucial for smooth mixing. Remove it from the refrigerator at least 2 hours before preparing, or soften quickly by microwaving in 15-second intervals.
Mold Selection
Silicone molds are essential for easy removal. Metal molds can work but may require brief warming to release the frozen treats without breaking.
Texture Success
Don’t over-mix once the whipped cream and cookies are added, as this can deflate the airy texture that makes these bites so appealing.

Frequently Asked Questions
Q: Can I use a different type of cookie for the crust? A: Absolutely! Graham crackers, vanilla wafers, or chocolate chip cookies all work well. Adjust the butter quantity slightly if the cookies seem very dry or very moist.
Q: What if I don’t have silicone molds? A: You can line a mini muffin tin with paper liners, though removal will be slightly more challenging. Ice cube trays also work in a pinch for unique shapes.
Q: Can these be made dairy-free? A: Yes, substitute dairy-free cream cheese and use coconut cream instead of heavy whipping cream. The texture will be slightly different but still delicious.
Q: How do I prevent the treats from being too hard when frozen? A: The high cream content prevents them from freezing rock-solid, but letting them sit at room temperature for 5-10 minutes before serving creates the perfect texture.
Q: Can I make these without a food processor? A: Place the Oreos in a sealed plastic bag and crush them with a rolling pin. You’ll want fairly fine crumbs for the best crust texture.
Q: Why are my cream cheese mixture lumpy? A: This usually indicates the cream cheese wasn’t at room temperature before mixing. Try beating longer on medium speed, or strain the mixture through a fine-mesh sieve.
Nutritional Information per bite:
- Calories: 137
- Carbohydrates: 12g
- Fat: 10g
- Protein: 1g
Note: Nutritional information doesn’t include optional garnishes like mini Oreos and additional whipped cream.
Prep Time: 30 minutes | Chill Time: 2 hours | Total Time: 30 minutes | Serves: 42


