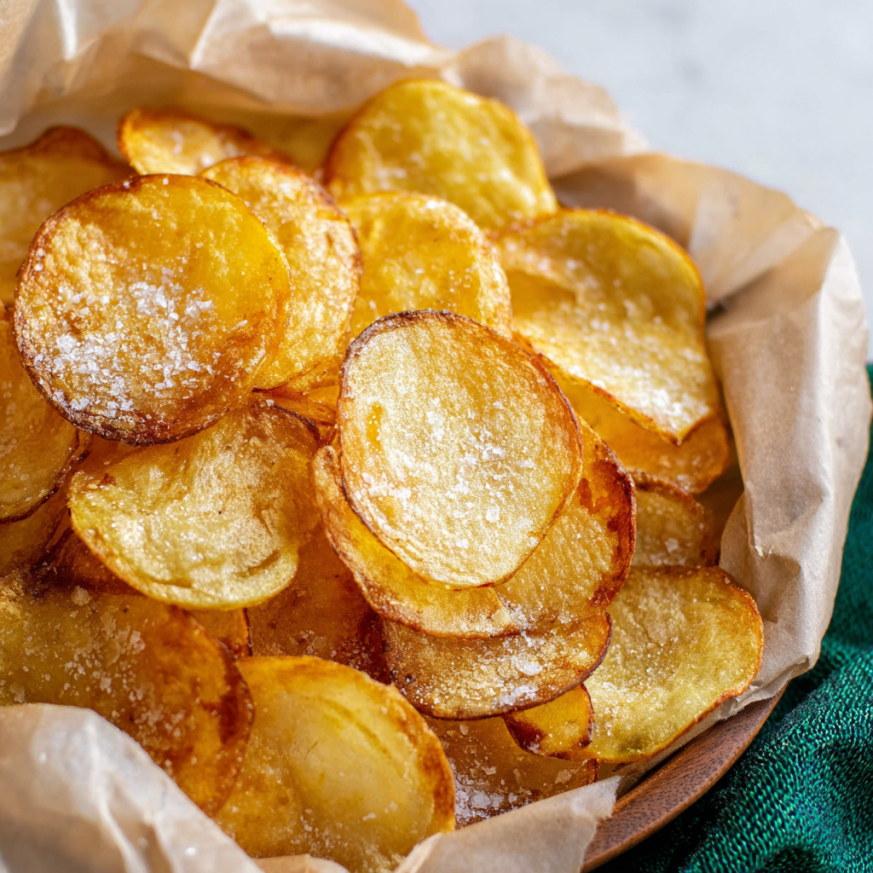
There’s something deeply satisfying about the first crunch of a perfectly made potato chip – that initial snap followed by the burst of salty, potato-y goodness that makes it impossible to eat just one. While store-bought chips certainly have their place, nothing quite compares to the experience of making your own from scratch. The process transforms humble potatoes into golden, crispy treasures that disappear almost as quickly as you can make them.
My journey with homemade potato chips began during a particularly ambitious weekend when I decided to recreate my childhood favorite snack. After several failed attempts that resulted in either burnt offerings or soggy disappointments, I finally cracked the code. The secret lies not just in the technique, but in understanding the science behind achieving that perfect balance of crispiness and flavor.
What makes this recipe truly special is its versatility – you can choose between traditional deep-frying for maximum indulgence or opt for the healthier baked version without sacrificing too much on taste and texture. Moreover, once you master the basic technique, you’ll discover endless possibilities for creative seasonings and flavor combinations.
Recipe Overview:
- Prep Time: 10 minutes
- Cook Time: 10 minutes (plus 1 hour soaking time)
- Total Time: 1 hour 20 minutes
- Servings: 8
- Course: Snack/Side Dish
- Cuisine: American
Why You’ll Love This Potato Chip Recipe
Superior Flavor and Freshness
Homemade chips deliver a clean, pure potato flavor that’s often masked by preservatives and artificial ingredients in commercial varieties. Additionally, you control every aspect of the seasoning, from salt levels to creative spice blends.
Perfect Texture Control
Unlike store-bought chips that can vary in quality, this recipe consistently produces chips with the ideal balance of crispiness and tenderness. Furthermore, you can adjust the thickness to your personal preference.
Healthier Alternative Options
When baked instead of fried, these chips contain significantly less oil while still delivering satisfying crunch and flavor. Consequently, you can enjoy this beloved snack with less guilt.
Cost-Effective Solution
Making chips at home costs a fraction of premium store-bought varieties, especially when potatoes are in season. Moreover, you can make large batches for parties or meal prep.
Impressive Party Contribution
Nothing elevates a gathering quite like fresh, warm homemade chips served alongside your favorite dips. These chips become an instant conversation starter and crowd favorite.
Ingredients You’ll Need
Essential Components
- 4 medium russet potatoes – choose firm, unblemished potatoes with minimal eyes
- 2 tablespoons kosher salt – for the soaking brine
- Vegetable oil for frying – enough to maintain 3 inches depth in your pot
Equipment Essentials
A mandoline slicer is crucial for achieving uniformly thin slices, though a sharp knife and steady hand can work as alternatives. Additionally, you’ll need a large Dutch oven for frying and a wire cooling rack for proper drainage.
Optional Seasonings
Consider preparing flavored salts by grinding kosher salt with herbs, spices, or even dried seaweed for gourmet variations. Furthermore, having various finishing salts on hand allows for creative experimentation.
Step-by-Step Instructions
Preparation Phase
Step 1: Begin by thoroughly scrubbing your potatoes under cold running water, removing any dirt or debris. Leave the skins on, as they add texture and nutrients to the finished chips.
Step 2: Fill a large bowl with cold water and position it near your cutting station. Using a mandoline slicer set to the thinnest setting, carefully slice each potato into paper-thin rounds, allowing them to fall directly into the cold water.
Step 3: Once all potatoes are sliced, drain the cloudy starch water and rinse the slices under cold running water until the water runs clear. This step removes excess starch that could prevent proper crisping.
Crucial Soaking Process
Step 4: Return the rinsed potato slices to the bowl and cover with fresh cold water. Add the kosher salt and stir gently to dissolve completely.
Step 5: Allow the potatoes to soak for exactly one hour. This soaking process draws out moisture and excess starch while seasoning the potatoes from within, creating the foundation for perfectly crispy chips.
Step 6: After soaking, drain the potatoes thoroughly and pat each slice completely dry with clean kitchen towels or paper towels. Removing every bit of moisture is critical for achieving maximum crispiness.
Deep-Frying Method
Step 7: Heat 3 inches of vegetable oil in a large Dutch oven over medium-high heat until it reaches 360-370°F (182-188°C). Use a deep-fry thermometer for accuracy, as proper temperature control is essential.
Step 8: Working in small batches, carefully add potato slices to the hot oil in a single layer, ensuring they don’t overlap. Overcrowding will lower the oil temperature and result in soggy chips.
Step 9: Fry for 2-4 minutes, watching carefully as the slices transform from pale to golden brown. The timing moves quickly, so stay attentive to prevent burning.
Finishing Touches
Step 10: Using a slotted spoon, immediately transfer the golden chips to a wire cooling rack placed over a baking sheet. Never drain chips on paper towels, as this can trap steam and make them soggy.
Step 11: While the chips are still hot, taste-test and adjust seasoning as needed. For the most authentic experience, grind additional kosher salt or table salt in a coffee grinder to create fine powder for even distribution.
Step 12: Continue frying remaining batches, maintaining oil temperature between batches. Serve chips immediately for optimal crispiness and flavor.
Baked Potato Chips Alternative
Oven Preparation
Step 1: Preheat your oven to 400°F (200°C) and line large baking sheets with parchment paper. You’ll likely need multiple sheets or will need to bake in batches.
Step 2: Follow the same slicing and soaking process as described above, ensuring potatoes are completely dry before proceeding.
Coating and Arrangement
Step 3: In a large bowl, toss the dried potato slices with just enough vegetable oil to lightly coat each piece. Use your hands to ensure even distribution without over-oiling.
Step 4: Arrange potato slices in a single layer on the prepared baking sheets, ensuring no pieces overlap. Overlapping will result in uneven cooking and soggy spots.
Baking Process
Step 5: Bake for 15-20 minutes per batch, flipping each chip halfway through the cooking time. Watch carefully during the final few minutes to prevent burning.
Step 6: Remove chips when they turn golden brown and appear crispy around the edges. Transfer immediately to wire racks for cooling and season while warm.
Serving Suggestions and Pairings
Classic Accompaniments
Serve these homemade chips alongside artisanal dips like caramelized onion dip, homemade guacamole, or classic French onion dip. Additionally, they pair beautifully with gourmet sandwiches and burgers.
Elevated Presentations
For special occasions, arrange chips on wooden serving boards with various flavored salts in small bowls, allowing guests to customize their experience. Furthermore, consider pairing with craft beers or wine for sophisticated entertaining.
Creative Applications
Crush slightly stale chips to create breadcrumb alternatives for coating chicken or fish. Moreover, they make excellent toppers for mac and cheese or creamy casseroles, adding textural contrast.
Portion Control Tips
Serve in individual small bowls to help with portion control, especially when entertaining. This approach also keeps chips crispier longer by reducing exposure to air and handling.
Recipe Variations to Explore
Gourmet Seasoning Blends
Create truffle chips by tossing hot chips with truffle salt and grated parmesan. Alternatively, try ranch seasoning powder, barbecue spice blends, or everything bagel seasoning for unique flavor profiles.
Sweet Potato Alternative
Substitute sweet potatoes for regular potatoes, adjusting cooking time slightly as they tend to brown faster. These create beautiful orange chips with natural sweetness that pairs well with cinnamon or chili powder.
Herb-Infused Versions
Add fresh herbs like rosemary or thyme to the oil while heating for subtle flavor infusion. Remove herbs before frying to prevent burning, but the oil will retain their essence.
Spicy Heat Variations
Dust hot chips with cayenne pepper, paprika, or chili powder for heat lovers. Furthermore, mixing hot sauce into the oil coating before baking creates evenly spiced chips.
Make-Ahead Tips and Storage
Preparation Strategies
While chips are best served immediately, you can slice and soak potatoes up to 2 hours in advance. Keep them refrigerated in the salt water until ready to cook.
Proper Storage Methods
Store completely cooled chips in airtight containers for up to 3 days at room temperature. However, they’ll gradually lose crispiness over time, so consume quickly for best quality.
Refresh Techniques
Restore crispiness to day-old chips by spreading them on a baking sheet and heating in a 350°F oven for 3-5 minutes. This technique removes moisture that has been absorbed from the air.
Batch Cooking Tips
When making large quantities, keep finished batches warm in a 200°F oven on wire racks while completing remaining batches. This maintains optimal serving temperature and texture.
Important Notes for Success
Potato Selection Guidelines
Choose mature russet potatoes with high starch content for the crispiest results. Avoid new potatoes or waxy varieties, which contain too much moisture and won’t achieve proper crispiness.
Oil Temperature Precision
Maintaining proper oil temperature is crucial – too hot and chips burn before crisping, too cool and they absorb excessive oil. Invest in a reliable thermometer for consistent results.
Safety Considerations
Never leave hot oil unattended, and keep a lid nearby to smother potential flare-ups. Additionally, have a fire extinguisher accessible when deep-frying at home.
Thickness Consistency
Uniform thickness ensures even cooking – thicker pieces will remain soft while thinner ones burn. Take time to adjust your mandoline properly and maintain steady pressure while slicing.
Frequently Asked Questions
Q: Can I make potato chips without a mandoline slicer? A: While a mandoline produces the most consistent results, you can use a sharp knife with careful attention to uniform thickness. Some food processors also have slicing attachments that work reasonably well.
Q: Why do my homemade chips turn out soggy? A: Soggy chips usually result from insufficient drying after soaking, overcrowding during frying, or draining on paper towels instead of wire racks. Ensure potatoes are completely dry and oil temperature is correct.
Q: How thin should I slice the potatoes? A: Aim for slices between 1/16 and 1/8 inch thick. Thinner slices become crispier but are more prone to burning, while thicker slices may remain soft in the center.
Q: Can I reuse the frying oil? A: Yes, strain the cooled oil through fine mesh or cheesecloth and store in the refrigerator for up to one month. However, the oil will eventually break down and should be discarded if it smells rancid or appears dark.
Q: What’s the best way to season chips evenly? A: Season chips while they’re still hot and slightly oily so seasonings adhere properly. Grinding salt to a fine powder in a coffee grinder ensures even distribution without large crystal chunks.
Q: How do I prevent chips from sticking together during frying? A: Add slices to hot oil one at a time and gently separate them with a slotted spoon if they start to stick. Don’t overcrowd the pot, as this increases the likelihood of sticking.
Q: Can I freeze potato slices before frying? A: Freezing changes the potato’s cellular structure and isn’t recommended for chips. However, you can freeze finished chips for up to one month, though they’ll lose some crispiness.
Q: Why is the soaking step necessary? A: Soaking removes excess starch and moisture while allowing salt to penetrate the potato. This process is crucial for achieving maximum crispiness and proper seasoning throughout each chip.
Nutrition Information (per serving): Calories: 84 | Carbohydrates: 19g | Protein: 2g | Fat: 0.1g | Saturated Fat: 0.03g | Fiber: 1g | Sugar: 1g | Sodium: 1749mg | Potassium: 444mg | Vitamin C: 6mg | Calcium: 15mg | Iron: 1mg


