
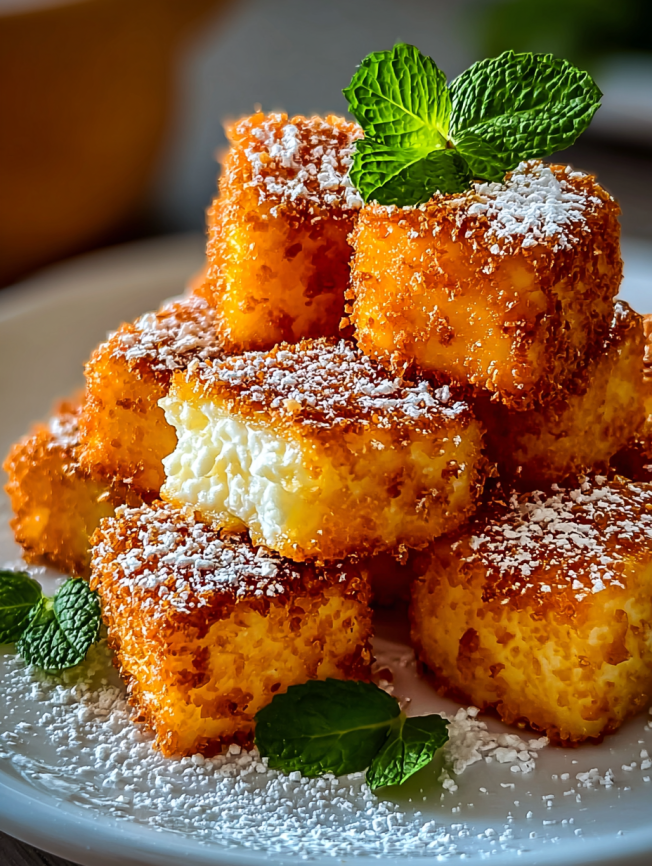
Prep Time: 15 minutes | Chill Time: 30 minutes | Cook Time: 10 minutes | Total Time: 55 minutes | Yield: 18-20 bites
Growing up, my grandmother had this incredible ability to transform the most ordinary pantry staples into extraordinary treats that would have us grandchildren begging for more. These crispy cottage cheese bites remind me of her genius for taking humble ingredients and creating something absolutely magical. What started as a way to use up leftover cottage cheese has become one of my most requested appetizers, proving that sometimes the best discoveries come from the most unexpected combinations.
Why These Treats Will Become Your New Obsession
These aren’t just another appetizer—they’re a revelation that challenges everything you thought you knew about cottage cheese. First, the incredible textural contrast between the golden, crunchy exterior and the creamy, tangy interior creates an almost addictive eating experience. Moreover, the versatility of these bites means they work equally well as sophisticated party appetizers or casual snacking treats.
What makes this recipe truly exceptional is its accessibility and speed. Unlike complicated appetizers that require specialty ingredients or advanced techniques, these treats use simple pantry staples to create something that tastes gourmet. Furthermore, the make-ahead friendly nature means you can prepare them hours in advance, making entertaining stress-free and enjoyable.
A Protein-Packed Surprise
Beyond their incredible taste, these treats pack a surprising nutritional punch. Cottage cheese provides high-quality protein while maintaining a relatively low calorie count, making these bites a guilt-free indulgence that actually contributes to your daily nutrition goals.
Premium Ingredients & Shopping Wisdom
The Foundation Elements
For the Base Mixture:
- 1 cup cottage cheese (full-fat, small curd preferred)
- 1/3 cup all-purpose flour (plus extra for adjustments)
- 2 large eggs (divided for mixture and coating)
- 1/2 teaspoon salt
- 1/4 teaspoon black pepper
- 1/2 teaspoon garlic powder (optional but recommended)
Cottage Cheese Selection: Choose full-fat, small curd cottage cheese for the best texture and flavor. The higher fat content creates creamier interiors, while small curds distribute more evenly throughout the mixture.
The Crispy Coating
For Maximum Crunch:
- 3/4 cup cornmeal (medium grind works best)
- 2 tablespoons chopped fresh herbs (parsley or chives)
- Oil for frying (vegetable or canola oil)
Professional Tip: Medium-grind cornmeal provides the perfect balance between crunch and coating adhesion. Fine cornmeal can become too dense, while coarse varieties may not stick properly.
Serving Accompaniments
These golden treats shine when served with various dipping sauces such as marinara, ranch dressing, or honey mustard. Additionally, they pair beautifully with fresh herb salads, pickled vegetables, or as part of a larger mezze platter featuring olives, crackers, and artisanal cheeses.
Step-by-Step Mastery Guide
Creating the Perfect Base
Begin by combining the cottage cheese, flour, one beaten egg, salt, pepper, and garlic powder in a mixing bowl. Stir the ingredients gently but thoroughly until the mixture thickens and holds together when pressed. The consistency should be firm enough to shape but not so dry that it crumbles apart.
Texture Check: The mixture should feel slightly sticky but manageable. If it seems too wet, add flour one tablespoon at a time until it reaches the proper consistency for shaping.
Shaping & Chilling Strategy
Using clean, slightly damp hands, form the mixture into uniform balls or nuggets, approximately 1.5 inches in diameter. This size ensures even cooking while providing satisfying bite-sized portions. Place the shaped treats on a parchment-lined baking sheet and refrigerate for 30 minutes to firm up completely.
Chilling Importance: This crucial step prevents the treats from falling apart during the coating and frying process. Properly chilled treats maintain their shape and develop better texture contrasts.
Professional Coating Technique
Beat the second egg in a shallow bowl until smooth and well-combined. Working with a few treats at a time, dip each chilled piece into the beaten egg, ensuring complete coverage. Next, roll each egg-coated treat in cornmeal, pressing gently to ensure the coating adheres properly.
Coating Success: For extra crunch, allow coated treats to rest for 5 minutes before frying. This brief waiting period helps the coating set and reduces the likelihood of it separating during cooking.
Achieving Golden Perfection
Heat approximately 2 inches of oil in a heavy-bottomed skillet over medium heat until it reaches 350°F (175°C). Carefully add the coated treats to the hot oil, working in batches to avoid overcrowding. Fry for 2-3 minutes per side until they achieve a beautiful golden-brown color.
Temperature Control: Maintaining proper oil temperature is crucial for achieving crispy exteriors without overcooking the delicate interiors. Use a thermometer for accuracy and adjust heat as needed.
Final Presentation
Transfer the fried treats to paper towels to drain excess oil, then immediately garnish with chopped fresh herbs while they’re still warm. The residual heat helps the herbs adhere while their fresh flavors complement the rich, creamy interiors.
Creative Serving Suggestions
Elegant Appetizer Presentation
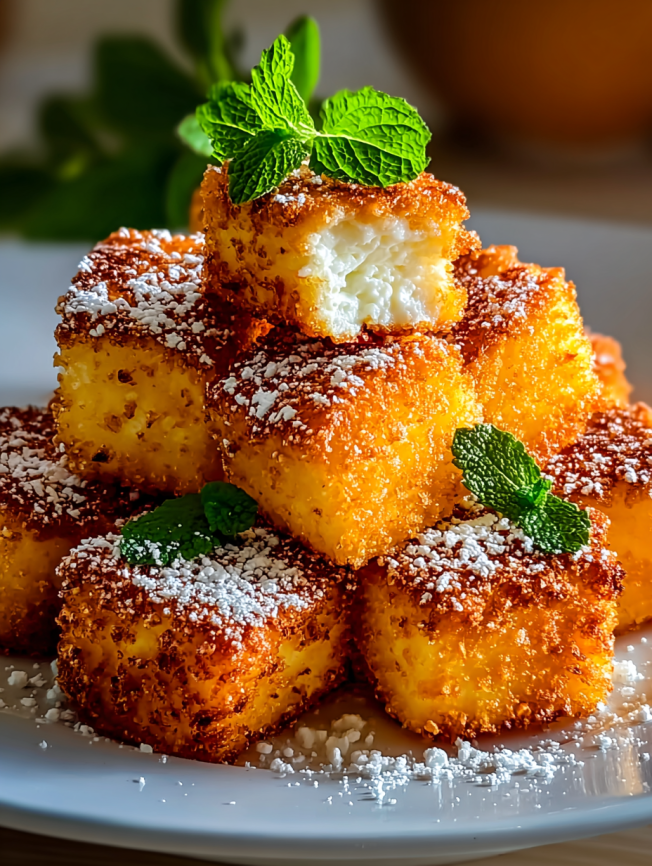
Arrange the golden treats on a white platter garnished with microgreens and accompanied by small bowls of gourmet dipping sauces. This sophisticated presentation elevates casual finger food into elegant party fare suitable for any gathering.
Casual Snacking Style
Serve warm treats in paper-lined baskets alongside cold beverages for relaxed entertaining. The casual presentation encourages mingling while the irresistible flavors keep guests coming back for more.
Brunch Enhancement
These treats make an unexpected but delightful addition to brunch spreads, offering a savory option that pairs beautifully with fresh fruit, pastries, and coffee drinks.
Exciting Flavor Variations
Mediterranean Herb Version
Incorporate dried oregano, basil, and sun-dried tomatoes into the base mixture, then serve with tzatziki sauce for a Greek-inspired twist. This variation brings bright, Mediterranean flavors that transport you to sunny coastal cafes.
Spicy Jalapeño Heat
Add finely minced jalapeños and a pinch of cayenne pepper to the mixture for those who enjoy heat. The creamy cottage cheese base helps temper the spice while still delivering satisfying warmth.
Sweet & Savory Fusion
Create a unique dessert version by adding a touch of honey and cinnamon to the mixture, then serving with fruit compote or maple syrup for dipping. This unexpected twist showcases cottage cheese’s versatility.
Make-Ahead & Storage Solutions
Advanced Preparation
Shape the treats up to 24 hours in advance and store them covered in the refrigerator until ready to coat and fry. This extended chilling time actually improves the final texture by allowing flavors to meld completely.
Freezing Strategy
Freeze shaped, uncoated treats on baking sheets until solid, then transfer to freezer bags for up to 3 months. When ready to serve, thaw completely before coating and frying for best results.
Reheating Excellence
While best served fresh, leftover treats can be reheated in a 375°F oven for 5-7 minutes to restore some crispiness. Avoid microwaving, as this makes the coating soggy and unappetizing.
Professional Kitchen Secrets
Oil Quality Matters: Fresh oil produces cleaner flavors and better browning. Avoid reusing oil that has been used for strongly flavored foods, as it can impart unwanted tastes to these delicate treats.
Batch Cooking Wisdom: Don’t overcrowd the frying pan, as this lowers oil temperature and results in greasy, unevenly cooked treats. Work in small batches for consistent results.
Texture Troubleshooting: If the mixture seems too soft to shape, gradually add more flour. Conversely, if it’s too stiff, incorporate a small amount of the beaten egg reserved for coating.
Frequently Asked Questions
Can I bake these treats instead of frying them? While baking is possible, it won’t achieve the same crispy texture that makes these treats special. If you prefer baking, preheat your oven to 425°F and bake for 15-18 minutes, turning once halfway through cooking.
What type of cottage cheese works best? Full-fat, small curd cottage cheese provides the ideal texture and flavor. Low-fat versions can work but may result in less creamy interiors and require slight flour adjustments to achieve proper consistency.
How do I know when the oil is the right temperature? Use a cooking thermometer for accuracy, aiming for 350°F. Without a thermometer, test by dropping a small piece of bread into the oil—it should sizzle immediately and brown within 60 seconds.
Can I prepare the coating mixture in advance? Yes, the cornmeal coating can be prepared and stored in an airtight container for several days. However, beat the egg fresh just before coating to ensure optimal adhesion.
What causes the treats to fall apart during frying? Insufficient chilling time is the most common culprit. Ensure treats are properly chilled for at least 30 minutes, and avoid handling them too much during the coating process.
Are there gluten-free alternatives to all-purpose flour? Rice flour or gluten-free all-purpose flour blends work well as substitutes. Start with slightly less than the recipe calls for, as gluten-free flours can absorb liquid differently.
How can I make these treats lighter in texture? Separate the eggs and whip the whites to soft peaks before folding them into the mixture. This technique incorporates air and creates a lighter, more delicate interior texture.
What’s the best way to drain excess oil? Use paper towels or a wire cooling rack set over a baking sheet. The wire rack method allows air circulation around the treats, preventing soggy bottoms while maintaining crispiness.
Can I use dried herbs instead of fresh ones? Dried herbs work, but use about half the amount since they’re more concentrated. Add them to the base mixture rather than using them as garnish for better flavor distribution.


