Growing up, my grandmother always had a dehydrator humming in her kitchen during apple season, filling the house with the most incredible cinnamon-apple aroma. Those homemade apple chips were my favorite after-school snack – crispy, naturally sweet, and so much better than anything store-bought. Now, decades later, I’ve discovered that my air fryer can create that same magic in a fraction of the time.
This recipe brings back all those childhood memories while fitting perfectly into my busy modern lifestyle. Instead of waiting all day for traditional dehydration, these apple chips are ready in just about three hours, transforming ordinary apples into an irresistible healthy snack.
Why These Apple Chips Will Become Your New Obsession
These cinnamon apple chips offer the perfect solution for healthy snacking without sacrificing flavor or satisfaction. Unlike store-bought versions loaded with preservatives and artificial flavors, these chips contain only three simple ingredients you probably already have in your pantry.
The natural sweetness of McIntosh apples pairs beautifully with warm cinnamon spice, creating a treat that tastes indulgent while being completely guilt-free. Furthermore, the air fryer method preserves more nutrients than traditional high-heat cooking methods, giving you a snack that’s both delicious and wholesome.
What makes this recipe particularly appealing is its incredible versatility and convenience. You can easily adjust the sweetness level, experiment with different spice combinations, or even make them completely plain for the purest apple flavor. Additionally, they store well for several days, making them perfect for meal prep or grab-and-go snacking.
Essential Ingredients and Equipment
Main Components
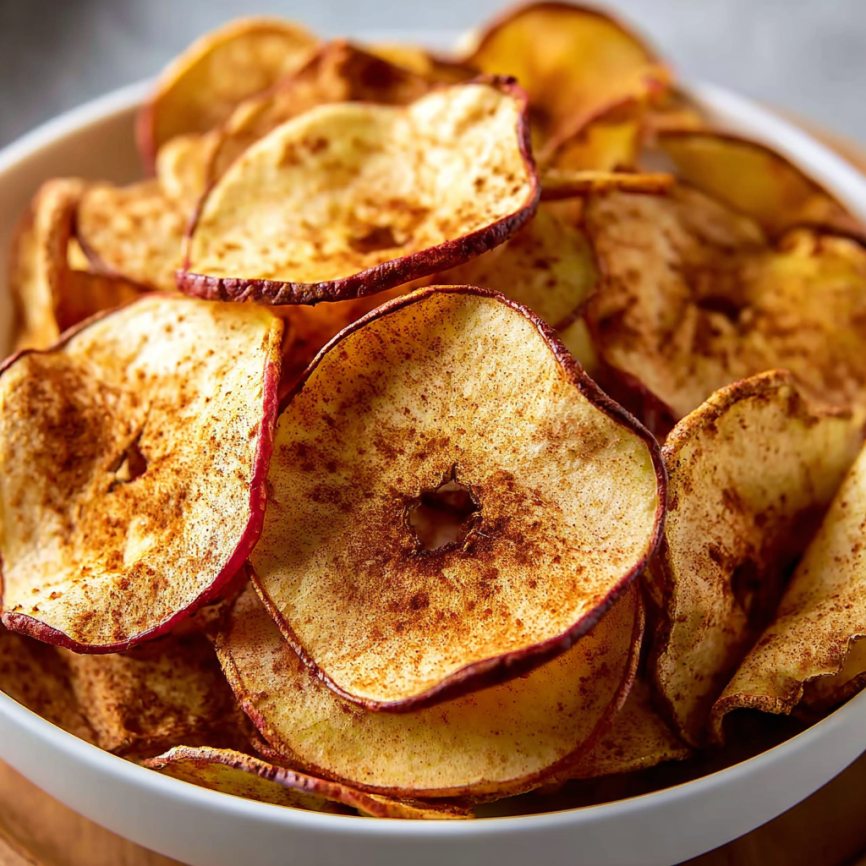
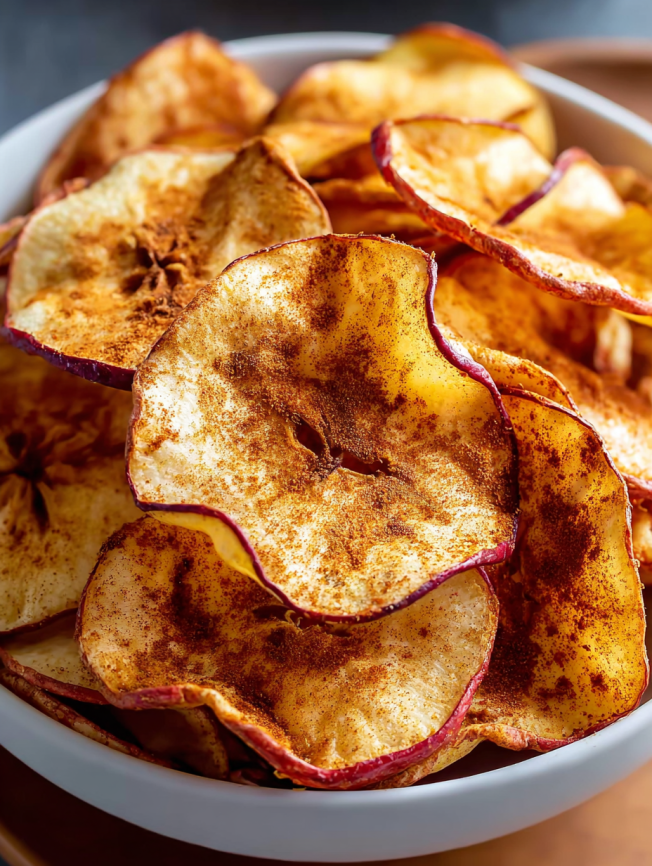
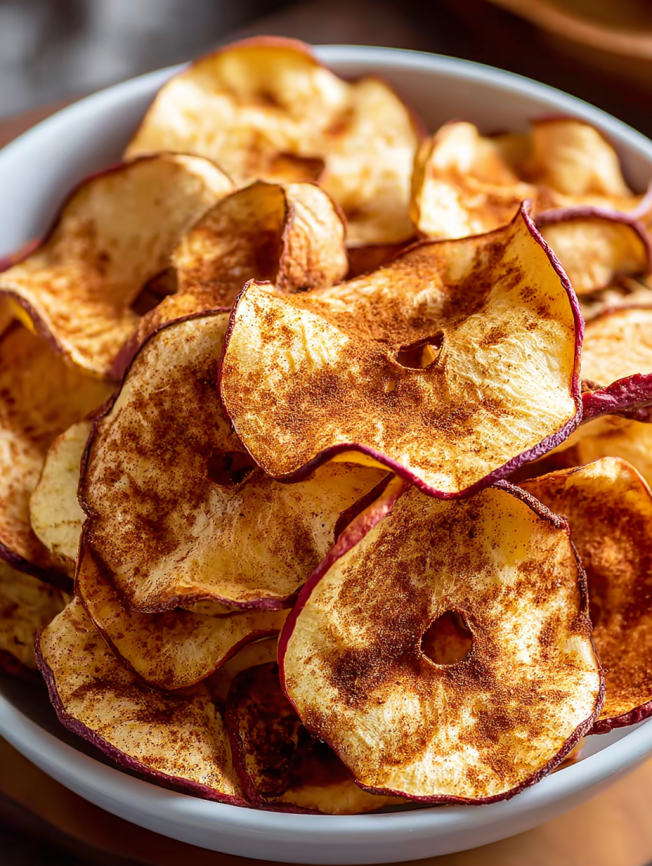
- 4 McIntosh apples – Choose firm, fresh apples without bruises for the best results
- 2 teaspoons ground cinnamon – Provides warm, aromatic spice that complements apple sweetness
- 1 teaspoon granulated sugar – Enhances natural apple sugars and aids in crisping
Additional Supplies
- Cooking spray – Prevents sticking and ensures even cooking
- Large mixing bowl – For coating apples evenly with seasonings
- Sharp knife or mandoline – Essential for achieving uniform 3-6mm thick slices
Serving Suggestions
These apple chips shine as standalone snacks, but they also work wonderfully crumbled over yogurt, oatmeal, or ice cream. Pack them in lunch boxes for kids, serve them at parties alongside cheese boards, or enjoy them with hot tea or coffee for an afternoon treat.
Detailed Step-by-Step Instructions
Preparation Phase
Step 1: Begin by preheating your oven to 200°F, which provides the low, gentle heat necessary for proper dehydration without burning the delicate apple slices.
Step 2: Wash and core your McIntosh apples thoroughly, then slice them into uniform pieces between 3-6mm thick. Consistent thickness ensures even cooking throughout the batch.
Seasoning Process
Step 3: Place all apple slices in a large mixing bowl, then sprinkle the cinnamon and sugar evenly over them. Toss gently but thoroughly, ensuring every slice is coated with the aromatic spice mixture.
Baking Setup
Step 4: Prepare your baking sheets by spraying them with cooking spray or lining with parchment paper to prevent sticking during the long cooking process.
Step 5: Arrange the seasoned apple slices in a single layer across the prepared baking sheets, making sure none overlap. Overlapping prevents proper air circulation and results in uneven drying.
Cooking Process
Step 6: Place the baking sheets in the preheated oven and bake for 2-3 hours, checking periodically after the first hour. The chips are ready when they feel dry to the touch but retain slight softness rather than becoming completely brittle.
Step 7: Remove from the oven and allow the apple chips to cool completely on the baking sheets before transferring to storage containers. This cooling period allows them to reach their final crispy texture.
Creative Serving and Presentation Ideas
These versatile apple chips complement numerous serving scenarios beyond simple snacking. Create an elegant appetizer by arranging them on a wooden board with artisanal cheeses, nuts, and honey for drizzling.
For breakfast applications, crumble them over Greek yogurt with granola, or stir pieces into pancake or muffin batter for added texture and flavor. They also make excellent garnishes for fall-themed cocktails or warm apple cider.
During holiday gatherings, present them in decorative bowls alongside other healthy snacks, or package them in clear bags tied with ribbon as thoughtful homemade gifts that showcase your culinary creativity.
Exciting Recipe Variations
Spice Combinations
While cinnamon creates the classic flavor profile, experiment with other warming spices for unique variations. Try a combination of cinnamon, nutmeg, and allspice for a more complex autumn flavor, or add a pinch of cardamom for an exotic twist.
Apple Variety Experiments
Different apple varieties produce distinct flavor profiles and textures. Honeycrisp apples create sweeter chips with more intense apple flavor, while Granny Smith varieties offer tartness that balances beautifully with the added sugar and cinnamon.
Sugar-Free Options
For those avoiding added sugars, omit the granulated sugar entirely and rely on the natural apple sweetness enhanced by cinnamon. Alternatively, try a light dusting of stevia or monk fruit sweetener for those who prefer extra sweetness without traditional sugar.
Make-Ahead and Storage Tips
These apple chips are ideal for advance preparation, particularly during busy weeks when healthy snacks need to be readily available. Once completely cooled and properly stored, they maintain their quality for up to four days at room temperature.
Store the finished chips in airtight containers or resealable bags, keeping them away from moisture which can make them soggy. For longer storage, consider vacuum-sealing portions in individual serving sizes.
If you notice the chips losing their crispness after a day or two, simply return them to a 200°F oven for 10-15 minutes to restore their texture. This quick refresh technique works wonderfully for reviving day-old chips.
Pro Tips and Important Notes
Achieving the perfect apple chip texture requires attention to several key details. First, slice thickness is crucial – too thin and they’ll burn easily, too thick and they won’t crisp properly. A mandoline slicer ensures consistent results if you have one available.
Monitor the chips closely during the final hour of baking, as they can go from perfectly done to overdone quickly. The ideal finished chip should feel dry but still have slight flexibility rather than being completely brittle.
Room temperature and humidity significantly affect cooking times. On humid days, extend baking time by 15-30 minutes, while dry conditions may require less time than the recipe suggests.
Frequently Asked Questions
Q: Can I use my air fryer instead of the oven for this recipe? A: Absolutely! Set your air fryer to 135°F and cook for 45-60 minutes, shaking the basket every 15 minutes. Air fryers often work faster than traditional ovens for dehydrating.
Q: Why do my apple chips turn brown during cooking? A: Some browning is natural and doesn’t affect taste. To minimize browning, briefly dip apple slices in lemon juice before seasoning, though this will add slight tartness to the final product.
Q: Can I make these without any added sugar? A: Definitely! The natural apple sugars provide plenty of sweetness, especially when concentrated through the dehydration process. Simply use cinnamon alone for a completely natural snack.
Q: How do I know when the chips are properly done? A: Perfectly done apple chips feel dry to the touch but still bend slightly without breaking. They shouldn’t feel wet or sticky, but they also shouldn’t be so dry that they crumble immediately.
Q: Can I double this recipe? A: Yes, but you’ll need additional baking sheets and possibly longer cooking time. Ensure proper spacing between slices for even air circulation and consistent results.
Q: What’s the best way to slice apples uniformly? A: A mandoline slicer produces the most consistent results, but a sharp knife works well too. Focus on keeping slices between 3-6mm thick – roughly the thickness of a coin.
Recipe Summary:
- Prep Time: 10 minutes
- Cook Time: 180 minutes (3 hours)
- Total Time: 190 minutes
- Servings: 4-6 portions
- Difficulty: Easy
- Dietary: Vegan, Gluten-Free, Dairy-Free, Low-Calorie
Approximate Nutrition per serving: 45 calories, 0g fat, 12g carbohydrates, 0g protein


