Prep Time: 30 minutes
Cook Time: 25 minutes
Total Time: 2 hours
Servings: 12 buns
A Treasured Easter Tradition
Growing up, Easter wasn’t complete without the heavenly aroma of hot cross buns filling our kitchen. My mother would start preparing them early on Good Friday morning, and by afternoon, the house would be perfumed with warm spices and the promise of something magical happening in the oven. The anticipation was almost unbearable as we watched those golden buns rise, their iconic crosses forming perfect lines across the tops.
Years later, when I moved away from home, I realized how much I missed this cherished tradition. That first Easter on my own, I attempted to recreate those beloved buns, and while my initial efforts were far from perfect, the process rekindled my connection to family traditions. Now, making hot cross buns has become my own Easter ritual, one that brings back precious memories while creating new ones.
Why This Recipe Will Become Your Easter Essential
Generously Sized Comfort
These aren’t the small, dense buns you might find elsewhere. Instead, they’re beautifully oversized, soft, and fluffy – exactly how hot cross buns should be. Moreover, their impressive size makes them satisfying as both breakfast treats and afternoon indulgences.
Foolproof Success
Despite involving yeast and multiple rising periods, this recipe includes detailed guidance for every step. Furthermore, the clear instructions ensure even novice bakers can achieve professional-looking results consistently.
Aromatic Spice Blend
The combination of allspice and cinnamon creates that distinctive hot cross bun fragrance that signals Easter’s arrival. Additionally, the orange zest adds bright citrus notes that complement the warm spices beautifully.
Traditional Authenticity
This recipe honors the time-tested traditions while incorporating modern techniques that guarantee success. Consequently, you’ll create buns that taste exactly like childhood memories while being achievable in today’s kitchen.
Essential Ingredients
For the Buns
- 2 packets rapid-rise yeast (or dry instant yeast)
- 1 1/2 cups warm milk
- 3/4 cup superfine sugar (or caster sugar), divided
- 4 1/2 cups bread flour (or all-purpose flour, plus extra if needed)
- 2 teaspoons allspice (or mixed spice)
- 1 teaspoon ground cinnamon
- 1/2 teaspoon salt
- 1 cup sultanas (golden raisins)
- Zest of one orange (or 2 tablespoons mixed peel)
- 1 large egg, room temperature
- 1/4 cup butter, melted and cooled slightly
For the Crosses
- 1/2 cup all-purpose flour
- 5 tablespoons warm water
- 1/2 teaspoon pure vanilla extract
For the Glaze
- 1 tablespoon orange marmalade (or apricot jam, honey, or maple syrup)
- 2 teaspoons boiling water
Serving Suggestions
Enjoy warm with butter, serve alongside Easter brunch spreads, or toast day-old buns for delightful breakfast treats.
Step-by-Step Instructions
Activating the Yeast
Begin by combining yeast, warm milk, and 2 teaspoons of sugar in a small bowl. Set aside until the mixture becomes frothy on top, approximately 3-5 minutes. This activation step ensures your yeast is alive and ready to create perfectly risen buns.
Preparing the Dry Mixture
While your yeast activates, grab a large mixing bowl and combine flour, remaining sugar, allspice, cinnamon, and salt. Whisk these dry ingredients lightly to ensure even distribution, then add sultanas and orange zest, mixing until evenly incorporated.
Creating the Dough
Make a well in the center of your dry ingredients, then pour in the activated yeast mixture, cooled melted butter, and egg. This well technique prevents the wet ingredients from overwhelming the flour mixture too quickly.
Mixing Methods
For Stand Mixer Users: Mix on low speed (setting 2) for about 5 minutes until a smooth, elastic dough forms. Add extra flour one tablespoon at a time only if needed, until the dough just pulls away from the bowl sides without being too sticky.
For Hand Mixing: Lightly dust your work surface with flour and oil your hands to prevent sticking. Knead the dough for approximately 10 minutes until it becomes soft and smooth.
Testing Dough Readiness
Hold the dough in your hands and gently pull it outward. Properly developed dough should have a smooth surface and stretch without tearing immediately. This test ensures your gluten development is adequate for light, fluffy buns.

The Rising Process
First Rise Preparation
Lightly oil your mixing bowl, place the dough inside, and cover with plastic wrap. Add a dry tea towel over the top for extra warmth retention. Find a warm spot in your kitchen and allow the dough to prove for 1-2 hours until doubled in size.
Shaping the Buns
Line a deep 9×13-inch baking tray with parchment paper, creating slight overhang for easier removal later. Remove the plastic wrap and punch down the dough to deflate it completely. Transfer to a clean, lightly floured work surface.
Knead the dough for an additional 1-2 minutes to remove remaining air bubbles. Shape into a log and divide into 12 equal pieces, each weighing approximately 4 ounces. Roll each piece into a ball and arrange on your prepared tray in rows of 3×4.
Second Rise
Preheat your oven to 350°F (180°C). Cover the shaped buns with plastic wrap, place a dry tea towel over the top, and leave in a warm place for 30 minutes until doubled in size.
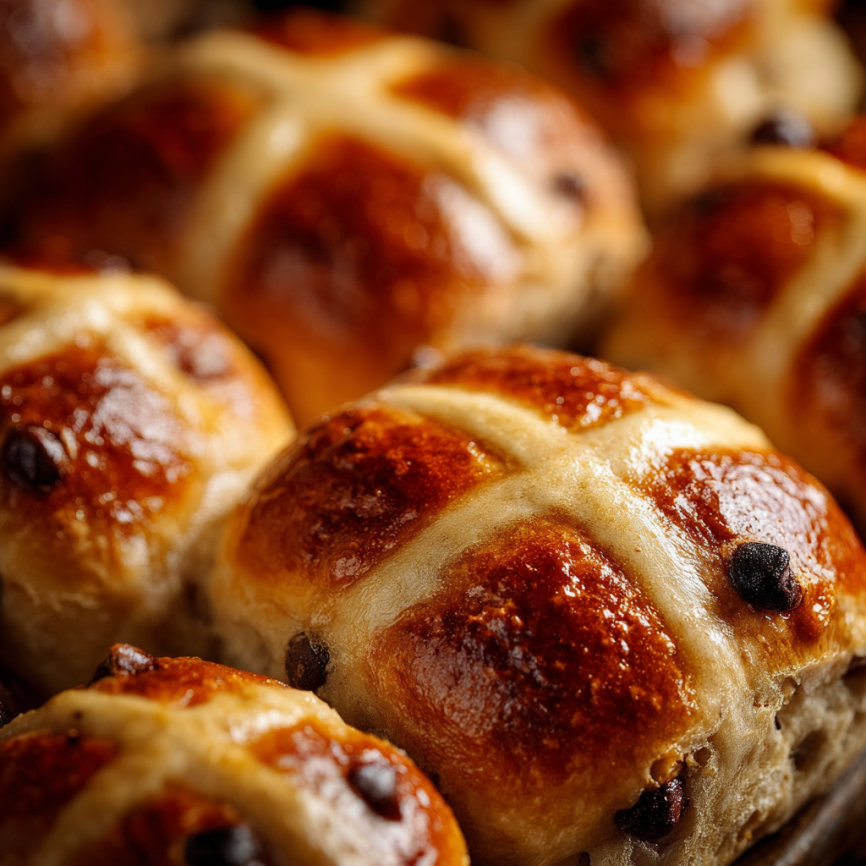
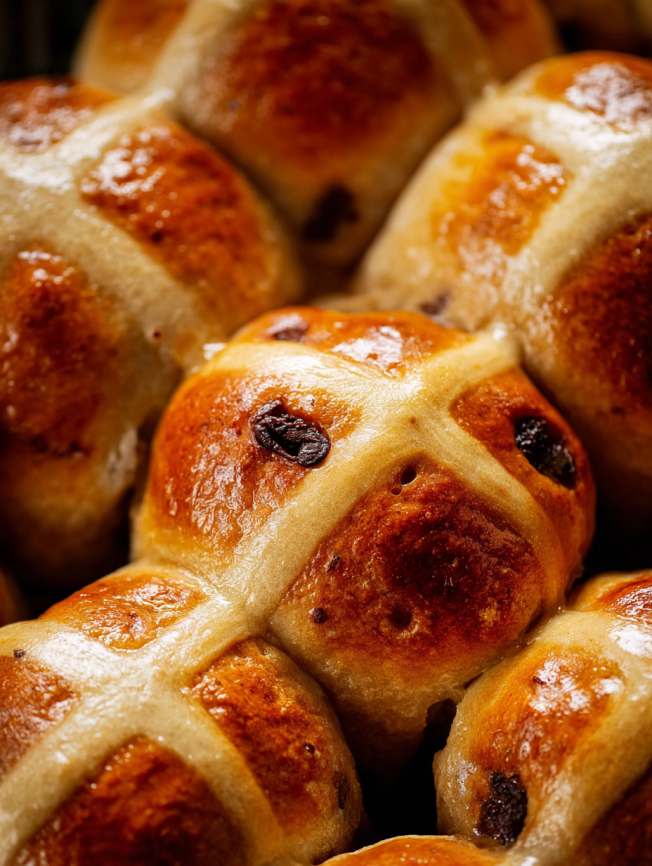
Creating the Signature Crosses
Preparing the Paste
Mix flour and water to create a thick paste resembling pancake batter consistency. The mixture should hold its shape when piped but flow smoothly from your piping bag.
Piping Technique
Place the paste in a sandwich-sized ziplock bag and snip a corner to create a 3mm hole. Test the hole size by squeezing some paste into a bowl first – you should be able to create clean, straight lines.
Remove the plastic wrap from your risen buns and slowly pipe crosses onto each one. Ensure some paste falls into the crevices between buns so the crosses maintain their shape during baking and rising.
Baking and Finishing
The Baking Process
Place buns in your preheated oven and bake for 22-25 minutes until they achieve a deep, golden brown color on top. The internal temperature should reach 190°F for perfectly cooked buns.
Glazing for Shine
Transfer baked buns to a wire cooling rack immediately. In a small bowl, mix your chosen jam or honey with boiling water until smooth. Brush this glaze over the warm buns for that characteristic glossy finish.
Allow buns to cool until just warm to the touch before serving – this temperature provides the perfect balance of warmth and structural integrity.
Creative Serving Ideas
Traditional Presentation
Slice open warm buns and spread with butter for the classic experience. The contrast between the spiced bread and creamy butter creates the perfect Easter morning treat.
Brunch Elegance
Arrange whole buns on tiered serving platters alongside other Easter treats for impressive breakfast buffets. Their beautiful crosses make them natural centerpieces for holiday tables.
Modern Twists
Toast day-old buns under the broiler for 3-4 minutes to create a crispy exterior with soft interior, or warm them in the microwave for 15 seconds to restore their original softness.
Delicious Variations
Fruit Enhancements
Substitute sultanas with dried cranberries, chopped apricots, or mixed dried fruits for different flavor profiles. Each variation offers unique sweetness and texture combinations.
Spice Modifications
Experiment with different spice blends like adding nutmeg, cardamom, or ginger for more complex flavor profiles while maintaining the traditional hot cross bun essence.
Glazing Alternatives
Try different glazes such as honey and water, maple syrup and water, or even a simple sugar glaze for varied finishes and flavors.
Make-Ahead Strategies
Preparation Timeline
These buns can be shaped and placed in the refrigerator overnight for the second rise. Simply remove them 30 minutes before baking to come to room temperature.
Storage Solutions
Store baked buns in airtight containers for up to 3 days at room temperature. For longer storage, freeze wrapped buns for up to 3 months, thawing at room temperature when needed.
Reheating Methods
Warm day-old buns in the microwave for 15 seconds or toast halves under the broiler for 3-4 minutes to restore their original texture and warmth.
Professional Baking Tips
Yeast Success
Ensure your milk temperature is around 110°F (45°C) – warm to the touch but not burning. Too hot kills the yeast, while too cool won’t activate it properly.
Flour Considerations
Bread flour creates lighter, softer buns compared to all-purpose flour, though either works well. Add extra flour gradually and only if the dough remains too sticky after proper mixing.
Rising Environment
Create an ideal rising environment by placing dough near (not on) a warm oven or in a slightly warmed oven that’s been turned off. Consistent warmth ensures even rising.
Frequently Asked Questions
What if my yeast doesn’t froth during activation? If your yeast mixture doesn’t become frothy within 5 minutes, the yeast is likely dead and won’t produce risen buns. Discard it and start fresh with new yeast.
Can I use different types of milk? Full-fat, 2%, or skim milk all work well in this recipe. Warm the milk in the microwave for 1 minute, stir, then warm for an additional 10-20 seconds until pleasantly warm to touch.
How do I know when the dough has risen enough? Properly risen dough should double in size and feel light and airy. Press gently with your finger – if the indentation remains, the dough is ready for the next step.
Can I make these buns without a stand mixer? Absolutely! Hand kneading takes about 10 minutes and produces equally good results. Oil your hands lightly to prevent sticking and knead until the dough becomes smooth and elastic.
Why are my crosses disappearing during baking? Ensure your cross paste is thick enough and that you pipe it into the crevices between buns. Too-thin paste will blend into the dough during baking.
How should I store leftover buns? Store in airtight containers at room temperature for up to 3 days. For longer storage, wrap individually and freeze for up to 3 months.
Can I prepare the dough ahead of time? Yes! After the first rise, you can refrigerate the dough overnight. Shape into buns the next day, allow to come to room temperature, then proceed with the second rise.
What’s the best way to reheat day-old buns? Microwave for 15 seconds to restore softness, or slice and toast under the broiler for 3-4 minutes for a crispy exterior with soft interior.
Nutrition Information (per bun):
Calories: 337 | Carbohydrates: 63g | Protein: 8g | Fat: 6g | Saturated Fat: 3g | Fiber: 2g | Sugar: 22g | Sodium: 148mg | Potassium: 202mg | Vitamin A: 191IU | Iron: 1mg


