There’s something magical about the aroma of brownies baking in the oven – that rich, chocolatey scent that fills your kitchen and draws everyone toward the source. After years of experimenting with countless brownie recipes, I’ve discovered the secret to creating the perfect balance between a fudgy center and that coveted crackly top. These one-bowl cocoa brownies have become my go-to recipe whenever I need a chocolate fix or want to impress guests with minimal effort.
What started as a quest for the perfect brownie has turned into my most requested recipe. The beauty lies not just in their incredible taste, but in their simplicity – requiring just one bowl and ingredients you likely already have in your pantry.
Why You’ll Fall in Love with These Brownies
Perfect Texture Balance
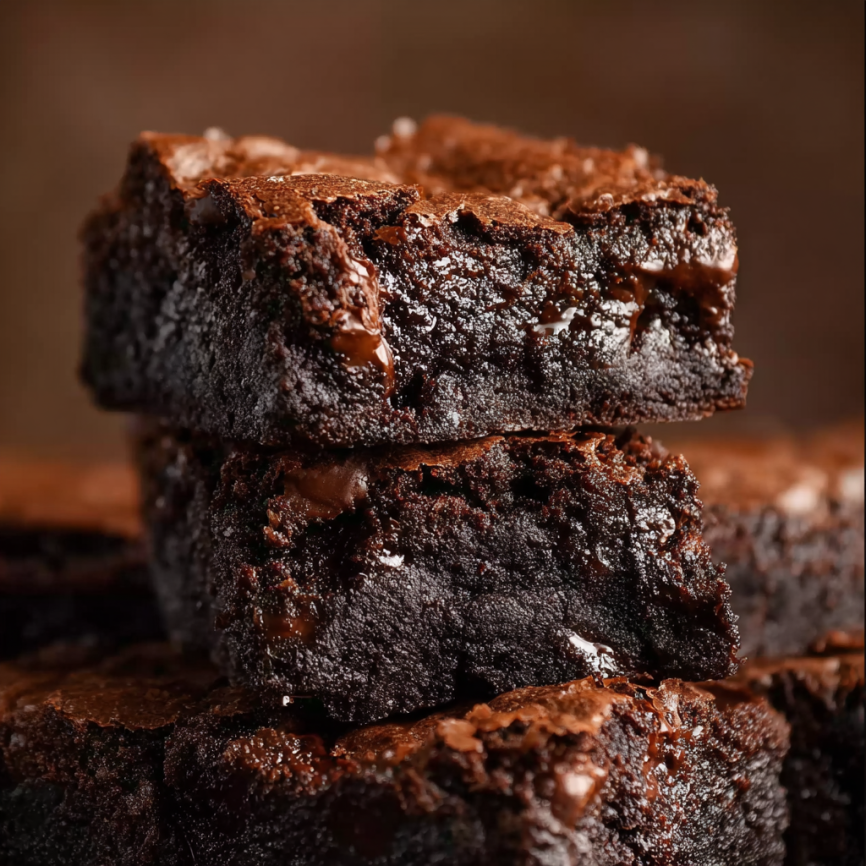
These brownies achieve the holy grail of brownie perfection: incredibly fudgy centers with gorgeously crackled tops. The secret lies in using hot melted butter, which creates steam during baking and results in that signature shiny, crackly surface we all crave.
One-Bowl Convenience
Forget about multiple mixing bowls and complicated techniques. This recipe comes together in a single bowl, making cleanup a breeze. From start to finish, you’ll have brownies ready in just 30 minutes – perfect for last-minute dessert emergencies.
Foolproof Results
Unlike temperamental recipes that require precise timing or special equipment, these brownies are incredibly forgiving. The technique is straightforward, making them ideal for both beginner bakers and experienced home cooks.
Customizable Base
The recipe serves as an excellent foundation for countless variations. Whether you prefer nuts, chocolate chips, or dried fruit, these brownies welcome add-ins beautifully without compromising their fudgy texture.
Essential Ingredients
Main Components
- 1/2 cup unsalted butter (melted and hot)
- 1 tablespoon cooking oil (olive oil or coconut oil)
- 1 1/8 cup superfine sugar (caster sugar or white granulated sugar)
- 2 large eggs
- 2 teaspoons pure vanilla extract
- 1/2 cup all-purpose flour (or plain flour)
- 1/2 cup unsweetened cocoa powder
- 1/4 teaspoon salt
Optional Add-Ins
Transform your brownies with these delicious additions:
- Crushed walnuts, peanuts, almonds, or pecans
- Chocolate chips or chunks
- Peanut butter chips
- Dried fruit (cranberries, raisins)
Prep Time: 10 minutes
Cook Time: 20 minutes
Total Time: 30 minutes
Servings: 16 brownies
Step-by-Step Instructions
Preparation Phase
Begin by preheating your oven to 350°F (175°C). Meanwhile, lightly grease an 8-inch square baking pan with cooking oil spray. Line the pan with parchment paper, ensuring the paper extends slightly over the edges for easy removal later.
Creating the Base
In a medium-sized bowl, combine the hot melted butter, oil, and sugar. The key here is ensuring your butter is genuinely hot – this creates the foundation for those coveted crackly tops. Whisk the mixture vigorously for about a minute until well combined.
Next, add the eggs and vanilla extract to the butter mixture. Beat thoroughly for another minute until the mixture becomes lighter in color. This step incorporates air and helps develop the brownies’ structure while contributing to the crackly surface.
Incorporating Dry Ingredients
Sift the flour, cocoa powder, and salt directly into the wet ingredients. Using a gentle folding motion, combine the dry ingredients until just incorporated. Resist the urge to overmix – once you no longer see streaks of flour, stop mixing immediately.
Baking Process
Pour the batter into your prepared pan, using a spatula to smooth the top evenly. If desired, sprinkle chocolate chunks or chips on top for extra indulgence.
Bake for 20-25 minutes, monitoring carefully during the final few minutes. The brownies are done when the center no longer jiggles and feels just set to the touch. For truly fudgy brownies, a toothpick inserted in the center should come out with moist crumbs attached, not completely clean.
Cooling and Serving
Remove the brownies from the oven and allow them to cool completely to room temperature before cutting. This cooling period is crucial for achieving the proper fudgy texture – cutting too early will result in a gooey mess rather than clean slices.

Serving Suggestions
Classic Presentations
Serve these brownies at room temperature for the ultimate fudgy experience. Cut into 16 squares for perfect portion sizes, or create larger pieces for serious chocolate lovers.
Elevated Serving Ideas
Transform these brownies into restaurant-worthy desserts by serving them warm with a scoop of vanilla ice cream and a drizzle of hot fudge sauce. Alternatively, dust with powdered sugar for an elegant presentation, or serve alongside fresh berries for a pop of color and acidity that balances the rich chocolate.
Party Perfect Options
For gatherings, consider cutting the brownies into smaller bite-sized pieces and arranging them on a decorative platter. They pair beautifully with coffee, milk, or even a glass of red wine for adult entertaining.
Recipe Variations
Sugar Substitutions
For even fudgier results, replace half the white sugar with light brown sugar. The molasses in brown sugar adds moisture and creates an even denser texture while contributing subtle caramel notes.
Flavor Enhancements
Create espresso brownies by adding 1 tablespoon of instant coffee powder to the dry ingredients. The coffee intensifies the chocolate flavor without making the brownies taste like coffee.
Texture Variations
For those who enjoy contrasting textures, fold in 1/2 cup of toasted nuts or 1/3 cup of mini chocolate chips just before baking. The nuts add crunch while the chocolate chips create pockets of melted chocolate throughout.
Dietary Adaptations
Substitute the all-purpose flour with almond flour for a gluten-free version, though the texture will be slightly denser. For dairy-free brownies, replace the butter with coconut oil and ensure your cocoa powder is dairy-free.
Make-Ahead Tips
Storage Solutions
These brownies store beautifully at room temperature for up to one week when kept in an airtight container. Layer them between sheets of parchment paper to prevent sticking.
Freezing Instructions
For longer storage, wrap individual brownies in plastic wrap and freeze for up to three months. Thaw at room temperature for 30 minutes before serving, or enjoy them directly from the freezer for a different texture experience.
Batter Preparation
The batter can be prepared up to 24 hours in advance and stored covered in the refrigerator. Allow it to come to room temperature for 15 minutes before baking, and you may need to add an extra minute or two to the baking time.
Professional Tips and Tricks
The Hot Butter Secret
Using genuinely hot melted butter is crucial for achieving those signature crackly tops. The heat creates steam during the initial baking phase, which forms the characteristic shiny, cracked surface that makes these brownies so visually appealing.
Mixing Technique Matters
Whisk the butter and sugar combination thoroughly to dissolve the sugar crystals completely. This creates a smoother batter and prevents grittiness in the final product. However, once you add the flour and cocoa, switch to gentle folding to avoid developing the gluten, which would create a cake-like texture.
Timing and Temperature
Keep a close eye on baking time – the difference between perfect and overbaked brownies is often just 2-3 minutes. The center should appear just set but still slightly soft to the touch. Remember that brownies continue cooking from residual heat even after removal from the oven.
Oven Positioning
Bake these brownies on the top shelf of your oven rather than the middle. The top shelf provides gentler heat that prevents the bottom from overcooking while ensuring the top develops properly.
Notes
Regular granulated sugar works perfectly if superfine sugar isn’t available. The slightly larger crystals won’t affect the final texture significantly.
For the ultimate fudgy experience, use a combination of half white sugar and half light brown sugar. The brown sugar adds moisture and creates an even denser, more decadent texture.
Ensure your cocoa powder is unsweetened – sweetened cocoa powder will throw off the balance of flavors and sweetness in the recipe.

Frequently Asked Questions
Q: Why do my brownies turn out cakey instead of fudgy? A: The most common cause is overmixing the batter once the flour is added. Mix only until the flour disappears – any additional mixing develops gluten and creates a cake-like texture. Also, ensure you’re not overbaking them.
Q: Can I double this recipe? A: Absolutely! Double all ingredients and use a 9×13-inch pan. The baking time will increase to 25-30 minutes. Check for doneness using the same visual cues – the center should be just set.
Q: My brownies are too sweet. How can I reduce the sweetness? A: Reduce the sugar to 1 cup instead of 1 1/8 cups, or add a pinch of sea salt on top before baking. You can also increase the cocoa powder by 1-2 tablespoons for a more intense chocolate flavor that balances the sweetness.
Q: Can I make these without eggs? A: Yes, substitute each egg with 1/4 cup of applesauce or 1 tablespoon of ground flaxseed mixed with 3 tablespoons of water. The texture will be slightly different but still delicious.
Q: How do I know when they’re perfectly done? A: The center should no longer jiggle when you gently shake the pan, and a toothpick inserted in the center should come out with a few moist crumbs attached. Clean toothpicks indicate overbaking.
Q: Can I add frosting to these brownies? A: While these brownies are perfect on their own, they pair beautifully with cream cheese frosting or chocolate ganache if you want to make them extra special for celebrations.
Nutritional Information (per brownie):
- Calories: 143
- Carbohydrates: 19g
- Protein: 2g
- Fat: 8g
- Saturated Fat: 4g
- Fiber: 1g
- Sugar: 14g


