Prep Time: 10 minutes | Cook Time: 12 minutes | Total Time: 22 minutes | Yield: 20 small cookies or 12 large cookies
The moment I pulled my first batch of chocolate crinkle cookies from the oven, I knew I’d discovered something magical. Those dramatic white cracks spreading across deep chocolate surfaces looked like winter frost on dark bark – absolutely stunning and completely irresistible. After years of perfecting this recipe, these cookies have become the most requested treat at every holiday gathering, combining the fudgy richness of brownies with the satisfying bite of a classic cookie.
Why These Crinkle Cookies Will Steal the Show
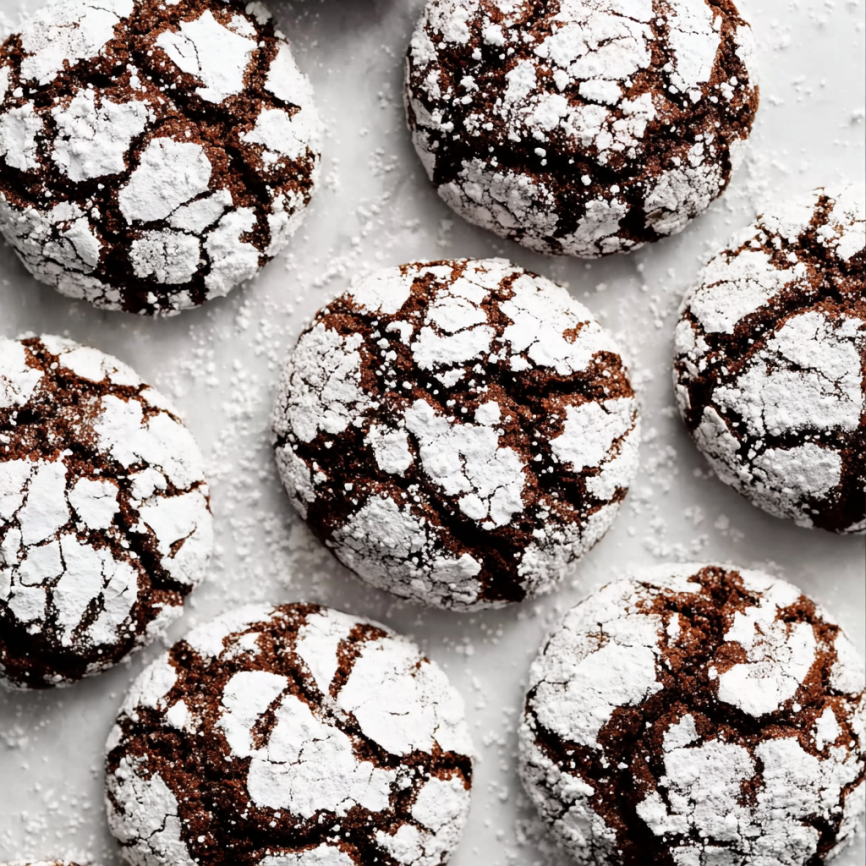
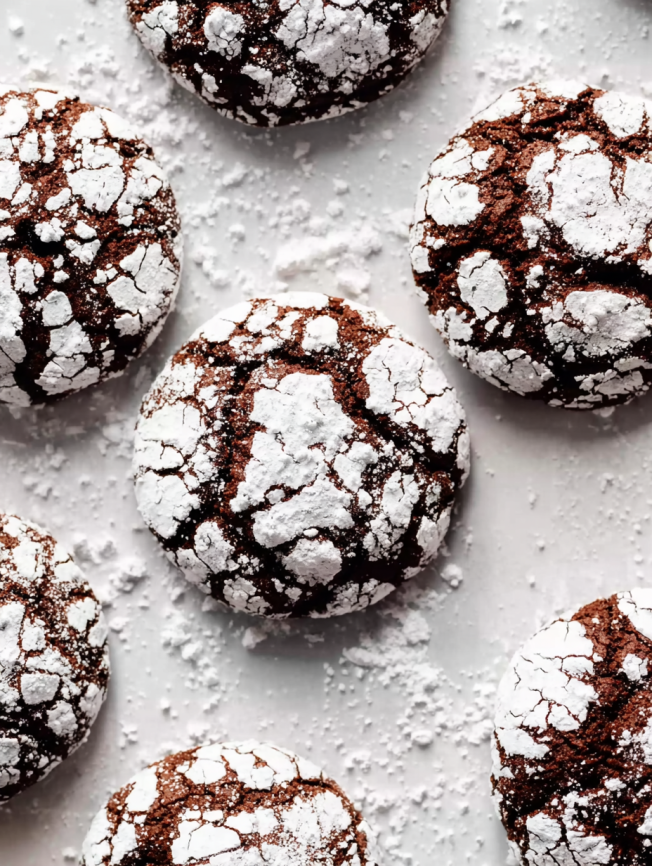
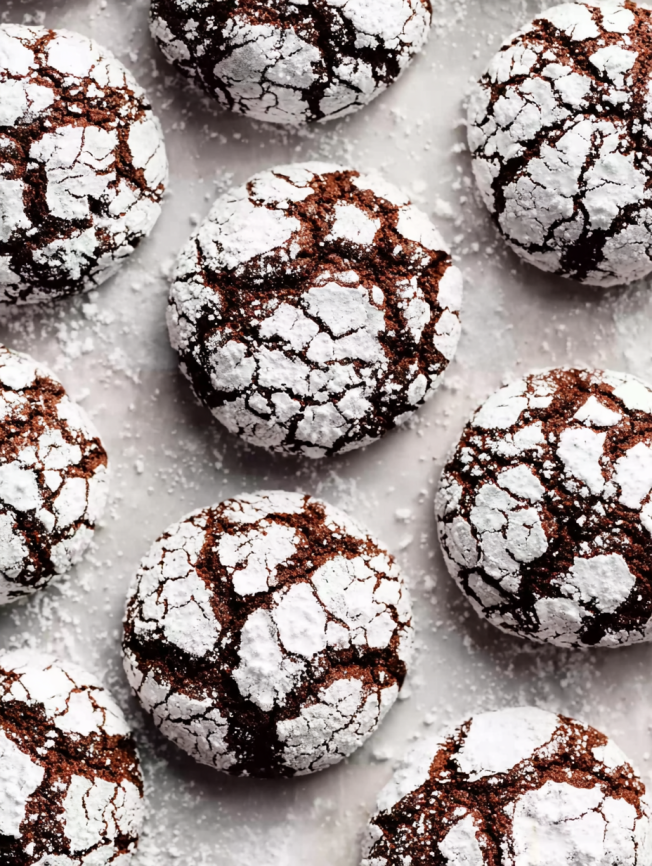
Stunning Visual Appeal
Few cookies command attention quite like chocolate crinkles. The dramatic contrast between the deep chocolate surface and bright white powdered sugar creates an almost artistic effect that makes these cookies as beautiful as they are delicious.
Perfect Texture Balance
These cookies achieve the holy grail of cookie textures – fudgy brownie centers with just enough cookie structure to hold their shape. Each bite delivers rich chocolate intensity followed by a subtle crunch that keeps you reaching for more.
Surprisingly Light and Guilt-Free
At only 88 calories per small cookie, these treats prove you don’t need to sacrifice indulgence for health consciousness. The recipe cleverly uses minimal oil while maximizing chocolate flavor, making them perfect for holiday enjoyment without the heavy guilt.
Foolproof Holiday Success
Unlike temperamental cookies that require precise timing and conditions, crinkles are remarkably forgiving. The overnight chilling actually improves their texture, making them ideal for busy holiday schedules.
Essential Ingredients
Chocolate Foundation
- 1/2 cup unsweetened cocoa powder – The star ingredient delivering intense chocolate flavor
- 1 cup white granulated sugar – Provides sweetness and helps create the signature crackled surface
- 1/4 cup vegetable oil – Creates moisture without heaviness, keeping calories in check
Binding and Structure Elements
- 2 large eggs – Provide richness and help bind the ingredients together
- 2 teaspoons pure vanilla extract – Enhances the chocolate flavor with warm, aromatic notes
- 1 cup all-purpose flour – Creates just enough structure for cookie integrity
Leavening and Finishing
- 1 teaspoon baking powder – Gives gentle lift and contributes to the cracking effect
- 1/2 teaspoon salt – Balances sweetness and intensifies chocolate flavor
- 1/4 cup confectioner’s sugar – Creates the beautiful white coating that cracks during baking
Serving Accompaniments
These cookies pair wonderfully with cold milk, hot coffee, or even a glass of red wine for adult gatherings. Consider serving alongside vanilla ice cream for an elegant dessert presentation.
Step-by-Step Instructions
Creating the Chocolate Base
Start by combining the cocoa powder, granulated sugar, and vegetable oil in a medium bowl. This might seem like an unusual beginning, but mixing these dry and wet ingredients first creates a paste that helps distribute the cocoa evenly throughout the dough.
Beat in the eggs one at a time, ensuring each is fully incorporated before adding the next. This gradual addition prevents the mixture from becoming lumpy and creates a smooth, glossy base. Finally, stir in the vanilla extract until evenly distributed.
Building the Cookie Structure
In a separate bowl, whisk together the flour, baking powder, and salt. This step ensures even distribution of the leavening agent, which is crucial for consistent cookie rise and cracking.
Add the dry ingredients to the chocolate mixture, stirring just until a cohesive dough forms. Resist the temptation to overmix – this can lead to tough cookies that lack the desired fudgy texture.
Essential Chilling Period
Cover the bowl tightly with plastic wrap and refrigerate for at least 4 hours, though overnight chilling yields even better results. This crucial step firms up the dough, making it easier to handle while also allowing the flavors to meld and intensify.
Shaping and Coating
Cookie Formation
When ready to bake, preheat your oven to 350°F (175°C) and line two baking sheets with parchment paper. Using clean hands or a cookie scoop, portion the chilled dough into balls – 1 tablespoon for smaller cookies or 2 tablespoons for larger ones.
Sugar Coating Technique
Place the confectioner’s sugar in a small bowl. Roll each dough ball generously in the sugar, ensuring complete coverage. Don’t be shy with the coating – this sugar layer is what creates those stunning white cracks as the cookies bake and expand.
Baking to Perfection
Arrange the coated dough balls on prepared baking sheets, leaving adequate space between each cookie. Bake for 10 minutes for small cookies or 12 minutes for larger ones. The cookies will appear soft and slightly underdone when you remove them – this is exactly what you want for that fudgy center.
Cooling and Storage Tips
Proper Cooling Technique
Allow cookies to cool on the baking sheet for exactly 5 minutes before transferring. This brief cooling period lets them set just enough to handle without breaking while preserving their tender texture.
Storage Guidelines
Store completely cooled cookies in an airtight container at room temperature for up to one week. Layer them between parchment paper to prevent the powdered sugar coating from rubbing off.
Recipe Variations
Flavor Enhancements
Double Chocolate Crinkles: Fold in 1/3 cup mini chocolate chips after mixing the dough for extra chocolate intensity.
Mocha Crinkles: Add 1 tablespoon instant espresso powder with the cocoa for coffee lovers.
Spiced Holiday Version: Include 1/2 teaspoon cinnamon and 1/4 teaspoon cayenne pepper for warmth and complexity.
Coating Alternatives
Colored Sugar Crinkles: Replace powdered sugar with colored sanding sugar for festive variations.
Dual-Coated Crinkles: Roll first in granulated sugar, then in powdered sugar for extra sweetness and texture.
Make-Ahead Strategies
Dough Preparation
The cookie dough can be prepared up to 3 days in advance and kept refrigerated. For longer storage, shape the dough into balls, freeze on baking sheets, then transfer to freezer bags for up to 3 months.
Baking from Frozen
Frozen dough balls can be coated in powdered sugar and baked directly from the freezer. Add 1-2 extra minutes to the baking time and watch for the characteristic cracking to appear.
Gift-Giving Preparation
These cookies travel beautifully and make excellent holiday gifts. Package them in decorative tins with parchment paper between layers to maintain their appearance.
Professional Baking Secrets
Achieving Maximum Cracking
The dramatic cracks that make these cookies so visually appealing result from the contrast between the firm, sugar-coated exterior and the expanding dough underneath. Ensure generous sugar coating and avoid overbaking to maximize this effect.
Temperature Considerations
Room temperature eggs incorporate more easily into the chocolate mixture, creating a smoother dough. If your eggs are cold, place them in warm water for 5 minutes before using.
Consistency Tips
Use a cookie scoop or measuring spoon to ensure uniform sizing. Consistent cookies not only look more professional but also bake evenly, preventing some from being overdone while others remain underbaked.
Troubleshooting Common Issues
Preventing Flat Cookies
If your cookies spread too much and don’t maintain their shape, the dough may not have been chilled long enough. Return it to the refrigerator for additional time before shaping and baking.
Enhancing Chocolate Flavor
For deeper chocolate intensity, use Dutch-processed cocoa powder, which has a richer, more complex flavor than regular unsweetened cocoa.
Maintaining Soft Centers
The key to fudgy centers is slightly underbaking. The cookies should look set around the edges but still appear soft in the center when removed from the oven.
Frequently Asked Questions
Can I use oil substitutes to make these healthier? You can substitute the vegetable oil with an equal amount of melted coconut oil or even applesauce, though this may slightly change the texture. Coconut oil provides the closest results to the original.
Why do my cookies lose their white coating? This usually happens when cookies are stored improperly or handled too much. Store in airtight containers with parchment between layers, and handle gently to preserve the powdered sugar coating.
Can I make these gluten-free? Yes! Substitute the all-purpose flour with a 1:1 gluten-free flour blend. The texture may be slightly different, but the cookies will still be delicious and maintain their characteristic appearance.
How do I know when they’re perfectly baked? Look for cookies that are set around the edges with visible cracks in the powdered sugar coating. The centers should still appear slightly soft – they’ll continue cooking from residual heat after removal.
Can I double this recipe? Absolutely! This recipe doubles perfectly with the same baking times. You may need to bake in multiple batches depending on your oven space.
What’s the best cocoa powder to use? Both natural and Dutch-processed cocoa work well, though Dutch-processed provides a slightly richer, less acidic flavor. Avoid cocoa mixes or hot chocolate powders, which contain added sugars and milk.
Why is the overnight chilling so important? Chilling serves multiple purposes: it firms the dough for easier handling, allows flavors to develop, and helps create the proper texture contrast between the crispy exterior and fudgy interior.
Nutrition Information (Per Small Cookie):
- Calories: 88kcal
- Carbohydrates: 18g
- Protein: 2g
- Fat: 4g
- Fiber: 1g
- Sugar: 12g
These chocolate crinkle cookies represent the perfect marriage of visual drama and incredible taste, proving that sometimes the most impressive results come from the simplest techniques and quality ingredients.


