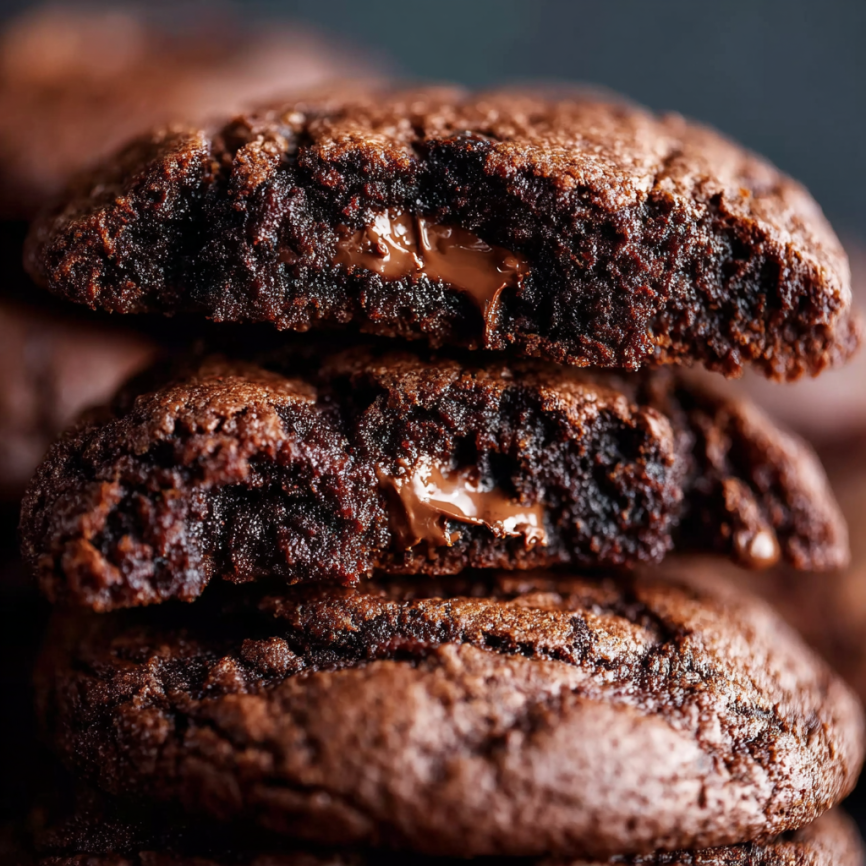
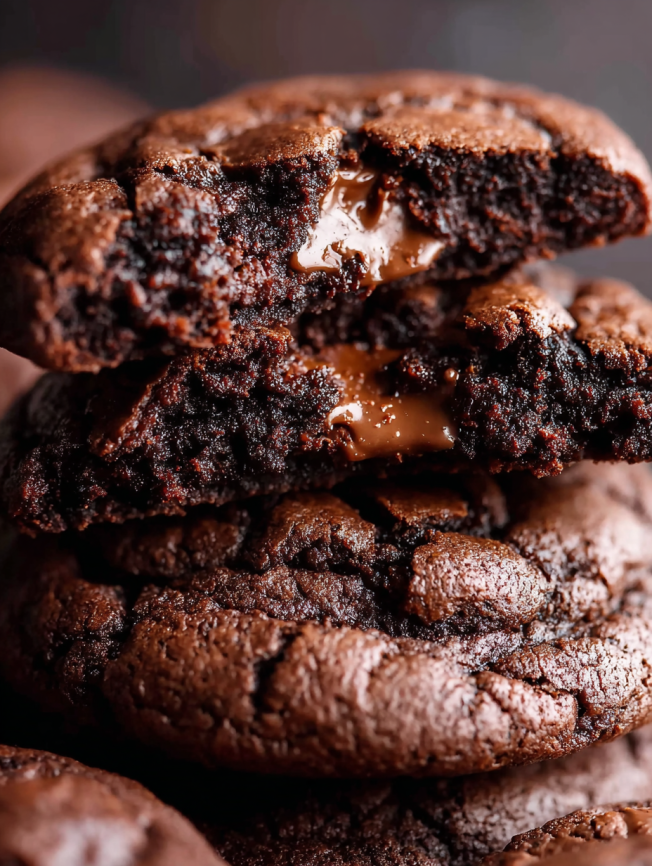
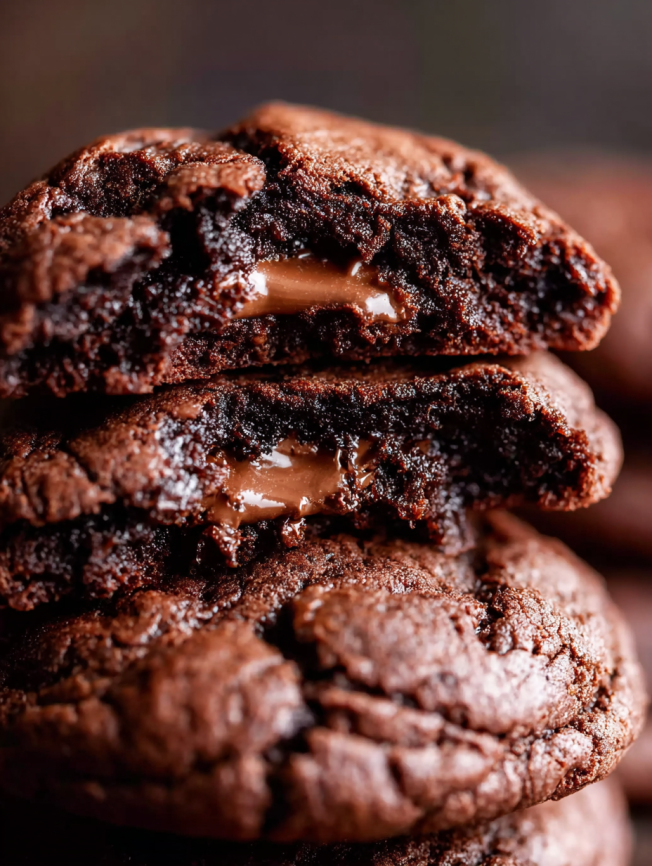
There’s something magical about the moment when you bite into a cookie that delivers the rich, dense satisfaction of a brownie. These Fudgy Chocolate Brownie Cookies have become my go-to treat whenever I’m craving something indulgent but don’t want to commit to a full pan of brownies. After countless batches and happy taste testers, I can confidently say these disappear faster than I can make them.
The beauty of this recipe lies in its simplicity. With just one bowl and a handful of pantry staples, you can create cookies that rival any bakery treat. Moreover, the entire process takes less than 25 minutes from start to finish, making them perfect for unexpected guests or sudden chocolate cravings.
Why You’ll Fall in Love with These Brownie Cookies
The Perfect Texture Balance
These cookies strike the ideal balance between chewy and fudgy. Unlike traditional cookies that can be either too crispy or too soft, these maintain a tender center while developing just enough structure to hold their shape. The secret lies in the combination of melted butter and vegetable oil, which creates moisture without making the cookies too dense.
One-Bowl Wonder
Busy schedules call for simple solutions. This recipe requires only one mixing bowl, which means less cleanup and more time to enjoy your cookies. Additionally, the straightforward mixing method eliminates the need for special equipment or complicated techniques.
Customization Friendly
The base recipe serves as an excellent foundation for countless variations. Whether you prefer extra chocolate chips, nuts, or different flavor additions, these cookies adapt beautifully to your preferences.
Essential Ingredients for Success
Main Components
- 1/2 cup unsweetened cocoa powder – The foundation of deep chocolate flavor
- 1 cup white granulated sugar – Provides sweetness and helps create the perfect texture
- 1/2 cup melted butter – Adds richness and helps bind ingredients
- 3 tablespoons vegetable oil – Creates extra moisture for that fudgy texture
- 1 egg – Acts as a binding agent and adds structure
- 2 teaspoons pure vanilla extract – Enhances the chocolate flavor
- 1 1/3 cups all-purpose flour – Provides structure without making cookies tough
- 1/2 teaspoon baking powder – Gives just enough lift for proper texture
- 1/2 teaspoon salt – Balances sweetness and enhances chocolate flavor
- 1/3 cup semi-sweet chocolate chips – Adds extra chocolate bursts throughout
Serving Suggestions
These cookies pair wonderfully with cold milk, hot coffee, or vanilla ice cream. For special occasions, try serving them alongside fresh berries or a dollop of whipped cream. They also make excellent gifts when packaged in decorative boxes or bags.
Step-by-Step Instructions
Preparation Phase
Start by preheating your oven to 350°F (175°C). Meanwhile, line two cookie sheets with parchment paper to prevent sticking and ensure even baking. This preparation step is crucial for achieving consistent results.
Mixing the Dough
In a medium-sized bowl, combine the cocoa powder, white sugar, melted butter, and vegetable oil. Mix these ingredients thoroughly until they form a smooth, glossy mixture. Next, beat in the egg and vanilla extract until everything is fully incorporated and the mixture appears uniform.
Adding Dry Ingredients
Add the flour, baking powder, and salt to the chocolate mixture. However, don’t immediately start mixing. Instead, stir the dry ingredients together first, then gently fold them into the wet ingredients until a dough forms. This technique prevents overmixing, which can lead to tough cookies.
Shaping and Baking
Using a cookie scoop or small ice cream scoop, portion out 1-2 tablespoons of dough onto the prepared baking sheets. Press each portion down slightly to your desired thickness. Remember that thicker cookies will be more fudgy, while thinner ones will have a slightly crispier edge.
Bake for 10-12 minutes, watching carefully to avoid overbaking. The cookies should still appear slightly soft in the center when you remove them from the oven. They will continue to set as they cool, developing that perfect fudgy texture.
Cooling Process
Allow the cookies to cool on the baking sheet for 10 minutes before transferring them to wire racks. This cooling period is essential for proper texture development and prevents the cookies from breaking apart.
Creative Serving Ideas
Classic Presentations
Serve these cookies at room temperature for the ultimate fudgy experience. They’re perfect for afternoon tea, dessert platters, or packed lunches. Furthermore, they maintain their texture beautifully for several days when stored properly.
Elevated Occasions
For dinner parties or special events, try warming the cookies slightly and serving them with vanilla ice cream and a drizzle of chocolate sauce. Alternatively, crumble them over yogurt parfaits or use them as a base for cookie ice cream sandwiches.
Recipe Variations to Try
Nutty Additions
Fold in 1/2 cup of chopped walnuts, pecans, or almonds for extra crunch and flavor. Toast the nuts lightly beforehand to enhance their taste and add aromatic depth to your cookies.
Flavor Twists
Replace the vanilla extract with different extracts like almond, peppermint, or orange for unique flavor profiles. You can also add 1 tablespoon of espresso powder to intensify the chocolate flavor and create a mocha variation.
Chocolate Varieties
Experiment with different types of chocolate chips. White chocolate chips create a beautiful contrast, while dark chocolate chips provide a more intense chocolate experience. You can even mix different varieties for a complex flavor profile.
Make-Ahead Tips
Dough Storage
The cookie dough can be prepared up to 3 days in advance and stored in the refrigerator. Simply cover the bowl tightly with plastic wrap or transfer the dough to an airtight container. When ready to bake, let the dough come to room temperature for easier scooping.
Freezer-Friendly Options
For longer storage, portion the dough into individual cookies and freeze them on a baking sheet. Once frozen solid, transfer the dough portions to freezer bags. They can be baked directly from frozen, though you may need to add 1-2 extra minutes to the baking time.
Baked Cookie Storage
Fully baked cookies stay fresh in an airtight container for up to one week. For optimal freshness, place parchment paper between layers to prevent sticking and maintain their texture.
Professional Tips and Notes
Temperature Matters
Using melted butter that’s not too hot is crucial for proper texture. If the butter is too warm, it can cause the cookies to spread too much during baking. Let the melted butter cool slightly before adding it to the other ingredients.
Don’t Overbake
The key to achieving that perfect fudgy texture is to remove the cookies while they still appear slightly underbaked. They will continue to cook on the hot baking sheet, reaching the ideal consistency as they cool.
Ingredient Quality
Using high-quality cocoa powder makes a noticeable difference in the final flavor. Dutch-processed cocoa powder works particularly well, though natural cocoa powder will also produce excellent results.
Frequently Asked Questions
Can I substitute ingredients?
Yes, several substitutions work well in this recipe. You can replace the vegetable oil with melted coconut oil or additional melted butter. For a gluten-free version, use a 1:1 gluten-free flour blend in place of all-purpose flour.
Why are my cookies too dry?
Dry cookies usually result from overbaking or using too much flour. Make sure to measure your flour correctly by spooning it into the measuring cup rather than scooping directly from the bag. Additionally, remove the cookies from the oven while they still look slightly soft in the center.
How do I store leftover cookies?
Store cooled cookies in an airtight container at room temperature for up to one week. For longer storage, freeze them in freezer-safe bags for up to three months. They thaw quickly at room temperature and taste just as fresh as the day they were baked.
Can I double the recipe?
Absolutely! This recipe doubles beautifully. Just make sure you have enough baking sheets and oven space to accommodate the larger batch. You may need to bake in multiple batches depending on your oven size.
What’s the best way to achieve consistent cookie sizes?
Using a cookie scoop ensures uniform portions and even baking. A #30 scoop (approximately 2 tablespoons) works perfectly for this recipe. If you don’t have a cookie scoop, use a small ice cream scoop or measure out rounded tablespoons of dough.
Recipe Summary:
- Prep Time: 10 minutes
- Cook Time: 12 minutes
- Total Time: 22 minutes
- Servings: 16 cookies
- Nutrition per cookie: 193 calories, 24g carbs, 2g protein, 11g fat
These Fudgy Chocolate Brownie Cookies deliver all the satisfaction of a brownie in convenient, portable form. With their rich chocolate flavor and perfect chewy texture, they’re destined to become a household favorite that you’ll find yourself making again and again.


