Servings: 6-8 waffles (depending on your waffle maker)
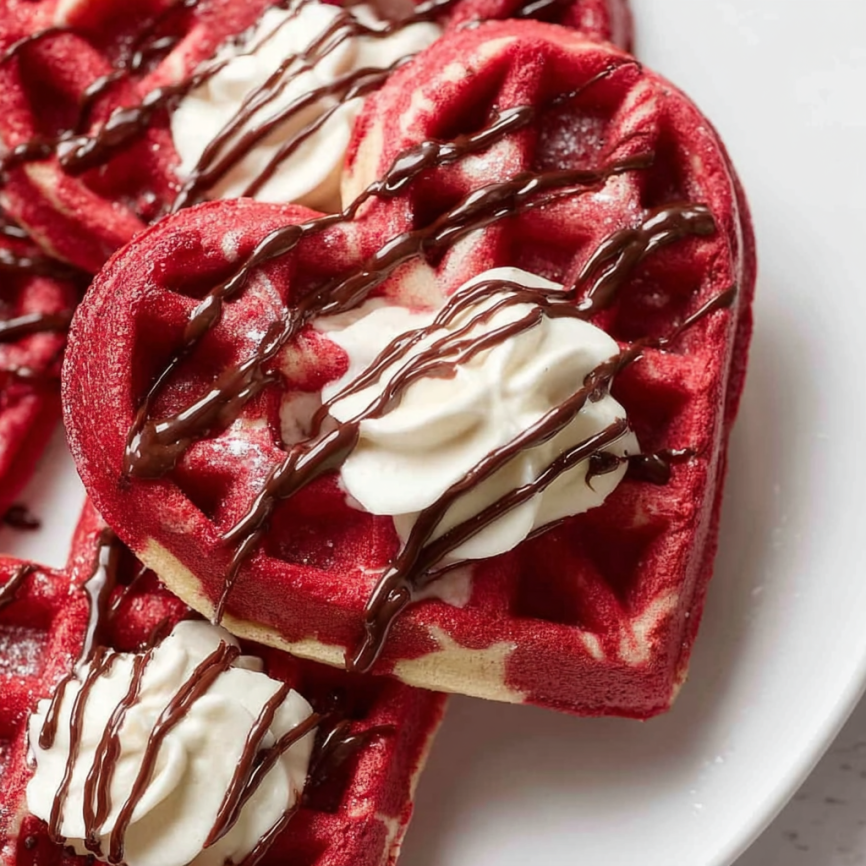
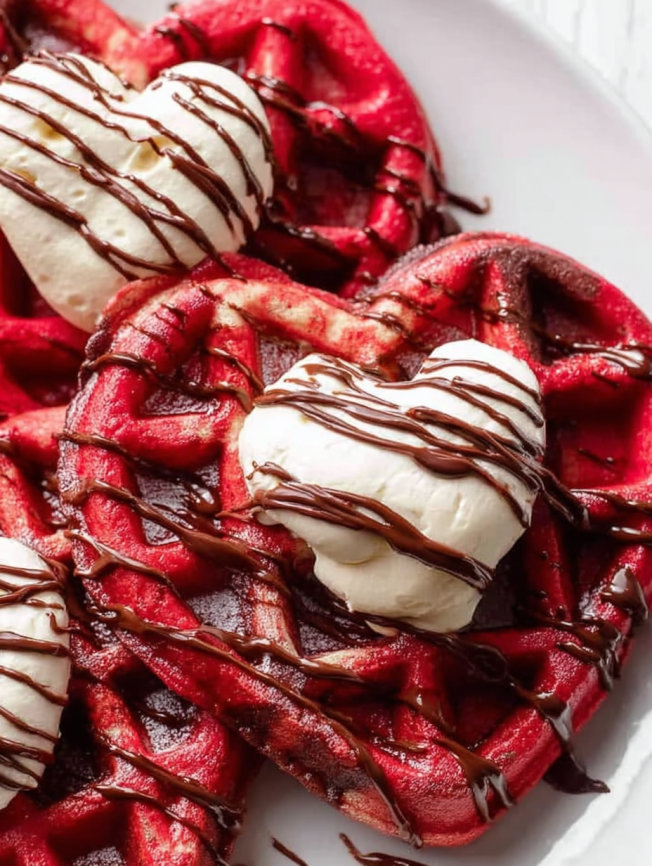
Saturday mornings in my house have never been quite the same since I discovered these Red Velvet Marbled Waffles. What began as a quest to create something special for my family’s weekend breakfast turned into an obsession with perfecting this stunning, protein-packed treat. The beautiful swirls of deep red and creamy vanilla create an Instagram-worthy breakfast that tastes even better than it looks.
Growing up, red velvet was always reserved for special occasions – birthdays, holidays, or those rare moments when my mother felt adventurous in the kitchen. Now, I’ve transformed that beloved flavor into something we can enjoy any day of the week, guilt-free and packed with wholesome ingredients.
Why These Waffles Will Become Your New Favorite
These aren’t your ordinary waffles – they’re a perfect marriage of indulgence and nutrition. The addition of Greek yogurt provides an impressive protein boost, making these waffles surprisingly filling and satisfying. Unlike traditional red velvet recipes loaded with butter and oil, this version uses minimal fat while maintaining that signature tender texture.
The marbled effect creates a visually stunning presentation that’s perfect for special occasions or when you want to make an ordinary morning feel extraordinary. Furthermore, the recipe is incredibly versatile – you can customize the toppings to suit any preference, from fresh berries to decadent chocolate drizzles.
Most importantly, these waffles freeze beautifully, making them an excellent make-ahead breakfast option for busy weekdays. Simply pop them in the toaster for a quick, protein-rich meal that rivals any coffeehouse treat.
Essential Ingredients
Main Components:
- 2 large eggs
- 1½ cups unsweetened almond milk
- ½ cup plain non-fat Greek yogurt
- 2 cups all-purpose flour
- 1½ tablespoons baking powder
- ¼ teaspoon salt
- 4 tablespoons brown sugar (or coconut sugar)
- 2 tablespoons melted butter (reduced fat)
- 3 teaspoons unsweetened cocoa powder
- 2 teaspoons red food coloring (or 2 tablespoons beetroot juice)
- 2 teaspoons vanilla bean paste (or pure vanilla extract)
Serving Suggestions:
These waffles are delicious on their own, but they truly shine when topped with vanilla ice cream, fresh strawberries, whipped cream, or a drizzle of melted chocolate. For a healthier option, try Greek yogurt with honey and fresh berries.
Step-by-Step Instructions
Preparing Your Equipment
Start by preheating your waffle maker according to the manufacturer’s instructions. This ensures even cooking and prevents the batter from sticking. While it’s heating, gather all your ingredients and measuring tools – having everything ready makes the process much smoother.
Creating the Base Batter
In a medium-sized jug or bowl, whisk together the eggs, almond milk, and Greek yogurt until the mixture is well combined and smooth. The Greek yogurt might seem lumpy at first, but consistent whisking will incorporate it beautifully into the liquid mixture.
In a separate bowl, combine the flour, baking powder, salt, and sugar, mixing until evenly distributed. Next, whisk the melted butter into the liquid mixture, ensuring it’s fully incorporated before proceeding.
Combining Wet and Dry Ingredients
Pour the wet ingredients into the dry ingredients and lightly whisk until the mixture becomes combined and creamy. Don’t worry if some small lumps remain – overmixing can lead to tough waffles, so gentle folding is key.
Creating the Marbled Effect
Divide the batter in half, pouring one portion into a separate bowl. Add the cocoa powder and red food coloring to one half, mixing until the color is evenly distributed and the batter turns a beautiful deep red. Meanwhile, add the vanilla bean paste to the remaining batter, stirring gently to combine.
The Marbling Technique
For the most striking marbled effect, try pouring both batters into a medium-sized pouring jug simultaneously – you may need an extra pair of hands for this step. Alternatively, keep the batters separate and create the marble pattern directly on the waffle iron.
Cooking Perfect Waffles
Spray your waffle maker with a small amount of cooking oil spray or grease it according to your usual method. Pour approximately ½ cup of the combined batter per waffle, following your manufacturer’s instructions for the appropriate amount.
If using separate batters, pour ¼ cup of the red velvet batter onto the waffle iron in a zigzag pattern, then add ¼ cup of the vanilla batter over the top. Using a plastic spatula, gently swirl the batters together to create the marbled effect before closing the lid.
Cook according to your waffle maker’s instructions, typically 3-5 minutes, until the waffles are golden brown and crispy on the outside. Transfer finished waffles to a cooling rack to maintain their crispiness while you prepare the remaining batter.
Creative Serving Ideas
Breakfast Elegance
Serve these waffles as the centerpiece of an elegant brunch spread. Arrange them on individual plates with a dollop of whipped cream, fresh berries, and a light dusting of powdered sugar. The contrast between the deep red swirls and white toppings creates a stunning visual presentation.
Dessert Transformation
Transform these waffles into a decadent dessert by serving them warm with a scoop of vanilla ice cream and a generous drizzle of melted chocolate. Add fresh strawberries or raspberries for a restaurant-quality finish.
Healthy Indulgence
For a nutritious twist, top with Greek yogurt mixed with honey, fresh berries, and a sprinkle of chopped nuts. This combination provides additional protein while maintaining the indulgent feel of the dish.
Delicious Recipe Variations
Chocolate Lovers’ Version
For an extra chocolate boost, fold mini chocolate chips into the red velvet batter before cooking. The chips will melt slightly during cooking, creating pockets of rich chocolate throughout the waffle.
Cream Cheese Swirl
Create a cream cheese mixture by blending softened cream cheese with powdered sugar and vanilla. Drizzle this over the cooked waffles for an authentic red velvet cake experience.
Seasonal Adaptations
During fall months, add a pinch of cinnamon and nutmeg to the vanilla batter for warm, spiced notes. For spring celebrations, incorporate lemon zest into the vanilla portion for a bright, citrusy contrast.
Make-Ahead Tips
Freezer-Friendly Option
These waffles freeze exceptionally well, making them perfect for meal prep. Allow the waffles to cool completely, then place them in a single layer on a baking sheet. Once frozen solid, transfer to freezer-safe bags with parchment paper between layers.
Frozen waffles can be stored for up to three months. To reheat, simply pop them in the toaster or toaster oven until heated through and crispy. This method preserves their texture better than microwaving.
Batter Preparation
The batter can be prepared the night before and stored in the refrigerator. However, for the best marbled effect, it’s recommended to divide and color the batter just before cooking. The separated batters can be stored for up to 24 hours in the refrigerator.
Topping Prep
Prepare your toppings in advance by washing and slicing berries, whipping cream, or melting chocolate. Store everything in the refrigerator until ready to serve.
Important Notes
Ingredient Substitutions
The recipe calls for unsweetened almond milk to keep the calorie and fat content lower, but you can easily substitute with low-fat, skim, or full-fat milk based on your preferences. Similarly, full-fat Greek yogurt can replace the non-fat version if you prefer richer flavor and texture.
Color Considerations
Natural beetroot juice creates a beautiful red color while adding subtle earthy sweetness. However, traditional red food coloring provides more vibrant results. Choose based on your preference for natural ingredients versus visual impact.
Storage Guidelines
Store leftover waffles in an airtight container in the refrigerator for up to three days. For optimal texture, reheat in a toaster rather than the microwave to restore crispiness.

Frequently Asked Questions
Q: Can I make these waffles without a waffle maker? A: While a waffle maker creates the classic texture and pattern, you can adapt this recipe for pancakes using a griddle or large skillet. Pour the batter in smaller portions and cook like regular pancakes, flipping when bubbles form on the surface.
Q: Why do my waffles turn out soggy instead of crispy? A: Soggy waffles usually result from undercooking or improper cooling. Ensure your waffle maker is fully preheated and cook until the indicator light shows they’re done. Additionally, place finished waffles on a cooling rack rather than stacking them to prevent steam buildup.
Q: Can I reduce the sugar in this recipe? A: Yes, you can reduce the brown sugar by half without significantly affecting the texture. However, keep in mind that some sweetness helps balance the slight tanginess from the Greek yogurt and cocoa powder.
Q: What’s the best way to achieve distinct marbled patterns? A: For the most defined marbling, avoid overmixing the two batters together. Pour them in alternating patterns and use just a few gentle swirls with a toothpick or knife tip. Too much mixing will blend the colors rather than create distinct swirls.
Q: Can I use whole wheat flour instead of all-purpose flour? A: You can substitute up to half the all-purpose flour with whole wheat flour for added nutrition. Using 100% whole wheat flour may result in denser waffles, so start with a 50/50 blend and adjust based on your preference.
Q: How do I prevent the waffles from sticking to my waffle maker? A: Always preheat your waffle maker thoroughly and use cooking spray or a light brush of oil between each waffle. If your waffle maker has a non-stick coating, avoid using cooking sprays that contain lecithin, as this can build up over time.
Q: Can I make these dairy-free? A: Absolutely! Use dairy-free Greek yogurt alternatives and replace the butter with melted coconut oil or vegan butter. The almond milk is already dairy-free, making this an easily adaptable recipe for various dietary needs.
Nutrition Information (per waffle):
- Calories: 265kcal
- Carbohydrates: 43g
- Protein: 8g
- Fat: 6g
- Saturated Fat: 3g
- Cholesterol: 65mg
- Sodium: 556mg
- Fiber: 2g
- Sugar: 10g
- Calcium: 293mg
- Iron: 3mg
These nutritional values are approximate and may vary based on specific ingredients and serving sizes.


