Prep Time: 10 minutes | Total Time: 30 minutes | Servings: 24 cups
Some of my most cherished memories involve sneaking spoonfuls of cookie dough from my mother’s mixing bowl, despite her warnings about raw eggs. Fast forward to today, and I’ve created the perfect solution – these incredible No Bake Chocolate Chip Cheesecake Cookie Dough Cups that capture all that nostalgic flavor without any of the worry. They’re safe, delicious, and absolutely impossible to resist.
What started as a weekend experiment quickly became my go-to treat for every occasion. These little cups have graced birthday parties, potluck dinners, and countless midnight snack sessions. The combination of creamy cheesecake, rich chocolate coating, and that beloved cookie dough texture creates something truly magical that appeals to both kids and adults alike.
Why These Cups Will Become Your New Obsession
These delightful treats offer the perfect trifecta of convenience, flavor, and satisfaction. First and foremost, they require absolutely no baking – perfect for hot summer days when you don’t want to turn on the oven. Additionally, the egg-free cookie dough center means you can indulge without any safety concerns about raw ingredients.
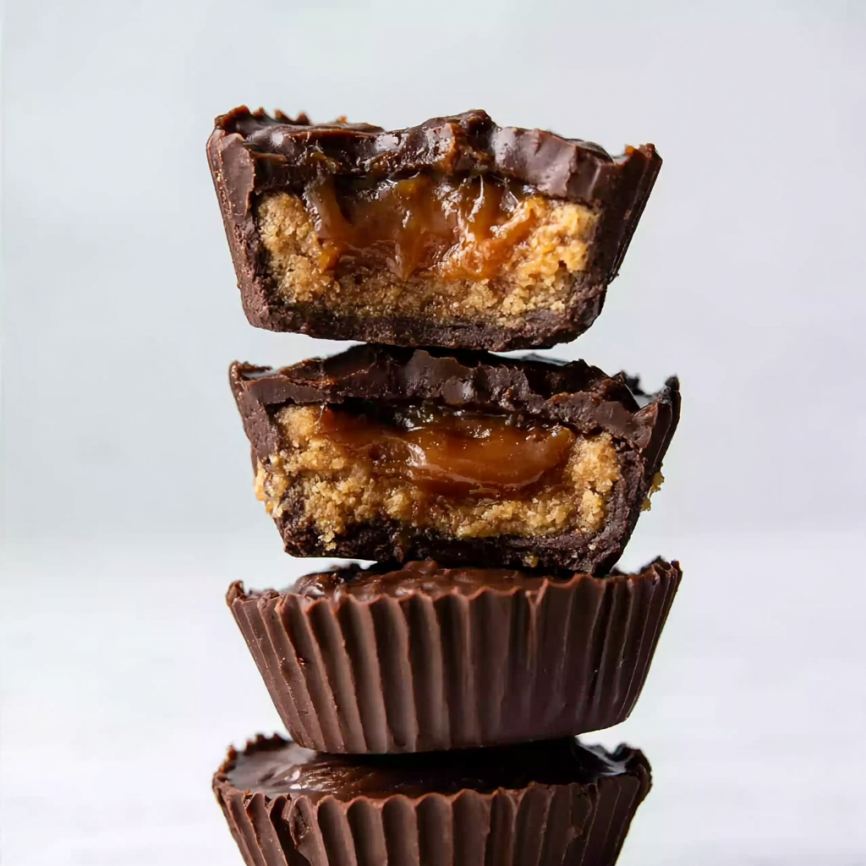
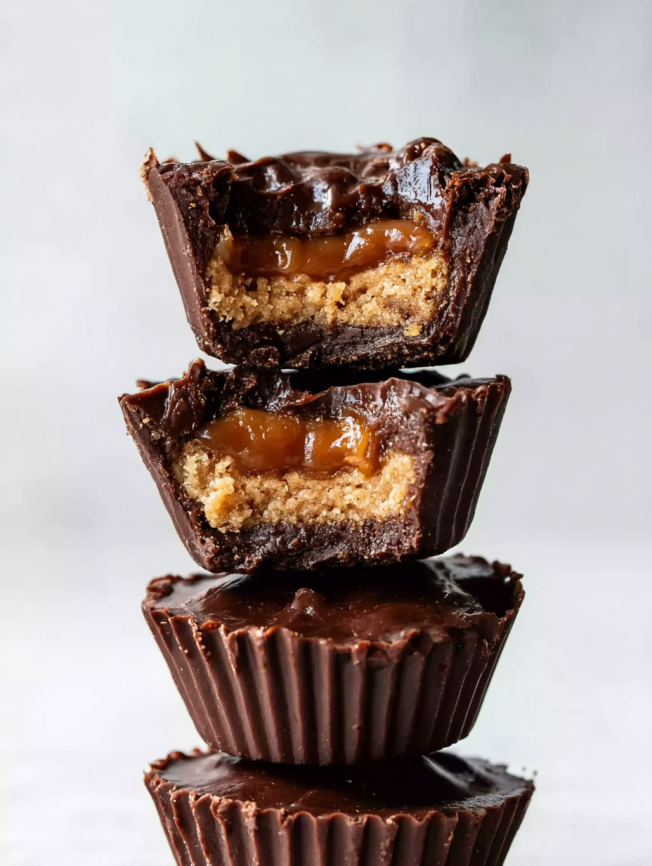
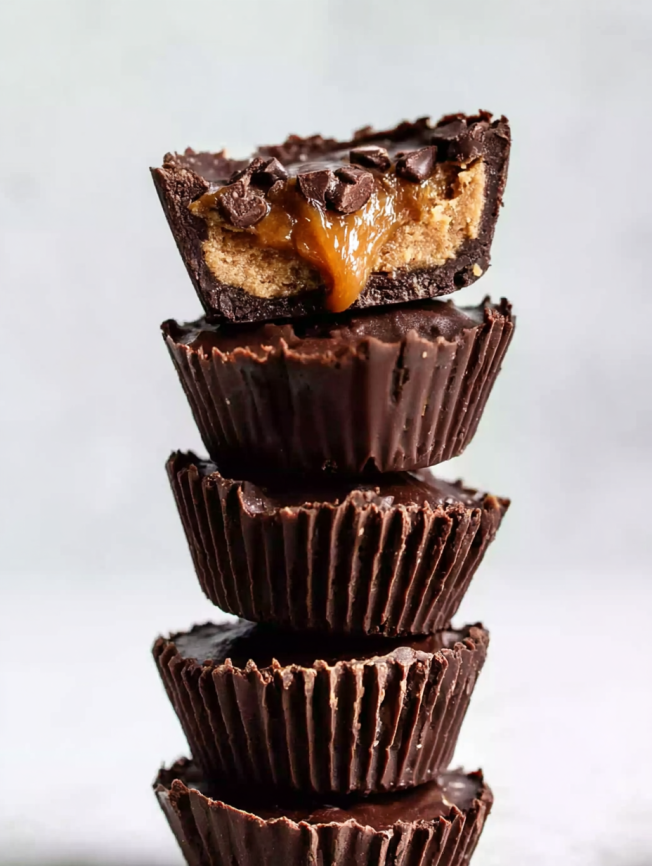
The texture combination is simply divine: a crisp chocolate shell gives way to a soft, creamy center that perfectly mimics traditional cookie dough. Moreover, using natural sweeteners and almond butter makes these treats surprisingly wholesome compared to traditional desserts.
Perhaps most importantly, these cups are incredibly portable and store beautifully, making them ideal for meal prep, party planning, or keeping on hand for unexpected guests. They freeze exceptionally well, essentially giving you a dessert emergency stash that’s ready in minutes.
Essential Ingredients
Cookie Dough Center:
- ⅔ cup creamy almond spread/butter (or peanut butter)
- ⅓ cup natural granulated sweetener (or coconut sugar)
- ½ teaspoon pure vanilla extract (optional)
- 1 pinch salt
- ½ cup cream cheese (softened)
- ⅓ cup Lily’s chocolate baking chips
Chocolate Coating:
- 2 cups Lily’s chocolate chips
- 1 tablespoon coconut oil
- 1 pinch salt flakes (optional, for garnish)
Serving Suggestions:
These cups are perfect on their own, but they also pair beautifully with fresh berries, a drizzle of caramel sauce, or a glass of cold milk. For special occasions, consider serving them alongside vanilla ice cream or arranging them on a dessert platter with other bite-sized treats.
Step-by-Step Instructions
Preparing Your Equipment
Begin by gathering all your ingredients and ensuring your cream cheese is properly softened – this will make mixing much easier. Line a 24-hole mini muffin pan with mini muffin liners, making sure each liner sits snugly in its cup.
Creating the Cookie Dough Center
In a medium-sized bowl, combine the almond butter, sweetener, vanilla extract, and salt. Mix thoroughly until the mixture becomes well combined and smooth. The consistency should be creamy and easily spreadable.
Next, add half of the softened cream cheese to the mixture, stirring continuously until the batter becomes completely creamy and uniform. Gently fold in the chocolate chips, ensuring they’re evenly distributed throughout the mixture.
Finally, add the remaining cream cheese, but this time, cut it through the mixture rather than fully incorporating it. This technique creates a beautiful marbled effect that adds visual appeal and texture contrast to your finished cups.
Preparing the Chocolate Coating
For the chocolate coating, combine the chocolate chips and coconut oil in a microwave-safe bowl. Microwave in 30-second increments, stirring thoroughly between each interval, until the chocolate becomes fully melted and smooth.
Alternatively, you can use the double boiler method by placing the chocolate and oil in a metal bowl over a pot of gently boiling water. Be extremely careful not to let any water droplets contact the chocolate, as this will cause it to seize and become unusable.
Assembling the Cups
Pour approximately 1 teaspoon of melted chocolate into the base of each muffin liner. Using the back of a teaspoon, carefully spread the chocolate evenly around the sides to create a cup shape. The walls should be thick enough to hold the filling but not so thick that they overwhelm the cookie dough center.
Repeat this process with all remaining chocolate and liners until each cup has been fully coated. The key is working quickly while the chocolate remains workable.
Setting and Filling
Place the lined muffin pan in the freezer for 5-10 minutes, or until the chocolate shells are completely set and firm to the touch. This step is crucial for preventing the shells from cracking when you add the filling.
Remove the pan from the freezer and carefully spoon approximately 1 teaspoon of the cookie dough mixture into each chocolate cup. Press gently to ensure the filling reaches the edges without breaking the chocolate shell.
Final Assembly
Cover each filled cup with the remaining melted chocolate, using a spoon to smooth the surface and create a neat finish. The chocolate should completely seal the cookie dough center while maintaining a professional appearance.
Return the cups to the freezer for another 10 minutes to set completely. Alternatively, you can let them set at room temperature, though this will take considerably longer. Just before serving, sprinkle with salt flakes if desired for an elegant finishing touch.
Creative Serving Ideas
Elegant Presentation
Arrange these cups on a tiered serving tray for an impressive dessert display. The contrast between the dark chocolate exterior and the lighter cookie dough center creates visual interest that’s perfect for dinner parties or special celebrations.
Seasonal Variations
During holidays, consider adding themed decorations like crushed candy canes for Christmas or colorful sprinkles for birthdays. The neutral chocolate base provides the perfect canvas for seasonal creativity.
Gift-Worthy Packaging
These cups make wonderful homemade gifts when packaged in clear cellophane bags or small gift boxes. They’re shelf-stable enough to transport easily while maintaining their professional appearance.
Delicious Recipe Variations
Peanut Butter Lovers’ Version
Replace the almond butter with natural peanut butter for a classic combination that never goes out of style. The result is reminiscent of popular peanut butter cup candies but with the added bonus of cookie dough texture.
Double Chocolate Indulgence
Add 2 tablespoons of unsweetened cocoa powder to the cookie dough mixture for an intensely chocolatey experience. This variation is perfect for serious chocolate enthusiasts who can never have too much of a good thing.
Mint Chocolate Chip Twist
Incorporate a few drops of peppermint extract into the cookie dough center and use white chocolate chips instead of regular ones. The refreshing mint flavor combined with the rich chocolate coating creates a sophisticated flavor profile.
Tropical Paradise
Substitute coconut butter for the almond butter and add dried coconut flakes to the cookie dough mixture. This variation transports you to a tropical paradise with every bite.
Make-Ahead Tips
Freezer Storage
These cups are freezer-friendly superstars that can be stored for up to three months without losing quality. Place them in airtight containers with parchment paper between layers to prevent sticking and maintain their perfect shape.
When ready to serve, simply remove the desired number of cups from the freezer and let them thaw at room temperature for 10-15 minutes. They’ll maintain their texture beautifully and taste just as fresh as when first made.
Refrigerator Storage
For shorter-term storage, keep the cups in the refrigerator for up to one week. Store them in an airtight container to prevent them from absorbing other flavors and to maintain their optimal texture.
Batch Preparation
This recipe doubles easily, making it perfect for large gatherings or to have extras on hand. Consider making multiple batches with different flavor variations to create an impressive assortment of treats.
Important Notes
Chocolate Quality Matters
Using high-quality chocolate chips like Lily’s brand makes a significant difference in both taste and texture. These sugar-free options provide excellent flavor while keeping the treats lower in carbohydrates, making them suitable for various dietary preferences.
Temperature Considerations
Working at room temperature is ideal for this recipe, as it allows better control over the chocolate coating process. If your kitchen is particularly warm, you may need to work in smaller batches to prevent the chocolate from becoming too thin.
Storage Guidelines
Always store these cups in the refrigerator or freezer, as the cream cheese center requires cool temperatures to maintain food safety. They’re best enjoyed slightly chilled, which also helps maintain the perfect texture contrast between the firm chocolate shell and creamy center.
Frequently Asked Questions
Q: Can I use regular chocolate chips instead of sugar-free ones? A: Absolutely! Regular chocolate chips work perfectly in this recipe. The sugar-free versions are simply used to keep the overall sugar content lower, but traditional chocolate chips will provide the same texture and melting properties.
Q: What if I don’t have mini muffin liners? A: You can make these cups without liners by greasing the mini muffin pan very well with coconut oil or butter. However, liners make removal much easier and create a more professional presentation. Regular-sized muffin liners will also work, just adjust the quantities accordingly.
Q: How do I know when the chocolate shells are properly set? A: The chocolate shells should feel firm to the touch and not leave any residue on your finger when gently pressed. They should also release easily from the sides of the muffin liners without cracking or breaking.
Q: Can I make these without cream cheese? A: While cream cheese is essential for the authentic cheesecake flavor and creamy texture, you could substitute with an equal amount of softened vegan cream cheese for dairy-free versions. However, the texture and flavor will be slightly different.
Q: Why is my chocolate coating too thick or too thin? A: If the chocolate is too thick, add a bit more coconut oil, one teaspoon at a time, until you reach the desired consistency. If it’s too thin, let it cool slightly before using. The ideal consistency should coat the back of a spoon without dripping rapidly.
Q: How long do these cups need to set at room temperature? A: At room temperature, the cups typically need 20-30 minutes to set completely, depending on your kitchen temperature. However, freezing is much faster and creates a firmer texture that’s easier to handle.
Q: Can I use different nut butters in this recipe? A: Yes! Cashew butter, peanut butter, or sunflower seed butter all work beautifully in this recipe. Each will impart its own unique flavor profile, so choose based on your personal preferences and any dietary restrictions.
Q: Are these cups suitable for people with dietary restrictions? A: These cups can be easily adapted for various dietary needs. They’re naturally gluten-free, and using sugar-free chocolate chips makes them suitable for lower-carb diets. For dairy-free versions, substitute the cream cheese with a plant-based alternative.
Nutrition Information (per cup):
- Calories: 142kcal
- Carbohydrates: 15g
- Protein: 2g
- Fat: 10g
- Saturated Fat: 4g
- Cholesterol: 1mg
- Sodium: 35mg
- Fiber: 1g
- Sugar: 10g
- Calcium: 53mg
- Iron: 0.4mg
These nutritional values are approximate and may vary based on specific ingredients and brands used.


