Growing up, my family had a tradition of making enormous cookies whenever we needed serious comfort food. Whether it was after a challenging exam week or during those cozy winter nights when we craved something warm and shareable, a giant cookie always seemed to fix everything. However, as I got older and became more health-conscious, I found myself missing those moments of pure indulgence without the guilt.
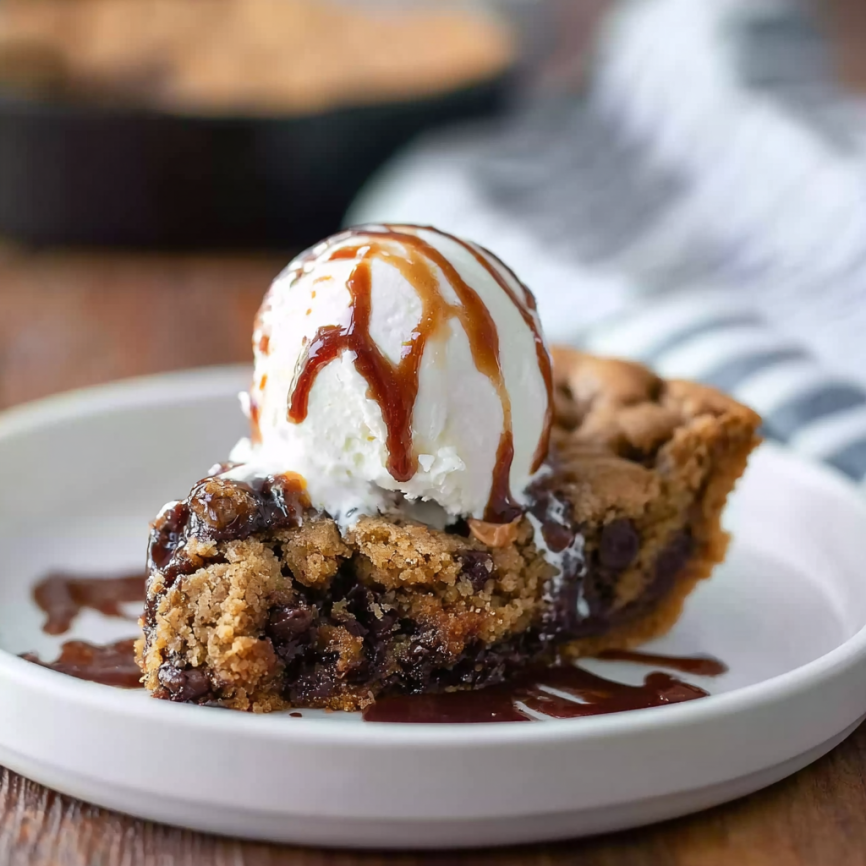
That’s when I discovered the magic of skillet cookies – specifically this incredible peanut butter chocolate chip version that delivers all the fudgy, gooey satisfaction of those childhood memories while being surprisingly light on fat. The secret lies in clever ingredient swaps that don’t compromise on flavor or texture. When I first pulled this golden beauty from the oven, with its perfectly crispy edges and molten center studded with chocolate chips, I knew I’d found the perfect balance between indulgence and mindful eating.
Why This Recipe Will Change Your Cookie Game
Guilt-Free Indulgence
Unlike traditional skillet cookies that can pack hundreds of calories per serving, this version uses smart substitutions like powdered peanut butter and applesauce to significantly reduce the fat content. Nevertheless, you’ll never feel like you’re missing out on flavor or satisfaction.
Perfect for Sharing
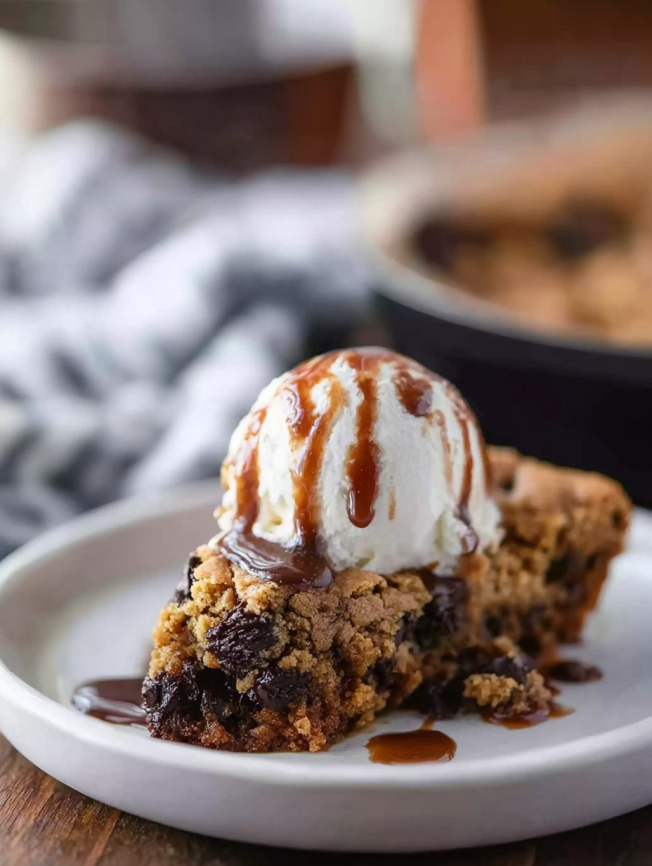
Furthermore, skillet cookies create an instant gathering point. There’s something magical about placing a warm, bubbling cookie in the center of the table with spoons for everyone to dig in. It transforms dessert into a communal experience that brings people together.
Customizable Texture
Additionally, this recipe allows you to control the final texture based on your preferences. Want a gooey, almost molten center? Bake for 20 minutes. Prefer a more set, cake-like consistency? Simply extend the baking time to 25-30 minutes.
One-Pan Wonder
Moreover, the entire cookie bakes in a single skillet, which means minimal cleanup and maximum enjoyment. It’s perfect for those moments when you want impressive results without the fuss of multiple pans and complex techniques.
Essential Ingredients
Base Components
- 1/2 cup light butter, softened to room temperature
- 2 tablespoons applesauce (the secret to moisture without extra fat)
- 1/2 cup brown sugar (provides rich, molasses-like depth)
- 1/3 cup sweetener or sugar of choice (adjust to your taste preferences)
- 2 teaspoons pure vanilla extract
- 1 extra-large egg (room temperature works best)
- 1 cup all-purpose flour
- 1/3 cup powdered peanut butter (or substitute with melted creamy peanut butter for higher fat content)
- 1/2 teaspoon baking soda
- 1/2 teaspoon salt (adjust to taste)
- 1/2 cup chocolate chips (dark or semi-sweet both work beautifully)
Equipment Needed
- 9-inch cast iron skillet (or pie dish/round baking pan)
- Parchment paper for easy removal
- Large mixing bowl
- Whisk for combining ingredients
Serving Suggestions
- Vanilla ice cream for the ultimate contrast
- Fresh whipped cream for lightness
- Sliced strawberries or bananas
- A drizzle of melted peanut butter
- Chopped toasted nuts for extra crunch
Step-by-Step Instructions
Preparation Phase
Begin by preheating your oven to 350°F (175°C). Meanwhile, line your 9-inch cast iron skillet with parchment paper, leaving slight overhang for easy removal later. This step prevents sticking and makes serving much simpler.
Creating the Base Mixture
In a large mixing bowl, combine the softened light butter, applesauce, brown sugar, and vanilla extract. Whisk these ingredients vigorously until the mixture becomes light and creamy – this process typically takes 2-3 minutes. Subsequently, add the egg and continue whisking until everything is well incorporated and smooth.
Incorporating Dry Ingredients
Next, add the flour, baking soda, and salt to the wet mixture. Stir gently until just combined, being careful not to overmix, which can result in a tough cookie. Then, fold in the powdered peanut butter in its dry state, followed by half of the chocolate chips. Mix briefly to distribute evenly.
Assembly and Final Touches
Spoon the thick batter into your prepared skillet, spreading it evenly to the edges. The batter will be quite thick, so use the back of a spoon to smooth the surface. Finally, sprinkle the remaining chocolate chips generously over the top, pressing them lightly into the surface.
Baking to Perfection
Place the skillet in the preheated oven and bake according to your texture preference. For a gooey, molten center, bake for exactly 20 minutes. For a more set, cake-like texture, extend the baking time to 25-30 minutes. The edges should be golden brown and pulling slightly away from the sides.

Understanding Texture Preferences
The Gooey Option
When baked for 20 minutes, the cookie maintains a molten center that’s perfect for serving with ice cream. The edges become crispy while the middle remains soft and fudgy, creating a delightful contrast in every bite.
The Set Version
Extended baking time creates a cookie that’s easier to slice and serve, making it ideal for potlucks or when you need neat portions. This version still maintains moisture thanks to the applesauce while providing a more traditional cookie texture.
Testing for Doneness
Regardless of your preference, the edges should always be golden brown and pulling away from the sides. The center should no longer look wet or raw, even in the gooey version.
Creative Variations to Try
Flavor Combinations
Consider swapping the chocolate chips for white chocolate chips and adding dried cranberries for a completely different flavor profile. Alternatively, try butterscotch chips with a pinch of cinnamon for a warm, comforting twist.
Nutritional Upgrades
For additional protein, substitute part of the all-purpose flour with almond flour or add a scoop of vanilla protein powder. These modifications enhance the nutritional value while maintaining the delicious taste.
Seasonal Adaptations
During fall, incorporate mini marshmallows and a sprinkle of graham cracker crumbs for s’mores flavors. In winter, add crushed peppermint candies and dark chocolate chips for a festive holiday version.
Make-Ahead and Storage Tips
Preparation Strategies
The batter can be prepared up to 24 hours in advance and stored covered in the refrigerator. When ready to bake, simply bring to room temperature for 15 minutes, then transfer to the skillet and bake as directed.
Storage Guidelines
Leftover cookie keeps well covered at room temperature for up to 3 days. For longer storage, wrap individual portions in plastic wrap and freeze for up to 3 months. Reheat frozen slices in the microwave for 15-20 seconds.
Reheating Instructions
To restore the freshly-baked texture, warm individual slices in the microwave for 10-15 seconds, or place the entire skillet in a 300°F oven for 5-7 minutes.
Important Notes
Ingredient Temperature Matters
Room temperature ingredients blend more easily and create a smoother batter. If you forget to soften your butter, cut it into small pieces and let it sit for 15 minutes, or microwave for 10 seconds at a time.
Powdered Peanut Butter Benefits
Using powdered peanut butter instead of regular peanut butter reduces fat content by approximately 75% while maintaining the rich peanut flavor. However, if you prefer using regular peanut butter, melt it slightly for easier mixing.
Skillet Selection
Cast iron skillets provide the best heat distribution and create beautifully crispy edges. However, any 9-inch round baking dish works as a substitute – just adjust the baking time by 2-3 minutes.
Frequently Asked Questions
Can I make this without a cast iron skillet?
Absolutely! Any 9-inch round baking dish, pie pan, or even a square baking pan works perfectly. The key is ensuring the depth allows for proper baking without overflowing.
What if I don’t have powdered peanut butter?
Regular creamy peanut butter works as a substitute, though it will increase the fat content. Use 1/4 cup of melted peanut butter instead of the 1/3 cup powdered version for best results.
How do I know when it’s perfectly done?
The edges should be golden brown and pulling away from the sides, while the center should be set but still soft. For the gooey version, the center may look slightly underdone, but it will continue cooking from residual heat.
Can I double this recipe?
Yes, but you’ll need a larger pan (like a 12-inch skillet) and should increase the baking time by 5-10 minutes. Watch carefully to prevent overbaking the edges.
Why is my cookie too dense?
Overmixing the batter develops too much gluten, creating a dense texture. Mix just until ingredients are combined, and don’t worry if the batter looks slightly lumpy.
Can I make individual portions?
Divide the batter among 6-8 ramekins for individual servings. Reduce baking time to 12-15 minutes and check for doneness with a toothpick.
Prep Time: 10 minutes
Cook Time: 20 minutes
Total Time: 30 minutes
Servings: 12 slices
Nutrition per serving: 192 calories | 28g carbohydrates | 3g protein | 8g fat | 1g fiber | 18g sugar


