There’s something magical about the aroma of banana bread baking in the oven, but when you add the irresistible combination of chocolate and peanut butter, it becomes absolutely heavenly. This recipe was born from a weekend morning when I had overripe bananas sitting on my counter and a serious craving for something that felt like dessert but could still pass for breakfast. The result exceeded all expectations – a fluffy, moist loaf packed with rich flavors and topped with a dreamy chocolate peanut butter drizzle that makes every slice feel like a celebration.
Why This Banana Bread Will Become Your New Obsession
The Ultimate Flavor Trio
The combination of sweet bananas, rich peanut butter, and decadent chocolate creates a symphony of flavors that satisfies every craving. Each bite delivers the perfect balance of fruity sweetness, nutty richness, and chocolatey indulgence. Furthermore, the chocolate chips provide delightful bursts of melted chocolate throughout the tender crumb.
Surprisingly Light and Fluffy
Unlike dense, heavy banana breads, this recipe creates an incredibly light and airy texture that melts in your mouth. The secret lies in the careful mixing technique and the perfect ratio of leavening agents. Additionally, the powdered peanut butter option keeps the bread moist without adding excessive heaviness.
Flexible and Health-Conscious
This recipe adapts beautifully to various dietary preferences and health goals. You can reduce calories by using powdered peanut butter and natural sweeteners, or go full indulgence with regular ingredients. Meanwhile, the spelt flour option adds extra nutrition and a subtle nutty flavor that complements the other ingredients perfectly.
Perfect for Any Time of Day
Whether you’re enjoying a slice with morning coffee, packing it for an afternoon snack, or serving it as dessert with ice cream, this banana bread works beautifully. The chocolate peanut butter topping transforms it from simple quick bread into an impressive treat worthy of special occasions.
Essential Ingredients
For the Banana Bread Base
- 1/2 cup butter, softened (for rich flavor and tender texture)
- 1 cup brown sugar (or natural sweetener for lower calories)
- 2 teaspoons vanilla extract
- 2 large eggs (room temperature preferred)
- 3 medium ripe bananas, mashed (the riper, the better)
- 1/2 cup powdered peanut butter (or regular peanut butter for richer flavor)
- 2 cups light spelt flour (or plain/all-purpose flour)
- 2 teaspoons baking powder
- 1 teaspoon bicarbonate of soda
- 4 tablespoons honey (adds moisture and natural sweetness)
- 1/2 cup dark or semi-sweet chocolate chips
For the Chocolate Peanut Butter Topping
- 4 tablespoons unsweetened cocoa powder
- 2 tablespoons powdered peanut butter (or regular peanut butter)
- 3 tablespoons sugar of choice (or natural sweetener)
- 6-8 tablespoons warm water (adjust for desired consistency)
Optional Additions
- Extra chocolate chips for sprinkling on top
- Chopped peanuts for texture
- Sea salt flakes for finishing
Step-by-Step Instructions
Preparing Your Baking Environment
Begin by preheating your oven to 175°C (350°F). Lightly grease a standard loaf pan with cooking oil spray, then wipe away any excess with a paper towel. This technique ensures easy release without affecting the bread’s texture.
Creating the Creamy Base
In a large mixing bowl, combine the softened butter, brown sugar, and vanilla extract. Whisk vigorously until the mixture becomes light in color and noticeably creamy. This creaming process incorporates air, which contributes to the bread’s fluffy texture.
Beat in the eggs one at a time, ensuring each is fully incorporated before adding the next. The mixture should be smooth and well combined at this stage.
Incorporating the Star Ingredients
Add the mashed bananas to the butter mixture, stirring gently to combine. The bananas should be well-ripened with brown spots for maximum sweetness and flavor. Next, fold in the powdered peanut butter, which distributes easily and provides intense peanut flavor without excess oil.
Combining Dry Ingredients
In a separate bowl, whisk together the flour, baking powder, and bicarbonate of soda. This pre-mixing ensures even distribution of leavening agents throughout the batter.
The Gentle Mixing Technique
Add the dry ingredients to the wet mixture along with the honey. Using a wooden spoon or spatula, stir gently until the batter just comes together. Avoid overmixing, which develops gluten and creates a dense, tough texture. The batter should look slightly lumpy and rustic.
Fold in the chocolate chips with minimal stirring, distributing them evenly throughout the batter.
Baking to Perfection
Pour the batter into your prepared loaf pan, spreading it evenly with a spatula. Bake for 55-60 minutes, or until the bread feels firm to the touch and a toothpick inserted in the center comes out with just a few moist crumbs clinging to it.
The top should be golden brown and spring back lightly when touched. If the top browns too quickly, tent with aluminum foil during the last 15 minutes of baking.
Cooling and Finishing
Allow the bread to cool in the pan for 15-20 minutes before turning it out onto a wire rack. This initial cooling period prevents the bread from breaking apart while still allowing it to release cleanly from the pan.
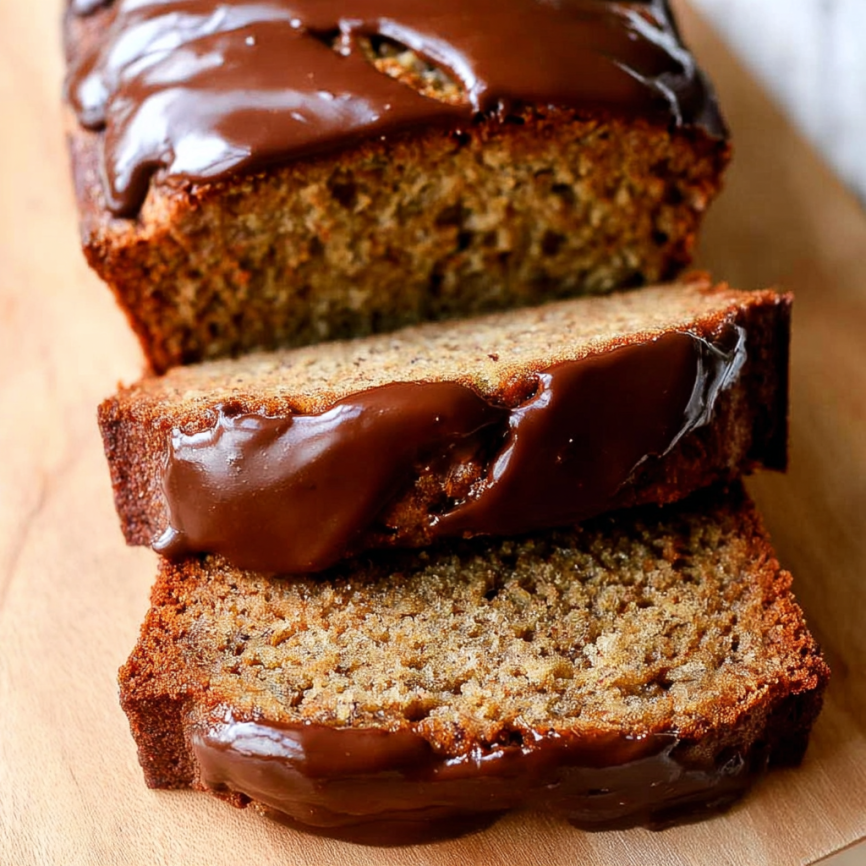
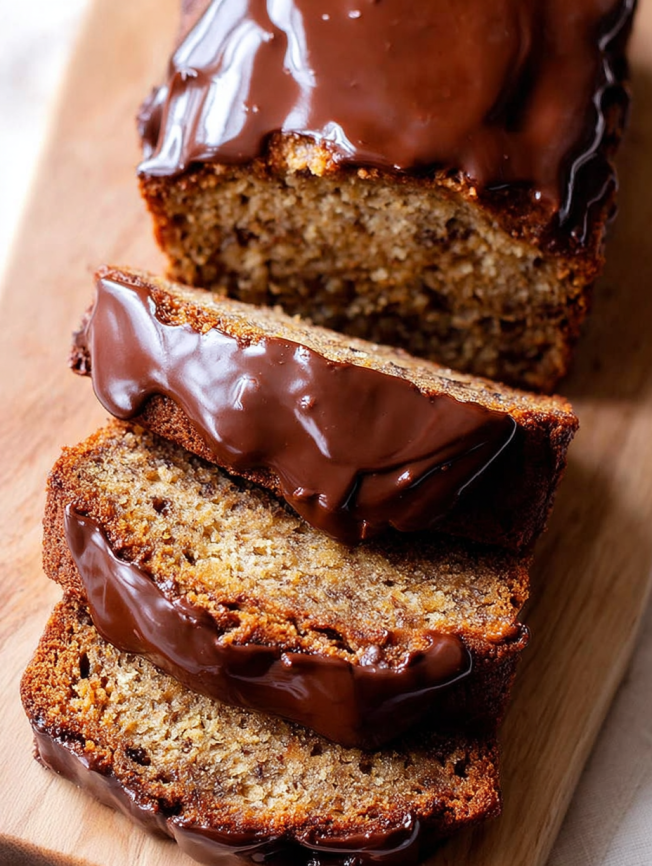
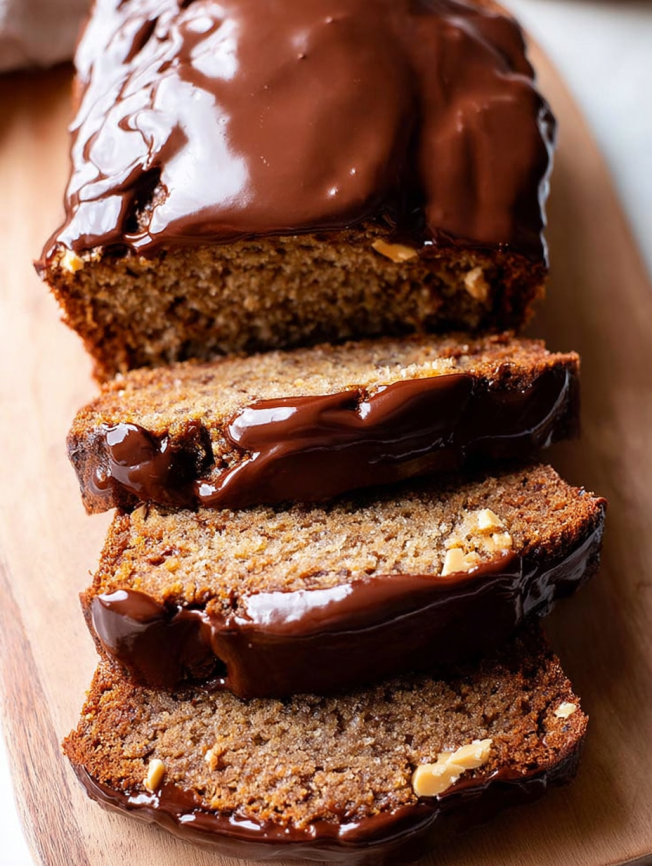
Creating the Irresistible Topping
Mixing the Perfect Drizzle
While the bread cools, prepare the chocolate peanut butter topping. In a small bowl, combine the cocoa powder, powdered peanut butter, and sugar. Gradually add warm water, one tablespoon at a time, whisking constantly until smooth.
The warm water helps dissolve the cocoa powder and creates a silky consistency. Continue adding water until you reach your desired thickness – it should be pourable but not too thin.
Application Techniques
Once the bread has cooled completely, drizzle the topping over the surface using a spoon or squeeze bottle. For a professional look, create parallel lines across the width of the loaf, then drag a toothpick perpendicular to the lines to create a feathered pattern.
Serving Suggestions
Classic Breakfast Option
Serve thick slices with a glass of cold milk or your favorite coffee. The combination of protein from the peanut butter and natural sugars from the bananas provides sustained energy for busy mornings.
Afternoon Indulgence
Pair with a cup of tea or coffee for a perfect afternoon treat. The chocolate peanut butter topping makes it feel special enough for entertaining guests or treating yourself after a long day.
Dessert Transformation
Warm individual slices in the microwave for 15-20 seconds and serve with vanilla ice cream. The warm bread and cold ice cream create a delightful temperature contrast that elevates the entire experience.
Creative Variations
Nutty Enhancements
Add 1/2 cup of chopped peanuts, walnuts, or pecans to the batter for extra crunch and flavor. Toasted nuts provide even more complex flavors that complement the peanut butter beautifully.
Chocolate Lover’s Version
Increase the chocolate chips to 3/4 cup and add 2 tablespoons of cocoa powder to the dry ingredients for a more intensely chocolate flavor. This creates a double chocolate peanut butter banana bread that’s absolutely decadent.
Healthier Adaptations
Replace half the flour with whole wheat flour for added fiber and nutrients. Use mashed avocado for half the butter to reduce saturated fat while maintaining moisture. These substitutions create a more nutritious version without sacrificing taste.
Seasonal Twists
Add a teaspoon of cinnamon and a pinch of nutmeg for warm spice notes. During fall, fold in 1/4 cup of pumpkin puree for extra moisture and seasonal flavor.
Make-Ahead and Storage Tips
Optimal Storage Methods
Store the cooled bread in an airtight container at room temperature for up to 4 days. The bread actually improves after the first day as the flavors meld together and the texture becomes even more tender.
Freezing Instructions
Wrap individual slices in plastic wrap and store in freezer bags for up to 3 months. Thaw at room temperature for 30 minutes, or toast directly from frozen for a warm, comforting treat.
Make-Ahead Strategies
The bread can be baked up to 2 days in advance without the topping. Add the chocolate peanut butter drizzle just before serving to maintain its fresh appearance and smooth texture.
Professional Baking Tips
Banana Selection and Preparation
Use bananas that are heavily speckled with brown spots for maximum sweetness and flavor. If your bananas aren’t quite ripe enough, place them in a paper bag with an apple overnight to accelerate ripening.
Measuring Accuracy
Spoon flour into measuring cups rather than scooping to avoid compacting. Level with a knife for precise measurements. Overpacked flour is a common cause of dense, heavy banana bread.
Temperature Considerations
Ensure all ingredients are at room temperature before mixing, except for the butter which should be soft but not melted. This temperature consistency creates smooth batter and even texture.
Troubleshooting Common Issues
Preventing Dense Texture
The most common mistake is overmixing the batter. Mix just until the ingredients are combined, even if small lumps remain. These will disappear during baking and help maintain the bread’s light texture.
Avoiding Sunken Centers
Don’t open the oven door during the first 45 minutes of baking, as temperature fluctuations can cause the bread to collapse. Use the oven light to check progress instead.
Ensuring Even Baking
Rotate the pan halfway through baking if your oven has hot spots. Place the pan in the center of the oven for the most even heat distribution.
Frequently Asked Questions
Can I use regular peanut butter instead of powdered?
Absolutely! Regular peanut butter will create a richer, denser texture and more intense peanut flavor. Use the same amount, but you may need to reduce the butter slightly to compensate for the added fat content.
What if my bananas aren’t ripe enough?
Place unripe bananas in a paper bag with an apple or pear overnight. For immediate use, you can roast whole bananas at 300°F for 15-20 minutes until they’re soft and sweet.
Can I make this recipe gluten-free?
Yes! Substitute the flour with a 1:1 gluten-free flour blend. You may need to add an extra 2-3 minutes to the baking time, and the texture will be slightly different but still delicious.
How do I know when the bread is done?
The bread is done when it feels firm to the touch, springs back lightly when pressed, and a toothpick inserted in the center comes out with just a few moist crumbs. The internal temperature should reach 200°F.
Can I make muffins instead?
Definitely! Divide the batter among 12 muffin cups and bake at 350°F for 18-22 minutes. This creates portable individual portions perfect for grab-and-go breakfasts.
Why is my bread too dense?
Dense bread usually results from overmixing the batter or using too much flour. Mix just until combined, and measure flour by spooning it into the cup rather than scooping.
Can I reduce the sugar content?
Yes, you can reduce the brown sugar by up to 1/3 without significantly affecting texture. The ripe bananas provide natural sweetness that helps compensate for the reduction.
What’s the best way to mash bananas?
Use a fork or potato masher to create a chunky texture with some small pieces remaining. This adds pleasant texture to the finished bread. Avoid using a blender, which creates too smooth a puree.
How can I make the topping thicker or thinner?
For thicker topping, use less water and add gradually until you reach the desired consistency. For thinner topping, add water one tablespoon at a time until it reaches a drizzling consistency.
Can I add other mix-ins?
Absolutely! Try dried cranberries, mini marshmallows, coconut flakes, or different types of chocolate chips. Keep total add-ins to about 3/4 cup to avoid affecting the bread’s structure.


