Prep Time: 5 minutes
Cook Time: 5 minutes
Total Time: 10 minutes
Servings: 4
There’s something magical about the first bite of perfectly cooked corn on the cob – that satisfying pop of sweet kernels bursting with flavor. Growing up, summer evenings weren’t complete without the familiar sight of golden ears bobbing in a pot of boiling water. However, I discovered a game-changing method that transforms ordinary corn into something extraordinary: cooking it in milk with aromatic garlic butter.
Why You’ll Fall in Love With This Recipe
The Secret is in the Milk
Unlike traditional boiling methods, cooking corn in milk creates an incredibly creamy, sweet flavor that enhances the natural sugars in the kernels. The milk acts as a gentle cooking medium, preventing the corn from becoming tough or overcooked. Additionally, this technique ensures every kernel stays plump and juicy.
Perfect for Busy Weeknights
This recipe delivers restaurant-quality results in just 10 minutes from start to finish. Furthermore, the simple ingredient list means you likely have everything needed already in your kitchen. The hands-off cooking method also allows you to prepare other dishes simultaneously.
Crowd-Pleasing Appeal
Whether you’re hosting a backyard barbecue or preparing a quick family dinner, this corn on the cob satisfies everyone. The aromatic garlic butter adds a gourmet touch that elevates this humble vegetable into something special.
Essential Ingredients
For the Corn
- 4 ears fresh corn (husks and silks removed)
- 4 cups milk of choice (whole milk works best, but any variety will do)
- 2 cups water (or enough to cover the corn completely)
- 1 tablespoon salt (enhances the natural sweetness)
For the Garlic Butter
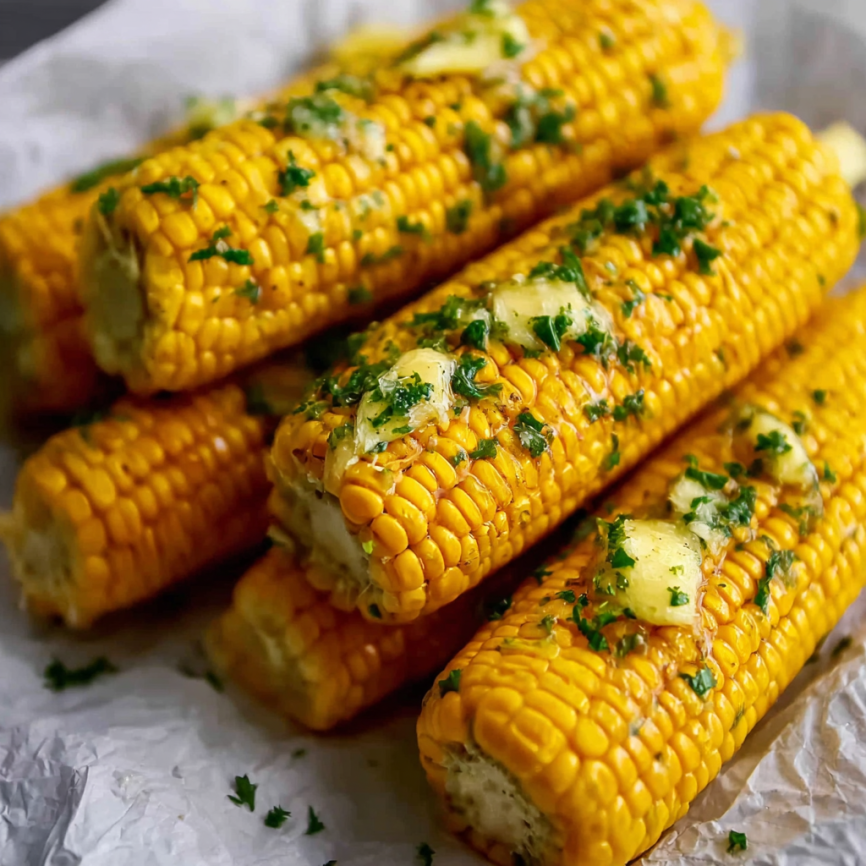
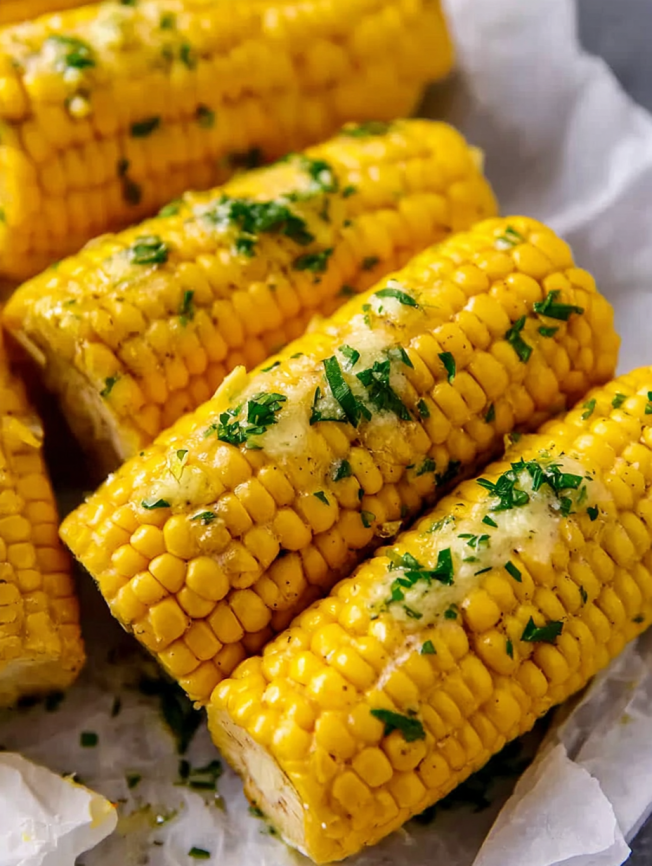
- 1/2 cup butter (I prefer reduced-fat butter, but regular works perfectly)
- 1 clove garlic, crushed (or 1 teaspoon garlic powder for convenience)
- 2 tablespoons fresh chopped parsley (adds color and freshness)
- 1 pinch salt (to taste)
Serving Suggestions
Fresh lime wedges, crumbled cotija cheese, or a sprinkle of paprika make excellent accompaniments. Consider serving alongside grilled meats, fresh salads, or other summer favorites.
Step-by-Step Instructions
Preparing the Cooking Liquid
Begin by combining the corn, milk, water, and salt in a large saucepan or pot. The liquid should completely cover the corn ears – add more water if necessary. This milk-based cooking method is what sets this recipe apart from ordinary boiled corn.
Bringing to a Boil
Place the pot over medium-high heat and bring the mixture to a rolling boil. Watch carefully as the milk begins to rise – this happens quickly and can overflow if left unattended. Once you see the milk starting to foam and rise, immediately reduce the heat to low.
Managing the Heat
If the milk rises too rapidly, don’t panic. Simply remove the pot from the heat momentarily to allow the milk to settle, then return it to low heat. This temperature control is crucial for preventing a messy overflow while ensuring proper cooking.
Testing for Doneness
Gently simmer the corn until the kernels become tender, typically 5-8 minutes. To test doneness, carefully remove one cob with tongs and pierce a kernel with a fork. You should feel the kernel “burst” or give way easily when properly cooked. If the kernels still feel firm, continue cooking for another minute or two.
Preparing the Garlic Butter
While the corn cooks, combine all garlic butter ingredients in a small serving bowl. Mix thoroughly until the garlic and parsley are evenly distributed throughout the butter. This can be done ahead of time and stored in the refrigerator.
Final Assembly
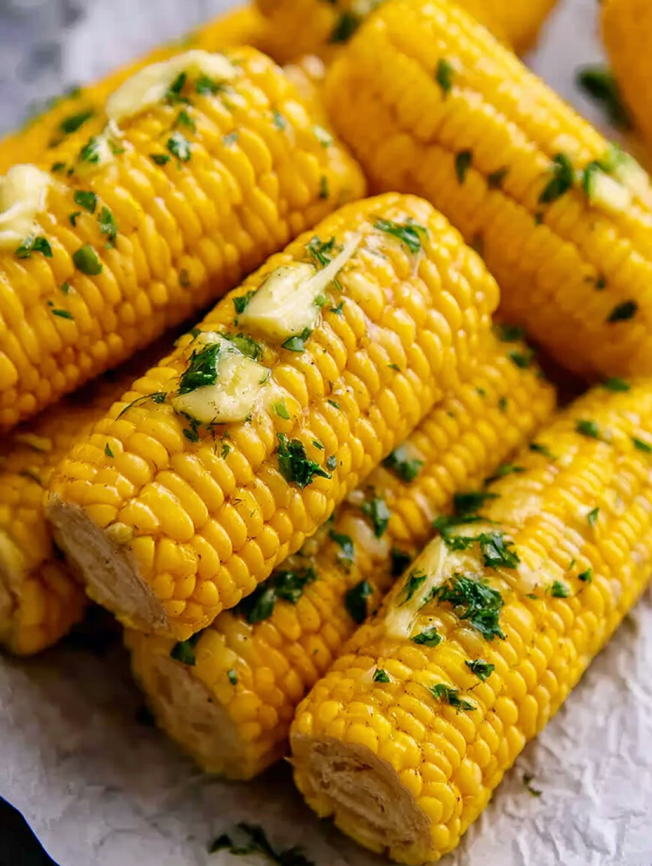
Remove each cob with tongs and transfer to serving plates. Generously brush or dollop the garlic butter over each ear, or serve the butter alongside for individual application.
Creative Serving Ideas
Classic Presentation
Serve the corn on individual plates with small bowls of garlic butter for dipping. Provide corn holders for easy handling and plenty of napkins – this is definitely a hands-on eating experience.
Family-Style Serving
Arrange all the corn cobs on a large platter with the garlic butter in the center. This creates a beautiful, rustic presentation perfect for casual gatherings.
Elevated Presentation
For special occasions, slice the kernels off the cob and serve in bowls, drizzled with the garlic butter. This method works particularly well for formal dinners or when serving guests who prefer less messy options.
Delicious Recipe Variations
Mexican Street Corn Style
Transform this recipe into elote by adding mayonnaise, cotija cheese, chili powder, and lime juice to the garlic butter mixture. This creates an authentic Mexican street food experience.
Herb-Infused Version
Replace the parsley with fresh thyme, rosemary, or basil for different flavor profiles. Each herb brings its own unique character to the dish.
Spicy Kick
Add a pinch of red pepper flakes or a dash of hot sauce to the garlic butter for those who enjoy heat. Start with a small amount and adjust to taste.
Dairy-Free Alternative
Substitute the milk with unsweetened plant-based milk (coconut milk works exceptionally well) and use vegan butter for a dairy-free version that doesn’t compromise on flavor.
Make-Ahead Tips
Preparing the Butter
The garlic butter can be made up to three days in advance and stored in the refrigerator. Allow it to come to room temperature before serving, or warm it gently in the microwave for easier spreading.
Corn Preparation
Fresh corn can be husked and stored in the refrigerator for up to 24 hours before cooking. Keep the cleaned ears in a damp paper towel to maintain moisture.
Leftover Storage
Cooked corn can be refrigerated for up to three days. To reheat, wrap in damp paper towels and microwave for 30-60 seconds, or warm in a 350°F oven for 5-10 minutes.
Important Notes
Leftover Garlic Butter Uses
Don’t waste any remaining garlic butter! It’s perfect for making garlic bread, tossing with pasta, or melting over grilled vegetables. Store covered in the refrigerator for up to a week.
Milk Selection Tips
While any milk works, whole milk produces the creamiest results. However, low-fat milk still delivers excellent flavor while reducing calories. Avoid ultra-pasteurized milk if possible, as it may curdle more easily.
Safety Considerations
Always use tongs when handling hot corn cobs to prevent burns. The milk mixture will be extremely hot, so exercise caution when moving the pot or testing the corn.
Frequently Asked Questions
Can I use frozen corn instead of fresh?
While fresh corn produces the best results, frozen corn on the cob can work in a pinch. However, reduce the cooking time to 3-4 minutes since frozen corn is already partially cooked. Fresh corn offers superior texture and flavor.
What if I don’t have milk?
Water alone works fine, though you’ll miss the creamy richness that milk provides. Consider adding a splash of heavy cream or butter to the water for similar results. The corn will still be delicious, just less indulgent.
How do I know when the corn is perfectly cooked?
Properly cooked corn kernels should pierce easily with a fork and feel tender but not mushy. Undercooked corn will feel firm and starchy, while overcooked corn becomes tough and chewy. The “burst” test mentioned in the recipe is your best guide.
Can I make this recipe for a larger crowd?
Absolutely! Simply multiply the ingredients proportionally and use a larger pot. You may need to cook in batches if your pot isn’t large enough to hold all the corn comfortably. Keep cooked corn warm in a low oven until serving.
What’s the best way to remove corn silk?
Remove the husks first, then use a clean kitchen towel or paper towels to rub away the silk. Any stubborn pieces can be removed with a vegetable brush under cold running water. Taking time to remove all silk ensures a pleasant eating experience.
How long can I keep the cooked corn warm?
Cooked corn can stay warm for up to 30 minutes if wrapped in clean kitchen towels. For longer periods, place the corn in a slow cooker on the warm setting with a small amount of the cooking liquid.
Nutrition Information (per serving):
- Calories: 429
- Carbohydrates: 29g
- Protein: 11g
- Fat: 32g
- Fiber: 2g
- Sugar: 17g
- Sodium: 2,050mg
Nutritional values are approximate and may vary based on specific ingredients used.


