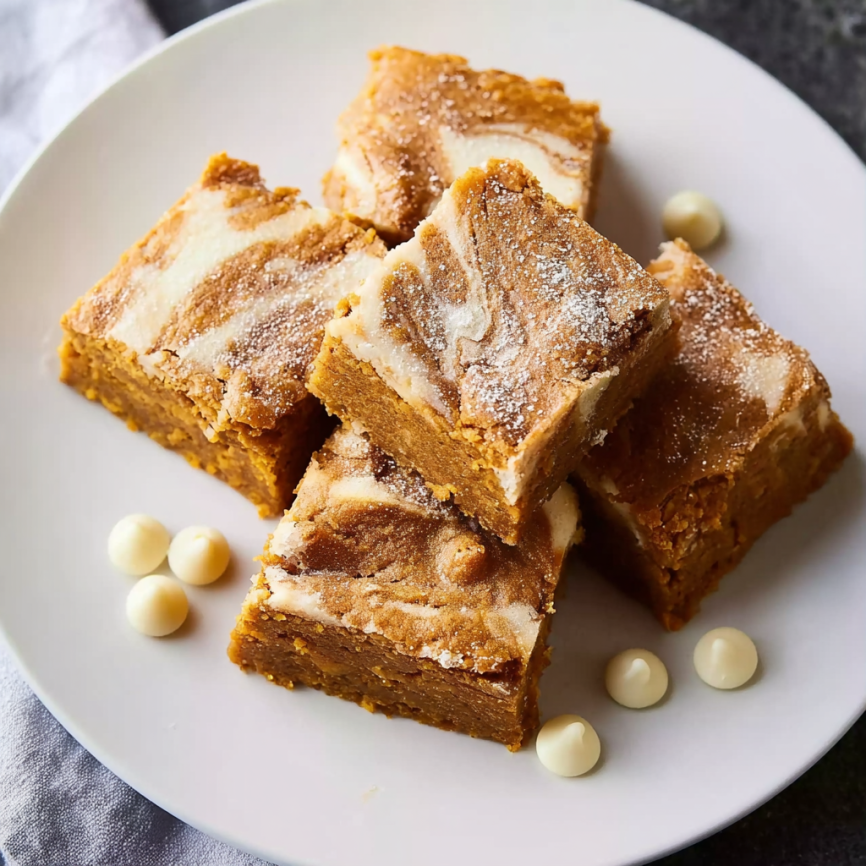
The first time I made these bars, I was trying to satisfy two very different dessert cravings at once. My family was torn between wanting something with autumn pumpkin flavors and craving rich, creamy cheesecake. These Cinnamon Cheesecake Swirl Pumpkin Bars became the perfect compromise – fudgy pumpkin blondies swirled with spiced cheesecake and studded with white chocolate chips. One bite and I knew I’d created something special that would become a fall tradition.
Prep Time: 10 minutes
Cook Time: 40 minutes
Total Time: 50 minutes
Servings: 16 bars
Why These Bars Will Steal Your Heart
Two Desserts in Perfect Harmony
These bars masterfully combine the best of both worlds – the warm, spiced comfort of pumpkin bars with the rich, tangy luxury of cheesecake. The swirled presentation creates beautiful marbled patterns that look as impressive as they taste.
Foolproof Fall Baking
Unlike traditional cheesecake that requires water baths and precise temperatures, this recipe delivers creamy cheesecake results with simple mixing bowl techniques. Additionally, the pumpkin base is incredibly forgiving, staying moist and tender even if slightly overbaked.
Make-Ahead Friendly
These bars actually improve in flavor after sitting overnight, making them perfect for entertaining or meal prep. The flavors meld beautifully, and the texture becomes even more luxurious with time.
Customizable Sweetness
With options for natural sweeteners or traditional sugar, you can adjust the sweetness level to your preference. The recipe works equally well with various sweetener combinations, making it adaptable to different dietary needs.
Essential Ingredients
For the Pumpkin Blondie Base
- 1 large egg – Provides structure and richness
- ½ cup light brown sugar, packed – Adds molasses depth and moisture
- ⅓ cup natural sweetener or sugar of choice – Customize sweetness to taste
- 1 cup pure pumpkin puree – Use canned or homemade (not pumpkin pie filling)
- ¼ cup cooking oil or melted coconut oil – Keeps bars moist and tender
- 1 Tbsp honey – Enhances flavor complexity
- ½ Tbsp vanilla extract – Rounds out the flavor profile
Dry Ingredients for Structure
- 1½ cups plain flour – Light spelt flour works beautifully, but all-purpose is fine
- 1 Tbsp baking powder – Ensures proper rise and texture
- 1½ tsp ground cinnamon – Warm spice that complements pumpkin
- 1 pinch salt – Enhances all other flavors
- ¼ cup white chocolate chips – Adds pockets of creamy sweetness
For the Cheesecake Swirl
- 8.8 oz packet cream cheese, room temperature – Low-fat or fat-free works well
- 2 Tbsp flour – Prevents the cheesecake from becoming too soft
- 1 tsp ground cinnamon – Bridges the flavor gap between layers
- 4 Tbsp natural sweetener or sugar – Balances the tangy cream cheese
Step-by-Step Instructions
Preparing Your Workspace
Preheat your oven to 350°F (180°C). Grease an 8×8 inch baking pan with cooking spray, then line with parchment paper, leaving some overhang for easy removal. This preparation step ensures your bars will release cleanly from the pan.
Creating the Pumpkin Base
In a large mixing bowl, whisk together the egg, brown sugar, sweetener, pumpkin puree, oil, honey, and vanilla extract until the mixture is smooth and creamy. The consistency should be uniform without any lumps or streaks.
Incorporating the Dry Ingredients
Add the flour, baking powder, cinnamon, and salt to the wet ingredients. Stir just until combined – overmixing can result in tough, dense bars. The batter should be thick but spreadable.
Adding the Final Touch
Gently fold the white chocolate chips into the batter, distributing them evenly throughout. Set this mixture aside while you prepare the cheesecake layer.
Preparing the Cheesecake Layer
In a medium bowl, combine the room-temperature cream cheese, flour, cinnamon, and sweetener. Beat with an electric mixer or whisk vigorously by hand until the mixture is completely smooth and lump-free. Room temperature cream cheese is crucial for achieving the right texture.
Assembling the Bars
Pour the pumpkin batter into your prepared pan and spread it evenly with a spatula. Next, dollop the cheesecake mixture over the top in spoonfuls, then use the back of a knife to create gentle swirls, pulling some of the pumpkin batter up into the cheesecake layer.
Achieving the Perfect Swirl
The key to beautiful marbling is restraint – you want distinct layers with elegant swirls, not a completely mixed batter. Make long, flowing motions with your knife, turning the pan as needed to create an attractive pattern.
Baking to Perfection
Bake for 38-45 minutes, depending on your oven. The bars are done when a toothpick inserted in the center comes out mostly clean with just a few moist crumbs. The surface should be set but still slightly soft to the touch.
Cooling for Best Results
Allow the bars to cool in the pan for at least 30 minutes before cutting. This cooling period helps the layers set properly and makes slicing much easier. For the cleanest cuts, chill the bars for an hour before slicing.
Perfect Serving Suggestions
Classic Comfort Style
Serve these bars at room temperature with a tall glass of cold milk or a warm cup of coffee. The temperature contrast enhances both the creamy cheesecake and the spiced pumpkin flavors.
Elegant Dessert Presentation
For special occasions, dust the bars with powdered sugar and serve with a dollop of whipped cream and a sprinkle of cinnamon. Fresh berries or a drizzle of caramel sauce can elevate the presentation further.
Seasonal Pairings
These bars pair beautifully with warm beverages like spiced cider, chai tea, or pumpkin spice lattes. The complementary flavors create a cohesive autumn dessert experience.
Recipe Variations to Try
Chocolate Lovers’ Version
Replace the white chocolate chips with dark chocolate chips or mini chocolate chunks. The bittersweet chocolate creates a more sophisticated flavor profile that pairs beautifully with the pumpkin and cinnamon.
Nutty Additions
Fold in chopped pecans, walnuts, or toasted pumpkin seeds for added texture and flavor. Toast the nuts lightly before adding to enhance their flavor and provide a pleasant crunch.
Spice Variations
Experiment with different spice combinations by adding nutmeg, ginger, or allspice to either the pumpkin base or cheesecake layer. Pumpkin pie spice blend makes an excellent substitute for the cinnamon.
Cream Cheese Alternatives
For a lighter version, try using Greek yogurt cream cheese or even thick Greek yogurt in place of regular cream cheese. The texture will be slightly different but equally delicious.
Make-Ahead Tips
Advance Preparation
These bars can be made up to 3 days ahead and stored covered at room temperature. In fact, many people prefer them after they’ve had time to set, as the flavors meld and intensify.
Freezing for Later
Wrap individual bars in plastic wrap and freeze for up to 6 months. Thaw at room temperature for about 30 minutes before serving. The texture remains remarkably good after freezing.
Batch Baking
Double the recipe and use a 9×13 inch pan for larger gatherings. Increase the baking time by 5-10 minutes and check for doneness with a toothpick. This size yields about 24 bars.
Pro Tips for Success
Room Temperature Ingredients
Ensure your cream cheese and egg are at room temperature before starting. Cold ingredients don’t mix as smoothly and can result in lumpy batters or uneven textures.
Proper Pumpkin Puree
Always use plain pumpkin puree, not pumpkin pie filling. The pie filling contains added spices and sugar that will throw off the recipe’s balance. If using homemade puree, make sure it’s well-drained.
Testing for Doneness
The toothpick test is your best friend here. The bars should be mostly set but still slightly moist in the center. They’ll continue cooking slightly as they cool, so don’t overbake.
Clean Slicing Technique
For the cleanest cuts, wipe your knife between slices and use a gentle sawing motion rather than pressing straight down. Chilled bars slice more cleanly than warm ones.
Storage and Serving
Optimal Storage Conditions
Store the bars in an airtight container or cover the pan with plastic wrap. They’ll stay fresh at room temperature for up to 3 days, though they’re best within the first 48 hours.
Refrigeration Considerations
While not necessary, refrigerating the bars can extend their shelf life to about a week. Let them come to room temperature for 15-20 minutes before serving for the best texture and flavor.
Serving Temperature
These bars are delicious at room temperature, but some people prefer them slightly chilled. Experiment to find your preference – the flavors are more pronounced at room temperature, while chilled bars have a firmer, more structured texture.
Frequently Asked Questions
Can I use fresh pumpkin instead of canned puree? Absolutely! Roast a pumpkin, scoop out the flesh, and puree it until smooth. Make sure to drain any excess liquid by placing the puree in a fine-mesh strainer for about 30 minutes. Fresh pumpkin puree tends to be more watery than canned, so this draining step is crucial.
What if I don’t have natural sweetener? You can substitute the natural sweetener with an equal amount of granulated sugar, brown sugar, or even coconut sugar. Each will provide slightly different flavor notes, but all work well in this recipe.
Can I make these bars gluten-free? Yes, substitute the all-purpose flour with a 1:1 gluten-free flour blend. Make sure your baking powder is also gluten-free. The texture might be slightly different, but the bars will still be delicious.
How do I know if my cream cheese is at room temperature? Room temperature cream cheese should give slightly when pressed with your finger but not be warm or soft. If you forgot to take it out early, cut it into small cubes and let it sit for 15-20 minutes, or microwave it for 10-15 seconds on low power.
Can I reduce the sugar content further? Yes, you can experiment with reducing the sweeteners by up to 25% without significantly affecting the texture. Keep in mind that the bars will be less sweet, so taste preferences vary. You might want to add a bit more vanilla extract to compensate.
What’s the best way to create the swirl pattern? Use a butter knife or the tip of a spoon to create long, flowing motions through both layers. Start from one corner and make S-shaped curves, then turn the pan and repeat. Don’t overdo it – you want distinct layers with beautiful marbling.
Why are my bars too dense? Dense bars usually result from overmixing the batter or using too much flour. Mix just until ingredients are combined, and measure flour accurately by spooning it into the measuring cup and leveling off the top.
Nutritional Information
Per Bar:
- Calories: 166
- Protein: 3g
- Carbohydrates: 26g
- Fat: 7g
- Fiber: 1g
- Sugar: 11g
These bars provide a moderate amount of calories while delivering vitamin A from the pumpkin and calcium from the cream cheese. The portion size is satisfying without being overly indulgent.
Troubleshooting Common Issues
Cracked Surface
If your bars develop cracks on top, your oven temperature might be too high, or they may be overbaked. Reduce the temperature by 25°F and check for doneness a few minutes earlier next time.
Soggy Bottom
A soggy bottom usually indicates underbaking. Make sure your oven is fully preheated and test with a toothpick in the center. The bars should be set but still slightly moist.
Uneven Swirls
If your swirls don’t look right, the cheesecake mixture might be too thick or too thin. Adjust with a tiny bit of milk to thin or a touch more flour to thicken.
Final Thoughts
These Cinnamon Cheesecake Swirl Pumpkin Bars represent everything wonderful about fall baking – warm spices, seasonal flavors, and the comfort of homemade desserts. The combination of textures and flavors creates a dessert that’s both familiar and special, perfect for everything from casual family dinners to holiday gatherings.
The beauty of this recipe lies in its versatility and reliability. Whether you’re an experienced baker or just starting out, these bars deliver consistent, impressive results. The make-ahead friendly nature means you can enjoy the satisfaction of homemade desserts without the stress of last-minute preparation.
Most importantly, these bars create those sweet moments that make baking worthwhile – the anticipation as they bake, the satisfaction of cutting into perfectly set layers, and the joy of sharing something delicious with people you care about. They’re the kind of dessert that becomes a requested favorite, marking the seasons and creating lasting memories around your table.


