Total Time: 4 hours 20 minutes | Yield: 12 servings | Diet: Vegetarian
Introduction
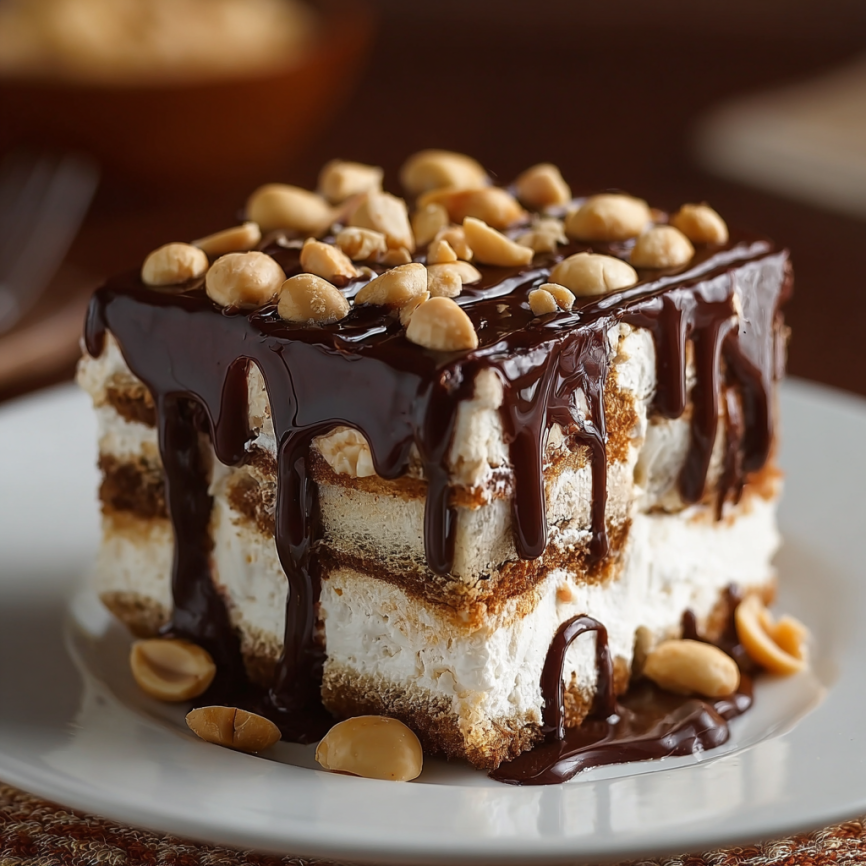
Sometimes the most memorable desserts are born from pure spontaneity. This incredible ice cream dessert with hot chocolate flavors came to life during a family reunion when I needed to feed a crowd with minimal effort but maximum impact. What started as a desperate attempt to create something special with store-bought ingredients has become our most requested dessert for summer gatherings and birthday celebrations.
The genius of this recipe lies in its beautiful simplicity – no baking required, yet it delivers restaurant-quality results that will have your guests asking for the recipe. Moreover, the combination of creamy ice cream sandwiches, rich chocolate syrup, smooth peanut butter, and crunchy nuts creates an irresistible symphony of textures and flavors that appeals to all ages.
Why This Dessert Will Steal the Show
No-Bake Convenience
Perfect for hot summer days when you don’t want to turn on the oven, this dessert requires zero cooking skills. Furthermore, most preparation can be done hours ahead, making it ideal for entertaining.
Crowd-Pleasing Flavors
The combination of chocolate, peanut butter, and vanilla creates a flavor profile that’s universally loved. Additionally, the contrast between creamy and crunchy textures keeps every bite interesting.
Make-Ahead Friendly
This dessert actually improves with time as flavors meld together in the freezer. Consequently, you can prepare it days in advance without sacrificing quality.
Budget-Friendly Elegance
Using simple, affordable ingredients, this dessert delivers impressive results that look and taste expensive. Even better, it serves a large crowd without breaking the budget.
Ingredients
Main Components
- Chocolate syrup: 1 can (450g) – choose high-quality syrup for best flavor
- Peanut butter: ¾ cup (180g) – creamy peanut butter works best
- Ice cream sandwiches: 19 sandwiches – classic vanilla ice cream with chocolate wafers
- Whipped cream: 1 package (340g) – frozen whipped topping, thawed
- Salted peanuts: 1 cup (150g) – roughly chopped for optimal texture
Optional Enhancements
Consider adding mini chocolate chips, crushed cookies, or caramel sauce for extra indulgence. Fresh berries also provide a lovely color contrast and fresh flavor balance.
Equipment Needed
You’ll need a 9×13 inch baking dish, microwave-safe bowl, and aluminum foil for covering. Having a sharp knife for clean cuts is also helpful for serving.
Step-by-Step Instructions
Setting the Foundation
- Prepare your workspace by clearing freezer space for a 9×13 inch dish. Next, line your baking dish with parchment paper for easy removal if desired.
- Arrange the base layer by placing ice cream sandwiches in a single layer in your prepared baking dish. Trim sandwiches as needed to fit snugly with minimal gaps.
Building the Layers
- Prepare peanut butter by heating it in the microwave for 30-45 seconds until easily spreadable. Stir well to ensure smooth consistency throughout.
- Apply peanut butter layer by spreading the warmed peanut butter evenly over all ice cream sandwiches using an offset spatula or back of a spoon. Work quickly before it hardens.
Creating the Chocolate Magic
- Add first chocolate layer by pouring half of the chocolate syrup evenly over the peanut butter layer. Use a spoon to spread gently if needed for complete coverage.
- Spread whipped cream generously over the chocolate syrup, creating smooth, even coverage. This layer acts as both flavor and visual appeal.
Final Touches
- Complete the chocolate layers by drizzling remaining chocolate syrup over the whipped cream. Create attractive patterns or simply cover evenly for rustic charm.
- Add the crunch by sprinkling chopped salted peanuts evenly across the surface. Press gently to help them adhere to the whipped cream.
Freezing and Serving
- Cover and freeze by wrapping tightly with aluminum foil and freezing for at least 4 hours or overnight. This allows all layers to set properly and flavors to meld.
- Serve with style by removing from freezer 5-10 minutes before cutting. Use a sharp knife dipped in warm water for clean, professional-looking squares.
Serving Suggestions
Presentation Ideas
Cut into neat squares and serve on chilled dessert plates. Consider garnishing each serving with a drizzle of extra chocolate syrup, a dollop of whipped cream, or a single salted peanut for elegant presentation.
Temperature Tips
Allow the dessert to soften slightly at room temperature before cutting for easier serving. However, don’t let it sit too long, as the ice cream sandwiches will become too soft to maintain their shape.
Portion Control
This rich dessert is quite indulgent, so smaller portions are often appreciated. Cut into 12-15 squares depending on your crowd and the richness tolerance of your guests.
Recipe Variations
Flavor Combinations
Cookies and Cream Version: Replace peanut butter with crushed chocolate sandwich cookies mixed with softened cream cheese. Add crushed cookies instead of peanuts for the topping.
Caramel Lover’s Dream: Substitute caramel sauce for chocolate syrup and use caramel-swirl ice cream sandwiches. Top with crushed pretzel pieces for sweet-salty contrast.
Berry Blast: Add a layer of mixed berry compote between the peanut butter and first chocolate layer. Fresh strawberries or raspberries work beautifully.
Dietary Adaptations
Gluten-Free Option: Use gluten-free ice cream sandwiches and ensure all other ingredients are certified gluten-free. Many brands now offer excellent gluten-free alternatives.
Nut-Free Alternative: Replace peanut butter with sunflower seed butter or cookie butter. Substitute chopped peanuts with crushed cookies or chocolate chips.
Lower Sugar Version: Use sugar-free chocolate syrup and light whipped topping. Choose ice cream sandwiches made with reduced sugar ice cream for a lighter treat.
Make-Ahead Tips
Advance Preparation
This dessert is perfect for making 1-2 days ahead of serving. In fact, the flavors improve with time as they meld together beautifully in the freezer environment.
Long-Term Storage
Properly wrapped, this dessert keeps in the freezer for up to 2-3 months. However, for optimal texture and flavor, consume within 2 weeks of preparation.
Party Planning
When entertaining, prepare this dessert early in the day or even the night before. This frees up your time for other party preparations while ensuring a spectacular finale to your meal.
Important Notes for Success
Ice Cream Sandwich Selection
Choose high-quality ice cream sandwiches with firm cookies that won’t become soggy. Avoid brands that are too soft initially, as they may not hold up well in the layered dessert.
Peanut Butter Technique
Warming the peanut butter is crucial for even spreading. However, don’t overheat it, as this can cause it to separate or become too thin to stay in place.
Layer Timing
Work efficiently when building layers, as the ice cream will begin to soften. If necessary, return the dessert to the freezer between steps to maintain structure.
Cutting Tips
For the cleanest cuts, use a sharp knife dipped in warm water and wiped clean between cuts. This prevents the layers from dragging and creates professional-looking portions.
Storage Considerations
Always cover tightly to prevent freezer burn and absorption of other freezer odors. Parchment paper between layers can help if stacking multiple desserts.

Frequently Asked Questions
Can I use homemade whipped cream instead of frozen topping?
While possible, frozen whipped topping holds its structure better in this frozen dessert. If using homemade whipped cream, ensure it’s very stiff and consider adding a stabilizer like powdered sugar.
What if I can’t find ice cream sandwiches?
You can create your own by placing vanilla ice cream between chocolate wafer cookies. Alternatively, use ice cream bars or even layer vanilla ice cream directly in the pan.
How do I prevent the dessert from becoming too hard?
Remove from freezer 5-10 minutes before serving to allow slight softening. Additionally, ensure your freezer isn’t set too cold, as this can make cutting difficult.
Can I make individual portions?
Absolutely! Use individual ramekins or small containers to create personal-sized desserts. Adjust ingredient quantities accordingly and reduce freezing time slightly.
What’s the best way to customize this for kids?
Consider using crushed cookies instead of nuts for safety, add colorful sprinkles, or use flavored syrups like strawberry or caramel for variety.
How do I know when it’s properly frozen?
The dessert should be firm throughout but still cuttable. If a knife inserted in the center comes out clean without soft ice cream, it’s ready to serve.
Can I add alcohol for an adult version?
Yes! Add 2-3 tablespoons of chocolate liqueur or peanut butter whiskey to the peanut butter before spreading. Note that alcohol may affect freezing, so allow extra time.
What should I do if the layers start sliding?
Ensure each layer is properly set before adding the next. Return to freezer between steps if necessary, and avoid making the peanut butter layer too thick or warm.
Recipe Details:
- Prep Time: 20 minutes
- Cook Time: 0 minutes (freezing time: 4 hours)
- Category: Dessert
- Method: No-Bake/Freezing
- Cuisine: American
Nutrition Information (per slice): Serving Size: 1 piece
- Calories: 350
- Sugar: 25g
- Sodium: 150mg
- Fat: 20g
- Saturated Fat: 5g
- Unsaturated Fat: 15g
- Trans Fat: 0g
- Carbohydrates: 40g
- Fiber: 2g
- Protein: 6g
- Cholesterol: 0mg


