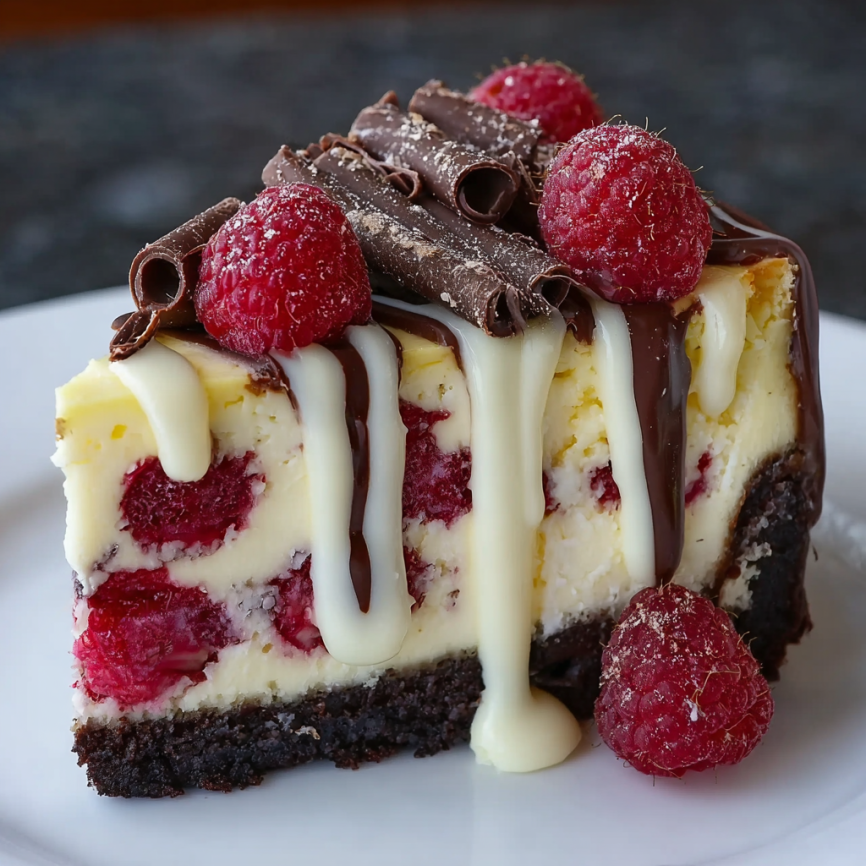
There’s something truly magical about the moment you present a beautifully swirled cheesecake to a table full of eager guests. I’ll never forget the first time I made this White Chocolate Raspberry Cheesecake for my sister’s birthday dinner – the collective gasp when I revealed the gorgeous marbled surface, followed by the blissful silence as everyone savored their first bite. That evening taught me that some desserts transcend simple sweetness; they become memorable experiences that bring people together and create lasting impressions.
Why This Cheesecake Will Become Your Signature Dessert
Perfect Balance of Sophisticated Flavors
This extraordinary dessert masterfully combines the luxurious richness of white chocolate with the bright tartness of fresh raspberries. While white chocolate provides creamy sweetness and velvety texture, the raspberry sauce adds vibrant color and a delightful contrast that prevents the dessert from being overwhelmingly rich. Furthermore, the chocolate cookie crust grounds these elegant flavors with its deep, slightly bitter notes that complement both the white chocolate and berries beautifully.
Stunning Visual Impact
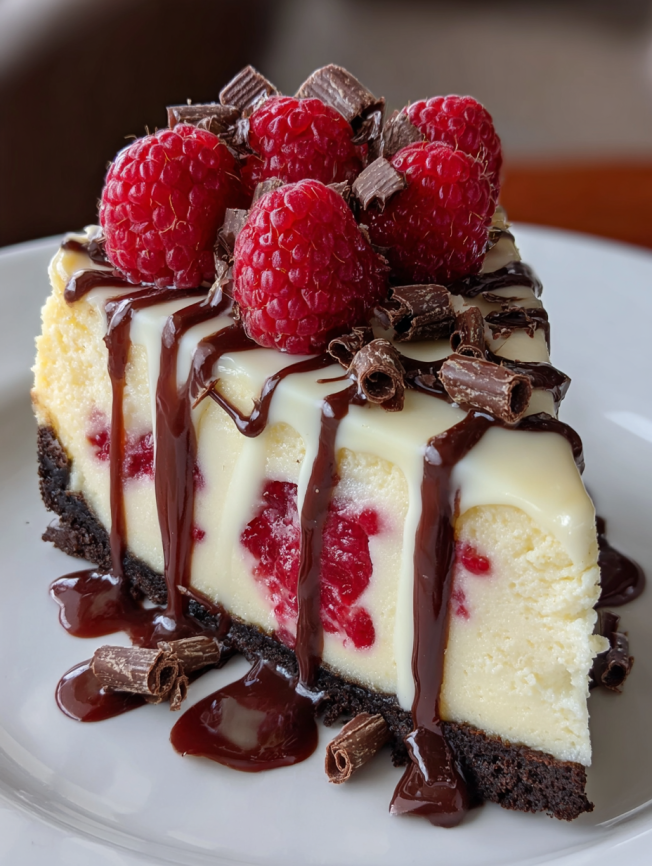
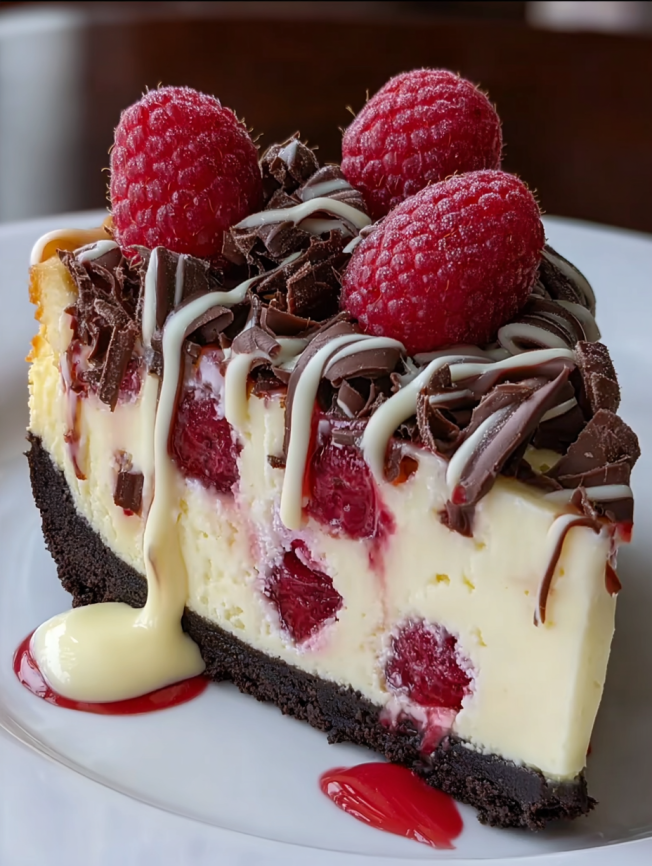
Beyond its incredible taste, this cheesecake is a genuine showstopper in terms of presentation. The marbled raspberry swirls create an artistic pattern that looks professionally crafted, while the contrast between the pale cream filling and vibrant red sauce makes every slice Instagram-worthy. Additionally, the elegant appearance makes it perfect for special occasions, holidays, or any time you want to impress your guests.
Make-Ahead Convenience
Unlike many elaborate desserts that require last-minute preparation, this cheesecake actually improves with time. The overnight chilling period allows all flavors to meld perfectly while achieving the ideal creamy texture. Moreover, you can prepare it up to three days in advance, making it an excellent choice for entertaining or special events where you want to minimize day-of stress.
Essential Ingredients and Quality Guidelines
For the Chocolate Cookie Crust
Base Components:
- 1 cup crushed chocolate cookies (chocolate wafers or Oreos work beautifully)
- 1/4 cup butter, melted
- 3 tablespoons white sugar
For the Raspberry Sauce
Fresh Berry Elements:
- 1 package (280g) frozen raspberries
- 1/2 cup water
- 2 tablespoons white sugar
- 2 teaspoons cornstarch
For the White Chocolate Cheesecake Filling
Luxurious Core Ingredients:
- 2 cups white chocolate chips or finely chopped white chocolate
- 1/2 cup heavy cream (30% fat content)
- 3 packages (225g each) cream cheese, completely softened
- 1/2 cup white sugar
- 3 large eggs, room temperature
- 1 teaspoon vanilla extract
Shopping and Preparation Tips
White Chocolate Selection: Choose high-quality white chocolate that contains cocoa butter rather than vegetable fats. Brands like Ghirardelli, Lindt, or Callebaut produce superior results with smoother melting properties and richer flavor.
Cream Cheese Preparation: Remove cream cheese from refrigeration 2-3 hours before baking to ensure proper softening. Properly softened cream cheese should yield easily to gentle pressure without being warm or oily.
Raspberry Considerations: While frozen raspberries work perfectly for the sauce, you can substitute fresh berries if preferred. Frozen berries often provide more intense flavor and better consistency for sauce-making.
Step-by-Step Instructions
Creating the Perfect Crust Foundation
Step 1: Prepare Your Equipment Preheat your oven to 325°F (165°C) and position the rack in the center. Grease a 9-inch springform pan thoroughly with butter, then line the bottom with parchment paper for easy removal.
Step 2: Craft the Cookie Crust Combine crushed chocolate cookies with melted butter and sugar in a medium bowl, mixing until the texture resembles wet sand and holds together when pressed. Press this mixture firmly and evenly into the bottom of your prepared pan, using the bottom of a measuring cup to ensure uniform thickness.
Step 3: Pre-Bake the Foundation Bake the crust for 10 minutes until it feels set but not overly hard. Remove from oven and set aside to cool completely while you prepare the other components.
Preparing the Vibrant Raspberry Sauce
Step 4: Cook the Berry Mixture In a small saucepan, combine frozen raspberries, water, sugar, and cornstarch. Cook over medium heat, stirring constantly with a wooden spoon until the mixture thickens and begins to bubble gently. This process typically takes 5-7 minutes and fills your kitchen with an amazing aroma.
Step 5: Strain for Smoothness Pour the cooked raspberry mixture through a fine-mesh sieve, pressing the pulp with the back of a spoon to extract maximum flavor while removing seeds. The resulting sauce should be smooth, glossy, and vibrant red. Set aside to cool completely.
Mastering the White Chocolate Filling
Step 6: Melt the White Chocolate Create a double boiler by placing a heatproof bowl over a saucepan of gently simmering water. Add white chocolate chips and cream to the bowl, stirring constantly until completely smooth and glossy. Remove from heat and allow to cool for 10 minutes.
Step 7: Create the Base Mixture In a large mixing bowl, beat softened cream cheese and sugar with an electric mixer on medium speed for 2-3 minutes until completely smooth and fluffy. Scrape down the bowl sides frequently to ensure even mixing.
Step 8: Incorporate Eggs Gradually Add eggs one at a time, beating on low speed after each addition until just incorporated. Overmixing at this stage can introduce air bubbles that may cause cracking during baking.
Step 9: Complete the Filling Gently fold in the vanilla extract and cooled white chocolate mixture using a rubber spatula, mixing just until combined and maintaining the smooth, creamy texture.
Assembly and Baking Techniques
Step 10: Layer and Swirl Pour half of the cheesecake filling over the cooled crust, spreading evenly. Drizzle one-third of the raspberry sauce over this layer, then add the remaining cheesecake filling. Top with the remaining raspberry sauce and use a knife to create gentle swirls, drawing through the layers to create beautiful marbled patterns.
Step 11: Bake to Perfection Bake for 55-65 minutes until the edges are set and the center has a slight jiggle when gently shaken. The surface should look mostly set but not completely firm in the center.
Cooling and Setting Process
Step 12: Gradual Cooling Turn off the oven and prop the door open slightly, allowing the cheesecake to cool gradually in the oven for 1 hour. This prevents sudden temperature changes that can cause cracking.
Step 13: Complete Chilling Transfer to the refrigerator and chill for at least 8 hours, preferably overnight. This extended chilling time is crucial for achieving the perfect creamy texture and allowing flavors to develop fully.
Creative Serving and Presentation Ideas
Elegant Plating Techniques
Remove the cheesecake from the springform pan by running a thin knife around the edges before releasing the sides. Use a sharp, clean knife dipped in warm water between cuts to achieve clean, professional-looking slices. Wipe the knife clean after each cut for the most attractive presentation.
Garnish Inspiration
Fresh Berry Accents: Top each slice with fresh raspberries and a few white chocolate shavings for added visual appeal and complementary flavors.
Mint and Powder: Add a small sprig of fresh mint and a light dusting of powdered sugar for an elegant restaurant-style presentation.
Sauce Drizzles: Create decorative patterns on the serving plates using additional raspberry sauce or melted white chocolate for an extra touch of sophistication.
Exciting Recipe Variations
Berry Alternatives
Mixed Berry Medley: Replace raspberries with a combination of strawberries, blueberries, and blackberries for a more complex flavor profile and stunning multi-colored swirls.
Seasonal Fruit Options: During summer, try fresh peach or apricot sauce, while winter calls for cranberry or pomegranate variations that add festive colors and flavors.
Chocolate Variations
Dark Chocolate Twist: Substitute dark chocolate for white chocolate and pair with cherry or blackberry sauce for a more intense, sophisticated flavor combination.
Milk Chocolate Version: Use milk chocolate chips for a milder, more approachable sweetness that appeals to a broader range of palates.
Crust Alternatives
Graham Cracker Classic: Replace chocolate cookies with graham crackers for a more traditional cheesecake base that allows the white chocolate and raspberry flavors to shine.
Nut-Based Options: Try crushed gingersnaps mixed with chopped almonds, or vanilla wafers combined with hazelnuts for unique textural elements.
Make-Ahead Strategies and Storage Solutions
Advanced Preparation Timeline
Three Days Before: Prepare the entire cheesecake and store covered in the refrigerator. The flavors actually improve with time, making this an ideal make-ahead dessert.
Day Before: If pressed for time, you can prepare the cheesecake the night before serving, though the flavors will be even better with longer chilling time.
Storage Guidelines
Refrigerator Storage: Properly covered, this cheesecake maintains its quality for up to 5 days in the refrigerator. Cover tightly with plastic wrap or store in an airtight container to prevent absorption of other flavors.
Freezing Instructions: Individual slices can be frozen for up to 2 months. Wrap each slice in plastic wrap, then aluminum foil, and place in freezer bags. Thaw overnight in the refrigerator before serving.
Professional Tips for Flawless Results
Preventing Common Issues
Avoiding Cracks: Use room temperature ingredients, don’t overmix, and ensure gradual cooling to prevent unsightly cracks in the surface. Additionally, avoid opening the oven door during baking, as temperature fluctuations can cause cracking.
Achieving Smooth Texture: Properly softened cream cheese is crucial for a lump-free filling. If lumps occur, strain the mixture through a fine-mesh sieve before adding other ingredients.
Perfect Swirl Patterns: Create swirls gently and don’t overwork the pattern – a few strategic knife strokes create more elegant results than excessive mixing.
Important Notes for Success
Temperature Management
All ingredients should be at room temperature before beginning, except for the cream used to melt the white chocolate. This ensures smooth incorporation and prevents lumps in the final product.
Timing Considerations
Plan to start this dessert at least 12 hours before serving to allow adequate cooling and chilling time. The extended preparation time is essential for achieving the proper texture and flavor development.
Equipment Essentials
A springform pan is crucial for easy removal and professional presentation. Additionally, a double boiler setup ensures gentle, even melting of the white chocolate without scorching.
Frequently Asked Questions
Can I use fresh raspberries instead of frozen? Absolutely! Use the same amount of fresh raspberries, but you may need to cook the sauce slightly longer to achieve the proper thickness. Fresh berries often contain less water than frozen ones.
What if my white chocolate seizes while melting? If the chocolate becomes grainy or seizes, remove it from heat immediately and whisk in a tablespoon of warm cream until smooth. Prevention is key – ensure no water contacts the chocolate during melting.
How do I know when the cheesecake is properly baked? The edges should be set and lightly golden, while the center should have a slight jiggle when gently shaken. The surface should look mostly matte rather than shiny and wet.
Can I make this cheesecake without a springform pan? While a springform pan is ideal, you can use a regular 9-inch cake pan lined with parchment paper, leaving overhang for easy lifting. However, presentation may not be as polished.
Why did my cheesecake crack? Cracking usually results from overmixing, sudden temperature changes, or overbaking. Ensure ingredients are room temperature, mix gently, and allow gradual cooling to prevent this issue.
Can I substitute the cream cheese with a lower-fat version? While possible, reduced-fat cream cheese contains more water and stabilizers, which can affect texture and may result in a less creamy, more dense final product.
How far in advance can I make the raspberry sauce? The raspberry sauce can be prepared up to one week in advance and stored covered in the refrigerator. It may thicken further upon chilling, so you can thin it with a teaspoon of water if needed.
What’s the best way to slice this cheesecake cleanly? Use a sharp, thin-bladed knife dipped in warm water between each cut. Wipe the blade clean with a damp towel after each slice to maintain clean lines and prevent the filling from dragging.
Prep Time: 45 minutes | Bake Time: 65 minutes | Cooling Time: 9 hours | Total Time: 9 hours 35 minutes
Yield: 16 servings | Difficulty: Intermediate | Method: Baked | Cuisine: American
Nutrition Information (per serving):
- Calories: 385 | Fat: 26g | Carbohydrates: 32g | Protein: 8g
- Sugar: 28g | Fiber: 2g | Sodium: 285mg | Cholesterol: 95mg


