Prep Time: 1 hour | Cook Time: 30 minutes | Total Time: 13 hours 30 minutes | Yield: 8-12 sandwiches
The Perfect Marriage of Two Beloved Desserts
Last summer, during a particularly sweltering heat wave, I found myself craving something that would satisfy both my chocolate obsession and my desperate need for cooling relief. Store-bought ice cream sandwiches felt disappointing after years of homemade treats, while regular brownies seemed too heavy for the weather. That’s when inspiration struck – why not combine the best of both worlds?
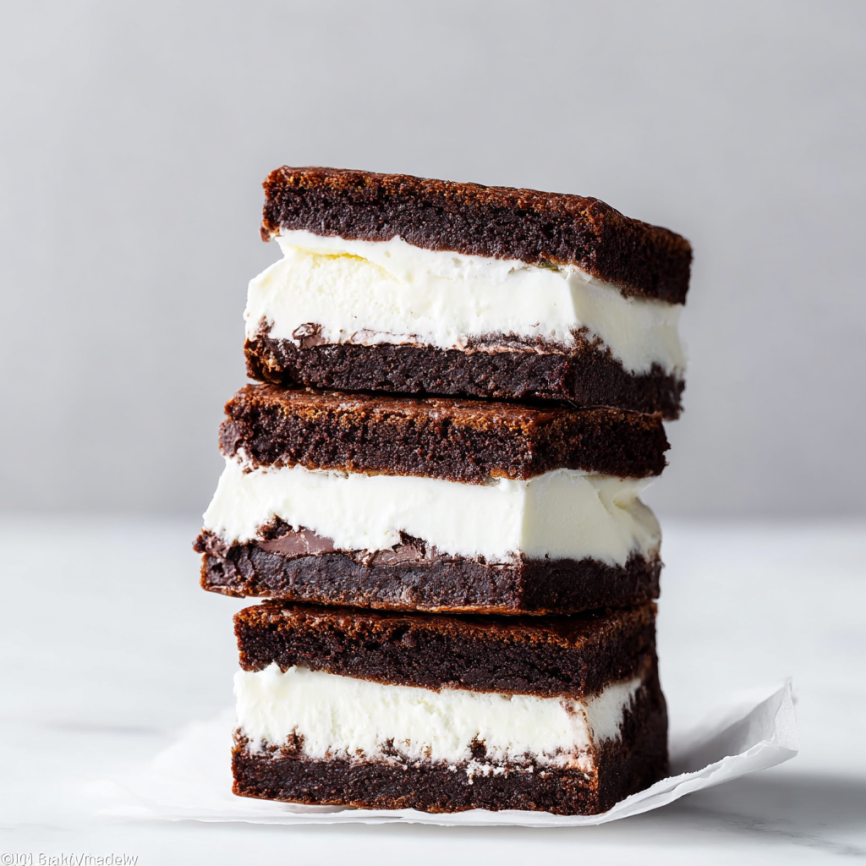
These brownie ice cream sandwiches became an instant sensation at every gathering I brought them to. Unlike their commercial counterparts, these feature rich, fudgy brownies that maintain the perfect texture even when frozen, paired with generous layers of creamy ice cream. The key lies in creating brownies that are sturdy enough to hold their shape yet tender enough to bite through easily, even straight from the freezer.
Why These Will Become Your Summer Signature Dessert
Perfect Texture Balance
The secret to exceptional brownie ice cream sandwiches lies in achieving brownies that are neither too cakey nor too fudgy. These strike the ideal balance – rich and chocolatey with just enough structure to support the ice cream layer without becoming rock-hard when frozen.
Impressive Presentation
Few homemade treats create the same excitement as perfectly sliced brownie ice cream sandwiches. The clean layers of chocolate and cream create stunning visual appeal, while the generous size makes each sandwich feel like a special indulgence rather than a simple snack.
Endless Customization
While vanilla ice cream provides the classic foundation, these sandwiches welcome any flavor combination you can imagine. Furthermore, the rich brownie base complements everything from fruity sorbets to sophisticated flavors like salted caramel or coffee.
Make-Ahead Convenience
These sandwiches actually improve with time in the freezer, making them perfect for entertaining. Once assembled, they’re ready whenever you need an impressive dessert that requires no last-minute preparation.
Essential Ingredients
For the Rich Brownie Layers
- 1 cup (226g) unsalted butter
- 2 cups (400g) granulated sugar
- 3 large eggs, at room temperature
- 1 tablespoon pure vanilla extract
- 1 cup (82g) unsweetened cocoa powder (natural or Dutch-process)
- 1 cup (125g) all-purpose flour, spooned and leveled
- 1 teaspoon salt
- ¾ teaspoon baking powder
For Assembly
- 2-quart container (½ gallon) ice cream, slightly softened
- Additional parchment paper for layering
Choose high-quality cocoa powder for the richest chocolate flavor – this is where the brownie’s intense taste develops.
Step-by-Step Instructions
Preparation and Setup
Step 1: Preheat your oven to 350°F (177°C). Line a 9-inch square baking pan with parchment paper, ensuring generous overhang on all sides for easy removal. Having two identical pans allows you to bake both brownie layers simultaneously.
Step 2: Remove ice cream from the freezer to begin softening while you prepare and bake the brownies. Proper softening ensures easy spreading without melting completely.
Creating the Brownie Base
Step 3: Melt the butter in a microwave-safe bowl or saucepan. Once melted, whisk in the granulated sugar until the mixture is completely smooth and well combined.
Step 4: Add the eggs one at a time, whisking thoroughly after each addition, then incorporate the vanilla extract. The mixture may appear slightly dull – this is perfectly normal.
Step 5: Add the cocoa powder, flour, salt, and baking powder all at once. Using a rubber spatula or wooden spoon, fold the ingredients together until a thick, cohesive batter forms. Don’t worry if it seems impossibly thick at first – it will come together with persistent folding.
Baking the First Layer
Step 6: Measure out half the batter (approximately 2 cups) and spread it evenly in your prepared pan. The thick consistency requires patience – use the back of a spoon to achieve an even layer.
Step 7: Place a sheet of parchment paper directly on top of the unbaked brownie batter, smoothing it down gently. This crucial step prevents excessive puffing and ensures flat brownie layers perfect for sandwiching.
Step 8: Bake for 15-16 minutes exactly. Longer baking creates brownies that are difficult to cut when frozen. The brownies should appear set but still slightly soft.
Step 9: Cool the first layer in the pan for 5 minutes, then carefully lift it out using the parchment overhang. Remove the top parchment layer and set the brownie sheet aside.
Preparing the Second Layer
Step 10: Line the warm pan with fresh parchment paper. Stir the remaining batter – it will be very thick at this point. If necessary, add up to one teaspoon of water to achieve spreadable consistency.
Step 11: Spread the remaining batter in the pan and top with parchment paper as before. Bake for another 15-16 minutes using the same timing guidelines.
Assembly Process
Step 12: Allow the second brownie layer to cool in the pan for 15 minutes. During this time, the ice cream should reach perfect spreading consistency – soft but not melting.
Step 13: Scoop the softened ice cream directly onto the warm brownie layer still in the pan. Use nearly the entire container, spreading it into a thick, even layer with the back of a spoon or ice cream scoop.
Step 14: Carefully place the first brownie layer on top of the ice cream, pressing gently to ensure good adhesion. The slight warmth helps create a bond between the layers.
Freezing and Final Preparation
Step 15: Cover the entire pan tightly with aluminum foil or plastic wrap. Freeze for at least 12 hours, though 12-18 hours provides optimal texture. Less time results in soft ice cream, while longer freezing makes cutting more difficult.
Step 16: Remove from freezer and lift the entire block using the parchment overhang. Using a very sharp knife and steady pressure, cut into 8-12 uniform squares or rectangles. Clean the knife between cuts for neat edges.
Serving Suggestions
These sandwiches are best enjoyed immediately after cutting, when the brownies have the perfect chewiness and the ice cream is at ideal consistency. For parties, consider cutting them into smaller, bite-sized portions and serving on chilled plates.
Create an impressive dessert station by offering multiple ice cream flavors assembled into separate batches. Arrange the sandwiches on marble or chilled serving platters, and provide small bowls of toppings like chocolate chips, crushed cookies, or caramel sauce for guests to customize their treats.
For special occasions, drizzle individual sandwiches with melted chocolate or dust with powdered sugar just before serving. They also pair beautifully with fresh berries or a dollop of whipped cream for elegant presentation.
Creative Flavor Combinations
Classic Variations
Vanilla ice cream remains the gold standard, but try upgrading to premium vanilla bean or French vanilla for enhanced richness. Chocolate ice cream creates an intensely chocolatey experience, while strawberry provides a delightful contrast to the rich brownie base.
Gourmet Adventures
Salted caramel ice cream adds sophisticated flavor complexity, while coffee or espresso ice cream appeals to adult palates. For special occasions, try premium flavors like pistachio, lavender honey, or brown butter ice cream.
Seasonal Specialties
During fall months, pumpkin or cinnamon ice cream creates cozy autumn treats. Summer calls for fresh peach, mint chip, or even fruity sorbet layers for lighter options. Holiday versions might feature peppermint stick or eggnog ice cream.
Mix-and-Match Options
Consider using two different ice cream flavors in the same sandwich for visual appeal and flavor complexity. Neapolitan combinations or complementary flavors like chocolate and peanut butter create exciting taste experiences.
Make-Ahead Strategies
Timeline Planning
Begin the process at least 24 hours before serving to allow adequate freezing time. The brownies can be baked up to two days ahead and stored covered at room temperature, while ice cream assembly should happen the day before serving.
Storage Solutions
Individual sandwiches wrapped in plastic wrap or parchment paper store beautifully in the freezer for up to one month. Label each package with the flavor and date for easy identification.
Serving Preparation
If sandwiches become too hard after extended freezing, remove them from the freezer 5-10 minutes before serving. This brief tempering period restores the ideal texture without compromising the ice cream layer.
Professional Tips and Techniques
Brownie Consistency Secrets
The key to perfect brownie ice cream sandwiches lies in achieving brownies that remain tender when frozen. The specific baking time of 15-16 minutes is crucial – longer baking creates brownies that become unpleasantly hard when frozen.
Ice Cream Selection
Choose ice creams with good structure that won’t become icy when refrozen. Premium brands or those with higher fat content work best. Avoid no-churn homemade ice creams, as they lack the stability needed for clean slicing.
Cutting Techniques
A sharp, thin-bladed knife works best for clean cuts. Dip the knife in warm water and wipe clean between cuts for professional-looking edges. Apply steady, downward pressure rather than sawing motions.
Temperature Management
Work quickly during assembly to prevent excessive melting, but don’t rush the freezing process. Proper freezing time ensures clean slicing and optimal texture when serving.
Troubleshooting Common Issues
Problem: Brownies are too hard to cut when frozen Solution: This typically indicates overbaking. Ensure brownies are removed at exactly 15-16 minutes, even if they seem slightly underdone. They continue cooking from residual heat.
Problem: Ice cream layer is uneven or has air pockets Solution: Ensure ice cream is properly softened before spreading, and take time to smooth it evenly. Use the back of a spoon or offset spatula for best results.
Problem: Sandwiches fall apart when cutting Solution: Insufficient freezing time is usually the culprit. Ensure at least 12 hours of freezing, and use a very sharp knife with confident, steady cuts.
Problem: Brownies crack or break during handling Solution: Allow brownies to cool slightly but handle while still warm and pliable. Extremely cold brownies become more brittle and prone to cracking.
Frequently Asked Questions
Q: Can I use a different size pan? A: The 9-inch square pan is specifically chosen for optimal thickness. A 9×13 pan creates sandwiches that are too thick to eat comfortably, while an 8-inch pan is too small for the batter amount.
Q: How far ahead can I make these? A: Assembled sandwiches keep beautifully in the freezer for up to one month. However, they’re at peak quality within the first week after assembly.
Q: Can I use homemade ice cream? A: Traditional churned homemade ice cream works wonderfully. Avoid no-churn ice cream recipes made with whipped cream and condensed milk, as they lack the necessary structure for clean slicing.
Q: Why do my brownies puff up too much? A: The parchment paper placed directly on top of the batter during baking prevents excessive rising. This step is crucial for achieving flat layers perfect for sandwiching.
Q: Can I add mix-ins to the brownies? A: While possible, additions like nuts or chocolate chips can make cutting through frozen sandwiches more difficult. If desired, use finely chopped additions and reduce the amount to prevent structural issues.
Q: What’s the best way to store individual sandwiches? A: Wrap each sandwich individually in plastic wrap or parchment paper, then store in an airtight container or freezer bag. This prevents freezer burn and makes serving single portions convenient.
Q: How do I know when the ice cream is the right consistency for spreading? A: Properly softened ice cream should be spreadable but not melting. It should hold its shape when scooped but yield easily to gentle pressure from the back of a spoon.


