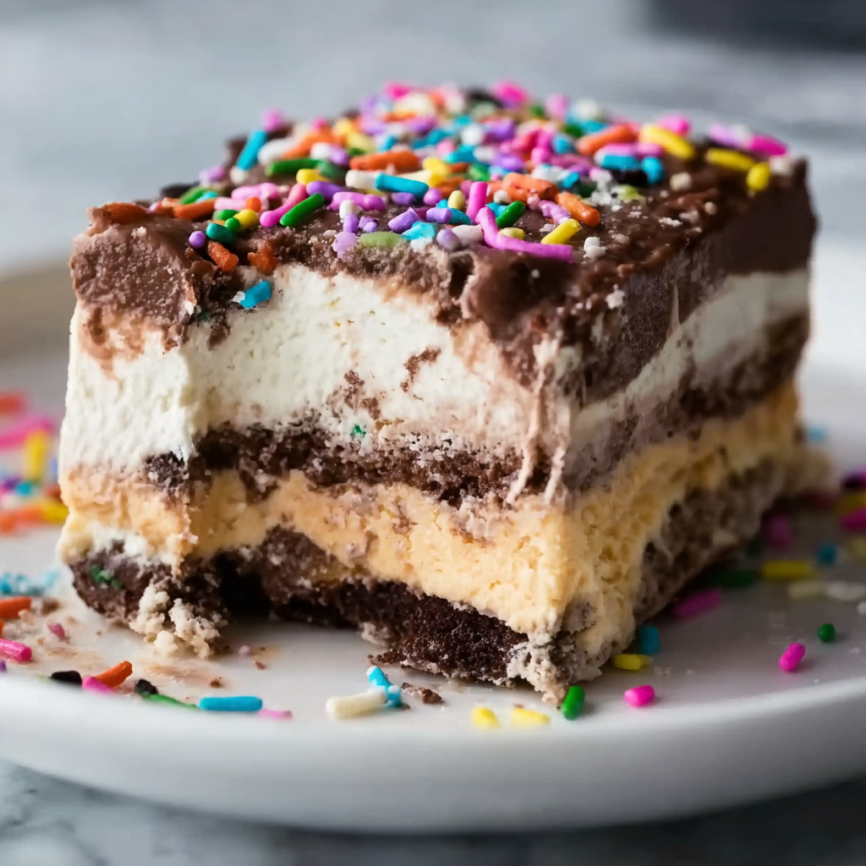
There’s something magical about watching faces light up when you present a towering ice cream cake at a celebration. Last summer, I discovered this show-stopping dessert when my niece requested “something better than regular cake” for her birthday. What started as a challenge became my go-to recipe for every warm-weather gathering. This 5-layer masterpiece combines the beloved crunch of Oreo cookies with creamy ice cream layers and rich hot fudge, creating a dessert that’s both impressive and surprisingly simple to make.
The best part? While it looks like you spent hours crafting this frozen masterpiece, most of the work happens in the freezer while you go about your day.
Why You’ll Fall in Love with This Ice Cream Cake
Perfect for Any Celebration
Whether you’re hosting a birthday party, summer barbecue, or graduation celebration, this cake steals the show every time. Unlike traditional cakes that can feel heavy in hot weather, this frozen treat provides the perfect cool-down factor that guests crave during warm months.
Customizable to Your Heart’s Content
The beauty lies in its versatility. While I love the classic chocolate and peanut butter cup combination, you can swap in any flavors that speak to you. Strawberry and vanilla create a lovely pink and white striped effect, while cookies and cream paired with mint chocolate chip offers a refreshing twist.
Make-Ahead Friendly
This dessert actually improves with time, making it ideal for busy hosts. You can assemble it days in advance, then simply slice and serve when you’re ready. No last-minute frosting or decorating stress—just pure frozen perfection waiting in your freezer.
Essential Ingredients for Your Frozen Masterpiece
For the Oreo Crust
- 30 regular Oreos (avoid Double-Stuf for the right texture balance)
- 1/2 cup unsalted butter, melted
- 9×13-inch pan for the perfect serving size
Ice Cream Layers
- 1 quart chocolate ice cream, softened to spreadable consistency
- 1 quart of your favorite flavor ice cream, softened (peanut butter cup creates an irresistible combination)
- 1 1/2 cups hot fudge sauce (homemade or high-quality store-bought)
Fluffy Whipped Cream Topping
- 1 cup heavy cream for that perfect cloud-like texture
- 2 tablespoons confectioners’ sugar for gentle sweetness
- 1/2 teaspoon pure vanilla extract for aromatic depth
- Colorful sprinkles for the final festive touch
Step-by-Step Assembly Guide
Creating the Foundation
Begin by transforming your Oreos into the perfect crust base. Pulse 30 cookies (including their cream centers) in a food processor until you achieve fine, uniform crumbs—approximately 3 cups total. The cream filling adds richness while helping bind everything together.
Transfer these crumbs to a large mixing bowl, then drizzle in the melted butter. Stir thoroughly until the mixture resembles wet sand with no dry spots remaining. Press this mixture firmly into your ungreased 9×13-inch pan, creating an even, compact foundation. Use your hands or the bottom of a measuring cup to ensure uniform thickness.
Place the pan in the freezer for 15 minutes while you prepare the first ice cream layer.
Building the Ice Cream Layers
First Layer: Chocolate Foundation
Remove your chocolate ice cream from the freezer about 10-15 minutes before use—it should be soft enough to stir smoothly but not melted. Give it a good mix in a bowl to eliminate any frozen chunks, then spread it evenly over your chilled Oreo crust.
Return to the freezer for 15-30 minutes, allowing this layer to firm up before adding the next component.
Second Layer: Your Signature Flavor
While the chocolate layer sets, soften your second ice cream flavor using the same method. Spread it carefully over the chocolate layer, working gently to avoid disturbing the layer beneath. The key is patience—rushing this step can create uneven layers.
Freeze again for 15-30 minutes before proceeding.
Adding the Hot Fudge Layer
Ensure your hot fudge sauce has a spreadable consistency—if it’s too thick, warm it slightly in the microwave. Drizzle and spread it over the second ice cream layer. Don’t worry if the fudge and ice cream blend slightly at the edges; this creates beautiful marbled effects that add to the cake’s charm.
Another 15-30 minute freeze ensures this layer sets properly.
Creating the Whipped Cream Crown
Using either a hand mixer or stand mixer with whisk attachment, beat the heavy cream, confectioners’ sugar, and vanilla extract on medium-high speed. Watch carefully as it transforms from liquid to soft peaks, then continue until stiff peaks form—typically 4-5 minutes total.
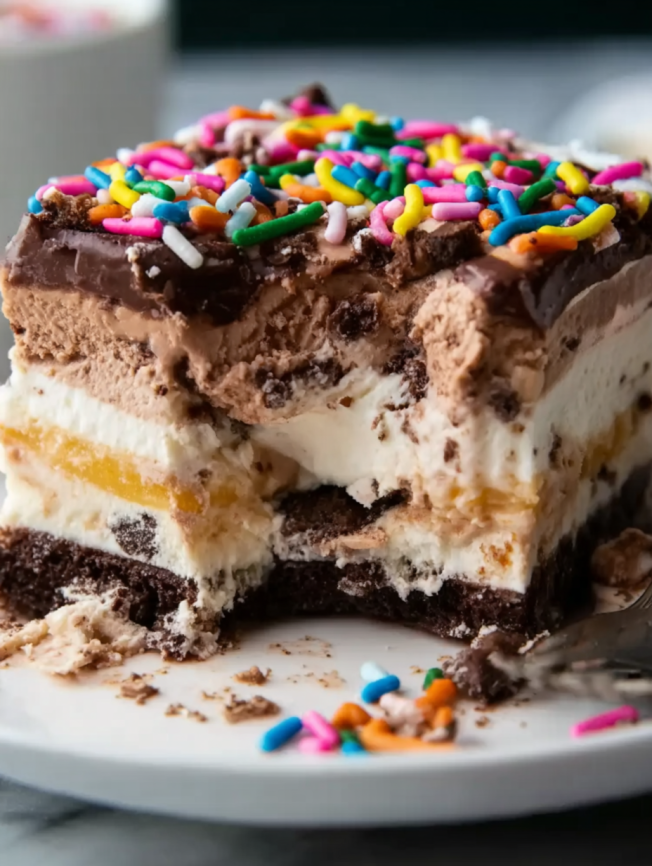
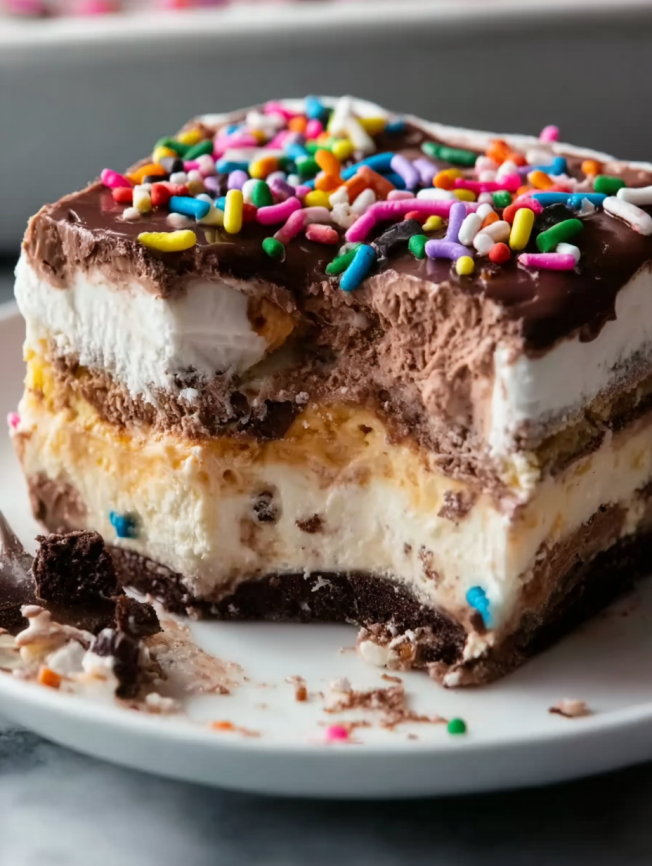
Spread this cloud-like topping over the fudge layer, creating gentle swirls and peaks for visual interest. Finish with a generous sprinkle of colorful sprinkles for that celebration-worthy appearance.
Serving Your Frozen Masterpiece
Cutting and Presentation Tips
After at least 12 hours of freezing, your cake is ready to serve. Use a very sharp knife, running it under warm water between cuts for clean slices. Cut confidently through all layers, including the Oreo crust—hesitation can cause cracking.
Serve immediately on chilled plates to prevent rapid melting. Each slice reveals beautiful distinct layers that never fail to impress guests.
Portion Considerations
This generous cake easily serves 12 people with substantial portions. For larger gatherings, consider making two cakes or cutting smaller pieces and offering additional toppings on the side.
Creative Variations to Try
Flavor Combinations That Wow
- Neapolitan Style: Use strawberry and vanilla ice cream for a classic three-flavor experience
- Coffee Lover’s Dream: Combine coffee and vanilla ice cream with chocolate fudge and caramel sauce
- Mint Chocolate Delight: Pair mint chocolate chip with chocolate ice cream and add crushed Andes mints
- Birthday Cake Special: Use birthday cake flavored ice cream with vanilla, adding rainbow sprinkles between layers
Crust Alternatives
While Oreos create the perfect base, experiment with other cookie crusts. Graham crackers work beautifully with fruit-flavored ice creams, while chocolate wafer cookies complement any flavor combination.
Sauce Variations
Swap hot fudge for caramel sauce, berry coulis, or even peanut butter sauce depending on your ice cream choices. Each creates a completely different flavor profile while maintaining the stunning layered effect.
Make-Ahead Success Tips
Timeline Planning
This dessert not only tolerates advance preparation—it requires it. Plan to make your cake at least 24 hours before serving for optimal texture and flavor melding. The longer freezing time allows all layers to set perfectly while flavors marry beautifully.
Storage Guidelines
Cover tightly with aluminum foil to prevent freezer burn and absorbing other freezer odors. Properly stored, this cake maintains quality for up to one week, though it rarely lasts that long in most households.
Softening Strategy
If your ice cream becomes too firm during assembly, let it sit at room temperature for a few minutes rather than microwaving, which can create uneven melting and texture issues.
Pro Tips for Perfect Results
Ice Cream Selection
Choose premium ice creams with fewer ice crystals for smoother layers. Avoid low-fat versions, which tend to become icy and don’t spread as smoothly.
Temperature Management
Work in a cool kitchen when possible, and don’t skip the freezing steps between layers. These pauses ensure distinct layers rather than a muddled mess.
Equipment Essentials
A food processor makes quick work of the Oreo crust, while a quality electric mixer ensures perfect whipped cream. Having both tools ready streamlines the entire process.
Frequently Asked Questions
Q: Can I make this cake without a food processor? A: Absolutely! Place the Oreos in a sealed plastic bag and crush them with a rolling pin or meat mallet. You’ll need to work a bit harder to achieve fine, uniform crumbs, but the results are equally delicious.
Q: What if my ice cream gets too soft during assembly? A: Simply return it to the freezer for 10-15 minutes until it reaches the right consistency. Patience here prevents layers from blending together and maintains those beautiful distinct stripes.
Q: Can I substitute the hot fudge with other sauces? A: Definitely! Caramel sauce, strawberry sauce, or even Nutella work wonderfully. Just ensure whatever you choose has a spreadable consistency at room temperature.
Q: How far in advance can I make this cake? A: You can make this cake up to 5 days ahead of time. In fact, it often tastes even better after a few days as the flavors meld together beautifully.
Q: Why is my whipped cream not holding its shape? A: Ensure your cream is very cold before whipping, and don’t overbeat once stiff peaks form. Overwhipping can cause the cream to become grainy or even turn into butter.
Q: Can I use sugar-free or dairy-free alternatives? A: Yes! Sugar-free ice creams and dairy-free whipped cream alternatives work well. Just be aware that some alternative products may have different freezing properties, so allow extra setting time between layers if needed.


