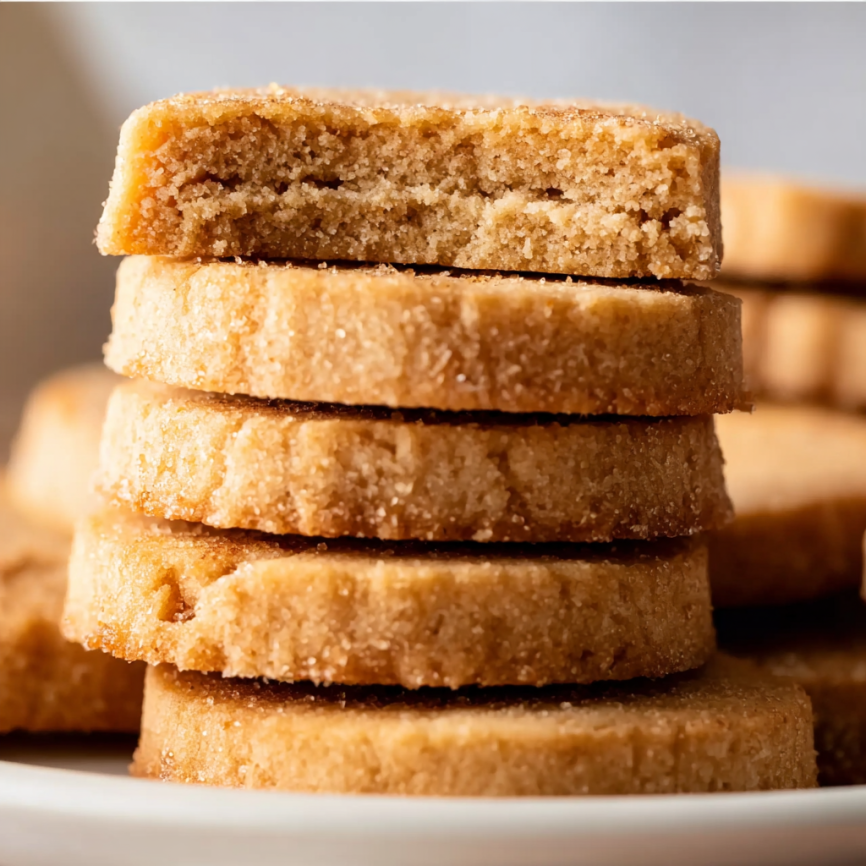
Growing up, my grandmother’s cookie jar was always filled with something delicious, but her brown sugar shortbread cookies held a special place in my heart. Unlike the traditional pale shortbread I’d encountered elsewhere, these golden beauties had a deeper, more complex sweetness that came from using brown sugar instead of white. Years later, when I started baking seriously, I knew I had to recreate that perfect balance of buttery richness and caramel-like flavor.
What makes these cookies truly special is their incredible simplicity. With just six basic ingredients and no need for a rolling pin, they come together effortlessly in one bowl. The brown sugar not only adds amazing flavor but also creates a tender, melt-in-your-mouth texture that’s completely different from regular shortbread. Meanwhile, the coarse sugar coating provides a delightful sparkle and subtle crunch that elevates each bite.
Why These Cookies Will Become Your New Favorite
They’re wonderfully forgiving. Unlike finicky cookies that require precise measurements and perfect timing, shortbread is naturally accommodating. Even if your dough seems a bit crumbly at first, it always comes together beautifully with a little patience and gentle handling.
The flavor is incredibly rich yet balanced. Brown sugar brings molasses notes that create depth without overwhelming sweetness. Furthermore, the generous amount of butter ensures each cookie has that signature shortbread richness we all crave.
They’re make-ahead friendly. The dough actually improves with chilling time, developing better flavor and structure. Additionally, you can keep shaped logs in your refrigerator for up to five days, making fresh cookies whenever the craving strikes.
No special equipment needed. These cookies require no rolling pin, cookie cutters, or complicated techniques. Simply mix, shape, chill, and slice – it’s that straightforward.
Essential Ingredients for Perfect Results
The Foundation
- 3/4 cup unsalted butter, softened – The star of shortbread; use high-quality butter for best flavor
- 1 cup packed brown sugar – Light or dark both work beautifully; dark creates richer flavor
- 1 1/2 teaspoons pure vanilla extract – Enhances the brown sugar’s natural warmth
The Structure
- 2 1/4 cups all-purpose flour, spooned and leveled – Proper measuring prevents tough cookies
- 1/4 teaspoon salt – Essential for balancing sweetness and enhancing flavor
The Finishing Touch
- 1/2 cup coarse sugar – Sparkling sugar or Sugar in the Raw creates beautiful texture contrast
Prep Time: 30 minutes | Chilling Time: 4 hours | Baking Time: 15 minutes | Total Time: 4 hours 45 minutes | Yield: 24 cookies
Step-by-Step Instructions
Creating the Perfect Base
Begin by ensuring your butter is properly softened – it should yield easily to gentle pressure but not be melty or greasy. In a large bowl, use either a handheld or stand mixer to beat the butter and brown sugar together on medium-high speed. This process takes about 3-4 minutes and is crucial for creating the right texture. The mixture should become completely smooth and noticeably lighter in color.
Add the vanilla extract and beat briefly until well incorporated. This aromatic addition will perfume your entire kitchen with the promise of delicious cookies to come.
Incorporating the Dry Ingredients
Switch your mixer to low speed before adding the flour and salt. This prevents a flour explosion and ensures gentle incorporation. Beat just until the flour begins to disappear, then increase the speed to medium-high and continue beating until the dough comes together into a cohesive mass.
Don’t worry if the dough seems crumbly at first – this is completely normal. If it refuses to come together after a couple of minutes, stop the mixer and use your hands to gently press the crumbs together on your work surface. Sometimes a few drops of water on your hands helps bind stubborn dough, but usually, patience and gentle pressure work perfectly.
Shaping the Logs
With lightly floured hands, divide your dough in half. Each portion should weigh approximately 325 grams if you want to be precise. Roll each piece into an 8-inch log, working gently to create an even cylinder. The logs don’t need to be perfectly round – slight irregularities add to their homemade charm.
Adding the Sparkling Finish
Pour your coarse sugar onto a large plate and roll each log thoroughly until completely coated. This sugar coating isn’t just decorative – it creates a delightful textural contrast and helps the cookies develop beautiful golden edges during baking.
Press the sugar gently into the surface to ensure it adheres well. The logs should look like they’re covered in edible glitter, promising the wonderful crunch that awaits.
The Essential Chilling Process
Wrap each sugar-coated log tightly in plastic wrap and refrigerate for at least four hours, though overnight chilling produces even better results. This step isn’t optional – it’s absolutely crucial for achieving the perfect texture and preventing spreading during baking.
During this chilling time, the butter firms up, the flour fully hydrates, and the flavors meld together beautifully. Moreover, cold dough slices cleanly without cracking or crumbling, ensuring each cookie maintains its perfect round shape.
Baking to Golden Perfection
Preparation and Setup
Preheat your oven to 350°F and line two large baking sheets with parchment paper or silicone mats. This prevents sticking and ensures even browning across the bottom of each cookie.
Remove the chilled logs from the refrigerator and unwrap them carefully. Using a sharp knife, slice each log into 12 equal pieces, creating 24 cookies total. Clean your knife between cuts if the dough sticks, and don’t worry if a few cookies aren’t perfectly round.
The Baking Process
Arrange cookies on your prepared baking sheets, leaving about 2 inches between each one. These cookies don’t spread dramatically, but they do need some breathing room for even heat circulation.
Bake for 14-16 minutes, watching carefully during the final few minutes. The cookies are done when they’re set and lightly golden around the edges. The centers should still look slightly soft – they’ll continue cooking from residual heat after removal.
Resist the urge to overbake, as this creates hard, dry cookies instead of the tender, crumbly texture that makes shortbread so special.
Cooling and Storage Tips
Allow cookies to rest on the baking sheet for 5 minutes before transferring to a cooling rack. This brief pause prevents breaking while the cookies are at their most fragile stage. Once completely cool, they’ll develop their characteristic tender-crisp texture.
Store finished cookies in an airtight container at room temperature for up to one week. Interestingly, they actually become slightly crunchier after the first day as moisture continues to evaporate, creating a different but equally delicious texture experience.
Creative Variations to Explore
Chocolate Chip Enhancement
Fold 3/4 cup mini chocolate chips into the dough after adding the flour. The smaller chips distribute more evenly and won’t interfere with clean slicing. Dark chocolate chips complement the brown sugar beautifully, while white chocolate creates a sweeter, more indulgent cookie.
Spiced Holiday Version
Add 1/2 teaspoon ground cinnamon and 1/4 teaspoon each ground ginger and nutmeg to the flour mixture. This creates warmly spiced cookies perfect for autumn and winter celebrations. Consider rolling the logs in cinnamon sugar instead of plain coarse sugar for extra spice appeal.
Nutty Sophistication
Incorporate 1/2 cup finely chopped toasted pecans or walnuts into the dough. Toast the nuts lightly in a dry skillet first to intensify their flavor and ensure they stay crispy in the finished cookies.
Make-Ahead Magic
These cookies are incredibly freezer-friendly, making them perfect for holiday preparation or whenever you want homemade cookies with minimal effort. The dough logs freeze beautifully for up to three months – simply wrap them extra securely and label with the date.
When ready to bake, transfer frozen logs to the refrigerator overnight to thaw completely before slicing. Alternatively, baked cookies freeze equally well for up to three months in airtight containers.
Planning for Success
For the freshest cookies, prepare the dough logs on Sunday and keep them refrigerated for fresh cookies throughout the week. Simply slice and bake as many as you need, leaving the rest chilled for later. This approach ensures you always have cookie dough ready for unexpected guests or sudden cravings.
Professional Baking Secrets
Room temperature butter is crucial. Properly softened butter creams beautifully with the brown sugar, creating the tender texture shortbread is famous for. Cold butter won’t incorporate properly, while overly warm butter can make the dough greasy and cause excessive spreading.
Pack your brown sugar properly. When measuring brown sugar, pack it firmly into the measuring cup – it should hold its shape when turned out. This ensures you get the full flavor impact and proper sweetness balance.
Measure flour accurately. Use the spoon-and-level method rather than scooping directly with the measuring cup. Too much flour creates tough, dry cookies, while too little can cause excessive spreading.
Sharp knife, clean cuts. Use a sharp chef’s knife to slice the chilled logs, wiping it clean between cuts. This prevents dragging and ensures each cookie maintains its perfect round shape.
Troubleshooting Common Issues
Dough too crumbly? This usually means the butter wasn’t soft enough or wasn’t creamed long enough with the brown sugar. Try the hand-pressing method described in the instructions, or add a few drops of water to help bind the mixture.
Cookies spreading too much? This typically indicates the dough wasn’t chilled long enough or the oven temperature is too low. Ensure proper chilling time and verify your oven temperature with a thermometer.
Cookies too hard? Overbaking is the most common culprit. These cookies should still look slightly soft in the centers when you remove them from the oven. They’ll continue firming up as they cool.
Frequently Asked Questions
Can I use salted butter instead of unsalted? While unsalted butter is preferred for better flavor control, you can substitute salted butter if needed. Simply reduce the added salt to just a pinch to avoid overly salty cookies.
What’s the difference between light and dark brown sugar? Both work beautifully in this recipe. Light brown sugar creates a milder molasses flavor, while dark brown sugar produces deeper, more complex taste. Choose based on your preference for intensity.
Why is chilling the dough so important? Chilling serves multiple purposes: it firms the butter to prevent excessive spreading, allows the flour to fully hydrate for better texture, and makes the dough much easier to slice cleanly. Skipping this step results in misshapen cookies with poor texture.
Can I make smaller or larger cookies? Absolutely! For smaller cookies, divide each log into 16 pieces instead of 12, reducing baking time by 1-2 minutes. For larger cookies, slice into 10 pieces per log and add 1-2 minutes to the baking time.
How do I know when the cookies are perfectly done? Look for lightly golden edges while the centers still appear slightly underbaked. The cookies should feel set but not hard when gently pressed. They’ll continue cooking from residual heat after removal from the oven.
Can I skip the coarse sugar coating? While the coating adds wonderful texture and visual appeal, you can omit it if desired. The cookies will still taste delicious, though they’ll lack the signature sparkle and subtle crunch that makes them extra special.


