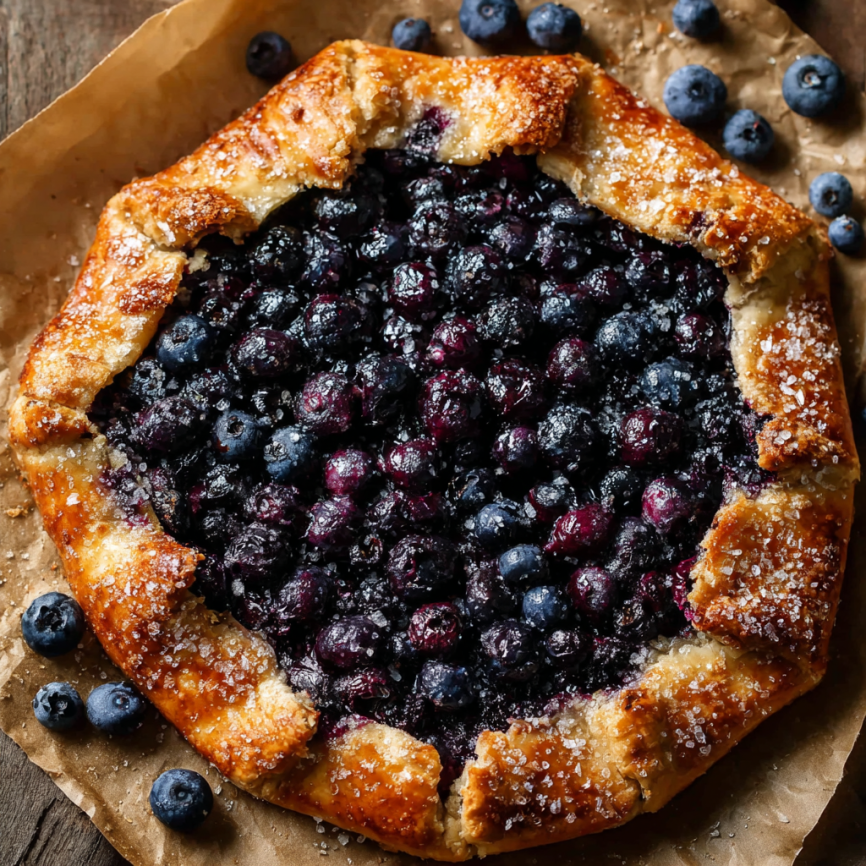
Every summer, when blueberry season reaches its peak, I find myself craving something that captures the essence of these jewel-toned berries without the fuss of traditional pie-making. Enter the blueberry galette – a free-form tart that delivers all the satisfaction of a classic blueberry pie with half the effort and twice the rustic charm.
My love affair with galettes began during a trip to a French countryside bakery, where I watched a baker effortlessly fold pastry around seasonal fruit. The imperfect, hand-shaped edges and golden, flaky crust spoke to something deeply appealing about homemade desserts. Unlike precise pies that demand perfect crimping and lattice work, galettes embrace imperfection and celebrate the natural beauty of simple ingredients.
This particular recipe holds a special place in my heart because it transforms humble ingredients into something extraordinary. The buttermilk cornmeal crust adds a subtle tang and delightful texture that perfectly complements the sweet-tart blueberry filling, while a hint of fresh lemon brightens every bite.
Why This Blueberry Galette Will Become Your Go-To Summer Dessert
Effortlessly Elegant: Despite its rustic appearance, this galette looks impressive enough for dinner parties yet simple enough for weeknight treats. The free-form nature means there’s no pressure to achieve perfection – every galette will be beautifully unique.
Faster Than Pie: While traditional pies require careful lattice work or precise top crusts, galettes come together in minutes. Simply roll, fill, and fold – no special techniques or equipment required.
Incredible Flavor Combination: The buttermilk cornmeal crust provides a subtle tang and pleasant texture that elevates this beyond ordinary fruit desserts. Meanwhile, fresh lemon zest and juice brighten the blueberries without overpowering their natural sweetness.
Seasonal Flexibility: Though perfect with summer blueberries, this recipe adapts beautifully to other seasonal fruits. Try it with peaches in August, apples in fall, or even frozen berries during winter months.
Make-Ahead Friendly: The dough can be prepared days in advance, making this an ideal dessert for entertaining or meal prep.
Essential Ingredients
For the Buttermilk Cornmeal Crust
- 1¼ cups (156g) all-purpose flour (spooned and leveled), plus extra for dusting
- ¼ cup (30g) fine cornmeal
- 3 tablespoons (38g) granulated sugar
- ¼ teaspoon salt
- ½ cup (113g) cold unsalted butter, cubed
- ¼ cup (60ml) cold buttermilk, plus more if needed
For the Blueberry Filling
- 4 cups (600g) fresh or frozen blueberries (no need to thaw frozen berries)
- ¼ cup (50g) granulated sugar
- 1 tablespoon (7g) cornstarch
- 2 teaspoons fresh lemon zest
- 1 tablespoon (15ml) fresh lemon juice
For Assembly and Finishing
- Egg wash: 1 large egg beaten with 1 tablespoon milk
- Coarse sugar for sprinkling (optional but recommended)
Perfect Pairings: Serve warm with vanilla ice cream, freshly whipped cream, or a dollop of crème fraîche for an extra special treat.
Step-by-Step Instructions
Creating the Perfect Crust
Begin with the foundation by whisking together flour, cornmeal, sugar, and salt in a medium bowl. The cornmeal adds both texture and a subtle nutty flavor that distinguishes this crust from standard pastry.
Cut in the cold butter using a pastry cutter or two forks until the mixture resembles coarse, pea-sized crumbs. This step is crucial for achieving the desired flaky texture – avoid overworking the mixture.
Add the buttermilk gradually, stirring just until the flour is moistened and the dough begins to clump together. If the mixture seems too dry, incorporate an additional tablespoon of buttermilk. The dough should hold together when pressed but not feel sticky.
Form and chill the dough by transferring the crumbly mixture to a lightly floured work surface. Gently bring it together with your hands, shaping into a ball before flattening into a 1-inch thick disc. Wrap tightly in plastic wrap and refrigerate for at least 1 hour, though it can be stored for up to 3 days.
Preparing the Blueberry Filling
Mix the filling ingredients just before rolling out the crust to prevent excess juice release. In a large bowl, gently combine blueberries, sugar, cornstarch, lemon zest, and lemon juice. Stir carefully until all berries are evenly coated and no powdery lumps remain.
Timing is important – don’t prepare the filling more than 10-15 minutes before assembly, as extended sitting time causes berries to release excessive juice that can make the bottom crust soggy.
Assembly and Baking
Prepare for baking by preheating the oven to 425°F (190°C) and lining a large baking sheet with parchment paper or a silicone baking mat.
Roll the dough on a lightly floured surface into a 12-14 inch circle. Don’t worry about achieving perfect roundness – the rustic, free-form shape is part of the galette’s charm. For a cleaner appearance, trim any particularly uneven edges, though this is entirely optional.
Transfer and fill by carefully moving the rolled dough to the prepared baking sheet. Spoon the blueberry filling into the center, leaving a 2-3 inch border around the edges for folding.
Create the signature galette shape by gently folding the dough edges over the fruit, overlapping sections as needed. Press lightly to seal the folds, then brush the crust edges with egg wash and sprinkle with coarse sugar for added texture and golden color.
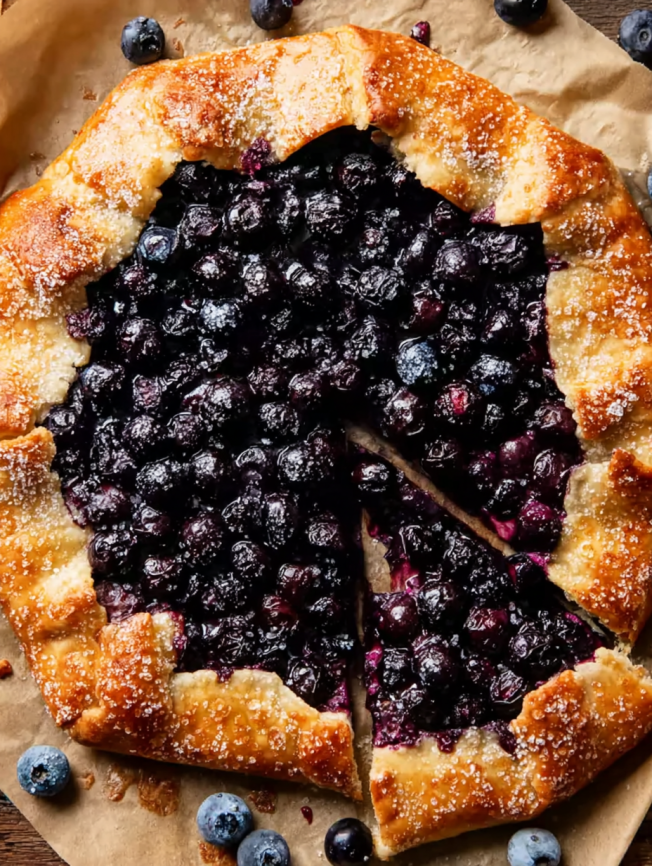
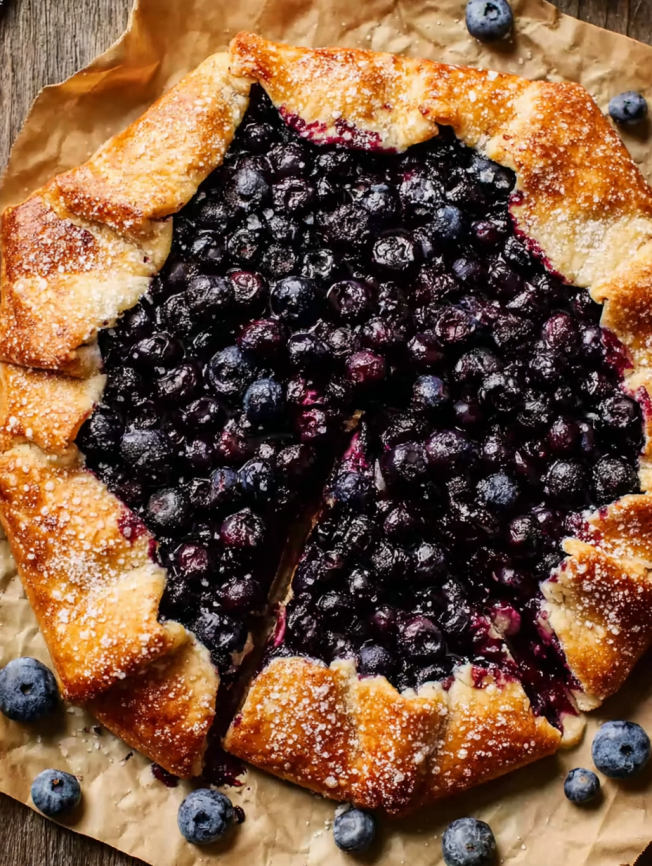
Bake to perfection for 28-32 minutes, until the filling bubbles actively and the crust achieves a beautiful golden brown color. Allow to cool on the baking sheet for 10 minutes before serving to prevent the filling from running.
Serving Suggestions and Presentation
Classic Comfort: Serve warm slices with generous scoops of vanilla ice cream, allowing it to melt slightly into the warm fruit juices.
Elegant Finishing: Dust with powdered sugar just before serving and garnish with fresh mint leaves for a restaurant-quality presentation.
Brunch Appeal: Cut into smaller wedges and serve alongside coffee or tea for a sophisticated morning treat that’s less heavy than traditional breakfast pastries.
Al Fresco Dining: This galette travels well for picnics and outdoor gatherings, maintaining its structure better than traditional pies.
Creative Variations
Seasonal Fruit Adaptations
Stone Fruit Galette: Replace blueberries with sliced peaches, plums, or apricots during late summer. Reduce the cornstarch slightly as stone fruits release less liquid.
Apple Cinnamon Version: Use thinly sliced apples with a pinch of cinnamon and nutmeg for a fall variation that’s equally delicious.
Mixed Berry Medley: Combine blueberries with raspberries and blackberries for a more complex flavor profile and stunning visual appeal.
Crust Modifications
Almond Enhancement: Add 2 tablespoons of finely ground almonds to the crust for extra richness and nutty flavor.
Herb-Infused Option: Incorporate 1 teaspoon of fresh thyme or lavender into the crust for an sophisticated, aromatic twist.
Whole Wheat Alternative: Substitute half the all-purpose flour with whole wheat pastry flour for added fiber and nutty flavor.
Make-Ahead Strategies
Dough Preparation: The crust can be made up to 3 days in advance and stored in the refrigerator, or frozen for up to 3 months. Thaw overnight in the refrigerator before using.
Partial Assembly: Roll out the dough and place it on the baking sheet up to 4 hours ahead. Cover with plastic wrap and refrigerate until ready to fill and bake.
Complete Make-Ahead: Assemble the entire galette and freeze unbaked for up to 1 month. Bake directly from frozen, adding 5-10 minutes to the cooking time.
Day-of Strategy: For entertaining, prepare the dough the night before and mix the filling just before guests arrive. Assembly takes only minutes, leaving you free to enjoy company.
Professional Tips and Techniques
Temperature Control: Ensure butter and buttermilk are genuinely cold – this creates steam pockets during baking that result in flaky layers. Some bakers even freeze the cubed butter for 10 minutes before use.
Flour Management: Measure flour correctly by spooning into the measuring cup and leveling with a knife. Too much flour creates a tough, dense crust.
Even Rolling: Roll from the center outward, rotating the dough frequently to maintain an even thickness and prevent sticking.
Juice Management: If your berries seem particularly juicy, add an extra teaspoon of cornstarch to prevent soggy bottoms.
Storage and Leftover Ideas
Optimal Storage: Store leftover galette covered at room temperature for up to 2 days, or refrigerate for up to 4 days. The crust stays crispest at room temperature.
Reheating Guidelines: Warm individual slices in a 350°F oven for 5-7 minutes to restore crispness, avoiding the microwave which makes pastry soggy.
Creative Repurposing: Crumble leftover galette over yogurt or oatmeal for breakfast, or use as a base for fruit trifle layered with whipped cream.
Frequently Asked Questions
Q: Can I use frozen blueberries instead of fresh? A: Absolutely! Use frozen berries directly from the freezer – don’t thaw them first. Frozen berries may release slightly more juice, so consider adding an extra teaspoon of cornstarch to the filling.
Q: What if I don’t have buttermilk? A: Create a simple substitute by adding ½ teaspoon of fresh lemon juice or white vinegar to a measuring cup, then filling to the ¼ cup mark with cold whole milk. Let sit for 5 minutes before using.
Q: Why is my crust tough instead of flaky? A: Tough crust typically results from overworking the dough or using warm ingredients. Keep butter and buttermilk very cold, and handle the dough minimally after adding liquid.
Q: Can I make this without cornmeal? A: Yes, though you’ll lose the distinctive texture and subtle flavor. Substitute the cornmeal with an equal amount of additional all-purpose flour for a more traditional pastry crust.
Q: How do I prevent a soggy bottom? A: Bake on the lower oven rack for the first 15 minutes to ensure bottom browning, and avoid over-mixing the filling which causes excess juice release.
Q: Is it normal for some juice to leak during baking? A: Yes, this is completely normal and part of the galette’s rustic charm. The parchment paper will catch any drips, and the caramelized fruit juices add to the dessert’s appeal.
Recipe Details:
- Prep Time: 20 minutes (plus chilling time)
- Cook Time: 28-32 minutes
- Total Time: 1 hour 30 minutes (including chilling)
- Yield: 8-10 servings


