The first time I successfully cracked through that perfect caramelized sugar crust to reveal the silky custard beneath, I knew I had discovered something magical. What seemed like an intimidating restaurant-only dessert suddenly felt achievable in my own kitchen. After years of perfecting this technique, I can confidently say that crème brûlée is far more approachable than most people realize.
This recipe transforms six simple ingredients into an extraordinary dessert that never fails to impress dinner guests. The secret lies in understanding a few key techniques and having the patience to let the custard chill properly. Once you master this classic French dessert, you’ll find yourself making it for every special occasion.
Why This Recipe Will Become Your Go-To Dessert
Restaurant-Quality Results at Home
This crème brûlée rivals anything you’d find in a high-end restaurant. The custard achieves that perfect balance between rich and light, while the caramelized sugar top provides the satisfying crack that makes this dessert so memorable.
Surprisingly Simple Technique
Despite its elegant reputation, crème brûlée requires only basic cooking skills. The most challenging part is tempering the eggs, but with proper technique, even beginners can achieve professional results on their first attempt.
Perfect Make-Ahead Option
Busy hosts will love that this dessert actually improves with time. The custards can be prepared up to two days in advance, making them ideal for dinner parties when you want to focus on your guests rather than last-minute dessert preparation.
Impressive Presentation Factor
Few desserts create the same “wow” moment as crème brûlée. The dramatic torch caramelization and elegant individual servings make every guest feel special, elevating any meal into a memorable dining experience.
Essential Ingredients for Perfect Custard
Equipment You’ll Need
- 8 shallow 4-ounce oval ramekins (for optimal surface area and even cooking)
Core Custard Components
- 5 large egg yolks (at room temperature for easier mixing)
- ¾ cup (150g) granulated sugar, divided (half for custard, half for caramelized topping)
- 3 cups (720ml) heavy cream or heavy whipping cream (the foundation of silky texture)
Flavor Enhancers
- ½ teaspoon espresso powder (optional but highly recommended for depth)
- ¼ teaspoon salt (balances sweetness and enhances all flavors)
- 1½ teaspoons pure vanilla extract (never compromise on quality here)
Step-by-Step Instructions for Success
Preparation Phase
Start by preheating your oven to 325°F (163°C). Meanwhile, bring a kettle or small pot of water to boil—you’ll need this hot water later for the crucial water bath that ensures gentle, even cooking.
Creating the Base Mixture
In a medium bowl, whisk together egg yolks and ½ cup (100g) of granulated sugar until well combined. The mixture should be smooth and slightly lightened in color. Set this aside while you prepare the cream mixture.
Heating the Cream Mixture
Combine heavy cream, espresso powder, and salt in a medium saucepan over medium heat. Watch carefully as the mixture heats, stirring occasionally to ensure the espresso powder dissolves completely. Remove from heat immediately when you see the first signs of simmering—overheating can cause the cream to curdle.
Stir in vanilla extract once the cream is off the heat. The residual warmth will help distribute the vanilla throughout the mixture.
The Critical Tempering Process
This step requires patience and constant motion to prevent scrambled eggs. Remove about ½ cup of the warm cream mixture and slowly drizzle it into the egg yolk mixture while whisking continuously. Keep those egg yolks moving throughout this process.
Once the egg yolks are warmed, reverse the process by slowly pouring the tempered egg mixture back into the remaining warm cream while whisking steadily. This gradual temperature adjustment creates the smooth, lump-free custard base you’re aiming for.
Setting Up for Baking
Place your ramekins in a large baking pan—if you don’t have one large enough, use multiple pans. Divide the custard mixture evenly among the ramekins, filling them nearly to the top for the best ratio of custard to caramelized sugar.
Carefully pour the hot water into the baking pan until it reaches about ½ inch up the sides of the ramekins. This water bath (bain-marie) is essential for gentle, even cooking that prevents curdling.
Baking to Perfection
Using oven mitts, carefully transfer the pan to your preheated oven. Baking time varies depending on ramekin depth, but start checking at 30 minutes. Look for edges that appear set while centers remain slightly jiggly—they should move as one unit when gently shaken.
For the most accurate doneness test, use an instant-read thermometer. The custard is perfectly cooked when it registers 170°F (77°C) in the center.
Cooling and Chilling
Remove the pan from the oven and carefully lift each ramekin from the water bath using oven mitts. Place them on a wire cooling rack for at least one hour at room temperature.
Once cooled, cover the custards loosely and refrigerate for a minimum of four hours. This chilling time is crucial for achieving the proper texture—rushing this step will result in a loose, unset custard.
Creative Serving Suggestions
Classic Presentation
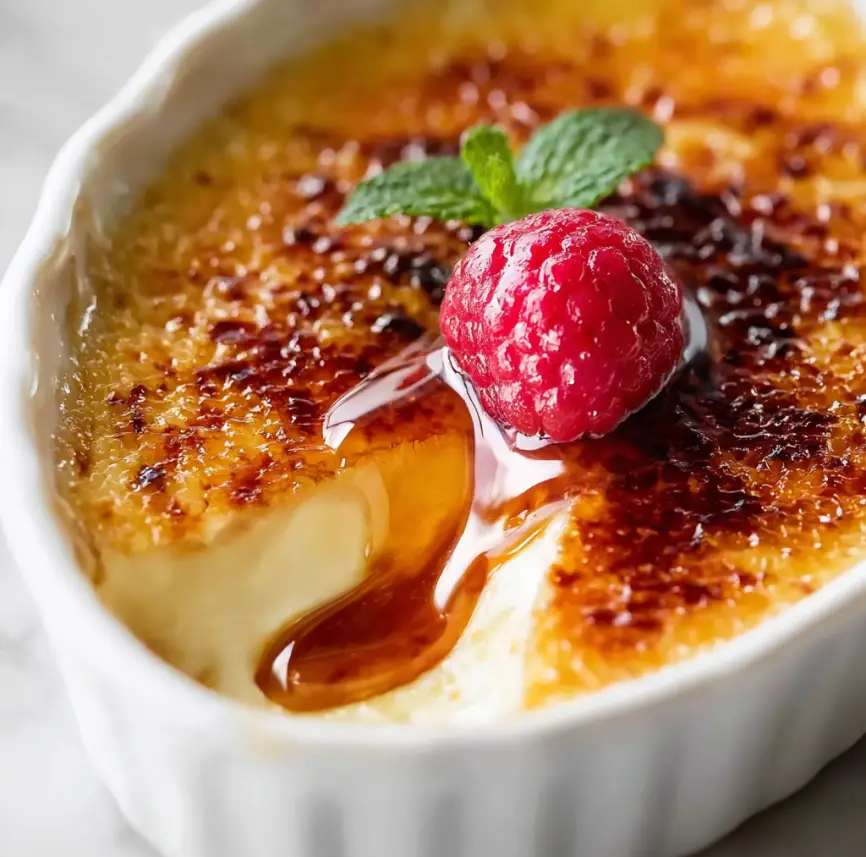
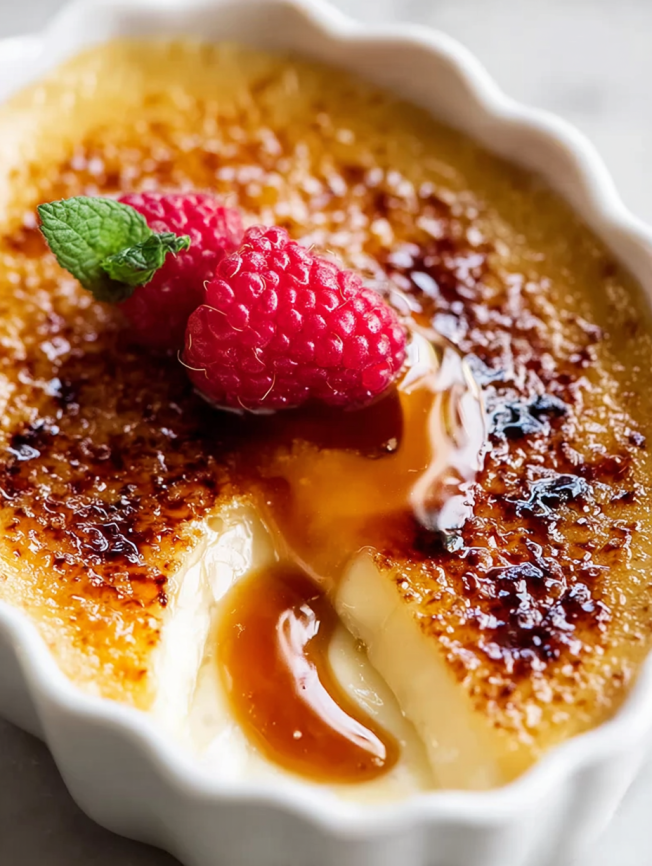
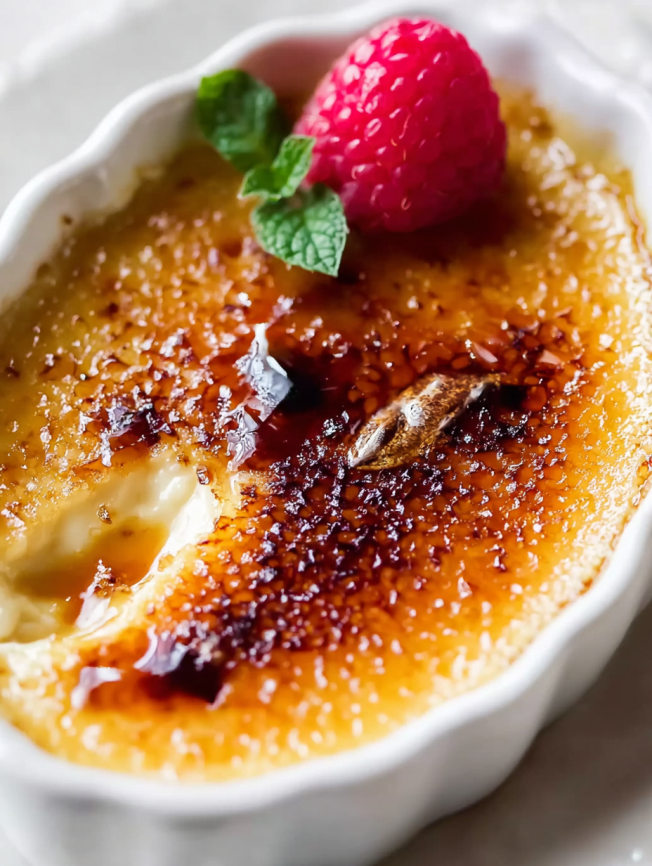
Serve crème brûlée in its traditional form with a light sprinkle of fresh berries or a delicate mint leaf for color contrast. The simple elegance needs no embellishment beyond the perfect caramelized sugar crust.
Seasonal Variations
During summer months, pair with fresh strawberries or raspberries. Winter presentations benefit from a light dusting of cinnamon or a few toasted nuts for added warmth and texture.
Wine Pairings
These rich custards pair beautifully with dessert wines like Sauternes or Port. For a non-alcoholic option, serve alongside espresso or strong coffee to complement the subtle coffee notes in the custard.
Delicious Recipe Variations
Flavor Infusions
Transform the basic recipe by infusing the cream with different flavors. Try steeping earl grey tea, lavender, or citrus zest in the warm cream before straining and proceeding with the recipe.
Chocolate Crème Brûlée
Add 2 ounces of melted dark chocolate to the warm cream mixture for a decadent chocolate version. Reduce the sugar slightly to balance the added sweetness from the chocolate.
Seasonal Fruit Additions
Place a small spoonful of fruit compote or fresh berries in the bottom of each ramekin before adding the custard mixture. This creates a delightful surprise layer beneath the smooth custard.
Smart Make-Ahead Strategies
Advance Preparation Timeline
The custard mixture can be prepared and stored in the refrigerator for up to one day before baking. This advance preparation actually improves the flavor as ingredients have more time to meld together.
Extended Storage Options
Baked custards keep beautifully in the refrigerator for up to two days before adding the sugar topping. This flexibility makes them perfect for entertaining when you want to minimize day-of preparation.
Caramelizing Timing
While the custards can be prepared well in advance, the caramelized sugar topping is best created just before serving. However, if necessary, torched custards can be refrigerated for up to one hour while maintaining most of their textural appeal.
Professional Tips and Techniques
Equipment Considerations
Shallow, wide ramekins provide the ideal surface area for caramelization while ensuring even cooking. If you don’t own ramekins, a large, wide ceramic dish works, though you’ll need to adjust the baking time accordingly.
Heavy Cream Substitutions
While heavy cream produces the richest results, half-and-half can be substituted for a lighter texture. The custard will still be delicious, though slightly less indulgent than the traditional version.
Espresso Enhancement
Don’t skip the espresso powder—it doesn’t make the custard taste like coffee but rather enhances all the other flavors. If espresso powder isn’t available, substitute two teaspoons of high-quality instant coffee for similar results.
Vanilla Quality Matters
Pure vanilla extract makes a noticeable difference in the final flavor. Alternatively, scrape seeds from half a vanilla bean or use one teaspoon of vanilla bean paste for an even more luxurious taste experience.
Frequently Asked Questions
Q: Can I make crème brûlée without a kitchen torch? A: Absolutely! Use your oven’s broiler instead. Place the sugar-topped custards on a baking sheet directly under the broiler on high heat. Watch carefully as the sugar caramelizes, rotating the pan if needed for even browning.
Q: Why did my custard curdle or have lumps? A: This usually happens when the eggs get too hot too quickly. Always temper the eggs gradually by adding warm cream slowly while whisking constantly. If it does happen, strain the mixture through a fine-mesh sieve before baking.
Q: How do I know when the custard is properly set? A: The edges should be firm while the center remains slightly jiggly when gently shaken. An instant-read thermometer should register 170°F (77°C) in the center for perfect doneness.
Q: Can I use a different type of sugar for the topping? A: Regular granulated sugar works best for caramelization. Brown sugar can be used but may not create as clean a crack, while superfine sugar caramelizes too quickly and can burn easily.
Q: What’s the best way to store leftover crème brûlée? A: Store unbaked custards covered in the refrigerator for up to two days. Once caramelized, they’re best enjoyed immediately, though they can be refrigerated for up to one hour if necessary.
Q: Why is my caramelized sugar not hardening properly? A: This often happens in humid conditions or if the custard surface is too moist. Pat the custard surface dry with a paper towel before adding sugar, and ensure you’re using enough heat to properly caramelize the sugar.
Q: Can I make one large crème brûlée instead of individual servings? A: Yes, but use a wide, shallow ceramic or glass dish and increase the baking time significantly. The custard should still register 170°F (77°C) in the center when done.
Prep Time: 15 minutes | Cook Time: 35 minutes | Total Time: 4 hours, 50 minutes | Serves: 8


