There’s something deeply satisfying about sliding a golden, flaky chicken pot pie out of the oven on a cold winter evening. The aroma alone has the power to transform any house into a home, filling every corner with warmth and the promise of comfort. I’ll never forget the first time I attempted this recipe during a particularly harsh January—my kitchen windows were fogged with steam, snow was piling up outside, and I needed something that would wrap my family in culinary love.
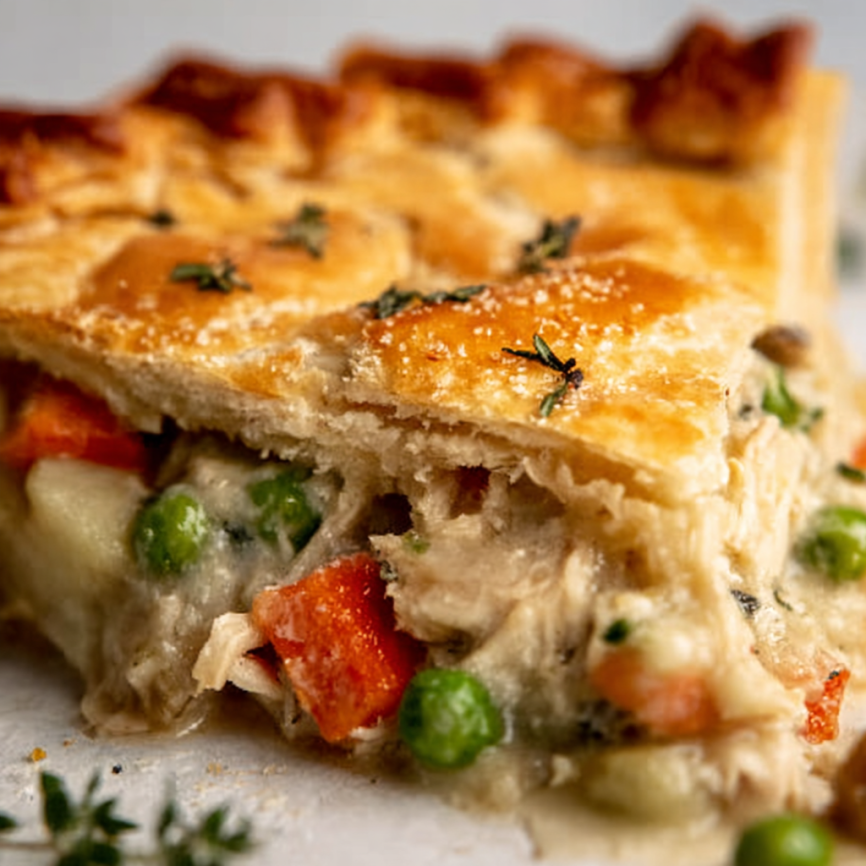
What emerged from that oven was more than just dinner; it was a masterpiece of layers—buttery, flaky crust giving way to tender chunks of chicken swimming in a rich, herb-scented gravy alongside perfectly cooked vegetables. This isn’t a shortcut version or a quick weeknight dinner. Instead, it’s the kind of recipe you make when you want to create something truly special, when the journey matters as much as the destination.
The beauty of this double crust pot pie lies in its perfect balance of textures and flavors, each component working in harmony to create something greater than the sum of its parts.
Why This Recipe Will Become Your Go-To Comfort Food
Complete Meal Satisfaction
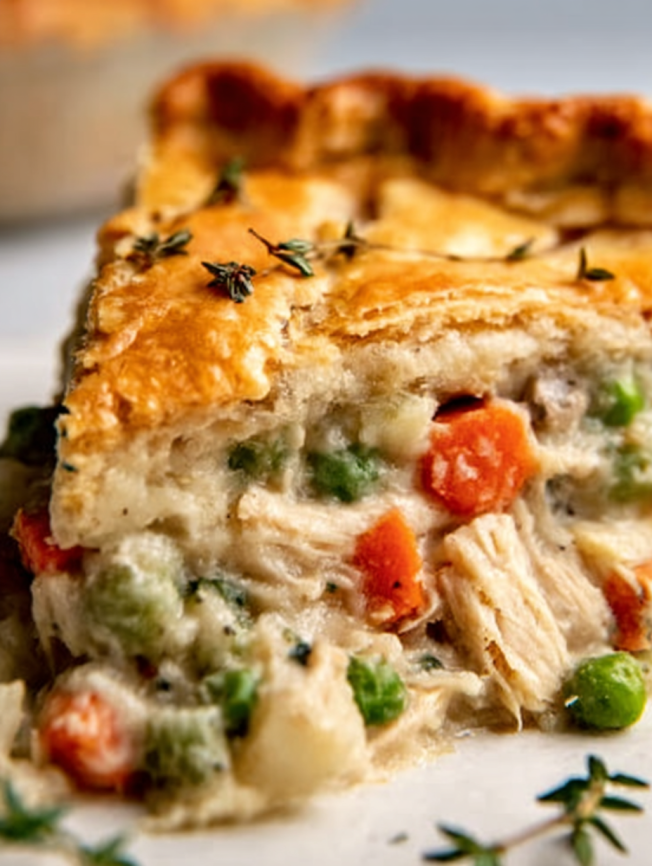
Unlike single-crust pot pies, this version provides the ultimate comfort food experience with flaky pastry both above and below the filling. Every bite delivers the perfect ratio of crust to filling, ensuring no forkful lacks that buttery, tender pastry texture.
Restaurant-Quality Results
This recipe produces the kind of pot pie you’d expect from a high-end comfort food restaurant. The thick, rich gravy clings perfectly to tender vegetables and succulent chicken pieces, while the golden crust provides both visual appeal and textural contrast.
Perfect Make-Ahead Option
Busy schedules don’t have to derail comfort food dreams. Multiple components can be prepared days in advance, making this elaborate-seeming dish surprisingly manageable for working families and busy hosts.
Customizable Foundation
Once you master this basic technique, endless variations become possible. Seasonal vegetables, different proteins, and herb combinations allow you to personalize this classic to suit your family’s preferences and dietary needs.
Essential Ingredients for Perfect Pot Pie
Flaky Crust Foundation
- Homemade pie crust or all-butter pie crust (both recipes yield 2 crusts)
Protein and Vegetable Base
- 1 pound (450g) skinless boneless chicken breast or thighs (cubed for even cooking)
- 1 cup (130g) sliced carrots (approximately 2 medium carrots)
- ½ cup (40g) sliced celery (adds crucial aromatic foundation)
- ⅓ cup (45g) chopped yellow onion (half of a small onion)
- 1 teaspoon minced garlic (fresh provides best flavor)
Rich Gravy Components
- ⅓ cup (5 Tbsp; 71g) unsalted butter (creates rich flavor base)
- ⅓ cup (41g) all-purpose flour (thickening agent for perfect consistency)
- 1¾ cups (420ml) chicken broth or stock (reduced sodium recommended)
- ⅔ cup (160ml) half-and-half (adds luxurious creaminess)
Seasoning and Finishing Elements
- ¾ teaspoon salt (adjust to taste)
- ½ teaspoon freshly ground black pepper (freshly ground makes a difference)
- 1 teaspoon dried thyme leaves (signature pot pie herb)
- 1 cup (125g) frozen peas (adds color and sweetness)
- Egg wash: 1 large egg beaten with 1 tablespoon milk (for golden crust)
Step-by-Step Assembly Instructions
Crust Preparation Phase
Begin by preparing your chosen pie crust recipe through the fifth step, including the crucial 2-hour chilling period. Many bakers find success preparing the crust the night before, as proper chilling is essential for handling and prevents shrinkage during baking.
Creating the Protein and Vegetable Base
In a large pot, combine cubed chicken, sliced carrots, and celery pieces. Add enough water to completely cover all ingredients, then place over medium-high heat. Bring the mixture to a rolling boil and maintain for exactly 10 minutes to ensure the chicken cooks through while vegetables become tender-crisp.
Remove from heat immediately and drain thoroughly. This pre-cooking step ensures even cooking throughout the final dish and prevents the vegetables from becoming mushy during the extended baking process.
Building the Flavor Foundation
In a large skillet over medium heat, combine butter, chopped onions, and minced garlic. Stir occasionally as the mixture cooks, watching for the onions to become translucent and the butter to develop a light golden color—this usually takes 3-4 minutes.
Developing the Rich Gravy
Add flour to the butter mixture, whisking constantly to prevent lumps from forming. Continue cooking for about one minute to eliminate the raw flour taste. Gradually whisk in salt, black pepper, thyme, chicken broth, and half-and-half, maintaining constant motion to ensure smooth incorporation.
Continue cooking and whisking until no flour lumps remain visible. Reduce heat to medium-low and simmer for approximately 10 minutes, stirring frequently. The goal is achieving a very thick gravy consistency—it should coat a spoon heavily and cling to the back of your whisk.
Taste the gravy and adjust seasonings as needed. Many cooks find they prefer additional thyme or a touch more pepper at this stage.
Oven Preparation
Preheat your oven to 425°F (218°C) while you prepare the assembly components. This high temperature is crucial for achieving the golden, flaky crust that makes this pot pie extraordinary.
Rolling and Fitting the Bottom Crust
On a generously floured work surface, roll out one disc of chilled pie dough, keeping the second disc refrigerated. Turn the dough a quarter turn after every few rolls until you achieve a circle approximately 12 inches in diameter.
Carefully transfer the rolled dough to a 9-inch pie dish that’s 1.5-2 inches deep. Gently tuck the dough into place with your fingers, ensuring it sits smoothly against the bottom and sides without stretching, which can cause shrinkage.
Using a sharp knife or kitchen shears, trim excess overhang, leaving about ½ inch beyond the pie dish edge.
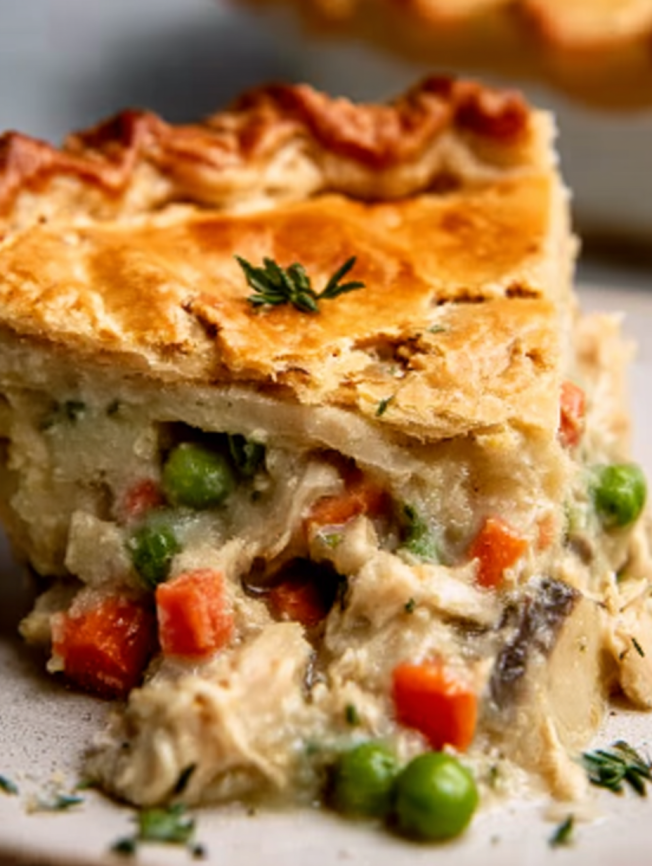
Assembling the Filling Layers
Spoon the cooked chicken and vegetable mixture evenly into the prepared crust. Scatter frozen peas over the top—there’s no need to thaw them first, as they’ll cook perfectly during baking.
Pour the prepared gravy evenly over the entire surface, using a spoon to distribute it into all corners and crevices. The thick consistency should stay in place rather than pooling.
Creating the Top Crust
Roll out the second disc of pie dough using the same technique as the first. Carefully drape it over the filled pie, ensuring complete coverage of the filling.
Trim the excess dough, leaving enough overhang to create a proper seal with the bottom crust. Crimp the edges using a fork or your preferred decorative technique, pressing firmly to seal completely.
Using a sharp knife, cut several small slits in the top crust to allow steam to escape during baking. Brush the entire surface, including edges, with egg wash for a golden, professional appearance.
Creative Serving Suggestions
Classic Comfort Presentation
Serve generous squares of pot pie alongside a simple green salad dressed with light vinaigrette. The fresh, crisp salad provides a perfect contrast to the rich, warming pie while helping balance the meal nutritionally.
Seasonal Accompaniments
During autumn and winter months, pair with roasted root vegetables or steamed green beans. Spring presentations benefit from fresh asparagus or early peas, while summer calls for fresh corn on the cob or sliced tomatoes.
Elegant Dinner Party Service
For special occasions, serve smaller portions as a first course, followed by a lighter main dish. The rich, satisfying nature of pot pie makes it perfect for multi-course meals when portioned appropriately.
Delicious Recipe Variations
Protein Alternatives
Turkey works wonderfully in place of chicken, especially during holiday seasons when you have leftover roasted turkey. Pre-cooked meats can be used—simply skip the initial boiling step and cook carrots and celery with the onion and butter mixture.
Vegetable Enhancements
Frozen or fresh corn adds sweetness and color when included with the peas. Diced Yukon Gold potatoes create heartier texture—cook them with the onion and butter until fork-tender before proceeding.
Sliced mushrooms or chopped zucchini provide additional vegetables and flavors. Add up to one cup of sliced mushrooms when cooking the onion and butter for best results.
Crust Alternatives
For variety, try a puff pastry top crust instead of traditional pie dough, though keep in mind the bottom may become slightly soggy. Biscuit toppings create a completely different but equally delicious presentation—simply skip the bottom crust and top with drop biscuits.
Herb and Seasoning Variations
Fresh chopped parsley, rosemary, or sage enhance the herb profile beautifully. A pinch of celery seed adds subtle complexity, while maintaining the essential thyme, salt, and pepper base.
Strategic Make-Ahead Planning
Component Preparation
The filling and gravy can be prepared completely one day in advance. Store covered in the refrigerator, then assemble and bake as directed the following day. This advance preparation actually improves flavors as ingredients have time to meld.
Crust Management
Pie crust dough stores beautifully in the refrigerator for up to five days or in the freezer for up to three months. When freezing, wrap tightly and thaw overnight in the refrigerator before rolling.
Freezing Complete Pies
Both unbaked and baked pot pies freeze excellently for 2-3 months. Unbaked pies can go directly from freezer to oven, though baking time will increase. Baked pies should be covered with foil and reheated at 375°F until warmed through.
Storage and Reheating
Leftover pot pie keeps in the refrigerator for up to five days in an airtight container. The filling actually thickens further overnight, creating an even richer texture the next day. Reheat individual portions in the microwave or warm entire remaining pie in a 350°F oven.
Professional Tips and Techniques
Crust Success Strategies
Keeping pie dough properly chilled throughout the process prevents shrinkage and ensures flaky layers. If the dough becomes too warm during rolling, return it to the refrigerator for 15-20 minutes before continuing.
Gravy Consistency Goals
The gravy should be noticeably thicker than typical breakfast gravy, as it will thin slightly during baking. If your gravy seems too thin, simmer longer until it heavily coats a spoon. Too thick? Whisk in additional broth gradually.
Even Cooking Techniques
Pre-cooking the protein and vegetables ensures everything finishes cooking simultaneously during baking. This step prevents overcooked crust with undercooked filling, a common pot pie pitfall.
Crust Protection Methods
Covering crust edges with foil or using a pie crust shield after 20 minutes prevents over-browning while allowing the center to finish cooking properly. This technique ensures evenly golden results throughout.
Frequently Asked Questions
Q: Can I use store-bought pie crusts instead of homemade? A: Absolutely! Two 9-inch refrigerated or thawed frozen pie crusts work perfectly. While homemade crusts provide superior flavor and texture, quality store-bought versions create delicious results when time is limited.
Q: What if I want to skip the bottom crust? A: Simply combine the finished gravy with the cooked chicken mixture and spoon directly into an ungreased pie dish. Reduce oven temperature to 375°F and bake for 35-40 minutes until the top crust is golden brown.
Q: How do I prevent a soggy bottom crust? A: Pre-baking (blind baking) the bottom crust for 10 minutes before adding filling helps prevent sogginess. Additionally, ensure your filling isn’t too hot when assembling, and avoid overly thin gravy consistency.
Q: Can I substitute different vegetables? A: Certainly! Maintain approximately 2 cups total vegetables plus one potato maximum to ensure adequate gravy coverage. Popular additions include corn, mushrooms, and diced potatoes, but avoid using all variations simultaneously.
Q: Why is my gravy lumpy? A: Lumps typically form when flour isn’t whisked in gradually or when liquid is added too quickly. To fix lumpy gravy, strain it through a fine-mesh sieve or whisk vigorously while simmering to break up lumps.
Q: How do I know when the pot pie is done? A: The crust should be golden brown all over, and the filling should be bubbling around the edges. If the crust browns too quickly, cover with foil and continue baking until the filling bubbles actively.
Q: Can I make individual pot pies instead? A: Yes! Divide the filling among 6-8 individual ramekins or small pie dishes. Adjust baking time to 20-25 minutes, watching for golden brown crusts and bubbling filling.
Prep Time: 2 hours, 50 minutes | Cook Time: 35 minutes | Total Time: 3 hours, 25 minutes | Serves: 8


