There’s something deeply satisfying about the idea of homemade cherry pie – that perfect balance of tart fruit nestled in flaky pastry, topped with golden crumbles. Yet the reality of rolling out pie dough and crimping edges often keeps this classic dessert relegated to special occasions. These cherry pie bars changed everything for me, delivering all the beloved flavors of traditional cherry pie in a format that’s infinitely more approachable.
The first time I made these bars, I was amazed by how the simple one-bowl crust mixture transforms into both a sturdy base and a delightfully crumbly topping. Meanwhile, the homemade cherry filling bubbles away on the stovetop, filling the kitchen with the most incredible aroma. What truly won me over, however, was discovering that these bars actually improve after a day or two, making them perfect for meal prep or entertaining.
Why These Cherry Pie Bars Are Simply Irresistible
Simplified Cherry Pie Experience
All the classic flavors of cherry pie come together in these bars without the intimidating process of pastry-making. The same mixture creates both crust and topping, streamlining preparation while delivering exceptional results.
Perfect Texture Combination
The oat-studded base provides a satisfying crunch that contrasts beautifully with the jammy cherry filling. Additionally, the crumble topping adds another layer of texture that makes each bite interesting and complex.
Make-Ahead Convenience
Unlike traditional pie, these bars are designed to be made in advance. They actually taste better after cooling completely, and the flavors continue to develop even after a day of storage. This quality makes them ideal for potlucks, bake sales, or busy weeknight desserts.
Portion Control Built-In
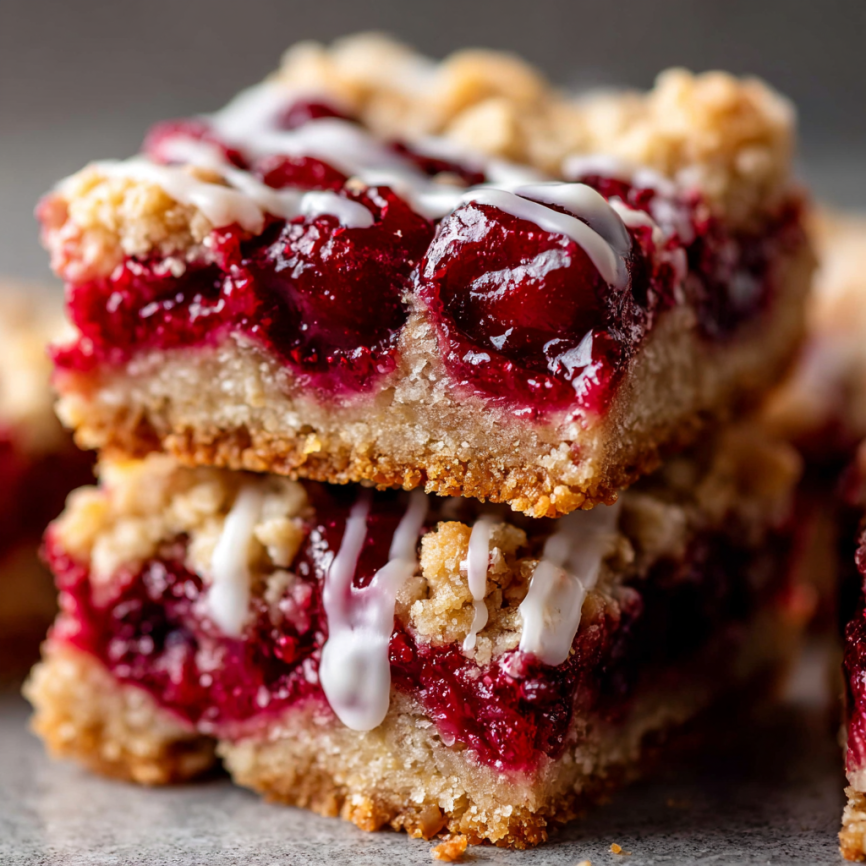
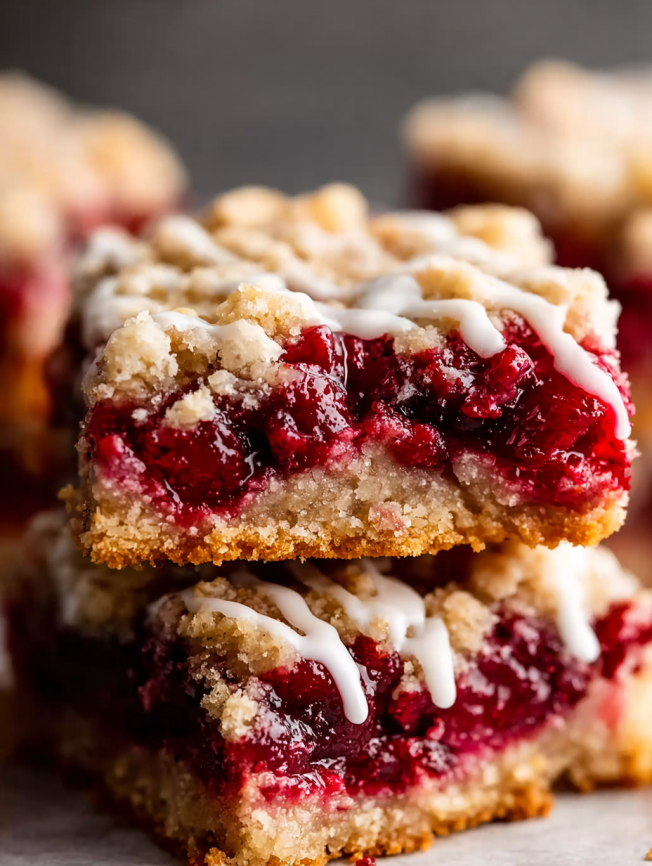
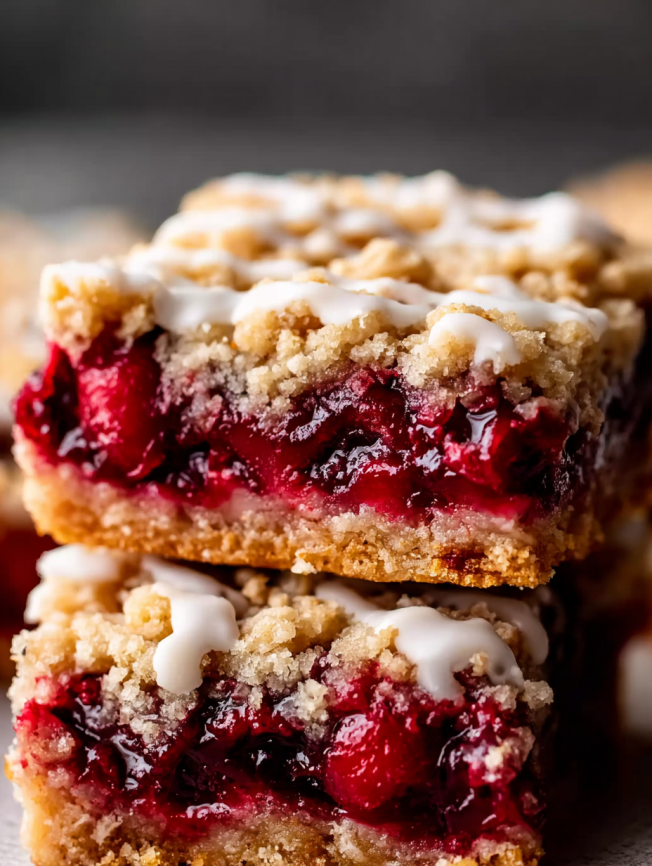
Cutting these bars into neat squares creates perfectly portioned servings that are easy to serve and enjoy. No messy pie slicing or worry about pieces falling apart – just clean, attractive squares ready to impress.
Essential Ingredients
For the Crust and Topping
- 1½ cups all-purpose flour (spooned and leveled for accuracy)
- 1 cup plus 2 tablespoons old-fashioned rolled oats (divided between crust and topping)
- ½ cup packed brown sugar (light or dark, depending on preference)
- 1 teaspoon baking powder (ensures proper texture)
- 1 teaspoon fresh lemon zest (brightens the overall flavor)
- ⅛ teaspoon salt (enhances all other flavors)
- 10 tablespoons unsalted butter (melted for easy mixing)
- 1 teaspoon pure vanilla extract
For the Cherry Filling
- 1½ tablespoons cornstarch (essential thickening agent)
- 3½ cups frozen sour cherries (do not thaw before using)
- ½ cup granulated sugar (balances cherry tartness)
- 1 teaspoon fresh lemon juice (enhances cherry flavor)
- ¼ teaspoon almond extract (complements cherry beautifully)
For the Optional Almond Icing
- 1 cup confectioners’ sugar (creates smooth, sweet glaze)
- 2 tablespoons milk (adjust for desired consistency)
- ¼ teaspoon almond extract (ties together the flavor profile)
Step-by-Step Instructions
Initial Preparation
Preheat your oven to 350°F and line a 9-inch square baking pan with parchment paper, leaving overhang on the sides for easy removal. This step is crucial for clean presentation and easy serving later.
Creating the Versatile Base Mixture
In a medium bowl, whisk together flour, 1 cup of oats, brown sugar, baking powder, lemon zest, and salt until evenly distributed. The lemon zest adds a subtle brightness that elevates the entire dessert, so don’t skip this ingredient.
Pour in the melted butter and vanilla extract, then stir until the mixture resembles moist, crumbly sand with no dry spots remaining. The consistency should hold together when pressed but still feel loose and sandy.
Forming the Foundation
Measure out approximately two-thirds of the crust mixture (about 2 cups) and press it firmly into the prepared baking pan. Use your hands, a large spoon, or the bottom of a measuring cup to create an even, compact layer that will serve as your sturdy base.
Bake this crust for exactly 10 minutes, then remove from the oven to cool slightly while you prepare the filling. This partial pre-baking ensures the bottom crust won’t become soggy from the fruit filling.
Crafting the Perfect Cherry Filling
Place cornstarch in a small bowl and keep it within easy reach of your stovetop – you’ll need to work quickly once the cherries start releasing their juices. In a medium saucepan over medium heat, combine the frozen cherries, granulated sugar, and lemon juice.
Cook the mixture, stirring occasionally, until the cherries begin releasing their natural juices, which typically takes 4-6 minutes. The frozen cherries will gradually thaw and soften during this process.
The Thickening Technique
Once the cherries are actively releasing juice, carefully remove 2-3 spoonfuls of the hot liquid and add it to your bowl of cornstarch. Using a fork, whisk this mixture until the cornstarch completely dissolves, creating a smooth slurry.
Return this cornstarch mixture to the saucepan and stir it into the cherry filling. Bring the entire mixture to a boil, then continue cooking while stirring occasionally until the filling thickens noticeably, approximately 10 minutes. Remove from heat and stir in the almond extract.
Assembly and Final Baking
Pour the hot cherry filling over the warm, pre-baked crust, spreading it evenly to the edges. Take the remaining crust mixture and stir in the reserved 2 tablespoons of oats for extra texture in the topping.
Sprinkle this enhanced crumble mixture evenly over the cherry filling, then lightly press it down with the back of a large spoon or flat spatula. This gentle pressing helps the topping adhere while baking.
Achieving Perfect Doneness
Bake the assembled bars for 40-50 minutes, watching for a lightly browned top and checking with a toothpick for doneness. The toothpick should come out mostly clean but may have a few jammy cherry specks – this indicates perfect moisture balance.
The Crucial Cooling Period
Allow the bars to cool completely in the pan on a wire rack, which typically takes about 2-3 hours at room temperature. For faster cooling, place the entire pan in the refrigerator after the first hour. Complete cooling is essential for clean cutting and proper texture development.
Serving Suggestions
Elegant Presentation
Cut the completely cooled bars into neat squares using a sharp knife, wiping the blade clean between cuts for professional-looking results. Arrange on a serving platter or individual plates for an attractive presentation.
Perfect Accompaniments
These bars shine on their own but pair wonderfully with vanilla ice cream, whipped cream, or a dollop of Greek yogurt. For special occasions, consider serving alongside other fruit-based desserts for a beautiful dessert spread.
Seasonal Serving Ideas
During summer months, serve these bars slightly chilled from the refrigerator for a refreshing treat. In cooler weather, they’re equally delicious at room temperature with a warm beverage.
Creative Variations
Fruit Substitutions
While sour cherries are traditional, you can experiment with other tart fruits. Fresh or frozen cranberries work beautifully with slight sugar adjustments, as do tart apples or pears when diced small.
Flavor Enhancements
Consider adding a pinch of cinnamon or cardamom to the filling for warm spice notes. Orange zest can replace the lemon zest for a different citrus dimension, while a splash of vanilla extract in the filling adds depth.
Texture Modifications
For extra crunch, fold chopped toasted almonds or pecans into the crumble topping. Alternatively, substitute part of the oats with chopped walnuts for a different textural element.
Make-Ahead Tips
Advance Preparation
These bars are actually designed to be made ahead, as the flavors improve and meld overnight. Store the completely cooled, uncut bars covered in the refrigerator for up to one week, then bring to room temperature before serving if desired.
Freezing Guidelines
Baked and cooled bars freeze exceptionally well for up to 3 months. Wrap individual squares in plastic wrap, then store in freezer bags for easy portion control. Thaw overnight in the refrigerator before serving.
Icing Timing
If using the optional almond icing, apply it only after the bars have cooled completely and just before serving. This timing prevents the icing from absorbing into the bars and maintains its attractive appearance.
Important Notes
Cherry Selection Matters
This recipe specifically calls for frozen sour cherries, which maintain their shape and provide the perfect tartness balance. Canned cherries are not recommended as they’re often too soft and may contain additives that affect the final texture.
Sugar Adjustments for Sweet Cherries
If you prefer using dark sweet cherries instead of sour, reduce the filling sugar to ⅓ cup and add an extra teaspoon of lemon juice to maintain the proper sweet-tart balance that makes these bars so appealing.
Pan Size Considerations
A 9-inch square pan creates bars with the ideal thickness and texture ratio. While you can double the recipe for a 9×13 pan, the smaller batch yields better results with more concentrated flavors.
Cutting Technique
For the cleanest cuts, use a sharp knife and wipe it completely clean between each cut. This technique prevents the sticky cherry filling from dragging and creates professional-looking squares.
Frequently Asked Questions
Q: Can I use fresh cherries instead of frozen? A: Fresh sour cherries work beautifully in this recipe. Use the same amount and cooking method, though fresh cherries may release their juices slightly faster than frozen ones.
Q: Why do the bars need to cool completely before cutting? A: Complete cooling allows the filling to set properly and the flavors to meld. Cutting too early results in messy, unstable bars that don’t hold their shape well.
Q: How do I know when the cherry filling is thick enough? A: The filling should coat the back of a spoon and hold its shape when stirred. It will continue to thicken slightly as it cools, so don’t over-reduce it on the stovetop.
Q: Can I make these bars without the almond icing? A: Absolutely! The bars are delicious on their own. The icing adds visual appeal and extra sweetness, but it’s entirely optional based on your preferences.
Q: What’s the best way to store leftover bars? A: Store covered bars at room temperature for up to 2 days or refrigerated for up to one week. The texture and flavor actually improve after the first day of storage.
Q: Can I substitute quick oats for old-fashioned oats? A: Old-fashioned oats provide better texture and don’t break down as much during baking. Quick oats can work in a pinch but won’t give the same satisfying chewiness.
Q: Why does the recipe divide the oats between crust and topping? A: This division creates textural variety – the base has a smoother consistency while the topping gets extra oat texture for more interesting contrast in each bite.
Q: How can I tell if my bars are done baking? A: Look for lightly browned edges and a toothpick that comes out mostly clean with just a few moist cherry pieces. The filling should appear set but still slightly glossy.
Prep Time: 30 minutes | Cook Time: 1 hour | Total Time: 4 hours 30 minutes (includes cooling) | Yield: 16 bars


