Last October, I was hosting my first dinner party in my new apartment, and panic was setting in. I’d promised dessert but realized I had neither the skill nor the time for an elaborate apple pie. That’s when my French neighbor Sophie knocked on my door with flour dusting her apron and the most heavenly apple aroma wafting from her kitchen. “Ma chérie,” she said with a knowing smile, “let me teach you about galette.”
What followed was a revelation. In just over an hour, we created something that looked like it came from a Parisian bakery – rustic yet elegant, with caramelized apples nestled in a golden, flaky crust that had that perfect imperfect charm. My guests were convinced I’d been secretly attending culinary school.
The truth is, galettes are the most forgiving desserts in the world. Unlike traditional pies with their precise lattice work and perfect crimped edges, galettes embrace imperfection. Every fold and wrinkle adds character, making this apple galette the perfect introduction to pastry making for anyone who’s ever been intimidated by pie crusts.
Why This Apple Galette Will Become Your New Fall Tradition
It’s Surprisingly Simple
Many people avoid making pastry because they think it requires years of training and perfect technique. However, this galette proves otherwise. The free-form nature means there’s no pie pan to fit, no decorative edges to master, and no stress about achieving bakery-level perfection.
Faster Than Traditional Pie
While apple pies require blind baking, multiple steps, and often hours of cooling time, this galette comes together quickly and can be served warm just minutes after leaving the oven. The entire process, from mixing dough to taking your first bite, takes just over two hours.
Impressive Results Every Time
Despite its rustic appearance, this dessert looks professionally made. The golden crust, visible apple arrangement, and caramelized edges create an Instagram-worthy presentation that will have everyone asking for your secret.
Adaptable to Any Season
While apples make this perfect for fall, the same technique works beautifully with pears, stone fruits, or berries throughout the year. Master this recipe once, and you’ll have a year-round dessert solution.
Essential Ingredients for Galette Success
The Foundation: Perfect Pastry Crust
- 1½ cups all-purpose flour – Forms the structure of your crust
- 2 tablespoons granulated sugar – Adds subtle sweetness and promotes browning
- ¼ teaspoon salt – Enhances flavor and strengthens gluten structure
- ½ cup cold unsalted butter, cubed – Creates those coveted flaky layers
- ¼ cup ice-cold water – Binds ingredients without developing tough gluten
- 1 large egg beaten with 1 tablespoon milk – Creates that beautiful golden finish
- Coarse sugar (optional) – Adds sparkle and textural contrast
The Star: Spiced Apple Filling
- 3-4 apples, peeled and sliced – Choose varieties that hold their shape when baked
- ¼ cup packed brown sugar – Provides deep, molasses-touched sweetness
- 1½ tablespoons all-purpose flour – Thickens the natural apple juices
- 2 teaspoons fresh lemon juice – Prevents browning and adds brightness
- 1 teaspoon ground cinnamon – The classic apple spice that defines fall
- ¼ teaspoon ground nutmeg – Adds warmth and complexity
- Salted caramel sauce (optional) – Elevates the dessert to restaurant quality
Step-by-Step Instructions for Galette Mastery
Creating the Perfect Pastry Dough
Begin by whisking flour, sugar, and salt together in a medium bowl. This ensures even distribution of ingredients. Using a pastry cutter or two forks, cut cold butter cubes into the flour mixture until it resembles coarse, pea-sized crumbs. The key here is keeping the butter cold – warm butter will create a tough, dense crust instead of flaky layers.
Gradually add ice-cold water, stirring gently until the flour is just moistened. The dough should hold together when pressed but not feel sticky. If it seems too dry, add water one tablespoon at a time. Turn the mixture onto a lightly floured surface and gently work it into a cohesive ball using your hands.
Shape the dough into a thick disc, wrap tightly in plastic wrap, and refrigerate for at least one hour. This chilling period allows the gluten to relax and the butter to firm up, making rolling much easier.
Preparing the Apple Filling
While your dough chills, combine sliced apples with brown sugar, flour, lemon juice, cinnamon, and nutmeg in a large bowl. Toss everything together until the apples are evenly coated. Cover the bowl and let it sit – this allows the apples to release some of their juices, which will combine with the flour to create a natural thickener.
The beauty of this filling is its simplicity. Unlike complicated pie fillings that require pre-cooking, these raw apples will cook perfectly during baking, maintaining some texture while becoming tender and caramelized.
Assembly Techniques
Line a large baking sheet with parchment paper – this prevents sticking and makes cleanup effortless. On a lightly floured surface, roll your chilled dough into a 12-inch circle. Don’t worry about perfect roundness; rustic charm is what makes galettes special.
Carefully transfer the dough to your prepared baking sheet. Arrange the seasoned apples in the center, leaving a 2-3 inch border around the edges. You can simply pile them on for a casual look, or arrange them in overlapping concentric circles for something more refined.
Now comes the fun part – folding the edges. Gently lift the border and fold it over the filling, pleating as necessary. These pleats not only look beautiful but also help contain the juices during baking. Press gently to seal any gaps, but don’t stress about perfection.
The Finishing Touches
Brush the exposed crust generously with egg wash – this creates that gorgeous golden-brown finish that makes your galette look professionally made. Sprinkle coarse sugar over the crust for extra sparkle and crunch. If you’re feeling indulgent, drizzle salted caramel over the apples (avoiding the crust) for an extra layer of flavor.
Refrigerate the assembled galette for at least 15-20 minutes while your oven preheats. This final chilling helps the galette maintain its shape during baking.
Baking to Golden Perfection
Bake at 400°F for 35-36 minutes, until the filling bubbles enthusiastically and the crust achieves a beautiful golden-brown color. The kitchen will fill with the most incredible aroma of caramelized apples and buttery pastry.
Allow the galette to cool on the baking sheet for about 10 minutes before slicing. This brief rest lets the juices settle slightly while keeping the pastry crisp.
Creative Serving and Presentation Ideas
Classic Comfort Style
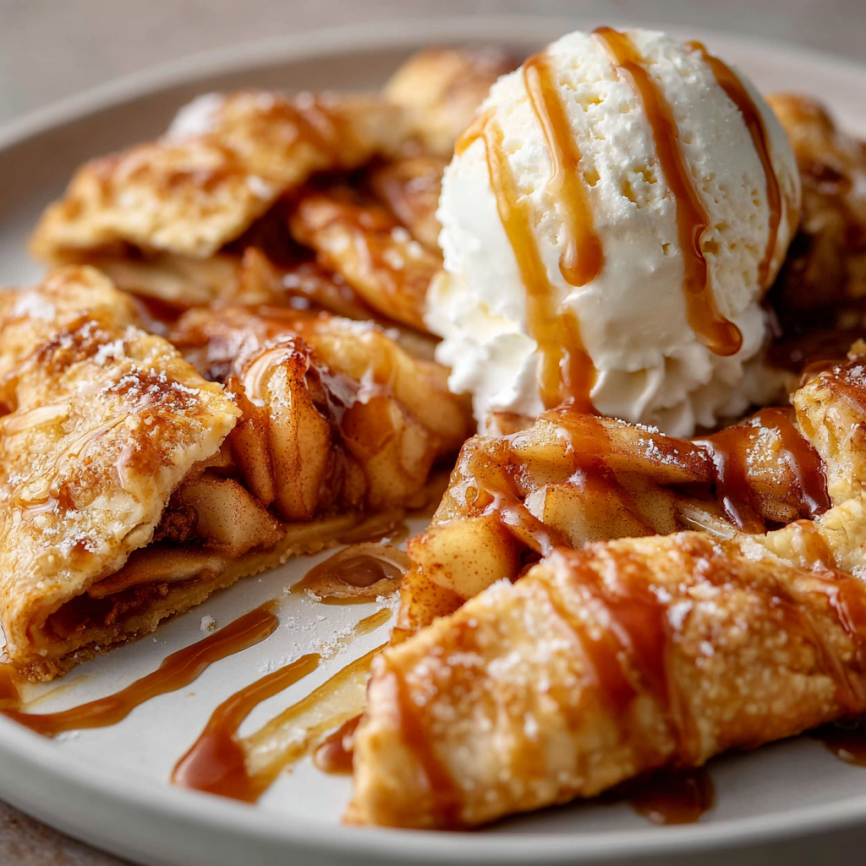
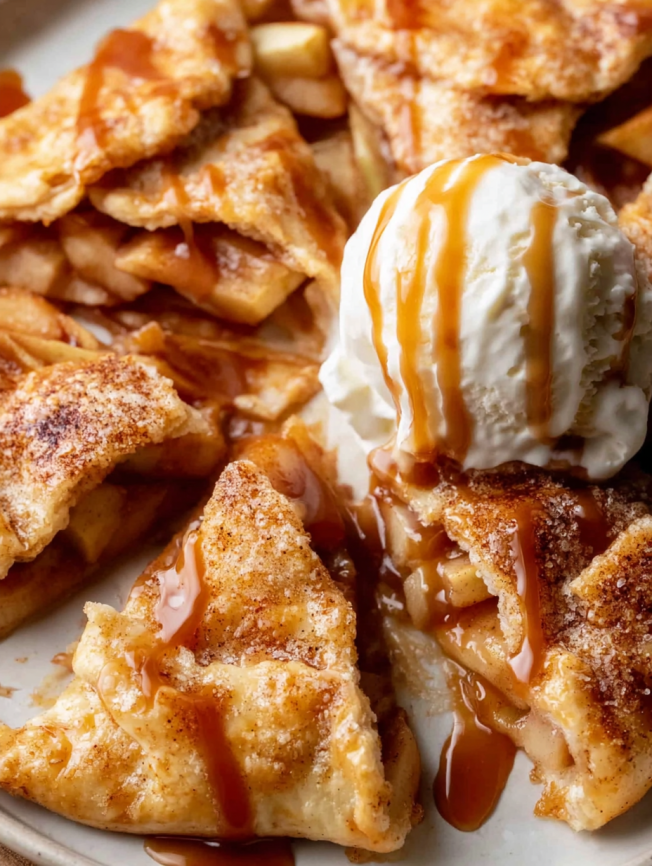
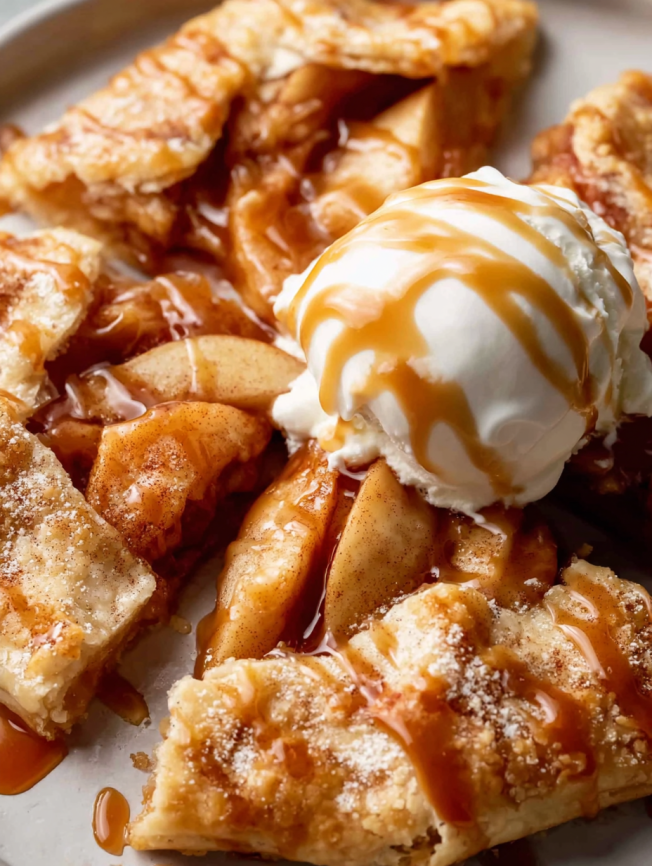
Serve warm slices with generous scoops of vanilla ice cream. The contrast between the warm, spiced apples and cold, creamy ice cream creates the perfect temperature and texture balance that defines comfort dessert.
Elegant Dinner Party Presentation
Dust each plate with powdered sugar before placing the galette slice. Add a small quenelle of whipped cream and a drizzle of caramel sauce around the plate for a restaurant-worthy presentation.
Brunch Transformation
This galette makes an unexpected but delightful brunch dish. Serve smaller wedges alongside coffee or tea, perhaps with a dollop of Greek yogurt instead of ice cream for a lighter touch.
Delicious Recipe Variations
Cranberry Apple Galette
Add ½ cup fresh or dried cranberries to your apple mixture for beautiful color and tart contrast. The cranberries’ acidity balances the brown sugar beautifully while adding festive appeal perfect for holiday gatherings.
Caramel Apple Pecan Galette
Sprinkle ½ cup chopped toasted pecans over the apples before folding the crust. Drizzle with homemade or store-bought caramel sauce both before and after baking for an indulgent twist that rivals any candy shop creation.
Cheddar Crust Apple Galette
Add ½ cup finely grated sharp cheddar cheese to your flour mixture for a savory-sweet combination that’s surprisingly sophisticated. The cheese adds richness while complementing the apples’ natural sweetness.
Bourbon Apple Galette
Replace the lemon juice with 2 tablespoons of bourbon for an adult version with complex depth. The alcohol cooks off during baking, leaving behind warm, oaky notes that pair beautifully with the cinnamon and nutmeg.
Make-Ahead Tips for Stress-Free Entertaining
Dough Preparation
The pastry dough can be made up to three days ahead and stored in the refrigerator, or frozen for up to three months. When freezing, wrap the disc tightly in plastic wrap, then place in a freezer bag. Thaw overnight in the refrigerator before using.
Filling Components
Slice your apples and toss with the spice mixture up to one day ahead. Store covered in the refrigerator to prevent browning. The lemon juice in the mixture helps preserve color and freshness.
Assembly Strategy
For maximum convenience, assemble the entire galette up to 8 hours ahead and refrigerate covered. This actually improves the final result, as the longer chilling time ensures better shape retention during baking.
Professional Secrets for Perfect Results
Temperature Control is Everything
Cold ingredients are crucial for flaky pastry. Chill your butter in the freezer for 15 minutes before using, and use the coldest water possible. Even on hot days, place your mixing bowl in the freezer for a few minutes before starting.
Apple Selection Matters
Choose apples that hold their shape when baked – Granny Smith, Honeycrisp, Pink Lady, or Fuji work beautifully. Avoid varieties like Red Delicious or McIntosh, which become mushy and lose their structure during baking.
Rolling Techniques
Roll from the center outward, rotating the dough quarter-turns to maintain a roughly circular shape. If the dough sticks, add small amounts of flour to your surface and rolling pin, but avoid over-flouring, which can make the crust tough.
Important Notes for Success
Managing Moisture
Don’t skip the flour in your apple mixture – it absorbs excess juices and prevents a soggy bottom crust. Similarly, the brief cooling period after baking allows juices to set slightly without making the pastry soggy.
Refrigerator Space Planning
The assembled galette needs to chill before baking, so clear refrigerator space ahead of time. If space is tight, assemble directly on parchment paper, then slide the entire sheet onto a refrigerator shelf.
Serving Temperature
While delicious at any temperature, this galette is at its peak when served warm. The pastry stays crisp, and the apples retain that perfect tender-but-not-mushy texture that makes each bite satisfying.
Frequently Asked Questions
Q: Can I make this galette without a food processor or pastry cutter? A: Absolutely! You can cut the butter into the flour using two butter knives, working them in a scissor-like motion. Alternatively, use your fingertips to rub the butter into the flour, working quickly to keep the butter cold.
Q: What should I do if my dough tears while rolling? A: Don’t panic – galette dough is very forgiving. Simply patch tears by pressing the edges together with your fingers. Small imperfections add to the rustic charm, and they won’t affect the final taste or appearance significantly.
Q: How can I prevent my galette from getting soggy on the bottom? A: Make sure your baking sheet is hot when you place the galette on it – you can preheat it in the oven for a few minutes. Additionally, don’t skip the flour in your apple mixture, as it absorbs excess moisture during baking.
Q: Can I use frozen apples for this recipe? A: Fresh apples work best because frozen ones release too much moisture when thawed. If you must use frozen apples, thaw them completely and pat dry with paper towels before tossing with the other filling ingredients.
Q: Why does my crust shrink during baking? A: This usually happens when the dough hasn’t been chilled long enough, or when it’s been overworked. Always chill the shaped galette for at least 15 minutes before baking, and handle the dough as little as possible during assembly.
Q: Can I reheat leftover galette? A: Yes! Reheat individual slices in a 350°F oven for 5-8 minutes to restore crispness to the crust. Avoid microwaving, as this makes the pastry soggy.
Q: What’s the difference between a galette and a tart? A: Galettes are free-form pastries baked on a flat surface, while tarts are baked in structured pans with removable bottoms. Galettes have a more rustic appearance and are generally easier to make since they don’t require precise shaping.
Q: Can I double this recipe to make two galettes? A: Certainly! Double all ingredients and divide the dough into two equal portions after the initial mixing. You can bake both galettes simultaneously on separate baking sheets, or prepare one for immediate baking and freeze the second for later use.
Prep Time: 1 hour 20 minutes | Cook Time: 35 minutes | Total Time: 2 hours 10 minutes Calories: Approximately 290 kcal per slice | Serves: 8
This Easy Apple Galette proves that the most impressive desserts often come from the simplest techniques. With its rustic charm, seasonal flavors, and forgiving nature, it’s the perfect recipe to build confidence in pastry making while creating something truly memorable. Whether you’re a beginner baker or an experienced cook looking for something effortlessly elegant, this galette delivers every single time.


