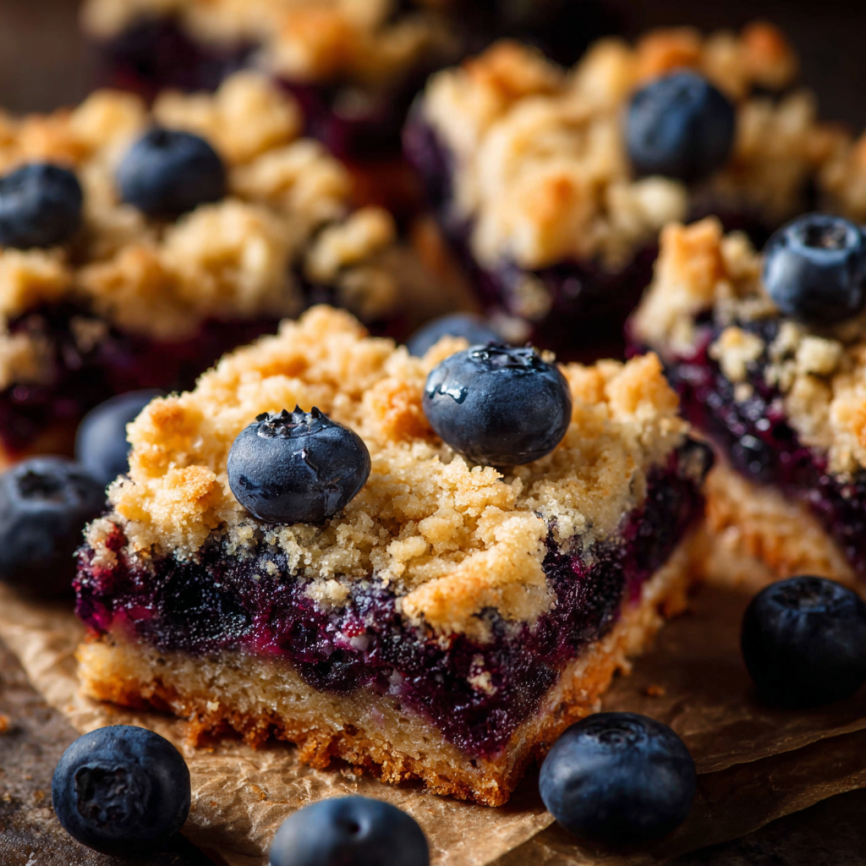
There’s nothing quite like the aroma of blueberry pie wafting through the kitchen on a warm summer afternoon. However, as much as I love traditional pie, I’ll admit that rolling out pastry dough and crimping edges can feel overwhelming on busy weekdays. That’s precisely when these blueberry pie bars became my go-to solution. They deliver all the jammy, sweet-tart goodness of classic blueberry pie in an easy-to-make bar form that’s perfect for potlucks, picnics, or just satisfying a weeknight dessert craving.
Why These Blueberry Pie Bars Will Win Your Heart
These bars represent everything wonderful about simplified baking without sacrificing an ounce of flavor or satisfaction. First and foremost, they eliminate the intimidation factor of pie-making while delivering that same beloved taste combination of buttery crust, juicy blueberry filling, and golden crumbly topping.
Moreover, the genius of this recipe lies in its efficiency – the same mixture creates both the bottom crust and the streusel topping, meaning fewer bowls to wash and less time spent on prep work. Additionally, the bar format makes them incredibly practical for serving crowds, packing in lunch boxes, or enjoying as an on-the-go treat.
Best of all, these bars showcase fresh blueberries at their absolute peak, transforming them into a jammy, luscious filling that’s perfectly balanced with bright lemon zest and warm cinnamon. The result is a dessert that tastes like summer in every single bite.
The Science Behind Perfect Blueberry Bars
Creating the ideal blueberry bar requires understanding how different components work together. The bottom crust needs to be sturdy enough to support the juicy filling while remaining tender and buttery. Meanwhile, the filling must achieve that perfect jammy consistency without being too runny or overly thick.
This recipe achieves these goals through careful ingredient ratios and technique. The cornstarch in the filling acts as a thickening agent, preventing the bars from becoming soggy while allowing the natural blueberry juices to create that coveted pie-like texture. Furthermore, pre-baking the crust ensures it stays crisp even when topped with the moist filling.
Why Fresh Blueberries Make the Difference
While frozen blueberries can work in a pinch, fresh berries truly shine in this recipe. Fresh blueberries hold their shape better during baking, creating beautiful bursts of fruit throughout each bar. They also release their juices more gradually, resulting in a filling that’s jammy rather than watery.
When selecting fresh blueberries, look for plump, firm berries with a deep blue color and a slight silvery bloom on the surface. Avoid berries that are soft, wrinkled, or leaking juice, as these won’t hold up well during the baking process.
Essential Ingredients for Success
For the Crust and Topping:
- 1½ cups (188g) all-purpose flour, spooned and leveled
- 1 cup (85g) + 2 tablespoons old-fashioned whole rolled oats, divided
- ½ cup (100g) packed light or dark brown sugar
- 1 teaspoon baking powder
- 1 teaspoon fresh lemon zest
- ¼ teaspoon ground cinnamon
- ⅛ teaspoon salt
- 10 tablespoons (142g) unsalted butter, melted
For the Blueberry Filling:
- 4½ cups (about 640g) fresh blueberries
- ½ cup (100g) granulated sugar
- 2 tablespoons (15g) cornstarch
- 1 tablespoon fresh lemon juice
- 2 teaspoons fresh lemon zest
Serving Suggestions:
These bars are delicious on their own but become extra special when served with a dollop of vanilla ice cream, a drizzle of heavy cream, or a sprinkle of powdered sugar for an elegant presentation.
Step-by-Step Instructions for Perfect Results
Setting Up for Success
Begin by preheating your oven to 350°F (177°C) and line a 9-inch square baking pan with parchment paper. Leave an overhang on the sides – this simple step will make removing the bars effortless once they’re cooled and set.
Creating the Versatile Crust Mixture
In a medium bowl, whisk together the flour, 1 cup of oats, brown sugar, baking powder, lemon zest, cinnamon, and salt until evenly combined. Next, add the melted butter and stir until the mixture resembles moist, crumbly sand with no dry spots remaining.
You’ll have approximately 3 cups of this mixture, which cleverly serves double duty as both crust and topping. Measure out about 2 cups (or roughly two-thirds) and press it firmly into the prepared baking pan using your hands, a large spoon, or the bottom of a measuring cup.
Pre-Baking the Foundation
Bake the pressed crust for exactly 10 minutes, then remove from the oven to cool slightly. This crucial step prevents the bottom from becoming soggy once the juicy blueberry filling is added.
Preparing the Jammy Blueberry Filling
While the crust cools, combine the blueberries, granulated sugar, cornstarch, and lemon juice in a saucepan over medium heat. Stir gently to combine, being careful not to burst too many berries. Cook for 2-3 minutes, stirring occasionally, until the cornstarch and sugar begin to dissolve and the berries look evenly glossy.
Remove the pan from heat and stir in the lemon zest. The filling should look slightly thickened but will continue to set during baking.
Assembly and Final Baking
Pour the warm blueberry filling over the pre-baked crust, spreading it evenly to the edges. Add the remaining 2 tablespoons of oats to the reserved crumb mixture, then sprinkle this topping generously over the filling. Gently press the topping down with the back of a spoon to help it adhere.
The Final Bake
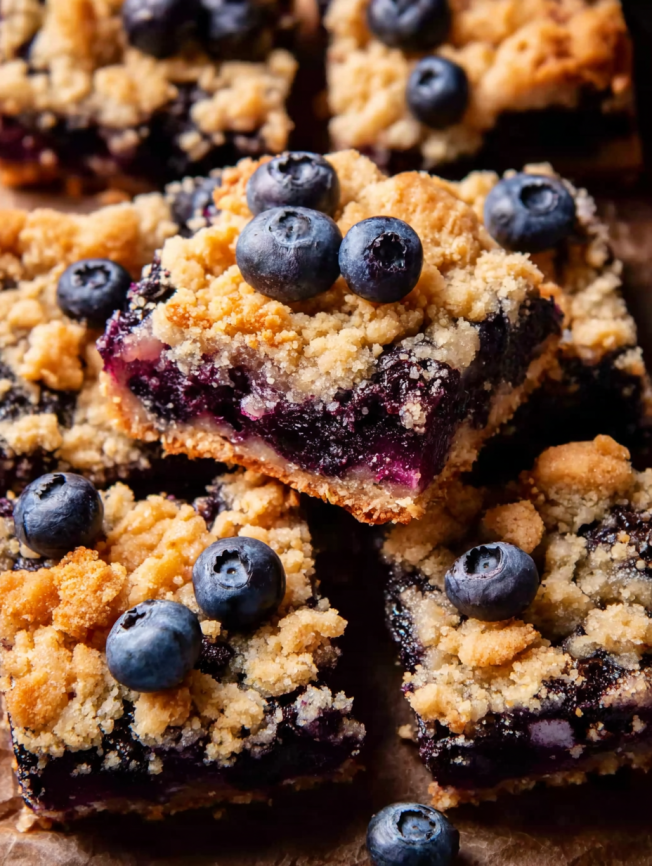
Return the pan to the oven and bake for 45-55 minutes, until the top is lightly golden brown and the blueberry filling is actively bubbling around the edges. The bubbling indicates that the cornstarch has fully activated and the filling has reached the proper consistency.
Cooling and Serving Tips
The Importance of Patience
Once baked, resist the temptation to cut into these bars immediately. Allow them to cool completely in the pan on a wire rack – this cooling time is crucial for the filling to set properly and the flavors to meld together.
For the cleanest cuts and most professional-looking bars, refrigerate them for at least 4 hours or overnight before slicing. The extended cooling time allows the filling to firm up completely, resulting in neat, bakery-worthy squares.
Perfect Presentation
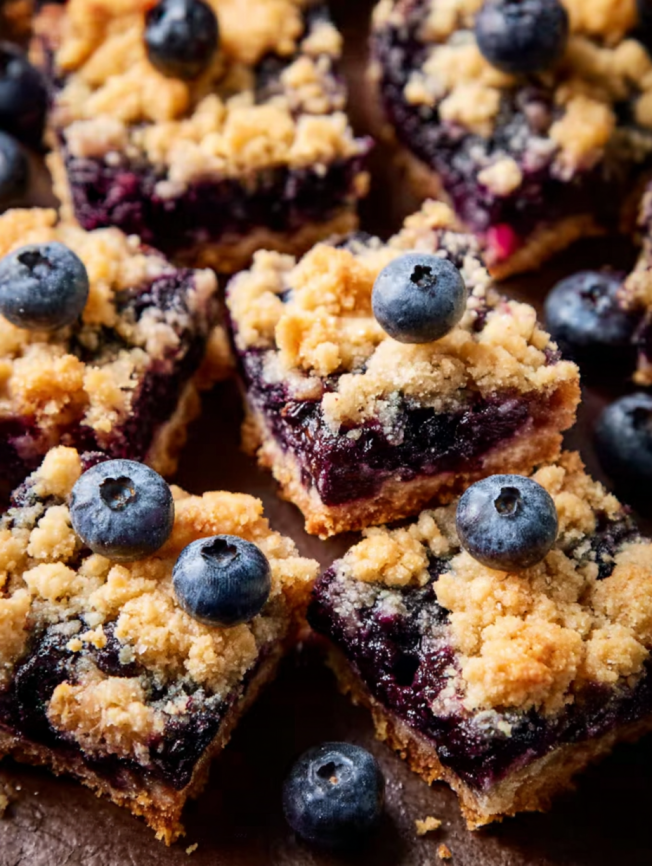
When ready to serve, use the parchment paper overhang to lift the entire block of bars from the pan. Place on a cutting board and use a sharp knife to cut into 16 even squares, wiping the blade clean between cuts for the neatest edges.
Creative Variations to Try
Blueberry-Apple Combination
For a delightful twist on the original, add one peeled and thinly sliced apple over the blueberry filling before adding the crumb topping. This combination creates wonderful textural contrast and adds subtle sweetness that complements the tartness of the blueberries.
Lemon Lovers’ Version
Enhance the citrus notes by adding an extra teaspoon of lemon zest to both the filling and the crust mixture. Consider drizzling cooled bars with a simple lemon glaze made from powdered sugar and fresh lemon juice.
Mixed Berry Medley
Substitute up to half of the blueberries with other berries such as raspberries, blackberries, or sliced strawberries. Each berry brings its own unique flavor profile while maintaining the same delicious jammy texture.
Make-Ahead and Storage Solutions
Advance Planning
These bars are excellent for advance preparation. Bake them completely, cool thoroughly, then cover and refrigerate for up to 24 hours before cutting. This approach actually improves the texture, making the bars easier to slice and serve.
Proper Storage Methods
Store cut bars covered at room temperature for up to 2 days, though they maintain better texture when refrigerated for up to 1 week. For longer storage, individually wrap cooled bars and freeze for up to 3 months.
Serving from Frozen
Frozen bars thaw beautifully at room temperature in about 30 minutes, or you can thaw them overnight in the refrigerator for the best texture. They taste remarkably fresh even after freezing.
Professional Tips for Bakery-Quality Results
The key to exceptional blueberry pie bars lies in attention to detail throughout the process. First, ensure your butter is properly melted but not hot, as overly warm butter can make the crust tough. Additionally, don’t overmix the crumb mixture – stop as soon as the butter is evenly distributed.
When pressing the bottom crust, aim for even thickness throughout the pan. Uneven spots will bake at different rates, potentially creating soggy or burnt areas. Finally, trust the visual and audible cues during baking – the filling should be actively bubbling and the top should be golden brown.
Troubleshooting Common Issues
If your bars turn out too crumbly, the mixture may have been too dry. Ensure your brown sugar is properly packed and your butter is fully melted. Conversely, if they seem too wet or don’t hold together, you may need to bake them slightly longer until the filling is fully set.
For bars that are too sweet or not sweet enough, remember that blueberry sweetness varies significantly by season and variety. Taste your berries before baking and adjust the sugar accordingly – very sweet berries may need less sugar, while tart berries might benefit from an extra tablespoon.
Frequently Asked Questions
Can I use a different sized pan for this recipe? While the recipe is optimized for a 9-inch square pan, you can double all ingredients and use a 9×13-inch pan. Increase the crust pre-bake time to 18 minutes and the final baking time to about 1 hour. However, the original size typically produces better results.
What’s the best way to measure the crumb mixture for the crust? Don’t worry about being perfectly precise – aim for roughly two-thirds of the mixture for the crust and one-third for the topping. The recipe is quite forgiving, and slight variations won’t significantly impact the final result.
Can I substitute frozen blueberries? Yes, but use them straight from the freezer without thawing. Keep in mind that frozen berries release more juice, so the filling will be slightly more liquid. You might need to bake for an additional 5-10 minutes to ensure proper setting.
Why is my filling too runny? This usually happens when the cornstarch hasn’t been cooked long enough to activate. Make sure the filling is bubbling actively around the edges before removing from the oven. If it’s still too runny after cooling, return it to the oven for another 10-15 minutes.
How do I prevent the bottom crust from getting soggy? The pre-baking step is crucial for preventing soggy bottoms. Don’t skip this step, and make sure the crust is set and lightly golden before adding the filling. Using fresh rather than frozen berries also helps reduce excess moisture.
Can I make these bars dairy-free or gluten-free? For dairy-free bars, substitute the butter with an equal amount of melted coconut oil or vegan butter. For gluten-free options, use a 1:1 gluten-free flour blend in place of regular flour, though the texture may be slightly different.
Prep Time: 25 minutes
Cook Time: 50 minutes
Total Time: 4 hours, 15 minutes (includes cooling)
Calories: 285 kcal per bar
Servings: 16 bars


