There’s something deeply nostalgic about banana cream pie that takes me back to Sunday dinners at my grandmother’s house. She’d emerge from the kitchen carrying this towering masterpiece – layers of flaky pastry, silky custard, fresh bananas, and billowy whipped cream that seemed to capture sunshine in every bite. For years, I thought creating such perfection at home was beyond my reach. However, after mastering the techniques behind this beloved classic, I’ve discovered that homemade banana cream pie isn’t just achievable – it’s absolutely worth every minute of effort.
Why This Banana Cream Pie Will Become Your Signature Dessert
This recipe represents the pinnacle of comfort dessert perfection, combining multiple textures and flavors into one harmonious creation. First, the buttery, flaky homemade pie crust provides the ideal foundation – sturdy enough to support the generous filling yet tender enough to cut cleanly with a fork.
Moreover, the from-scratch vanilla custard sets this pie apart from any store-bought version. By making the custard yourself, you control the consistency and flavor intensity, creating a silky smooth filling that’s rich without being overly sweet. Additionally, the careful layering of fresh bananas throughout ensures every bite contains that perfect banana flavor.
Furthermore, the homemade whipped cream topping adds the final touch of elegance and indulgence. Unlike artificial toppings, real whipped cream provides a light, airy contrast to the dense custard while allowing the other flavors to shine through rather than masking them.
The Art of Perfect Custard Making
Creating silky smooth custard from scratch might seem intimidating, but understanding the science makes it surprisingly manageable. The key lies in proper tempering – gradually warming the egg yolks to prevent them from scrambling when they meet the hot milk mixture.
Cornstarch serves as the thickening agent, creating that perfect spoon-coating consistency that holds its shape when sliced yet remains creamy on the tongue. Meanwhile, the combination of whole milk and heavy cream provides the ideal fat content for both richness and stability.
Mastering the Blind Baking Technique
Blind baking – pre-baking the crust before adding filling – ensures a crisp bottom that won’t become soggy from the custard filling. This technique requires patience but produces professional results that make all the difference in the final texture.
Using pie weights or dried beans prevents the crust from puffing up during baking, while the initial parchment paper lining makes removal easy. The two-stage baking process first sets the sides, then allows the bottom to brown properly for optimal flavor and texture.
Essential Ingredients for Success
For the Pie Crust:
- 1 unbaked 9-inch pie crust (homemade or high-quality store-bought)
- Optional egg wash: 1 large egg white beaten with 1 tablespoon milk
For the Custard Filling:
- 4 large egg yolks
- ¼ cup (30g) cornstarch
- 2 cups (480ml) whole milk
- ½ cup (120ml) heavy cream
- ½ cup (100g) granulated sugar
- ⅛ teaspoon salt
- 2 teaspoons pure vanilla extract
- 2 tablespoons (28g) unsalted butter, softened
- 4 yellow bananas (firm but ripe)
- Optional: ground cinnamon for sprinkling
For the Whipped Cream:
- 1 cup (240ml) cold heavy cream
- 2 tablespoons confectioners’ or granulated sugar
- ½ teaspoon pure vanilla extract
Perfect Serving Accompaniments:
This pie pairs beautifully with a cup of strong coffee, Earl Grey tea, or a glass of cold milk. For special occasions, consider serving alongside fresh berries or a drizzle of caramel sauce.
Step-by-Step Pie Creation Process
Preparing the Foundation
Begin by making your pie dough at least 2 hours ahead, as proper chilling is essential for easy rolling and preventing shrinkage. If using homemade dough, prepare it the day before for best results and convenience.
Roll the chilled dough on a floured surface, turning it quarter-turns frequently until you achieve a 12-inch circle. Transfer carefully to your pie dish, then create decorative edges by folding excess dough over itself and fluting or crimping as desired.
The Critical Chilling Step
After shaping, chill the prepared crust for at least 30 minutes and up to 5 days. This step prevents the crust from shrinking during baking and helps maintain those beautiful decorative edges you’ve worked to create.
Blind Baking to Perfection
Preheat your oven to 375°F (190°C) while the crust chills. Line the cold crust with crumpled parchment paper, then fill with pie weights, ensuring they press against the sides to prevent shrinkage.
Bake for 15-16 minutes until the edges begin browning, then carefully remove the weights and parchment. Pierce the bottom all over with a fork to prevent puffing, then continue baking 14-15 minutes until the bottom is golden brown.
Creating Silky Smooth Custard
The Tempering Technique
Whisk egg yolks and cornstarch together until smooth – this mixture needs to be completely lump-free for perfect results. In a separate saucepan, combine milk, cream, sugar, and salt, whisking until the sugar dissolves completely.
Heat the milk mixture over medium heat until it reaches a gentle simmer. The key word here is gentle – vigorous boiling will cause the mixture to become too hot and potentially scramble the eggs during tempering.
Achieving Perfect Consistency
Remove about ½ cup of the hot milk mixture and slowly drizzle it into the egg yolk mixture while whisking constantly. This gradual process warms the yolks safely without cooking them prematurely.
Pour the tempered yolk mixture back into the saucepan in a slow, steady stream while whisking continuously. The custard will thicken dramatically and begin bubbling – continue cooking for exactly 1 minute while whisking to ensure the cornstarch is fully activated.
Final Flavor Enhancement
Remove from heat and immediately whisk in vanilla and butter until completely smooth. The butter adds richness while the vanilla provides that classic custard flavor that makes this pie so memorable.
Assembly and Chilling Strategy
Preventing Skin Formation
Place plastic wrap directly on the surface of the warm custard to prevent a skin from forming. Allow it to cool for exactly 15 minutes – any longer and it becomes too thick to spread smoothly.
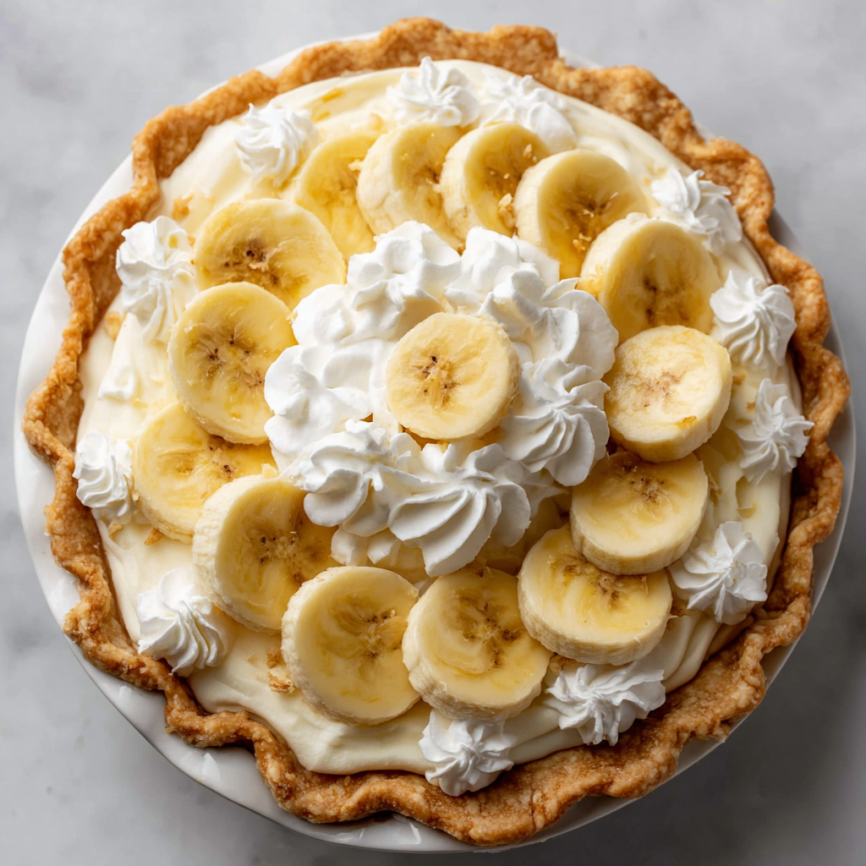
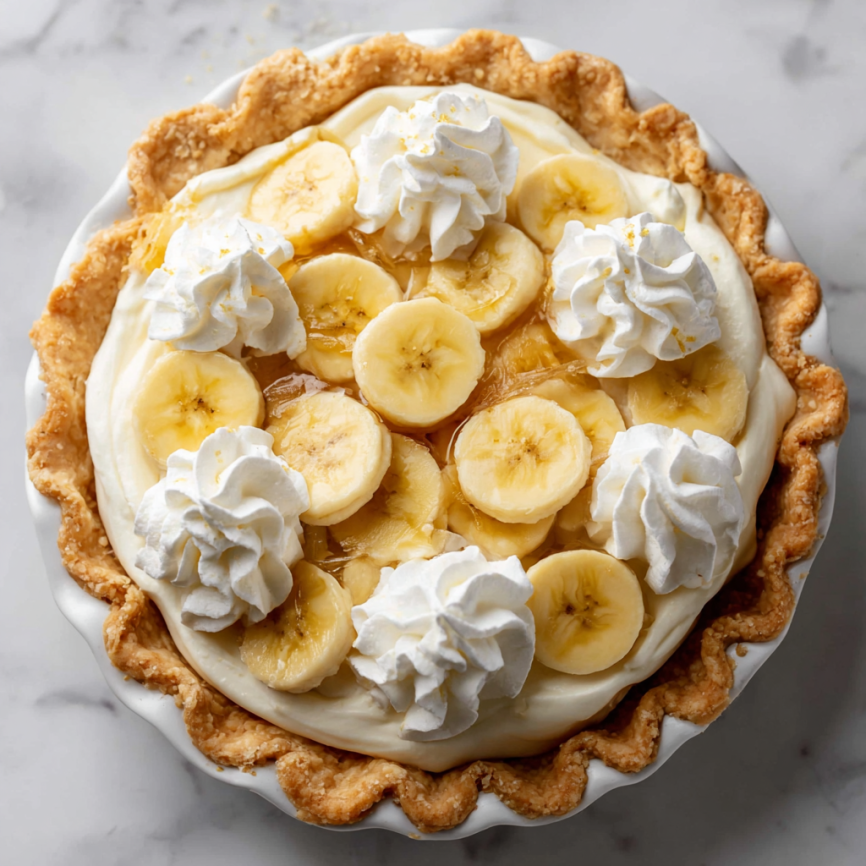
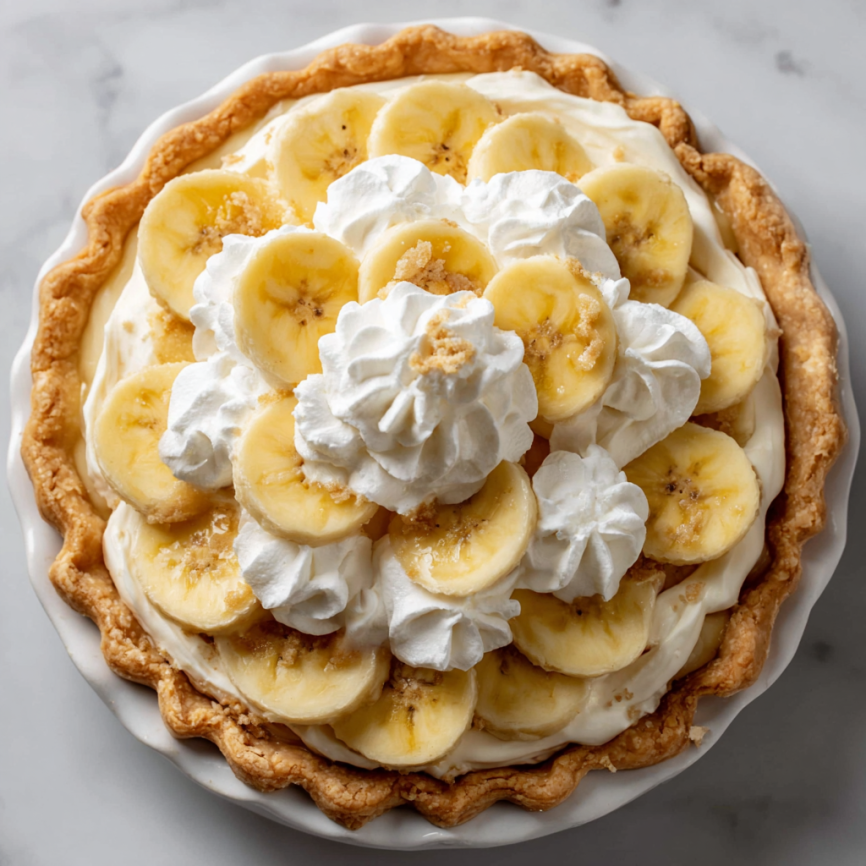
Strategic Banana Placement
Slice 2-3 bananas and arrange them evenly in the cooled pie shell. A light sprinkle of cinnamon at this stage adds warmth and complements the banana flavor beautifully without overwhelming the custard.
Professional Spreading Technique
Spread the slightly warm custard over the bananas using an offset spatula for the smoothest, most professional appearance. Work quickly but gently to maintain the custard’s silky texture.
Cover the surface again with plastic wrap and refrigerate for at least 4 hours or overnight. This chilling time allows all flavors to meld while ensuring clean, neat slices when serving.
Whipped Cream Perfection
Timing for Best Results
Make the whipped cream no more than 1 hour before serving to maintain optimal texture and volume. Cold cream whips faster and holds its shape better, so ensure your cream has been properly chilled.
Achieving Ideal Consistency
Using an electric mixer, whip the cream, sugar, and vanilla on medium-high speed until medium peaks form. This consistency – firmer than soft peaks but not as stiff as hard peaks – provides the perfect topping texture that won’t deflate quickly.
Professional Presentation Options
Pipe the whipped cream using a large star tip for an elegant presentation, or simply spread it smoothly with a spatula for a more rustic appearance. Both methods create beautiful results when executed with care.
Creative Variations to Explore
Chocolate Banana Cream
Add 2 tablespoons of unsweetened cocoa powder to the custard mixture for a chocolate twist that pairs magnificently with bananas. Consider drizzling finished slices with chocolate sauce for extra indulgence.
Coconut Banana Cream
Replace 1 teaspoon of vanilla extract with coconut extract in both the custard and whipped cream. Sprinkle toasted coconut over the whipped cream for added texture and tropical flair.
Caramel Banana Cream
Layer homemade or high-quality store-bought caramel sauce between the bananas and custard. The sweet, buttery caramel creates beautiful flavor complexity that elevates this classic dessert.
Make-Ahead Strategies for Entertaining
Component Timeline
Prepare the pie crust up to 3 days in advance, storing it covered in the refrigerator after blind baking. Similarly, the custard can be made a day ahead and stored with plastic wrap directly on its surface.
Final Assembly Schedule
Complete the pie through the custard layer up to 24 hours before serving. Add the whipped cream topping no more than 1 hour before presentation to maintain optimal texture and appearance.
Storage Solutions
Store the completed pie covered in the refrigerator, using a pie carrier or large bowl inverted over the pie to protect the whipped cream from absorbing other flavors or collapsing.
Professional Tips for Flawless Results
Success with banana cream pie depends heavily on temperature control and timing throughout the process. Ensure all dairy ingredients are at proper temperatures – room temperature for mixing, cold for whipping, and properly heated for custard making.
When selecting bananas, choose fruits that are yellow but still firm. Overripe bananas will break down and become mushy, while underripe bananas lack the sweet flavor that makes this pie so special.
For the cleanest slices, use a sharp knife dipped in warm water and wiped clean between cuts. This technique prevents the custard from dragging and maintains those beautiful, distinct layers.
Troubleshooting Common Challenges
If your custard turns out lumpy despite careful tempering, strain it through a fine-mesh sieve while still warm to remove any cooked egg pieces. This step salvages the custard while maintaining its smooth texture.
For custard that’s too thin, return it to heat and cook for an additional minute while whisking constantly. The cornstarch needs adequate heat and time to reach its full thickening potential.
If your pie crust shrinks excessively during blind baking, you likely didn’t chill it long enough before baking, or the dough was overworked during rolling. Prevention is key, but a slightly smaller crust will still taste delicious.
Storage and Serving Guidelines
This pie tastes best when served within 24 hours of completion, though it will keep in the refrigerator for up to 5 days. The banana slices will gradually brown, but the flavor remains excellent throughout this period.
For the most attractive presentation, add fresh banana slices as garnish just before serving. Lightly brushing them with lemon juice helps prevent browning, though they should be added at the last moment regardless.
Frequently Asked Questions
Can I use a store-bought pie crust instead of homemade? Absolutely! Choose a high-quality frozen pie crust and follow the same blind baking instructions. The results won’t be quite as flaky as homemade, but they’ll still be delicious and save considerable time.
What if my custard doesn’t thicken properly? This usually means the cornstarch wasn’t fully activated. Return the mixture to medium heat and cook for another minute while whisking constantly. Ensure the mixture reaches a full simmer for the cornstarch to work effectively.
Can I make this pie without eggs? Eggs are essential for proper custard texture and stability. However, you can explore pudding-style fillings using instant pudding mix, though the texture and flavor won’t match the homemade version.
How do I prevent the bananas from browning? Use bananas that are ripe but still firm, and assemble the pie no more than 24 hours before serving. For garnish bananas, slice them just before serving and lightly brush with lemon juice if needed.
Can this pie be frozen? While technically possible, freezing significantly affects the custard’s texture, making it grainy and less appealing. This pie is best enjoyed fresh from the refrigerator within a few days of making.
Why did my whipped cream deflate? Overwhipping causes the cream to break down and become grainy or deflated. Stop mixing as soon as medium peaks form, and serve within an hour for best results. Using very cold cream and a chilled bowl helps maintain stability.
Prep Time: 4 hours (includes crust preparation)
Cook Time: 30 minutes
Total Time: 8 hours (includes chilling)
Calories: 385 kcal per slice
Servings: 8 slices


