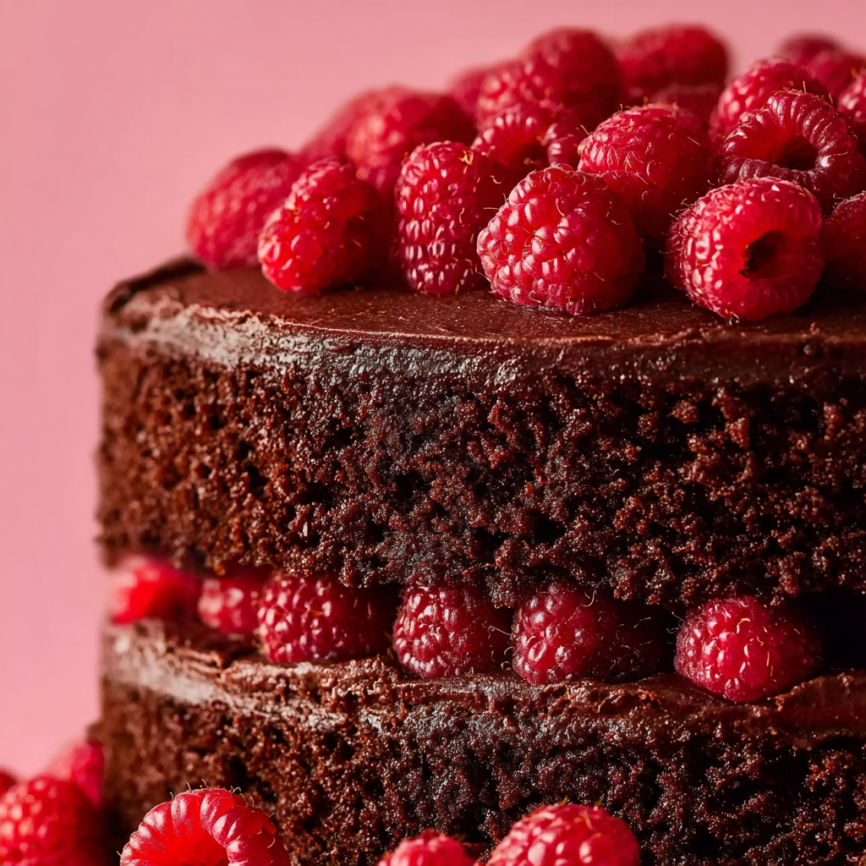
Description: Enjoy layers of moist dark chocolate cake, sweet creamy chocolate buttercream, and homemade raspberry filling, all covered with a luxurious chocolate raspberry ganache.
A Symphony of Chocolate and Berries
Sometimes you encounter a flavor combination so perfect, it feels like it was destined to exist. For me, chocolate and raspberry represent one of those magical pairings that never fails to create pure culinary joy. This cake represents the culmination of my obsession with getting this classic combination absolutely perfect—rich, decadent chocolate paired with bright, tangy raspberries in a way that celebrates both flavors without letting either dominate.
When I first set out to create this cake, I wanted something that would showcase the complexity of really good chocolate while highlighting the natural tartness of fresh raspberries. After numerous attempts and countless taste tests, this recipe emerged as my love letter to both ingredients. Each component has been carefully crafted to complement the others, creating layers of flavor that build with every bite.
The result is a cake that’s impressive enough for the most special occasions yet approachable enough for weekend baking adventures. Whether you’re celebrating an anniversary, hosting a dinner party, or simply treating yourself to something extraordinary, this cake delivers both visual impact and unforgettable flavor.
Why This Recipe Will Become Your New Obsession
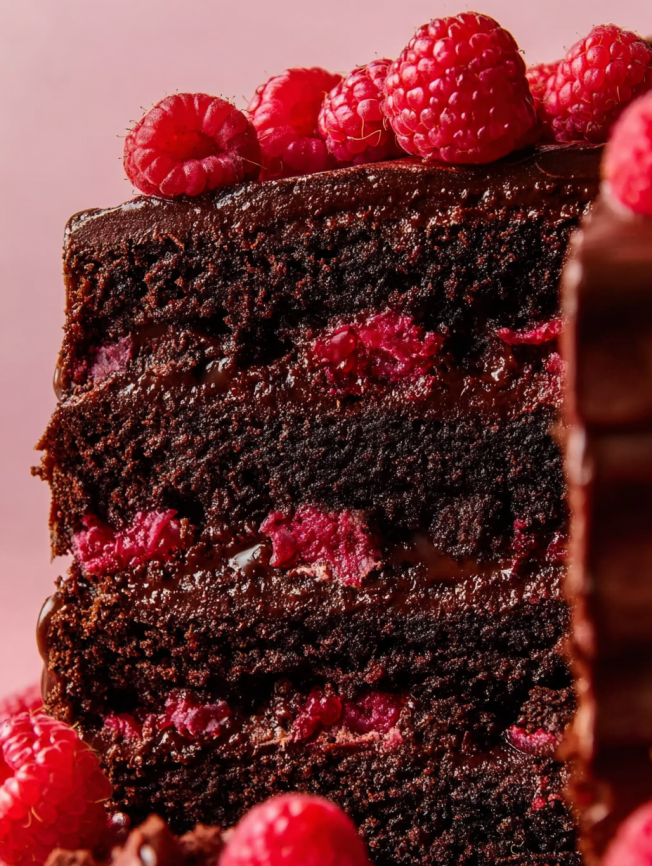
This isn’t just another chocolate cake with some berries thrown on top—it’s a carefully orchestrated dessert experience that hits every note perfectly. The chocolate cake itself achieves that coveted balance between rich cocoa intensity and tender, moist crumb that melts on your tongue. Unlike many chocolate cakes that can be dense or overly sweet, this version incorporates both sour cream and buttermilk to create incredible moisture while maintaining a light, elegant texture.
The homemade raspberry filling sets this cake apart from anything you’ll find in a bakery. By cooking fresh raspberries with just enough cornstarch to create the perfect consistency, we preserve that bright, natural berry flavor that commercial fillings simply can’t match. This filling provides beautiful color contrast and a burst of tartness that cuts through the richness of the chocolate components.
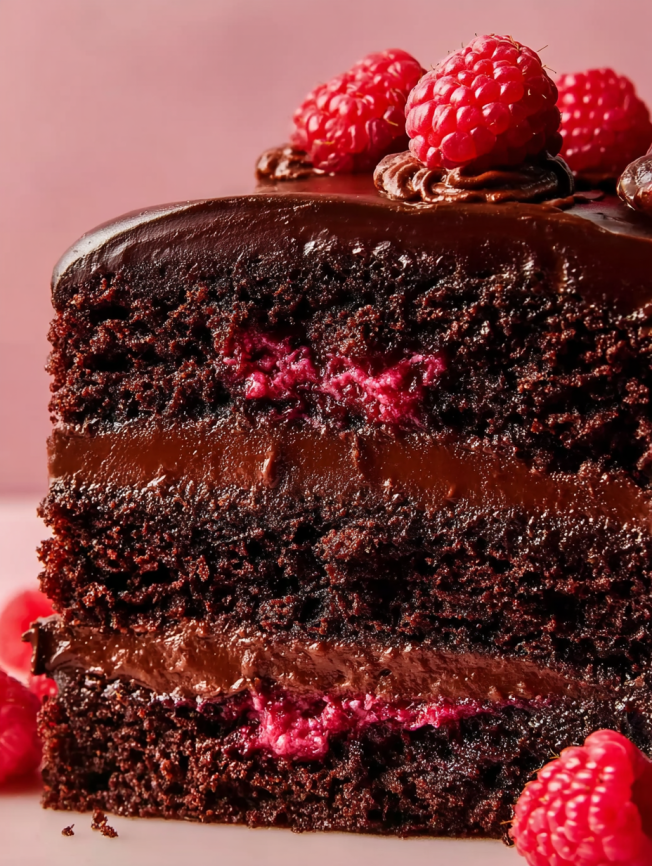
Meanwhile, the chocolate buttercream serves multiple purposes—it acts as a protective barrier that keeps the raspberry filling from soaking into the cake layers, provides creamy richness, and creates the perfect canvas for our stunning ganache finish. The final chocolate raspberry ganache coating elevates the entire dessert to restaurant-quality status, creating a glossy, mirror-like finish that’s as beautiful as it is delicious.
Essential Ingredients Breakdown
For the Raspberry Filling
- 1.5 tablespoons (22ml) water
- 1.5 tablespoons (4.5 teaspoons or 12g) cornstarch
- 3 cups (12 ounces/about 340–375g) fresh or frozen raspberries (do not thaw)
- 1/3 cup (67g) granulated sugar
- 1 teaspoon lemon juice
- 1/2 teaspoon pure vanilla extract
For the Chocolate Cake
- 1¾ cups (219g) all-purpose flour (spooned & leveled)
- 3/4 cup (62g) unsweetened natural cocoa powder
- 1¾ cups (350g) granulated sugar
- 2 teaspoons baking soda
- 1 teaspoon baking powder
- 1 teaspoon salt
- 2 teaspoons espresso powder (optional)
- 1/2 cup (120ml) vegetable oil or melted coconut oil
- 2 large eggs, at room temperature
- 3/4 cup (180g) full-fat sour cream, at room temperature
- 1/2 cup (120ml) buttermilk, at room temperature
- 2 teaspoons pure vanilla extract
- 1/2 cup (120ml) hot water or black coffee
- 1 cup (170g) mini semi-sweet chocolate chips (tossed in 1 tablespoon flour)
For the Chocolate Buttercream
- 1 cup (16 Tbsp; 226g) unsalted butter, softened to room temperature
- 3½ cups (420g) confectioners’ sugar
- 1/2 cup (41g) unsweetened natural or Dutch-process cocoa powder
- 3 tablespoons (45ml) heavy cream or milk
- 1/8 teaspoon salt
- 2 teaspoons pure vanilla extract
For the Chocolate Raspberry Ganache
- 8 ounces (226g) quality semi-sweet or bittersweet chocolate, finely chopped
- 3/4 cup (180ml) heavy cream or heavy whipping cream
- 1/4 cup (60ml) raspberry liqueur, such as Chambord (or replace with more heavy cream)
- Optional garnish: fresh raspberries & fresh mint
Detailed Step-by-Step Instructions
Creating the Perfect Raspberry Filling
Begin by whisking the cornstarch and water together in a small bowl until completely smooth—even the smallest lumps will create an uneven texture in your finished filling. In a medium saucepan, combine this cornstarch mixture with raspberries (there’s no need to thaw frozen ones), granulated sugar, and lemon juice.
Place the saucepan over medium heat and stir the mixture with a silicone spatula, gently mashing the raspberries as they begin to soften and release their juices. The mixture will gradually thicken as it heats, eventually reaching a boil. Once boiling, maintain this temperature for exactly 5 minutes, stirring occasionally to prevent sticking.
Remove the pan from heat and immediately stir in the vanilla extract. The filling will appear quite loose at this stage, but don’t worry—it will continue thickening as it cools. Allow it to cool at room temperature for 10-15 minutes, then transfer to a covered container and refrigerate for at least 4 hours, though overnight is even better. This chilling time is crucial for achieving the proper consistency for spreading between cake layers.
Preparing Your Cake Layers
Preheat your oven to 350°F (177°C) and prepare three 9-inch cake pans by greasing them thoroughly, lining with parchment paper rounds, then greasing the parchment as well. This double-protection ensures your cakes will release cleanly from the pans.
Mixing the Chocolate Cake Batter
In a large bowl, whisk together all the dry ingredients: flour, cocoa powder, sugar, baking soda, baking powder, salt, and espresso powder if using. This thorough mixing ensures even distribution of leavening agents throughout your batter.
Using either a handheld or stand mixer fitted with a whisk attachment, combine the oil, eggs, and sour cream on medium-high speed until well blended. Add the buttermilk and vanilla, beating until everything is incorporated. The combination of sour cream and buttermilk creates the tender, moist texture that makes this cake special.
Pour the wet ingredients into the dry mixture, then add the hot water or coffee. Mix on low speed until the batter is completely smooth—it will be quite thin, which is exactly what we want for moist, tender cakes. Finally, fold in the flour-coated chocolate chips, which add delightful bursts of chocolate throughout each slice.
Baking to Perfection
Divide the batter evenly among your prepared pans—you should have approximately 6 to 6.5 cups of batter total. Bake for 24-26 minutes, checking for doneness with a toothpick inserted into the center of each cake. The cakes are ready when the toothpick comes out clean or with just a few moist crumbs.
Allow the cakes to cool completely in their pans on wire racks. Don’t be alarmed if they sink slightly in the center as they cool—this is completely normal and won’t affect the final result since we’ll be trimming and layering them.
Mastering the Chocolate Buttercream
While your cakes cool, prepare the chocolate buttercream that will serve multiple functions in this recipe. Beat the softened butter with a handheld or stand mixer until light and creamy, approximately 2 minutes. This initial beating incorporates air and creates the smooth base for your frosting.
Gradually add the confectioners’ sugar, cocoa powder, heavy cream, salt, and vanilla extract. Begin mixing on low speed to prevent a sugar cloud, then increase to high speed and beat for a full minute until the buttercream is smooth and pipeable. Taste and adjust seasoning with additional salt if needed—this helps balance the sweetness and enhances the chocolate flavor.
Assembly Techniques for Professional Results
Creating Stable Layers
Place your first cake layer on your serving plate or cake stand, ensuring it’s level and centered. Using a large offset spatula, spread approximately 1/4 cup of chocolate buttercream evenly across the top, creating a thin but complete layer that will act as a moisture barrier.
Next, fill a piping bag fitted with a large round tip (Wilton 2A works perfectly) with about 1/2 cup of buttercream. Pipe a thick border around the edge of the frosted layer—this creates a “dam” that will contain the raspberry filling and prevent it from oozing out the sides of your cake.
Adding the Raspberry Component
Using a small offset spatula, carefully spread half of your chilled raspberry filling inside the buttercream border. The filling should come right up to the buttercream dam but not overflow it. This technique ensures clean, professional-looking layers when you slice the finished cake.
Gently place the second cake layer on top, being careful not to press too hard and cause the filling to squeeze out. Repeat the entire process—buttercream layer, piped border, and remaining raspberry filling—before adding your final cake layer.
Applying the Crumb Coat
Using your remaining chocolate buttercream, apply a thin layer over the entire cake—top and sides. This crumb coat doesn’t need to be perfect; its job is to seal in any loose crumbs and create a smooth foundation for your ganache. Use a bench scraper to smooth the sides if desired, then refrigerate the cake uncovered for at least 30 minutes to set the buttercream.
Creating the Show-Stopping Ganache
Preparation and Technique
While your crumb coat sets, prepare the chocolate raspberry ganache that will provide the cake’s stunning finish. Place your finely chopped chocolate in a medium heatproof bowl—the finer you chop it, the more smoothly it will melt.
In a small saucepan, combine the heavy cream and raspberry liqueur (if using) and heat over medium heat until the mixture just begins to simmer. Watch carefully to avoid boiling, which can cause the ganache to break or become grainy.
Pour the hot cream mixture over the chocolate and let it sit undisturbed for 2-3 minutes. This gentle approach allows the chocolate to soften gradually. Using a metal spoon or small rubber spatula, stir very slowly from the center outward until the mixture becomes completely smooth and glossy.
Achieving the Perfect Consistency
The ganache will be quite thin initially, so transfer it to the refrigerator for about 30 minutes to thicken to a spreadable consistency. You want it thick enough to coat the cake without running off, but still fluid enough to spread smoothly.
Final Assembly and Presentation
Remove your chilled cake from the refrigerator and pour the thickened ganache over the center, using an offset spatula to spread it evenly across the top and down the sides. Work efficiently, as the ganache will continue to set as it cools.
For an elegant finishing touch, arrange fresh raspberries around the top edge of the cake and add a few sprigs of fresh mint for color contrast. The natural beauty of fresh berries perfectly complements the sophisticated ganache finish.
Serving Suggestions and Presentation Ideas
This cake is spectacular served at room temperature, where all the flavors can fully develop and the textures achieve their optimal consistency. However, it’s equally delicious served chilled, which creates a more fudge-like ganache experience.
Consider serving thin slices accompanied by fresh raspberry coulis or a dollop of lightly sweetened whipped cream. The additional berry component enhances the cake’s fruit notes while providing textural contrast.
For special occasions, individual cake portions can be plated with a few fresh berries, a sprig of mint, and perhaps a light dusting of powdered sugar for an restaurant-worthy presentation.
Creative Variations to Explore
Flavor Adaptations
Transform this recipe by substituting other berry fillings—blackberry or strawberry work beautifully with the chocolate base. You can also experiment with different liqueurs in the ganache: Grand Marnier creates an orange-chocolate variation, while Kahlua adds coffee notes that complement the espresso powder in the cake.
For a more intense chocolate experience, add a tablespoon of Dutch-process cocoa powder to your ganache along with the cream, creating an extra-rich finish that serious chocolate lovers will adore.
Size Variations
This recipe adapts beautifully to different pan sizes. For a 6-inch cake perfect for smaller gatherings, use the same amount of raspberry filling but reduce the buttercream and ganache recipes by half. The baking time will decrease to approximately 18-20 minutes for the smaller pans.
Alternatively, transform this into an elegant sheet cake for larger crowds by baking the batter in a well-greased 13×9-inch pan for 35-40 minutes, then layering the components horizontally.
Make-Ahead Strategies for Success
Component Preparation
One of the greatest advantages of this recipe is how well each component can be prepared in advance. The raspberry filling actually improves with time, developing deeper flavor and better consistency when made up to a week ahead. Store it covered in the refrigerator and bring to room temperature before using.
The cake layers can be baked up to two days in advance when wrapped tightly and refrigerated, or frozen for up to three months. For longer storage, wrap each layer individually in plastic wrap, then aluminum foil, ensuring no air can reach the cake.
Buttercream and Ganache Storage
Chocolate buttercream keeps beautifully in the refrigerator for up to three days. Before using, bring it to room temperature and rewhip briefly, adding a tablespoon of room-temperature cream if needed to restore its smooth consistency.
Similarly, prepare ganache up to three days ahead and refrigerate covered. Bring to room temperature before use, or gently rewarm in a double boiler if it becomes too thick to spread easily.
Professional Tips and Troubleshooting
Ingredient Insights
Natural cocoa powder is essential in this recipe due to its acidity, which reacts with the baking soda to create proper rise and tender texture. Dutch-process cocoa won’t provide the same chemical reaction, potentially resulting in dense cake layers.
Room temperature ingredients are crucial for proper mixing and texture. Cold eggs and dairy won’t incorporate smoothly into the batter, potentially creating lumps or uneven texture in your finished cake.
Common Issues and Solutions
If your cake layers dome significantly during baking, your oven temperature may be too high. Use an oven thermometer to verify accuracy and consider reducing the temperature by 25°F if necessary.
Should your ganache appear grainy or separated, it’s likely due to overheated cream or chocolate. Salvage it by whisking in a tablespoon of cool cream, or start fresh if the mixture is severely broken.
Storage and Transport
Store finished cake covered in the refrigerator for up to 5 days. The ganache may lose some gloss when chilled, but the flavor remains excellent. For transportation, use a cake carrier with sufficient height clearance, and avoid temperature extremes that could cause the ganache to crack or become too soft.
Frequently Asked Questions
Can I make this cake without raspberry liqueur? Absolutely! Simply replace the 1/4 cup of raspberry liqueur with an equal amount of heavy cream in the ganache. The flavor will be slightly less complex but still delicious.
How do I know when the raspberry filling is thick enough? Properly thickened filling should coat the back of a spoon and hold its shape when spread. If it seems too thin after chilling, cook it briefly over medium heat with an additional teaspoon of cornstarch mixed with water.
Can I use frozen raspberries for the filling? Yes, frozen raspberries work perfectly and often provide more consistent results than fresh. Don’t thaw them before cooking—add them directly to the saucepan frozen.
Why did my cake layers sink in the middle? Slight sinking is normal and expected with this recipe due to the high moisture content. However, excessive sinking could indicate overmixing, incorrect oven temperature, or expired leavening agents.
How far in advance can I assemble the complete cake? The fully assembled cake is best served within 24 hours of completion for optimal texture and appearance. However, it can be stored for up to 3 days refrigerated if necessary.
Can I make cupcakes with this recipe? Yes! This batter makes excellent cupcakes. Fill standard cupcake liners 2/3 full and bake for 18-22 minutes. Fill cooled cupcakes with raspberry filling and top with buttercream and ganache.
What’s the best way to slice this cake cleanly? Use a sharp knife warmed under hot water and wiped clean between cuts. The warm blade will slice through the ganache more easily, creating cleaner edges.


