Prep Time: 15 minutes | Cook Time: 27 minutes | Total Time: 1 hour, 40 minutes (includes cooling) | Yield: 24 bars
Description: Think of these bars as no-chilling, no-rolling EASY M&M cookies! Using melted butter, more brown sugar than white sugar, and a touch of cornstarch guarantee the absolute softest, chewiest M&M cookie bar texture.
The Cookie Bar That Changed Everything
Sometimes the most brilliant discoveries happen when you’re looking for an easier way to satisfy a craving. That’s exactly how these M&M cookie bars came into existence in my kitchen. After countless batches of traditional M&M cookies that required rolling, chilling, and careful spacing on multiple baking sheets, I found myself wondering: what if there was a way to capture all that beloved cookie flavor and texture in one simple pan?
The answer turned out to be these incredible cookie bars that deliver everything I love about M&M cookies with a fraction of the work. No rolling dough balls, no chilling time, no rotating multiple baking sheets—just mix, press, bake, and enjoy. Yet somehow, they manage to be even better than the original cookies, with their perfectly soft, chewy texture and generous distribution of colorful M&Ms throughout every single bite.
What makes these bars truly special isn’t just their convenience factor, though that’s certainly appealing. Instead, it’s the way they’ve solved every problem I’ve ever had with cookie baking while creating something that tastes absolutely divine. These bars represent the perfect intersection of simplicity and indulgence, proving that sometimes the easiest path leads to the most delicious destination.
Why These Bars Will Become Your New Cookie Obsession
These cookie bars eliminate every frustrating aspect of traditional cookie making while delivering superior results. Unlike individual cookies that can vary in size and baking time, resulting in some being overdone while others remain underbaked, these bars bake evenly throughout, ensuring consistent texture in every piece.
The secret lies in the carefully calibrated ingredient ratios that create the ultimate soft, chewy texture. Using melted butter instead of creamed butter creates a denser, fudgier consistency that holds up beautifully when cut into bars. Meanwhile, the higher proportion of brown sugar to white sugar provides moisture and that distinctive chewy texture that makes these bars absolutely irresistible.
The addition of cornstarch might seem unusual, but it’s actually a game-changing ingredient that creates an incredibly tender crumb while preventing the bars from becoming tough or cakey. This professional baker’s trick ensures that your bars stay soft for days, making them perfect for meal prep, lunchboxes, or any time you want a guaranteed crowd-pleaser.
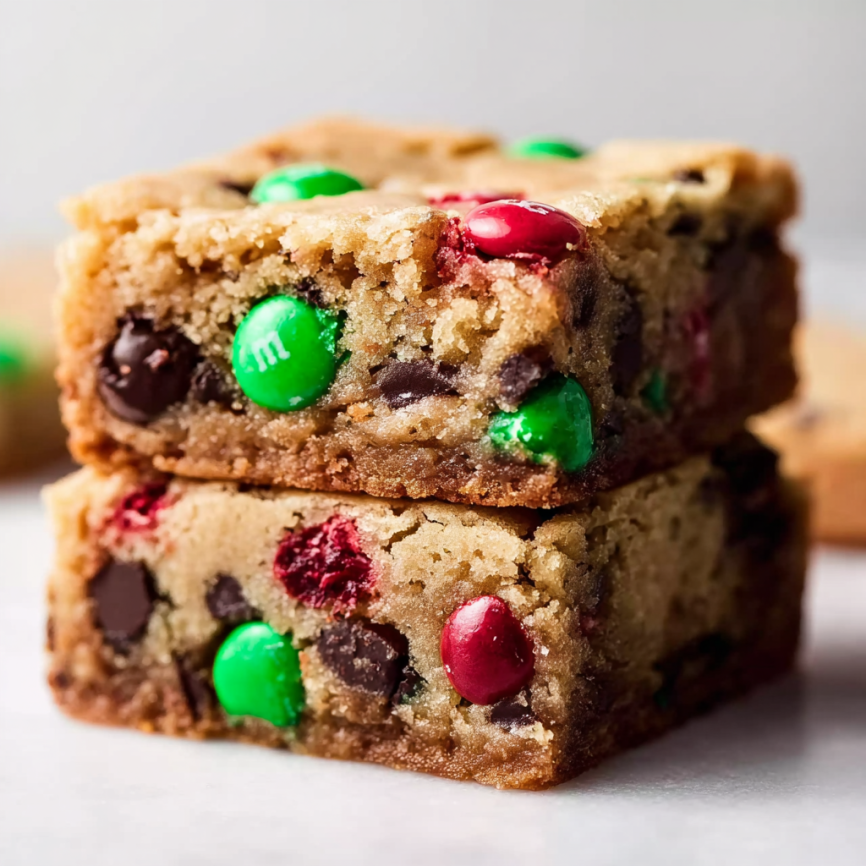
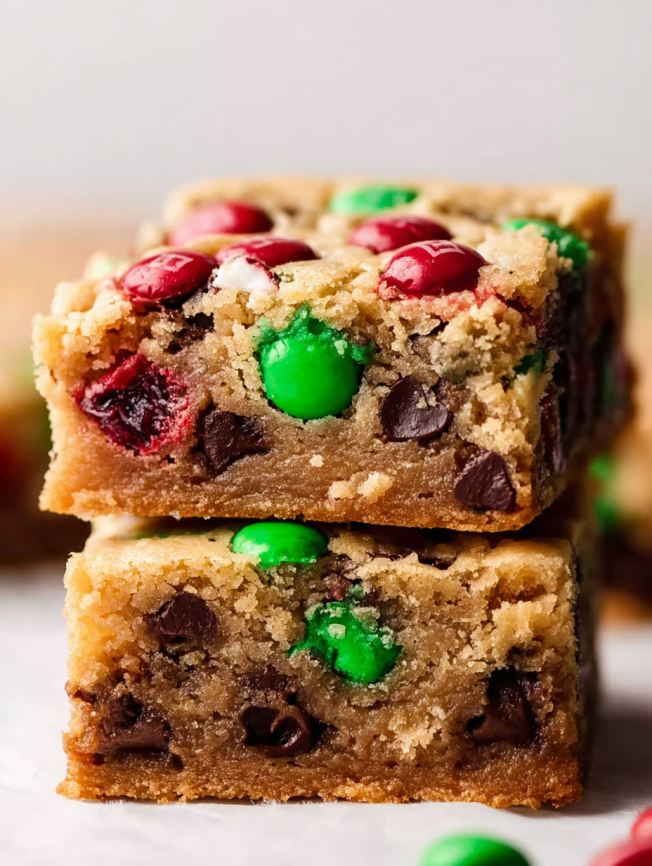
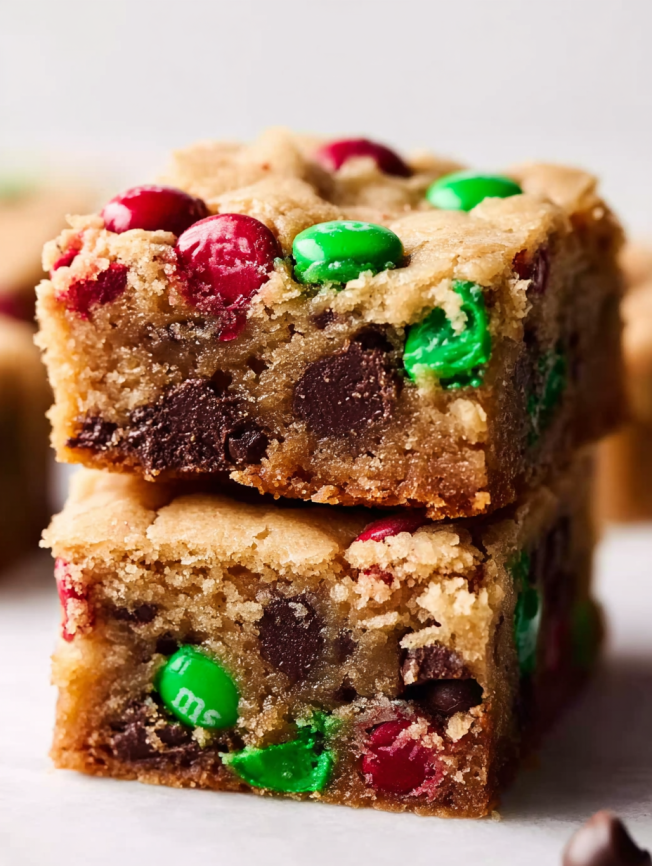
Perhaps best of all, the generous amount of M&Ms and chocolate chips means every bite delivers that perfect combination of chocolate and candy-coated crunch. Unlike cookies where the add-ins can be unevenly distributed, the bar format ensures every piece gets its fair share of colorful, chocolatey goodness.
Essential Ingredients for Perfect Results
The Foundation
- 2¾ cups (343g) all-purpose flour (spooned and leveled)
- 1½ teaspoons cornstarch
- 1 teaspoon baking soda
- 1/2 teaspoon salt
The Flavor Base
- 1 cup (16 Tbsp; 226g) unsalted butter, melted & cooled for 5 minutes
- 1 cup (200g) packed light or dark brown sugar
- 1/2 cup (100g) granulated sugar
- 2 large eggs, at room temperature
- 2 teaspoons pure vanilla extract
The Star Attractions
- 1¼ cups (about 260g) mini or regular-size M&Ms
- 3/4 cup (135g) semi-sweet chocolate chips
Each ingredient serves a specific purpose in creating these exceptional bars. The melted butter provides richness while creating that distinctive chewy texture, while the brown sugar contributes moisture and deep flavor. Cornstarch acts as a tenderizer, and the combination of M&Ms and chocolate chips ensures every bite is packed with chocolate satisfaction.
Step-by-Step Instructions for Success
Preparation Essentials
Begin by preheating your oven to 350°F (177°C) and positioning the rack in the center position for even baking. Line a 9×13-inch baking pan with parchment paper, ensuring you leave overhang on all sides—this simple step will make removing and cutting your bars effortless later.
The choice between metal and glass pans can affect your results slightly. Metal pans conduct heat more efficiently, creating slightly crispier edges, while glass pans provide more gentle, even heating throughout. Both work beautifully with this recipe, so use whichever you prefer or have available.
Creating the Perfect Dry Mix
In a large bowl, whisk together the flour, cornstarch, baking soda, and salt until evenly distributed. This preliminary mixing ensures that the leavening agents and cornstarch are evenly incorporated throughout the flour, preventing any pockets of concentrated flavors or textures in your finished bars.
The cornstarch is crucial here—it inhibits gluten development while adding tenderness, creating that melt-in-your-mouth texture that sets these bars apart from ordinary cookie bars. If you don’t have cornstarch on hand, the bars will still be delicious, just slightly less tender.
Mastering the Wet Ingredients
The key to perfect texture lies in properly handling the melted butter. Melt it completely, then allow it to cool for exactly 5 minutes—this timing is crucial. Butter that’s too hot will begin cooking the eggs when mixed, creating an undesirable texture, while butter that’s cooled too long will create a crumbly dough that won’t press together properly.
In a medium bowl, whisk the melted butter with both sugars until the mixture is smooth and no brown sugar lumps remain. This thorough mixing dissolves the sugars properly and creates the base for your bars’ chewy texture. Add the eggs one at a time, whisking well after each addition, then incorporate the vanilla extract.
Combining Components
Pour the wet ingredients into the flour mixture and mix with a large spoon or silicone spatula until just combined. The dough will be soft, slick, and quite thick—this consistency is exactly what you want for achieving the perfect texture.
Fold in the M&Ms and chocolate chips, distributing them as evenly as possible throughout the dough. Don’t worry if they don’t seem to stick perfectly to the dough initially—the melted butter can make the mixture a bit slippery, but everything will settle beautifully during baking.
Achieving Even Distribution
Transfer the dough to your prepared pan and use your hands or the back of a large spoon to press it into an even layer. Take time to ensure consistent thickness throughout—this prevents some areas from overbaking while others remain underdone.
For the most attractive finished product, press a few extra M&Ms and chocolate chips into the surface before baking. This creates beautiful visual appeal and ensures every piece has plenty of colorful candy on top.
Baking Techniques for Perfect Results
Temperature and Timing
Bake the bars for 26-30 minutes, watching for the edges to become lightly golden brown while the center remains set but not overbaked. The surface should look slightly underdone when you remove the pan from the oven—the bars will continue cooking from residual heat as they cool.
If you notice excessive browning before the 25-minute mark, tent the pan loosely with aluminum foil to prevent the top from becoming too dark while allowing the interior to finish cooking properly.
Recognizing Perfect Doneness
A toothpick inserted in the center should come out with a few moist (but not wet) crumbs clinging to it. Completely clean toothpicks indicate overbaking, which will result in dry, cake-like bars instead of the desired chewy texture.
Remember that the bars will puff up significantly during baking, then settle as they cool. This is completely normal and contributes to their wonderfully dense, chewy final texture.
Cooling and Cutting Strategies
The Patience Factor
Allow the bars to cool in the pan for at least one hour before attempting to cut them. This cooling time is essential—cutting too early will result in crumbly, messy pieces that won’t hold their shape properly.
While the bars are still slightly warm, consider pressing additional M&Ms and chocolate chips into the surface for enhanced visual appeal. The gentle warmth will help these extras adhere without sinking completely into the bars.
Professional Cutting Techniques
Once cooled, use the parchment paper overhang to lift the entire batch from the pan. This technique allows you to cut clean, even bars without struggling to remove individual pieces from the pan corners.
Use a sharp knife and clean it between cuts for the neatest edges. For perfectly uniform bars, measure and mark your cutting lines before making the first cut—this ensures consistent portion sizes that look professionally made.
Creative Variations and Customizations
Flavor Adventures
While classic M&Ms create the traditional experience, experiment with seasonal varieties like pumpkin spice M&Ms for fall baking or peppermint M&Ms during the holidays. Each variation creates a completely different flavor profile while maintaining the same beloved texture.
For chocolate enthusiasts, try using a combination of different chocolate chips—dark chocolate, white chocolate, and milk chocolate create visual interest and complex flavors. You can also substitute some of the chocolate chips with butterscotch or peanut butter chips for unique taste combinations.
Texture Modifications
Crush some of your M&Ms before folding them into the dough—this creates beautiful color streaks throughout the bars and adds interesting textural variety. Similarly, try using a combination of mini and regular M&Ms for varied sizes and textures in each bite.
For extra indulgence, fold in a handful of mini marshmallows along with the M&Ms and chocolate chips. The marshmallows will create pockets of gooey sweetness that complement the chocolate beautifully.
Size Adaptations
This recipe adapts perfectly to different pan sizes. For a smaller batch, use a 9-inch square pan with reduced ingredient quantities, baking for 22-26 minutes. For larger gatherings, the full recipe works beautifully in a 9×13-inch pan as written.
Individual portion bars can be created by pressing the dough into muffin cups and baking for 12-15 minutes. These personal-sized treats are perfect for lunch boxes or portion control.
Advanced Techniques for Superior Results
Flavor Enhancement Methods
For deeper, more complex flavor, try browning your butter before cooling and using it in the recipe. Start with an extra 3 tablespoons of butter to compensate for moisture loss during browning. The nutty, caramelized flavor adds sophisticated depth that elevates these bars from simple treats to gourmet desserts.
Toast your chocolate chips lightly in a dry skillet before adding them to the dough. This intensifies their chocolate flavor and creates slight textural interest that adds complexity to each bite.
Texture Optimization
The ratio of brown sugar to white sugar is carefully calibrated for optimal chewiness, but you can adjust it slightly based on your preferences. More brown sugar creates chewier bars, while more white sugar produces slightly crispier edges.
For extra-soft bars, slightly underbake them by 2-3 minutes, then allow them to finish cooking via residual heat as they cool in the pan. This technique requires careful attention but produces incredibly tender results.
Storage and Make-Ahead Strategies
Optimal Storage Conditions
Store cooled bars covered at room temperature for up to one week. They actually improve slightly after the first day as the flavors meld together and the texture becomes more uniform throughout.
For longer storage, wrap individual bars in plastic wrap or parchment paper, then store in an airtight container. This method prevents them from sticking together while maintaining their soft texture.
Freezing Guidelines
These bars freeze exceptionally well for up to three months. Wrap the cooled bars individually or layer them between parchment paper in a freezer-safe container. Thaw overnight in the refrigerator, then bring to room temperature before serving for the best texture and flavor.
The unbaked dough can also be frozen for up to three months. Press it into your prepared pan, wrap tightly, and freeze. Bake directly from frozen, adding 5-8 minutes to the original baking time.
Troubleshooting Common Issues
Texture Problems
If your bars turn out cake-like instead of chewy, the most likely culprits are overbaking or using butter that was too cool when mixed. Ensure your melted butter is still warm when combining with sugars, and remove bars from the oven as soon as the edges are set.
Crumbly bars that fall apart usually result from insufficient mixing or butter that was too hot when added to the eggs. The dough should be cohesive and slightly sticky when properly mixed.
Distribution Issues
If your M&Ms and chocolate chips sink to the bottom during baking, the dough may have been too thin or the add-ins too heavy. Toss them lightly in flour before folding into the dough—this helps suspend them throughout the bars.
Uneven baking typically indicates inconsistent thickness when pressing the dough into the pan. Take extra time to ensure uniform distribution for even results.
Nutritional Considerations and Benefits
These bars provide sustained energy through their combination of carbohydrates and fats, making them excellent for active lifestyles or growing children. The eggs contribute protein, while the chocolate provides antioxidants and mood-boosting compounds.
Unlike many commercial snack bars, these homemade versions allow you to control the quality of ingredients and avoid artificial preservatives and excessive processing.
Frequently Asked Questions
Can I make these bars without cornstarch? Yes, though the texture will be slightly less tender. The cornstarch creates that signature soft, chewy texture, but omitting it won’t ruin the bars—they’ll just be a bit more traditional in texture.
Why do my bars turn out cakey instead of chewy? This usually happens when the butter is too cool when mixed or when the bars are overbaked. Ensure your melted butter is still warm (but not hot) when combining ingredients, and remove bars from the oven while they still look slightly underdone in the center.
Can I substitute the brown sugar with white sugar? Brown sugar is essential for the chewy texture and rich flavor. White sugar alone will create crispier, less flavorful bars. If necessary, you can use all brown sugar, but don’t replace it entirely with white sugar.
How do I prevent the M&Ms from sinking? Toss them lightly in flour before folding into the dough. This helps suspend them throughout the bars and prevents sinking during baking.
Can I use salted butter instead of unsalted? Yes, but reduce the added salt to 1/4 teaspoon to prevent over-salting. Unsalted butter gives you better control over the final flavor balance.
Why are my bars falling apart when I cut them? This typically happens when bars haven’t cooled completely or weren’t pressed firmly enough into the pan initially. Ensure you cool them for at least one hour and use firm, even pressure when initially shaping the dough.
Can I double this recipe? Yes, but you’ll need to use two 9×13-inch pans or one very large sheet pan. Don’t try to make them thicker in a single pan, as this will affect baking time and texture.
How do I know when they’re perfectly done? Look for lightly golden edges and a center that’s set but still appears slightly soft. A toothpick should come out with a few moist crumbs—completely clean means they’re overbaked.


