Prep Time: 25 minutes
Cook Time: 28 minutes
Total Time: 3 hours (includes cooling)
Yield: 16 bars
Introduction: Rediscovering a Childhood Favorite
Growing up, fig bars were always a special treat in our household – that perfect combination of chewy oats and sweet fruit filling that made them feel both indulgent and wholesome. When I first decided to recreate this beloved snack at home, I was amazed by how much better the homemade version tasted compared to store-bought alternatives. The natural sweetness of dried figs, combined with warm spices and hearty oats, creates a depth of flavor that mass-produced versions simply cannot match.
What initially drew me to this recipe was the complete control over ingredients – no preservatives, artificial flavors, or unpronounceable additives. Instead, these bars showcase the natural beauty of whole foods working in harmony. The first bite revealed layers of texture and taste that transported me back to childhood while satisfying my adult appreciation for quality ingredients.
Why These Bars Will Transform Your Snacking
Superior Nutritional Profile
Unlike their commercial counterparts, these homemade fig bars provide genuine nutritional benefits. The whole wheat flour and oats deliver fiber and complex carbohydrates, while dried figs contribute natural sugars along with potassium and antioxidants. Additionally, the absence of artificial preservatives means you’re fueling your body with real, recognizable ingredients.
Customizable Sweetness and Flavors
Creating these bars at home allows you to control the sweetness level perfectly. The natural fruit sugars from figs provide most of the sweetness, supplemented by just enough maple syrup and brown sugar to create the ideal balance. Furthermore, you can adjust spice levels or experiment with different fruit combinations to suit your family’s preferences.
Impressive Yet Achievable Results
Despite their sophisticated appearance and complex flavors, these bars are surprisingly straightforward to make. The process requires basic baking skills and common kitchen equipment. Moreover, the forgiving nature of this recipe means even novice bakers can achieve professional-looking results that rival expensive bakery treats.
Essential Ingredients and Components
Rich Fig Filling Foundation
- 1 and 1/2 cups (about 230g) chopped dried figs, stems removed – The star ingredient providing natural sweetness and chewy texture
- 1/2 cup (120ml) water – Helps rehydrate and soften the figs during cooking
- 2 tablespoons (30ml) orange juice – Adds bright acidity and enhances the fig flavor
- 1 teaspoon pure vanilla extract – Provides aromatic depth and rounds out the filling flavors
Wholesome Crust and Topping Base
- 1/3 cup (70g) coconut oil, melted – Creates tender texture while keeping bars dairy-free
- 1/4 cup (60ml) pure maple syrup – Adds natural sweetness with subtle complexity
- 1/2 cup (100g) packed brown sugar – Contributes moisture and molasses notes
- 1 large egg, at room temperature – Binds ingredients and adds richness
Nutritious Dry Ingredients
- 1 and 2/3 cups (142g) old-fashioned whole rolled oats – Provides hearty texture and nutty flavor
- 1 cup (130g) whole wheat flour (spooned & leveled) – Adds structure while maintaining wholesome character
- 1 teaspoon baking powder – Creates slight lift for tender texture
- 3/4 teaspoon ground cinnamon – Contributes warm, aromatic spice
- 1/4 teaspoon ground nutmeg – Adds subtle complexity and depth
- 1/4 teaspoon salt – Enhances all flavors and balances sweetness
Step-by-Step Instructions
Preparing Your Workspace
Begin by preheating your oven to 350°F (177°C) for even baking results. Line an 8-inch square baking pan with parchment paper, ensuring enough overhang on the sides for easy removal later. This preparation step is crucial for clean, professional-looking bars that release effortlessly from the pan.
Creating the Perfect Fig Filling
Start with the filling since it needs time to cool before assembly. Combine chopped dried figs, water, and orange juice in a medium saucepan over medium heat. Cook while stirring occasionally for 5-8 minutes, watching as the figs soften and absorb the liquid. The mixture should appear plump and slightly saucy when ready.
Remove from heat and stir in vanilla extract, then allow the mixture to cool for 5 minutes. Transfer to a food processor or high-speed blender and puree until smooth, though don’t worry about breaking down the tiny fig seeds – they add pleasant texture. The finished filling should yield approximately 1 and 1/4 cups of smooth, spreadable consistency.
Building the Oat Base and Topping
In a large bowl, whisk together melted coconut oil, maple syrup, brown sugar, and room-temperature egg until well combined. The mixture should be smooth and glossy without any sugar lumps remaining.
Add the oats, flour, baking powder, cinnamon, nutmeg, and salt to the wet ingredients. Begin whisking to combine, then switch to a spoon or silicone spatula once the mixture becomes too thick to whisk effectively. Work until all ingredients are evenly distributed and you have approximately 2 and 1/2 cups of crumbly mixture.
Assembly and Layering Technique
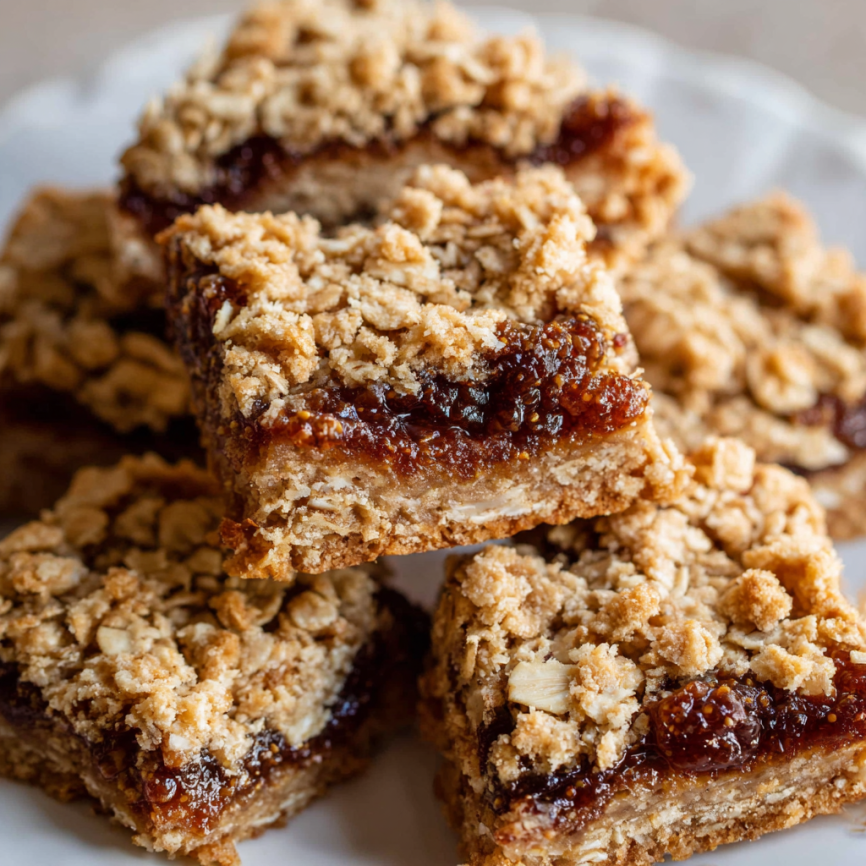
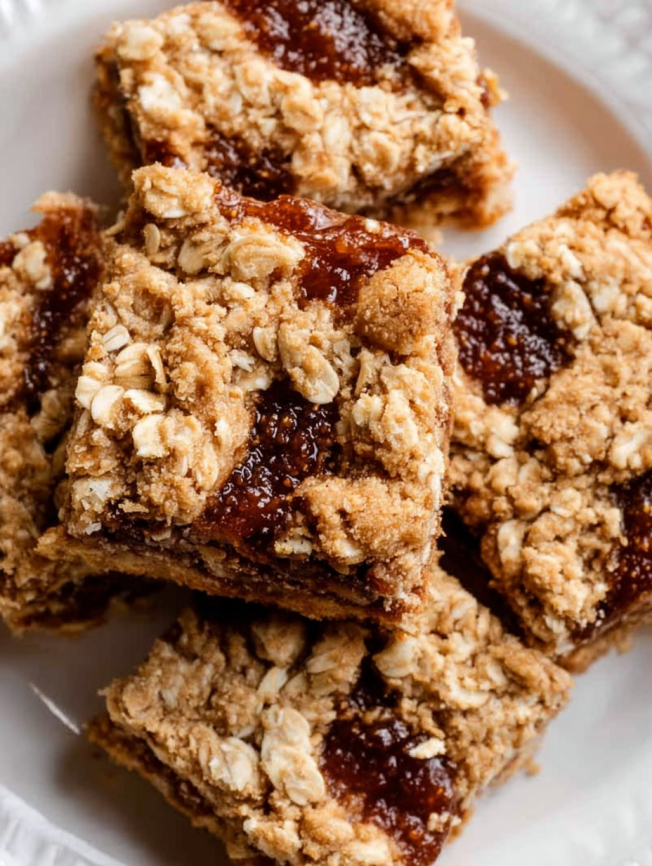
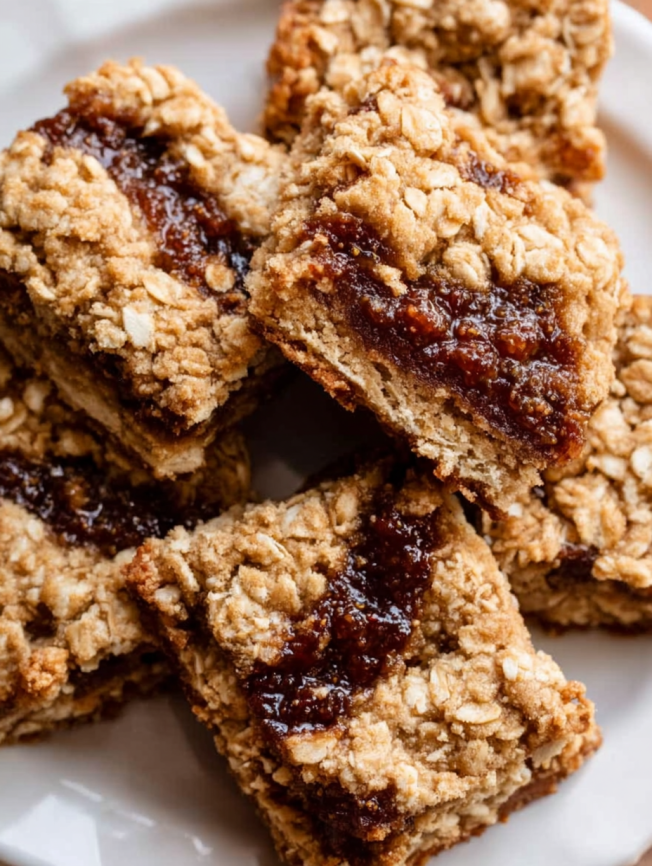
Take slightly more than 1 and 1/2 cups of the oat mixture and press it firmly and evenly into your prepared pan. Use the bottom of a measuring cup or your fingers to create a compact, level base layer that extends to all corners.
Spread the fig filling in an even layer over the pressed crust, using an offset spatula for smooth distribution. Sprinkle the remaining oat mixture evenly over the filling, then gently press it down to ensure good contact with the fig layer and create a compact top surface.
Baking to Golden Perfection
Bake for 25-30 minutes, adjusting timing based on your pan size – 8-inch pans typically require closer to 30 minutes, while 9-inch pans need about 25 minutes. Watch for light golden browning on top, being careful not to overbake, which can result in dry, hard bars.
Don’t be concerned if oil appears on the parchment paper during baking and cooling – this is completely normal with this recipe. Remove from the oven and place the entire pan on a wire rack to cool completely before cutting, as this cooling period allows the bars to set properly.
Serving Suggestions and Enjoyment
Perfect Pairing Opportunities
These fig bars shine when served with various beverages that complement their warm, spiced flavors. Hot coffee or black tea creates a classic combination, while herbal teas like chamomile or rooibos offer gentler pairings. For children, cold milk provides the traditional contrast that makes these bars even more enjoyable.
Elegant Presentation Ideas
Transform these humble bars into elegant desserts by serving them on beautiful plates with a light dusting of powdered sugar. For special occasions, consider warming them slightly and serving with a dollop of Greek yogurt or a small scoop of vanilla ice cream.
Portable Snacking Excellence
The sturdy nature of these bars makes them ideal for packed lunches, hiking trips, or travel snacks. Wrap individual bars in parchment paper for mess-free enjoyment anywhere you go.
Creative Recipe Variations
Alternative Fruit Fillings
While figs create the classic flavor, experiment with other dried fruits for exciting variations. Dried apricots create a bright, tangy filling, while dates produce an ultra-rich, caramel-like sweetness. Dried cranberries mixed with orange zest offer a festive twist perfect for holiday gatherings.
Nutty Enhancements
Add 1/2 cup of chopped walnuts, pecans, or almonds to the oat mixture for extra crunch and protein. These nuts complement the fig filling beautifully while adding satisfying texture contrast throughout each bite.
Spice Modifications
Customize the spice blend to match your preferences or seasonal themes. Try adding cardamom for Middle Eastern flair, or incorporate ginger and allspice for holiday-inspired variations. A pinch of orange zest in both the filling and crust creates bright, citrusy notes that elevate the entire bar.
Gluten-Free Adaptations
Substitute the whole wheat flour with your favorite gluten-free flour blend for those with dietary restrictions. Almond flour works particularly well, adding richness while maintaining the bars’ wholesome character.
Make-Ahead Tips and Storage
Strategic Preparation Methods
These bars actually improve in flavor after sitting for a day, making them perfect for advance preparation. You can prepare the fig filling up to three days ahead, storing it covered in the refrigerator until ready to use. The oat mixture can also be prepared a day in advance and stored at room temperature.
Long-Term Storage Solutions
Properly stored bars maintain their quality for up to 4 days at room temperature in an airtight container. For longer storage, refrigerate them for up to 10 days, though bring them to room temperature before serving for the best texture and flavor experience.
Freezing for Future Enjoyment
These bars freeze exceptionally well for up to 3 months when properly packaged. Layer them between parchment paper sheets in a freezer-safe container to prevent sticking. Thaw overnight in the refrigerator, then bring to room temperature before serving to restore their perfect chewy texture.
Important Notes and Expert Tips
Fig Selection and Preparation
The quality of dried figs significantly impacts the final result. Turkish Smyrna figs tend to be larger and more tender, while Black Mission figs offer intense, concentrated flavor. Either variety works beautifully in this recipe. When preparing figs, ensure all stems are removed, as they can create unpleasant bitter notes in the finished filling.
Equipment Considerations
A food processor creates the smoothest filling, but a high-speed blender works equally well. If using a standard blender, you may need to stop and scrape down the sides several times to achieve uniform consistency. The small fig seeds won’t break down completely, but they add pleasant texture to the finished bars.
Texture Optimization
Old-fashioned oats provide the best texture, creating distinct oat pieces that add heartiness to each bite. Quick oats can substitute in a 1:1 ratio, but they’ll create a slightly more crumbly texture. Avoid instant oats, which will become mushy during baking.
Frequently Asked Questions
Q: Can I substitute fig jam for the homemade filling? A: While the homemade filling provides superior flavor and texture control, you can use approximately 1 and 1/4 cups of high-quality fig jam as a substitute. Look for jam with minimal added sugars and no artificial ingredients for the best results.
Q: Why do my bars fall apart when I cut them? A: This usually indicates insufficient cooling time or improper pressing of the layers. Allow bars to cool completely (at least 2 hours) before cutting, and ensure you press both the bottom crust and top layer firmly during assembly. Using a sharp, clean knife also helps create clean cuts.
Q: Can I make these bars dairy-free? A: Yes! The recipe is already dairy-free when using coconut oil instead of butter. Ensure your other ingredients, particularly any substitutions, are also dairy-free to maintain this dietary accommodation.
Q: What’s the best way to cut clean bar squares? A: Use the parchment paper overhang to lift the entire batch out of the pan first, then place on a cutting board. Use a large, sharp knife and wipe it clean between cuts for the most professional appearance. A gentle sawing motion works better than pressing straight down.
Q: How can I tell when the bars are perfectly done? A: Look for light golden browning on top, particularly around the edges. The center should appear set but not dark. Overbaking results in hard, dry bars, while underbaking creates bars that won’t hold their shape when cut.
Q: Can I double this recipe for a larger batch? A: Absolutely! Double all ingredients and use a 9×13 inch pan instead. Increase the baking time to 35-40 minutes, checking for doneness at the 35-minute mark. The larger pan will create thinner bars that bake more quickly than the original thickness.


