Last February, during an unexpected snowstorm that left my family housebound for three days, I found myself staring into the pantry wondering how to create something special from basic ingredients. That’s when inspiration struck – why not combine the rich, saucy goodness of enchiladas with the hearty comfort of traditional chili? The result was this incredible Cheesy Enchilada Chili that had my kids asking for seconds and my husband requesting the recipe to share with his coworkers.
What makes this dish truly exceptional isn’t just its fusion of beloved flavors, but how it transforms ordinary weeknight ingredients into something that feels restaurant-worthy. The enchilada sauce creates a deeper, more complex base than traditional chili, while the melted cheese adds richness that elevates every spoonful. Best of all, it comes together in just 45 minutes, making it perfect for those nights when you want maximum comfort with minimal effort.
Why This Recipe Will Revolutionize Your Dinner Game
Perfect Fusion of Favorites
Rather than choosing between chili and enchiladas, this recipe delivers the best of both worlds. The robust, spiced meat base satisfies chili lovers, while the enchilada sauce and melted cheese create that beloved Mexican comfort food experience.
One-Pot Convenience
Busy schedules demand efficient cooking methods, and this recipe delivers beautifully. Everything cooks in a single pot, minimizing cleanup while maximizing flavor development through layered cooking techniques.
Crowd-Pleasing Appeal
Whether you’re feeding picky eaters or adventurous food enthusiasts, this dish strikes the perfect balance of familiar and exciting. The mild heat level welcomes all palates while optional toppings allow individual customization.
Budget-Friendly Satisfaction
Stretch your grocery budget without sacrificing satisfaction by using affordable ground meat, canned beans, and pantry staples. This recipe easily feeds a large family or provides multiple meals for smaller households.
Complete Ingredients Breakdown
Aromatic Chili Base:
- 1 tablespoon olive oil
- 1 lb ground beef or ground chicken
- 1 medium onion, diced
- 1 green bell pepper, diced
- 1 red bell pepper, diced
- 3 cloves garlic, minced
- 2 tablespoons chili powder
- 1 tablespoon ground cumin
- 1 teaspoon smoked paprika
- 1 teaspoon oregano
- ½ teaspoon salt
- ½ teaspoon black pepper
Rich Enchilada Sauce Mixture:
- 1 can (15 oz) red enchilada sauce
- 1 can (14.5 oz) diced tomatoes with juices
- 1 can (8 oz) tomato sauce
- 1 can (15 oz) black beans, drained and rinsed
- 1 can (15 oz) kidney beans, drained and rinsed
- 1 cup corn (frozen or canned)
- ½ cup water or beef broth
Creamy Cheese Components:
- 1½ cups shredded cheddar cheese
- ½ cup shredded Monterey Jack or pepper jack cheese
- ¼ cup cream cheese (optional, for extra richness)
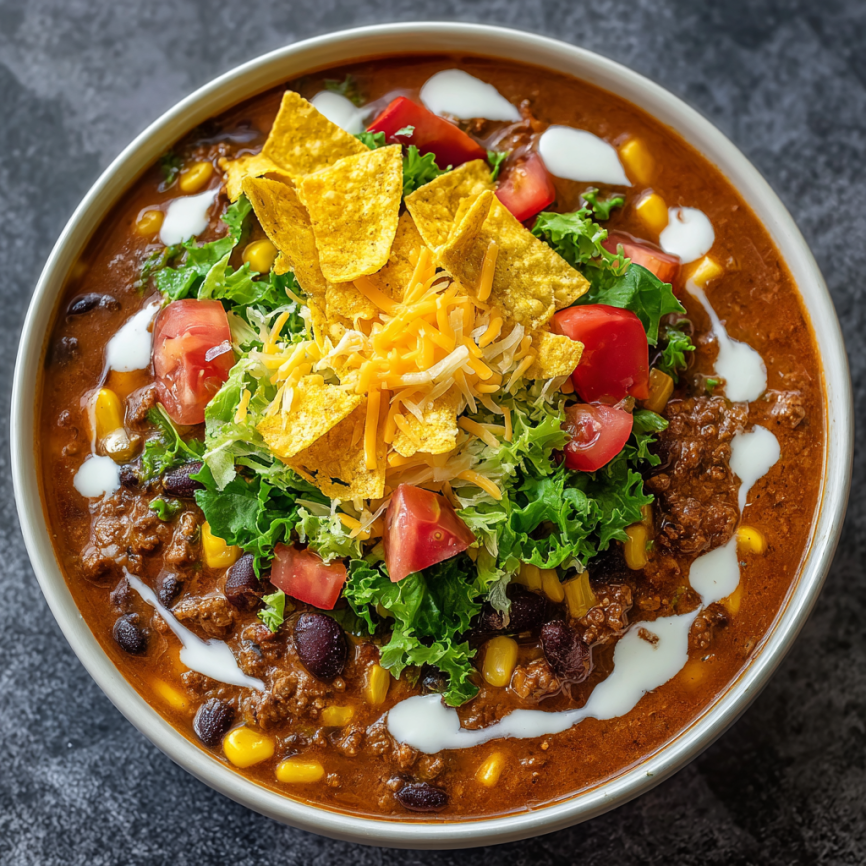
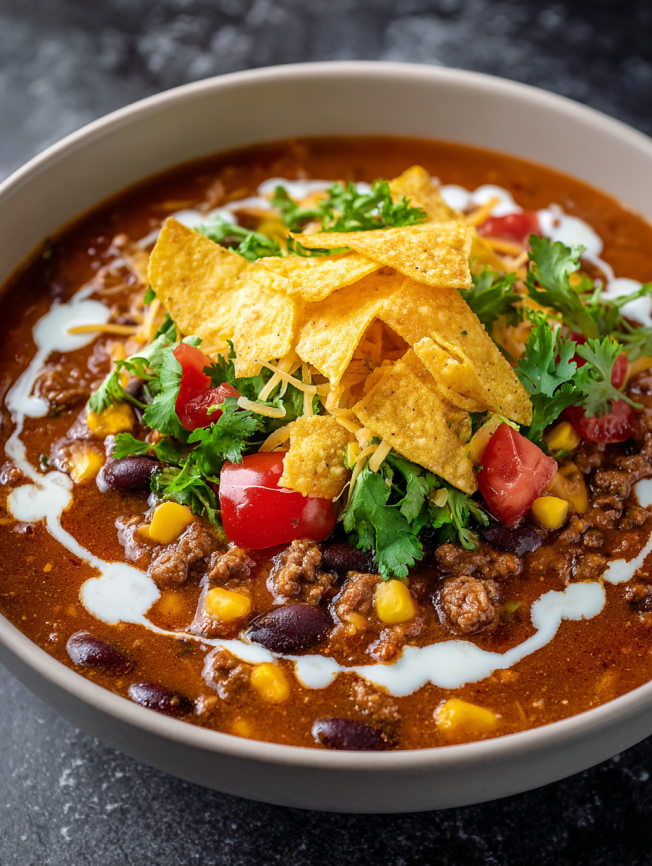
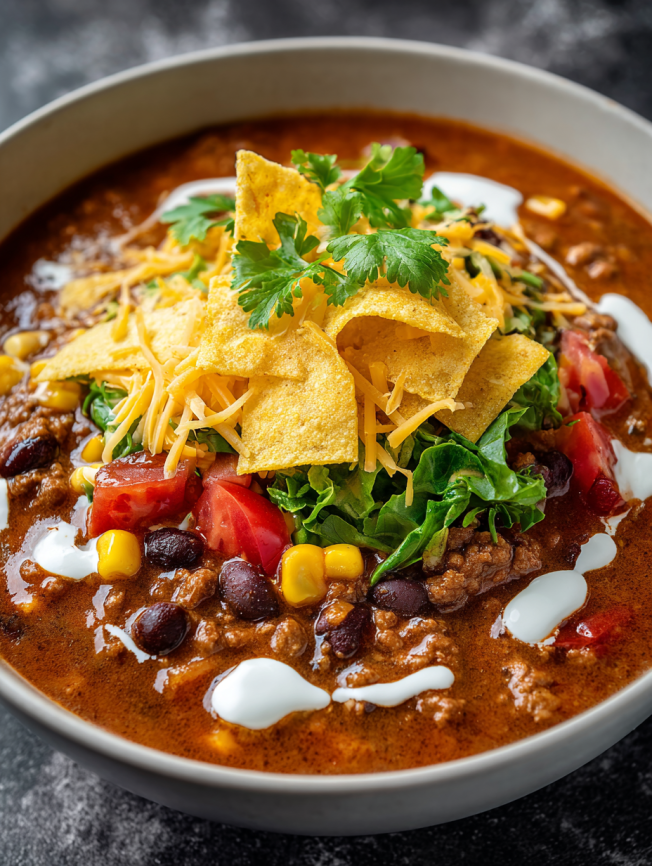
Fresh Topping Options:
- Sour cream or plain Greek yogurt
- Fresh cilantro, chopped
- Sliced jalapeños
- Diced avocado
- Lime wedges
- Tortilla chips or cornbread
Detailed Cooking Instructions
Foundation Building
Step 1: Create the Aromatic Base Heat olive oil in a large, heavy-bottomed pot over medium heat until it shimmers slightly. Add diced onions and both bell peppers, cooking for approximately 5 minutes while stirring occasionally. The vegetables should soften and become fragrant without browning. Next, incorporate minced garlic and cook for just 30 seconds until aromatic.
Step 2: Brown the Protein Increase heat to medium-high and add ground beef or chicken to the vegetable mixture. Break apart the meat using a wooden spoon, cooking until no pink remains and the meat develops light brown edges. This process typically takes 6-8 minutes and creates essential flavor foundations through proper browning.
Flavor Development
Step 3: Toast the Spices Reduce heat to medium and add chili powder, cumin, smoked paprika, oregano, salt, and pepper to the meat mixture. Stir constantly for 1-2 minutes, allowing the spices to become fragrant and bloom in the rendered fat. This technique intensifies flavor significantly compared to adding raw spices later.
Step 4: Build the Sauce Base Pour in enchilada sauce, diced tomatoes with their juices, and tomato sauce, stirring to combine thoroughly. The mixture should have a rich, deep red color and coat all the meat and vegetables evenly.
Final Assembly
Step 5: Add Beans and Corn Incorporate drained black beans, kidney beans, and corn into the mixture, followed by water or broth to achieve proper consistency. Bring the entire mixture to a rolling boil, then reduce heat to maintain a gentle simmer.
Step 6: Slow Simmer to Perfection Allow the chili to simmer uncovered for 25-30 minutes, stirring every 8-10 minutes to prevent sticking. During this time, flavors meld together while excess liquid evaporates, creating the perfect thick consistency.
Creamy Finishing Touch
Step 7: Incorporate the Cheese Reduce heat to low and gradually stir in shredded cheddar and Monterey Jack cheeses, followed by cream cheese if using. Continue stirring until all cheese melts completely and the chili becomes beautifully creamy and cohesive.
Step 8: Final Seasoning Adjustment Taste and adjust seasonings as needed, adding more salt, pepper, or spices to achieve your preferred flavor balance.
Creative Serving Presentations
Traditional Comfort Style
Serve generous bowls topped with dollops of sour cream, fresh cilantro, and sliced jalapeños alongside warm cornbread or tortilla chips. This classic presentation emphasizes the dish’s comfort food roots while providing textural contrast.
Interactive Toppings Bar
Create a DIY topping station with various options like diced avocado, shredded cheese, lime wedges, and chopped onions. This approach makes family dinners more engaging while accommodating different taste preferences within the same meal.
Creative Base Options
Transform the serving experience by ladling chili over baked potatoes, rice, or even baked sweet potatoes for different nutritional profiles. Each base creates a unique dining experience while maintaining the core comfort food appeal.
Delicious Recipe Variations
Spicy Heat Lovers Version
Elevate the heat level by substituting pepper jack for regular Monterey Jack and adding diced chipotle peppers in adobo sauce. Additionally, incorporate fresh jalapeños or serrano peppers during the vegetable sautéing stage for building heat layers.
Vegetarian-Friendly Alternative
Replace ground meat with a combination of diced mushrooms, extra beans, and crumbled tempeh or plant-based ground meat substitute. The enchilada sauce and cheese still provide rich, satisfying flavors without animal protein.
Smoky Barbecue Fusion
Add 2 tablespoons of barbecue sauce and 1 teaspoon of liquid smoke to create a unique flavor profile that bridges Tex-Mex and Southern comfort food traditions. This variation pairs excellently with cornbread and coleslaw.
White Bean and Chicken Version
Create a lighter variation using white beans, ground chicken or turkey, and green enchilada sauce instead of red. Top with Monterey Jack cheese and fresh lime for a brighter, yet equally satisfying meal.
Make-Ahead Strategies and Storage
Advance Preparation Options
This chili actually improves in flavor when made ahead of time, making it perfect for meal planning. Prepare the entire recipe up to three days in advance, storing it in the refrigerator and reheating gently before serving.
Freezer-Friendly Solutions
Portion cooled chili into freezer-safe containers or bags, removing as much air as possible before sealing. Properly stored, this chili maintains quality for up to three months and provides convenient future meals.
Batch Cooking Benefits
Double or triple the recipe during preparation to maximize cooking time investment. Having multiple portions ready transforms busy weeknights into stress-free dinner solutions with minimal additional effort.
Reheating Best Practices
Reheat refrigerated chili slowly over medium-low heat, stirring frequently and adding small amounts of broth or water if needed to restore proper consistency. Microwave reheating works for individual portions but may require stirring to ensure even heating.
Essential Cooking Notes
Cheese Selection Impact: Freshly shredded cheese melts significantly better than pre-shredded varieties, which contain anti-caking agents that can create grainy textures. The extra effort of grating cheese yourself pays off in creaminess.
Spice Level Control: Start with recommended spice amounts and adjust gradually, as heat levels can vary significantly between different chili powder brands. Remember that flavors intensify during the simmering process.
Consistency Management: The chili should be thick enough to coat a spoon but not so thick that it becomes paste-like. Adjust liquid levels during cooking to achieve your preferred consistency.
Bean Preparation: Rinsing canned beans removes excess sodium and starch, preventing the chili from becoming too thick or salty. However, reserve some bean liquid if you prefer a slightly thicker consistency.
Meat Browning Importance: Proper browning creates fond (browned bits) that adds significant flavor depth to the final dish. Don’t rush this step, as it forms the flavor foundation for the entire recipe.
Frequently Asked Questions
Q: Can I use different types of ground meat in this recipe? A: Absolutely! Ground turkey, pork, or even a mixture of different meats work beautifully. Each provides slightly different flavor profiles, with turkey being leaner and pork adding richness. Adjust cooking times slightly based on the meat’s fat content.
Q: What’s the best way to prevent the cheese from becoming stringy or clumpy? A: Remove the chili from heat before adding cheese, and stir it in gradually while the mixture is still hot but not actively cooking. This gentle melting process prevents overheating, which causes proteins to seize and become stringy.
Q: Can I make this recipe in a slow cooker? A: Yes, but brown the meat and sauté vegetables first for better flavor development. Transfer everything to your slow cooker and cook on low for 4-6 hours. Add cheese during the final 30 minutes to prevent overcooking.
Q: How can I make this recipe less spicy for sensitive palates? A: Reduce chili powder to 1 tablespoon, omit the smoked paprika, and use mild enchilada sauce. You can also add a tablespoon of sugar to balance heat, or serve with cooling toppings like sour cream and avocado.
Q: What’s the best way to thicken chili that’s too thin? A: Simmer uncovered for additional time to reduce liquid, or mix 2 tablespoons of cornstarch with cold water to create a slurry, then stir into the simmering chili. Mashed beans also work as a natural thickener.
Q: Can I substitute the enchilada sauce with something else? A: While enchilada sauce provides the signature flavor, you can substitute with a mixture of tomato sauce, chili powder, cumin, and paprika. However, the unique taste profile that makes this recipe special comes specifically from the enchilada sauce.
Prep Time: 15 minutes
Cook Time: 30 minutes
Total Time: 45 minutes
Servings: 6-8
Cuisine: American/Tex-Mex Fusion
This Cheesy Enchilada Chili represents the perfect marriage of two beloved comfort food traditions, creating something entirely new while honoring the essence of both. Whether you’re feeding a crowd or meal-prepping for busy weeks ahead, this recipe delivers satisfaction, convenience, and unforgettable flavor in every warming bowl.


