Every December, my kitchen transforms into a peppermint wonderland, and this Peppermint Bark Fudge has become the crown jewel of my holiday baking tradition. Last year, I discovered the perfect way to capture all the festive charm of classic peppermint bark while creating something even more indulgent—creamy, melt-in-your-mouth fudge that delivers those beloved chocolate and peppermint flavors in perfect harmony.
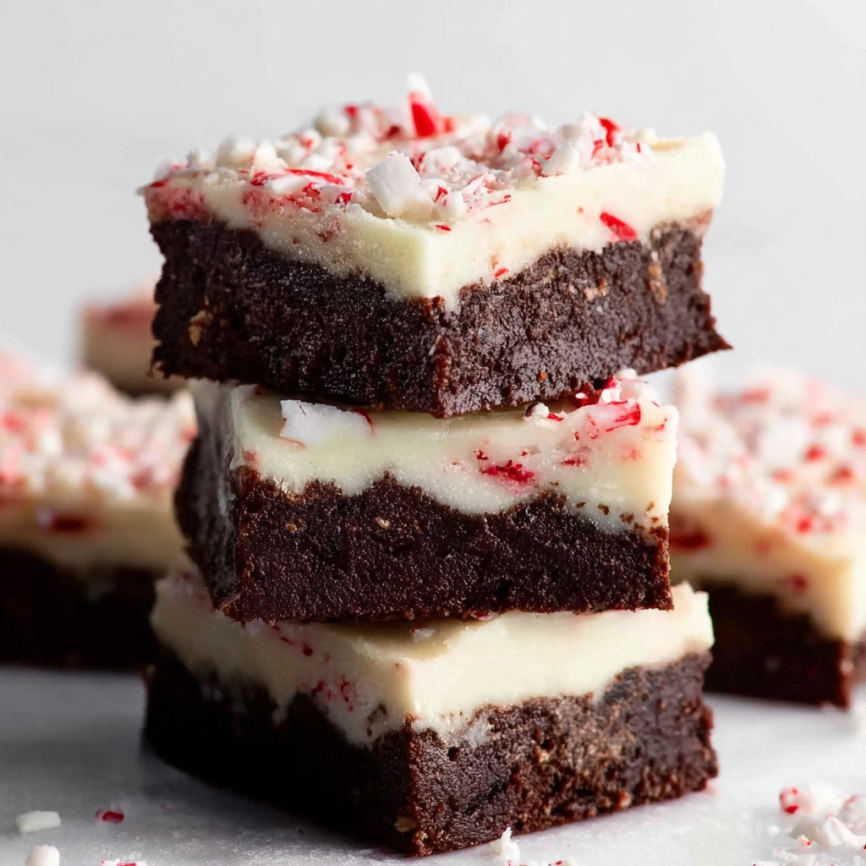
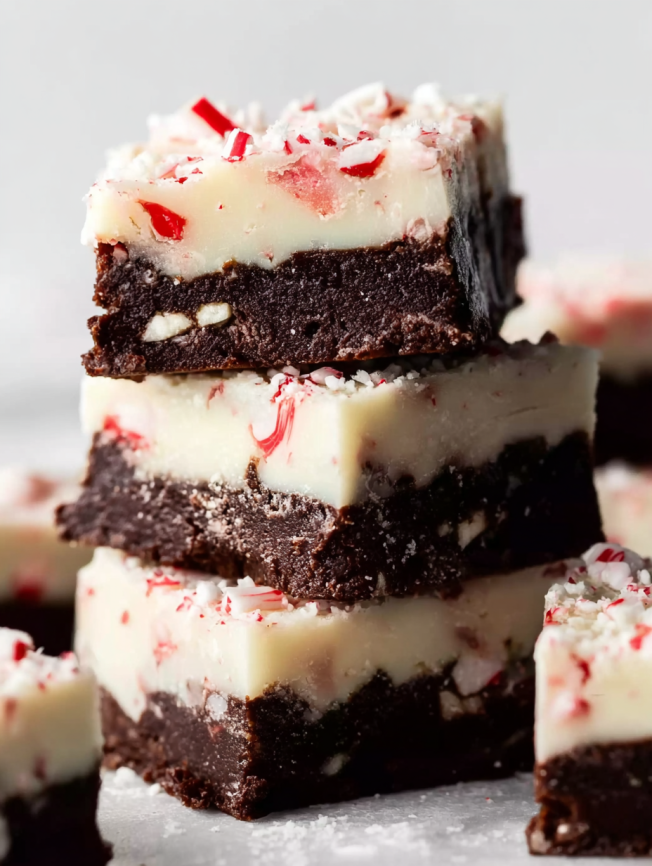
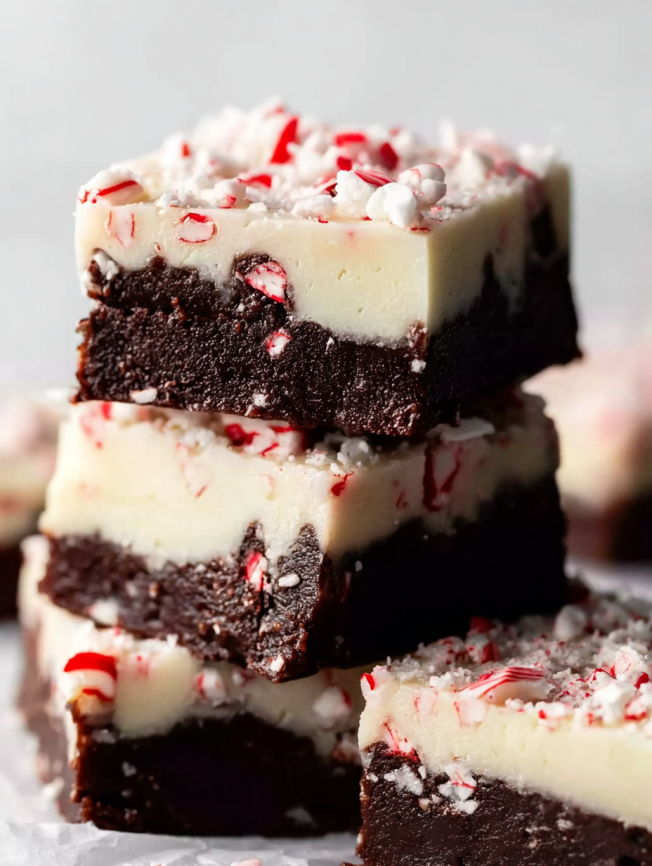
What started as an experiment to satisfy my peppermint bark cravings year-round has evolved into my most requested holiday treat. Friends and family now expect these beautiful two-toned squares at every gathering, and I’ve watched countless faces light up with that first bite. The combination of rich chocolate and bright white chocolate layers, punctuated by festive crushed candy canes, creates pure holiday magic.
Why This Fudge Will Become Your Holiday Hero
Foolproof Success Without the Fuss
Traditional fudge recipes can be intimidating with their candy thermometers and endless stirring requirements. However, this shortcut method eliminates all that stress while delivering professional-quality results. The sweetened condensed milk base ensures perfect consistency every single time, making it ideal for both novice and experienced candy makers.
Stunning Visual Appeal
The gorgeous two-layer presentation creates an impressive centerpiece for any holiday spread. Moreover, the contrasting colors—rich chocolate brown topped with pristine white—immediately signal festive celebration. When you add the cheerful red and white candy cane pieces, the visual impact becomes absolutely irresistible.
Make-Ahead Convenience
Holiday entertaining demands recipes that work with your schedule rather than against it. This fudge actually improves with time, developing deeper flavors as it sets. Additionally, it freezes beautifully, allowing you to prepare weeks in advance without sacrificing quality.
Perfect Gift Potential
Few homemade treats say “happy holidays” quite like beautifully packaged fudge squares. These travel well, look professional, and create lasting memories for recipients—all while staying fresh for extended periods.
Essential Ingredients for Success
Chocolate Layer Foundation
- ½ cup + 1 tablespoon (195g) sweetened condensed milk (half a can)
- 1½ cups (270g) semi-sweet chocolate chips
- 2 tablespoons (12g) marshmallow creme
- ½ teaspoon pure vanilla extract
- ¼ teaspoon peppermint extract
White Chocolate Layer Components
- ½ cup + 1 tablespoon (195g) sweetened condensed milk (remaining half can)
- 1½ cups (270g) white chocolate chips
- 2 tablespoons (12g) marshmallow creme
- ½ teaspoon pure vanilla extract
- ¼ teaspoon peppermint extract
- ⅓ cup (45g) crushed candy canes, plus 1 extra tablespoon for garnish
Smart Shopping Tips
Quality chocolate chips make a noticeable difference in both flavor and texture. Choose reputable brands for the smoothest melting results. When selecting candy canes, traditional peppermint varieties work best—avoid flavored alternatives that might clash with the chocolate. Furthermore, ensure your marshmallow creme is fresh, as older containers can become difficult to incorporate smoothly.
Step-by-Step Instructions
Setting Up for Success
Step 1: Prepare Your Workspace Begin by lining an 8-inch square baking pan with aluminum foil or parchment paper, leaving generous overhang on all sides for easy removal later. This preparation step is crucial—attempting to remove set fudge from an unlined pan often results in broken pieces and frustration.
Creating the Chocolate Foundation
Step 2: Master the Chocolate Layer In a medium saucepan over medium heat, combine half the sweetened condensed milk, chocolate chips, and marshmallow creme. Stir constantly as the mixture heats—this prevents scorching and ensures smooth incorporation. Once the chocolate chips have completely melted and the mixture appears uniformly smooth, remove from heat immediately.
Step 3: Add Flavor Enhancers Quickly stir in vanilla and peppermint extracts while the mixture is still warm. The heat helps distribute these flavors evenly throughout the chocolate base. Work efficiently during this step, as the mixture begins firming as it cools.
Step 4: Create the Base Layer Pour the chocolate mixture into your prepared pan and spread evenly using a small offset spatula. Don’t worry about achieving perfect smoothness—the white layer will cover any minor imperfections. Place the pan in the refrigerator while you prepare the white chocolate layer.
Building the White Chocolate Crown
Step 5: Clean Your Equipment Wipe your saucepan clean with paper towels, being careful as it may still be warm from the previous batch. Alternatively, wash and dry completely if you prefer. Clean equipment ensures the white chocolate layer maintains its pristine color.
Step 6: Prepare the White Chocolate Mixture Combine the remaining sweetened condensed milk, white chocolate chips, and marshmallow creme in the clean saucepan over medium heat. Stir constantly until the white chocolate melts completely. This layer will be slightly thinner than the chocolate layer, which is perfectly normal and expected.
Step 7: Incorporate Festive Elements Once smooth, remove from heat and stir in vanilla extract, peppermint extract, and the crushed candy canes. The candy pieces add both texture and visual appeal, creating those distinctive peppermint bark characteristics we all love.
Final Assembly and Setting
Step 8: Layer and Garnish Pour the white chocolate mixture over the chilled chocolate layer, spreading gently to avoid disturbing the base. Work quickly but carefully to achieve even coverage. Sprinkle the reserved crushed candy canes on top for extra visual impact and textural contrast.
Step 9: The Patience Phase Cover the pan with aluminum foil and refrigerate for at least 4 hours, though overnight chilling produces the best results. Proper setting time ensures clean cuts and prevents cracking when you slice the fudge.
Step 10: Perfect Portioning Once completely set, lift the fudge from the pan using the foil overhang. Peel away the foil carefully, then cut into 1-inch squares using a sharp knife. Clean the blade between cuts for the neatest presentation.
Creative Serving Ideas
Elegant Presentation Options
Arrange fudge squares on a beautiful platter lined with festive parchment or doilies. Consider alternating the pieces to create interesting patterns, or group them in small gift boxes for individual servings.
Temperature Considerations
While delicious straight from the refrigerator, allowing the fudge to come to room temperature for 10-15 minutes before serving enhances the creamy texture and allows flavors to fully develop.
Pairing Suggestions
These rich squares pair wonderfully with strong coffee, hot chocolate, or dessert wines. For children’s parties, serve alongside cold milk or hot cocoa for the perfect treat combination.
Exciting Recipe Variations
Seasonal Adaptations
Transform this recipe for different holidays by changing the extract flavors and mix-ins. Try orange extract with mini chocolate chips for Halloween, or vanilla extract with crushed cookies for other celebrations.
Chocolate Alternatives
Experiment with different chocolate varieties—dark chocolate creates a more sophisticated flavor profile, while milk chocolate appeals to those preferring milder tastes. Each variation offers its own unique character.
Mix-in Modifications
Beyond candy canes, consider crushed peppermint cookies, mini marshmallows, or even toasted nuts. Each addition creates a different textural experience while maintaining the basic fudge structure.
Size Variations
Create bite-sized pieces for parties by cutting smaller squares, or make larger portions for special gifts. Adjust presentation accordingly—smaller pieces work well for large gatherings, while larger squares make impressive individual treats.
Make-Ahead Mastery
Advance Preparation Strategy
This fudge actually benefits from advance preparation, as flavors meld and improve over time. Prepare up to three weeks ahead and store in the refrigerator, or freeze for up to two months without quality loss.
Proper Storage Techniques
Store finished fudge in airtight containers with parchment paper between layers to prevent sticking. Room temperature storage works for up to one week, while refrigeration extends freshness to 2-3 weeks.
Freezing Guidelines
For longer storage, wrap the entire uncut block in plastic wrap, then place in an airtight container before freezing. This method prevents freezer burn and maintains optimal texture. Thaw overnight in the refrigerator before cutting and serving.
Gift-Giving Preparation
Package individual pieces in small boxes or bags up to one week before gifting. Store packaged fudge in cool, dry conditions to maintain peak freshness until presentation.
Professional Tips and Techniques
Temperature Control Matters
Medium heat is crucial for proper melting—too high and you risk scorching, too low and the mixture won’t combine properly. Watch for gentle bubbling around the edges as your indicator of correct temperature.
Stirring Technique Importance
Constant stirring prevents hot spots and ensures even melting. Use a wooden spoon or heat-resistant silicone spatula for best results, avoiding metal utensils that can scratch your pan.
Ingredient Quality Impact
Premium chocolate chips and real vanilla extract significantly improve the final product’s taste and texture. While slightly more expensive, these upgrades are worthwhile for special occasions.
Pan Size Considerations
An 8-inch pan creates perfectly thick squares, while a 9-inch pan results in slightly thinner pieces. Both work well, but adjust expectations accordingly when cutting and serving.
Candy Cane Crushing Mastery
Place unwrapped candy canes in a sealed plastic bag and use a rolling pin to crush them. Aim for varied sizes—some fine pieces for easy eating, some larger chunks for visual appeal and texture contrast.
Frequently Asked Questions
Q: Why did my fudge turn out grainy instead of smooth? A: Graininess typically results from overheating or insufficient stirring. Keep heat at medium and stir constantly. If it happens, try reheating gently while stirring vigorously to smooth it out.
Q: Can I use a different type of milk instead of sweetened condensed milk? A: Sweetened condensed milk is essential for this recipe’s success—it provides both sweetness and the proper consistency. Regular milk or evaporated milk won’t produce the same results.
Q: My white chocolate layer looks yellowish. What went wrong? A: This usually indicates overheating. White chocolate is more sensitive to temperature than regular chocolate, so use lower heat and remove from heat as soon as it’s melted and smooth.
Q: How do I know when the fudge is properly set? A: The surface should feel firm to gentle touch, and the fudge shouldn’t indent when pressed lightly with your finger. If still soft, continue chilling until completely set.
Q: Can I make this fudge without marshmallow creme? A: Yes! Substitute with 3 heaping tablespoons of mini marshmallows in each layer. They’ll melt during cooking and provide similar texture and stability.
Q: Why are my fudge squares cracking when I cut them? A: This usually means the fudge is too cold or the knife isn’t sharp enough. Let it sit at room temperature for 10-15 minutes before cutting, and use a sharp knife cleaned between cuts.
Q: How can I make cleaner cuts? A: Use a sharp knife warmed under hot water, then dried before each cut. Score the surface lightly first to create cutting guides, then make firm, decisive cuts straight down.
Q: What’s the best way to crush candy canes evenly? A: Place unwrapped candy canes in a heavy-duty plastic bag, seal tightly, then use a rolling pin or meat mallet to crush. Aim for pieces ranging from fine powder to small chunks for the best texture variety.
Prep Time: 20 minutes
Cook Time: 5 minutes
Total Time: 4 hours, 25 minutes
Yield: 64 1-inch squares
Cuisine: American Holiday


