Prep Time: 45 minutes | Cook Time: 15 minutes | Total Time: 1 hour | Yield: 3 dozen cookies
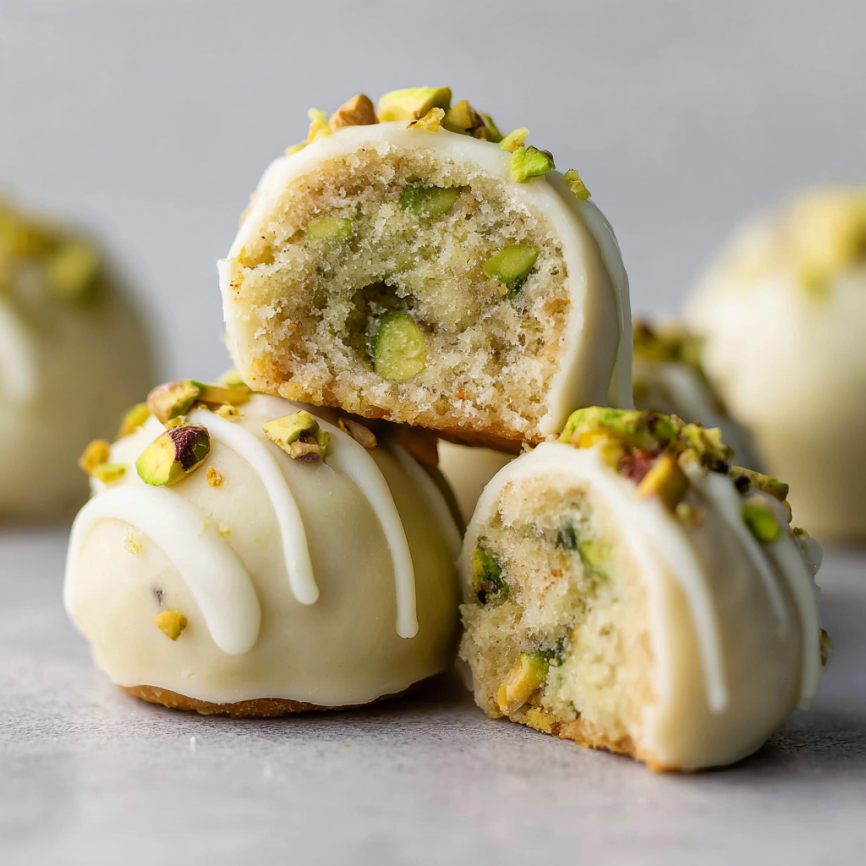
The first time I made these pistachio drop cookies, I was transported to a charming Mediterranean café where the air was filled with the aroma of toasted nuts and sweet butter. What started as an adaptation of my beloved snowball cookies has evolved into something truly special – soft, crumbly cookies bursting with real pistachio flavor and crowned with an elegant brown butter icing that adds just the right touch of sophistication.
Why These Cookies Will Steal Your Heart
Real Pistachio Flavor
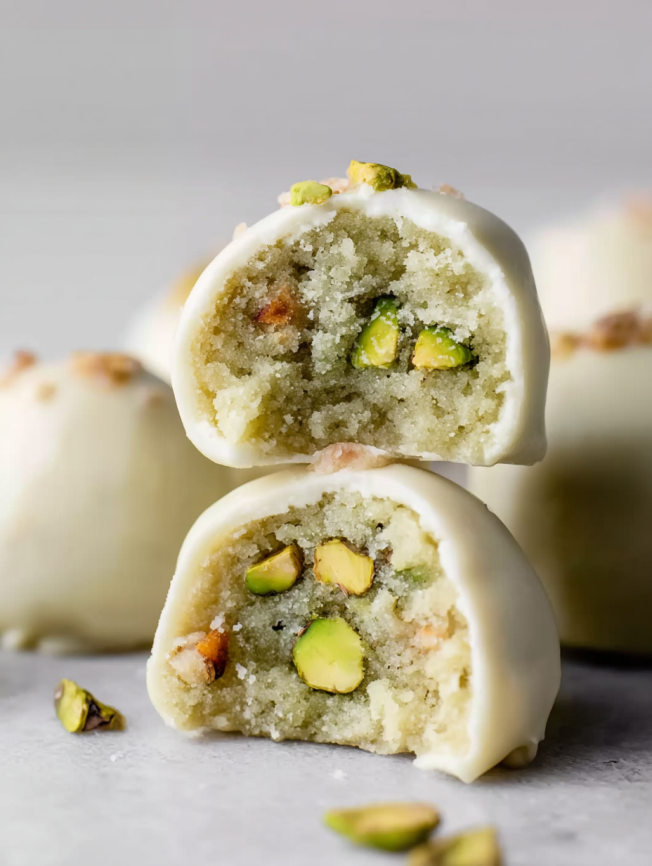
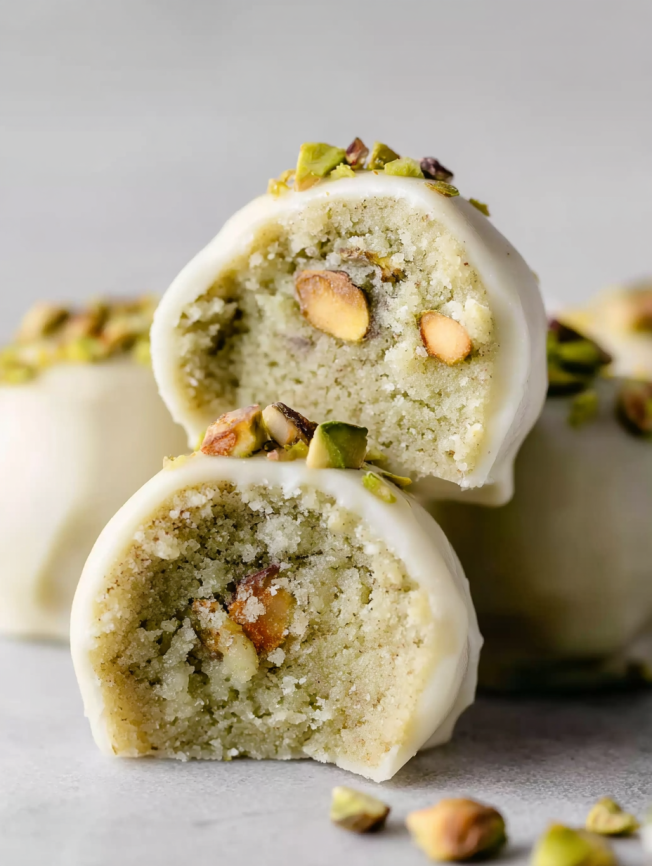
Unlike many pistachio desserts that rely on artificial flavoring, these cookies showcase the genuine, nutty richness of real pistachios. Every bite delivers that distinctive taste that makes pistachios so beloved – earthy, slightly sweet, and absolutely irresistible.
Simple Yet Elegant
With just six basic ingredients for the cookies and four for the optional icing, this recipe proves that simplicity often yields the most impressive results. The brown butter icing elevates these humble drop cookies into something worthy of your finest dinner party.
Quick and Convenient
Requiring only 30 minutes of chilling time, these cookies satisfy your baking cravings without the lengthy wait that many cookie recipes demand. From start to finish, you’ll have fresh-baked cookies in just one hour.
Essential Ingredients
Cookie Base
- 1 cup (130g) salted or unsalted pistachios
- 1 cup (16 Tbsp; 226g) unsalted butter, softened to room temperature
- ¾ cup (90g) confectioners’ sugar
- 1 teaspoon pure vanilla extract
- 1 teaspoon almond extract
- 2¼ cups (281g) all-purpose flour (spooned & leveled)
- Optional: 1-2 drops green food coloring
Brown Butter Icing (Optional but Recommended)
- ¼ cup (4 Tbsp; 56g) unsalted butter
- 1 cup (120g) confectioners’ sugar
- 2 tablespoons (30ml) milk or heavy cream
- ¼ teaspoon pure vanilla extract
Ingredient Quality Tips
Choose high-quality pistachios for the best flavor – they should be vibrant green and smell fresh, not rancid. Confectioners’ sugar is crucial here; granulated sugar will cause the cookies to spread too much and create an unpleasant grainy texture.
Step-by-Step Instructions
Preparing the Pistachios
Start by pulsing the pistachios in a food processor until they form small, uniform crumbs. You’ll need exactly ¾ cup of finely chopped pistachios – any more will make your cookies too crumbly to hold together properly.
Creating the Cookie Dough
Using either a handheld or stand mixer with paddle attachment, beat the softened butter for one full minute on medium speed. This creates a completely smooth and creamy base. Next, add the confectioners’ sugar, vanilla extract, and almond extract, beating on medium-high speed until everything is well combined.
Bringing It All Together
Add the flour, ¾ cup of pistachio crumbs, and food coloring (if using) to the butter mixture. Beat on medium-high speed until combined. Don’t worry if the dough appears to resist coming together at first – keep mixing, and it will eventually form a cohesive, thick dough.
The Essential Chill
Cover the cookie dough tightly and refrigerate for 30 minutes. This brief chilling period helps the cookies maintain their shape during baking. However, if you’re planning ahead, the dough can stay refrigerated for up to 3 days.
Shaping and Baking
Preheat your oven to 350°F (177°C) and line large baking sheets with parchment paper or silicone mats. Roll the chilled dough into balls using about 1 tablespoon of dough each. If the dough feels crumbly, don’t panic – the warmth of your hands will help bring it together as you roll.
Place the dough balls 2 inches apart on your prepared baking sheets. Bake for 14-15 minutes, until the cookies are lightly browned on the bottom edges and just barely golden on top.
Cooling Process
Allow cookies to rest on the baking sheet for 5 minutes before transferring to a wire rack. This prevents them from breaking apart while still warm and ensures they maintain their tender texture.
Mastering Brown Butter Icing
The Art of Brown Butter
Creating perfect brown butter requires attention and patience. Slice the butter into pieces and place them in a light-colored skillet – this helps you monitor the color change. Melt over medium heat, stirring occasionally as the butter foams and begins to develop those coveted lightly browned specks.
Timing is Everything
After 5-6 minutes, you’ll notice a beautiful nutty aroma emerging. Once you see the brown specks forming, remove the skillet from heat immediately. Allow the butter to cool for exactly 5 minutes – any longer and it may solidify before you can make your icing.
Final Assembly
Whisk the cooled brown butter with confectioners’ sugar, milk or heavy cream, and vanilla extract until smooth. The consistency should be perfect for dipping or drizzling. Adjust thickness by adding more sugar to thicken or more liquid to thin as needed.
Serving Suggestions
Presentation Ideas
These cookies are naturally elegant and work beautifully on a tiered serving tray alongside other Mediterranean-inspired treats. The subtle green hue makes them perfect for spring gatherings or St. Patrick’s Day celebrations.
Pairing Options
Serve these alongside espresso or Turkish coffee to complement their nutty richness. They also pair wonderfully with vanilla ice cream or fresh berries for a more substantial dessert.
Creative Variations
Flavor Adaptations
While the combination of vanilla and almond extracts is classic, you can experiment with orange zest for a citrusy twist or add a pinch of cardamom for an exotic touch. Rose water can also create an interesting Middle Eastern flavor profile.
Seasonal Modifications
During the holidays, consider adding a touch of cinnamon to the dough or using colored sugar instead of food coloring. For summer gatherings, try incorporating dried cranberries or chopped white chocolate chips.
Size Variations
Make mini cookies using half the dough per cookie for bite-sized appetizers, or create jumbo versions using 2 tablespoons of dough each for a more substantial treat. Adjust baking time accordingly.
Make-Ahead Tips
Dough Storage
The cookie dough is incredibly accommodating for advance preparation. Shape the dough into balls and store them in the refrigerator for up to 3 days or freeze for up to 3 months. When ready to bake, bring chilled dough to room temperature first.
Icing Considerations
Brown butter icing is best made fresh, but you can prepare it while the cookies bake or chill. If the icing becomes too thick while waiting, simply whisk in a teaspoon of warm milk to restore the proper consistency.
Storage Solutions
Cookies without icing stay fresh at room temperature for up to one week when stored in an airtight container. Iced cookies should be consumed within 24 hours at room temperature or can be refrigerated for up to one week.
Important Notes
Equipment Essentials
A food processor is crucial for achieving the proper pistachio texture – hand chopping won’t provide the consistent results needed. Additionally, a light-colored skillet is important for monitoring the brown butter progress.
Pistachio Selection
Quality matters significantly with pistachios. Look for nuts that are vibrant green in color and have a fresh, nutty aroma. Avoid any that smell rancid or appear dull in color, as this will negatively impact your cookies’ flavor.
Understanding Texture
Don’t be alarmed if the dough seems crumbly when you first try to shape it. The natural oils in the pistachios and butter will come together with gentle handling, and the warmth from your hands helps bind everything properly.
Frequently Asked Questions
Q: Can I use pre-ground pistachios instead of whole ones? A: Fresh grinding produces the best flavor and texture. Pre-ground pistachios may be too fine or potentially stale, which will compromise the cookies’ quality.
Q: Is the brown butter icing necessary? A: While optional, the brown butter icing adds sophistication and complements the pistachio flavor beautifully. However, these cookies are delicious on their own or dusted with powdered sugar.
Q: Why do my cookies spread too much during baking? A: This usually indicates that either the dough wasn’t chilled long enough, the butter was too warm, or granulated sugar was accidentally used instead of confectioners’ sugar.
Q: Can I make these cookies without a food processor? A: While a food processor gives the best results, you can finely chop pistachios by hand with a sharp knife. Ensure they’re chopped as uniformly as possible for consistent texture.
Q: How do I know when the brown butter is ready? A: Look for lightly browned specks and listen for the nutty aroma. The butter should smell toasted and fragrant, not burned. If you’re unsure, err on the side of caution and remove it from heat earlier.
Q: Can I substitute other nuts? A: While pistachios provide a unique flavor, you can substitute with finely ground almonds or hazelnuts. However, the distinctive pistachio taste is what makes these cookies special.
Q: Why is my icing too thick or too thin? A: Icing consistency depends on how long the brown butter cooled and the exact amount of liquid used. Simply adjust by adding more confectioners’ sugar to thicken or more milk to thin until you reach the desired consistency.
These pistachio drop cookies represent the perfect marriage of simplicity and sophistication. With their tender crumb, rich nutty flavor, and elegant brown butter icing, they’re guaranteed to become a treasured addition to your baking repertoire. Whether served at an intimate gathering or enjoyed with your morning coffee, these cookies bring a touch of gourmet elegance to any occasion.


