Total Time: 30 minutes | Prep Time: 10 minutes | Cook Time: 20 minutes | Cuisine: American
Sometimes the most brilliant recipe ideas come from the simplest combinations. These Tuna Melt Stuffed Bell Peppers were born during one of those hectic weeknight moments when I was craving the comfort of a classic tuna melt but wanted something lighter and more nutritious. The inspiration struck as I stared at beautiful bell peppers in my refrigerator alongside a can of tuna – why not combine the best of both worlds?
What started as a quick solution to dinner has become one of my family’s favorite go-to meals. The beauty lies in how this recipe transforms humble ingredients into something that feels both familiar and exciting. Instead of heavy bread, vibrant bell peppers provide the perfect vessel, creating a meal that’s satisfying without the post-lunch sluggishness.
This recipe perfectly captures the essence of comfort food while embracing modern healthy eating trends. Furthermore, it’s incredibly versatile and forgiving, making it ideal for both experienced cooks and kitchen novices looking to create something impressive with minimal effort.
Why You’ll Love These Tuna Melt Stuffed Peppers
Low-Carb Comfort Food Perfection These stuffed peppers deliver all the satisfaction of a traditional tuna melt without the heavy bread. The bell peppers provide natural sweetness and crunch that perfectly complements the creamy tuna filling, creating a lighter yet equally satisfying meal experience.
Quick and Easy Weeknight Solution With just 30 minutes from start to finish, this recipe fits seamlessly into busy schedules. The preparation is straightforward and requires no special cooking skills, making it perfect for those nights when you want something delicious without spending hours in the kitchen.
Meal Prep Champion These stuffed peppers are excellent for meal prepping since they store beautifully and reheat perfectly. Additionally, you can prepare the filling ahead of time and stuff the peppers just before baking, making weekday meals even more convenient.
Customizable to Every Taste The base recipe serves as a fantastic canvas for creativity. Whether you prefer different cheeses, want to add vegetables, or need to accommodate dietary restrictions, this recipe adapts beautifully to your preferences and needs.
Nutritionally Balanced Packed with protein from tuna, vitamins from bell peppers, and healthy fats from mayonnaise, this dish provides balanced nutrition that keeps you satisfied for hours. Moreover, it’s naturally gluten-free and can easily be made dairy-free.
Ingredients You’ll Need
The Foundation
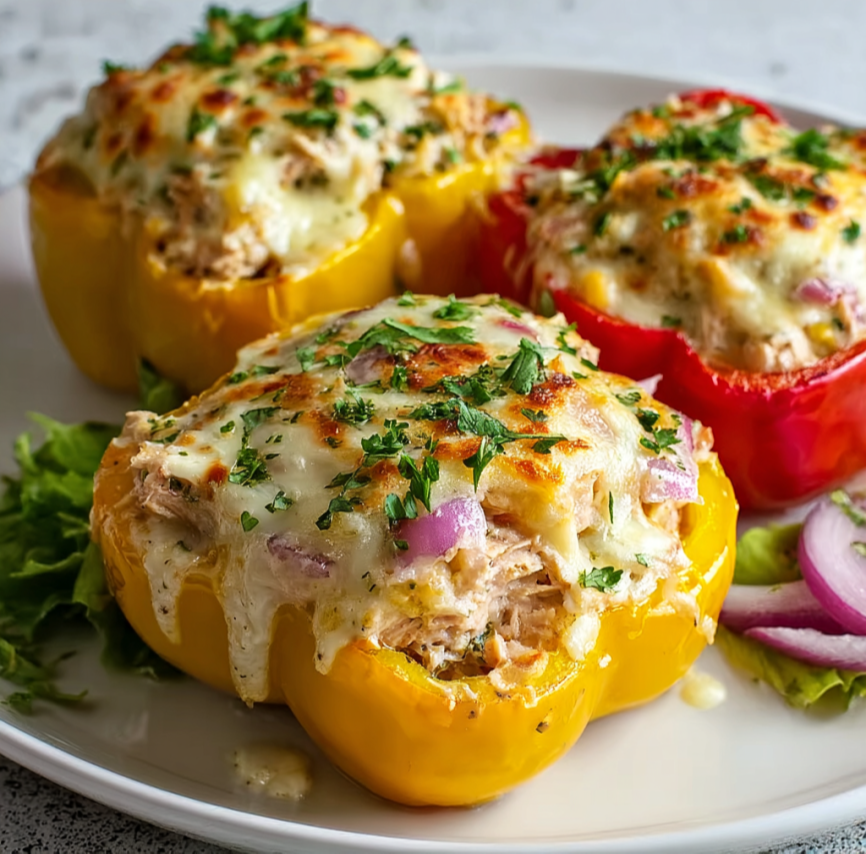
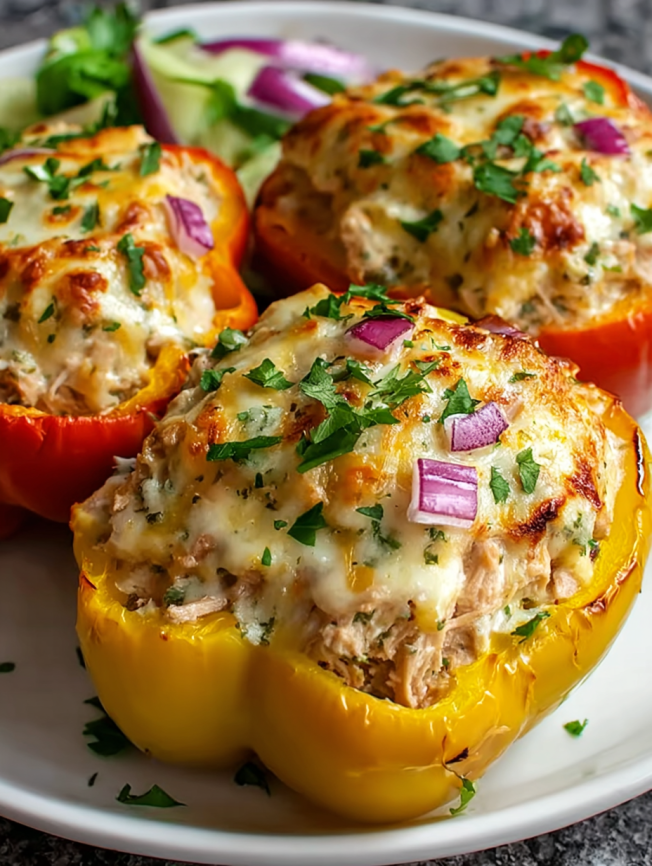
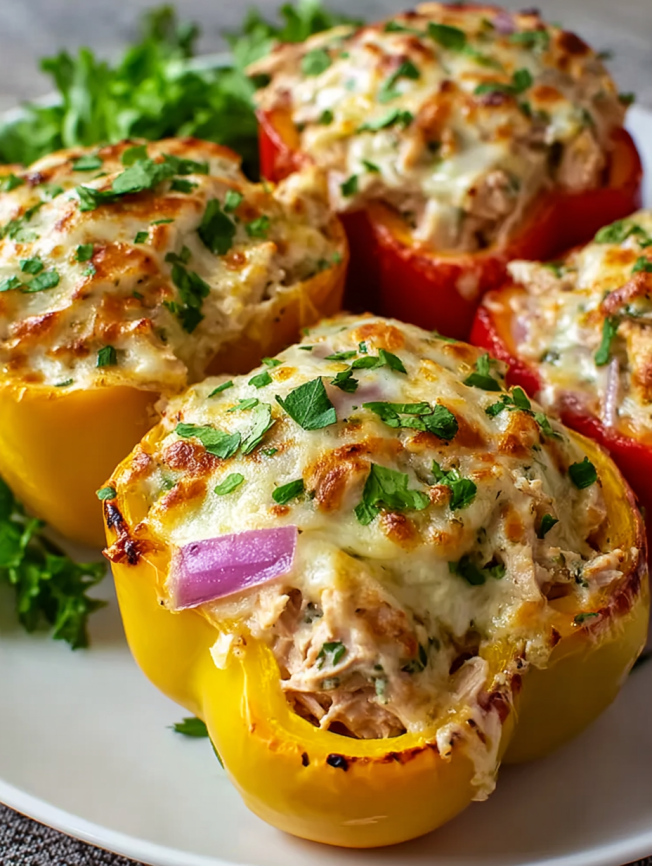
- Bell Peppers (3 large, any color) – Choose firm, bright-colored peppers that will hold their shape during baking and provide natural sweetness
- Tuna (2 cans, 5 oz each, drained) – The protein star that provides hearty substance and classic flavor
Creamy Tuna Salad Base
- Mayonnaise (¼ cup) – Creates the creamy binding that holds everything together perfectly
- Dijon Mustard (1 tablespoon) – Adds tangy depth and sophisticated flavor complexity
- Lemon Juice (1 teaspoon) – Brightens the entire mixture and prevents the tuna from tasting flat
- Garlic Powder (½ teaspoon) – Provides savory depth without the bite of fresh garlic
Flavor Enhancers
- Black Pepper (¼ teaspoon) – Essential seasoning that adds warmth and complexity
- Red Onion (¼ cup, finely chopped) – Contributes sharp flavor and satisfying crunch
Cheesy Topping
- Cheddar Cheese (½ cup, shredded) – Classic choice that melts beautifully and provides sharp, tangy flavor
- Mozzarella Cheese (½ cup, shredded) – Creates that perfect stretchy, gooey texture we all love
Optional Garnish
- Fresh Parsley or Green Onions (2 tablespoons, chopped) – Adds fresh color and mild onion flavor for finishing
Step-by-Step Instructions
Preparing the Foundation
Step 1: Set Up for Success Preheat your oven to 375°F (190°C), ensuring it’s fully heated before you begin baking. This temperature provides the perfect balance of cooking the peppers until tender while melting the cheese to golden perfection.
Prepare your bell peppers by cutting them in half lengthwise, removing all seeds and white membranes. If your peppers don’t sit flat, carefully trim a small slice from the bottom to create stability. Arrange the pepper halves cut-side up on a large baking sheet, ensuring they have enough space between them for even heating.
Creating the Perfect Tuna Filling
Step 2: Master the Tuna Mixture In a medium mixing bowl, combine the drained tuna, mayonnaise, Dijon mustard, lemon juice, garlic powder, and black pepper. Using a fork, gently flake the tuna while mixing, creating a cohesive but not overly smooth texture. The goal is to maintain some texture while ensuring every bite is well-seasoned.
Add the finely chopped red onion and fold it in gently. The onion should be distributed evenly throughout the mixture, providing little bursts of sharp flavor and satisfying crunch in every bite.
Assembly and Baking
Step 3: Stuff with Precision Divide the tuna mixture evenly among the six pepper halves, mounding it slightly in the center. Don’t pack the filling too tightly, as this can make the peppers difficult to eat. Instead, create gentle mounds that will hold together during baking.
Sprinkle the cheddar cheese evenly over each stuffed pepper, followed by the mozzarella. The combination of these two cheeses creates both flavor complexity and the perfect melting characteristics.
Step 4: Achieve Baking Perfection Place the baking sheet in the preheated oven and bake for 15-20 minutes, until the peppers are tender when pierced with a knife and the cheese is melted and bubbling. The exact timing depends on the thickness of your pepper walls and your desired level of tenderness.
For an extra-special golden finish, switch to broil for the final 2-3 minutes, watching carefully to prevent burning. The cheese should develop beautiful golden spots while maintaining its gooey texture.
Final Touches
Step 5: Perfect the Presentation Remove the peppers from the oven and let them cool for 3-4 minutes before serving. This brief resting period allows the filling to set slightly, making them easier to handle and preventing burns from molten cheese.
If using garnishes, sprinkle the chopped parsley or green onions over each pepper just before serving for a fresh pop of color and flavor.
Serving Suggestions
Light Meal Pairings
These stuffed peppers work beautifully as a complete light meal when served with a simple side salad dressed with vinaigrette. The fresh greens provide a nice contrast to the rich, creamy filling while keeping the overall meal balanced and satisfying.
Hearty Dinner Options
For a more substantial meal, serve alongside roasted sweet potato wedges or quinoa pilaf. These sides complement the peppers while adding additional nutrients and fiber to create a truly satisfying dinner experience.
Elegant Presentation Ideas
For entertaining, arrange the stuffed peppers on individual plates with a small mixed green salad and a dollop of avocado crema or herb yogurt sauce. This presentation elevates the humble tuna melt into something restaurant-worthy.
Recipe Variations
Mediterranean Inspired Version
Transform these peppers with Mediterranean flavors by adding diced tomatoes, olives, and feta cheese to the tuna mixture. Replace the mozzarella with additional feta and finish with fresh basil for a completely different but equally delicious experience.
Spicy Southwest Style**
Give your peppers a kick by adding diced jalapeños, cumin, and chili powder to the tuna mixture. Top with pepper jack cheese instead of cheddar and garnish with fresh cilantro and a squeeze of lime for a southwestern twist.
Gourmet Upgrade
Elevate the dish by using high-quality tuna in olive oil, adding capers and fresh dill to the mixture, and topping with gruyere cheese. This version feels elegant enough for entertaining while maintaining the recipe’s simplicity.
Veggie-Packed Version
Boost the nutritional content by mixing diced celery, shredded carrots, and chopped bell pepper remnants into the tuna filling. These additions provide extra crunch, color, and vitamins without overwhelming the classic tuna melt flavors.
Protein Power Bowl**
For those following high-protein diets, add a chopped hard-boiled egg to the tuna mixture and top with extra cheese. This variation provides substantial protein while maintaining the recipe’s satisfying comfort food appeal.
Make-Ahead Tips
Strategic Preparation
The tuna filling can be prepared up to two days in advance and stored in the refrigerator. This actually improves the flavor as the ingredients have time to meld together. Simply stuff the peppers and add cheese just before baking for the freshest results.
Freezer-Friendly Options
These stuffed peppers freeze beautifully for up to three months. Prepare them completely but don’t bake, then wrap individually and freeze. Bake directly from frozen, adding an extra 10-15 minutes to the cooking time.
Meal Prep Excellence
For weekly meal prep, prepare 6-8 stuffed peppers at once. Store cooked peppers in individual containers for easy grab-and-go lunches throughout the week. They reheat perfectly in the microwave or oven.
Time-Saving Shortcuts
Keep cooked bell pepper halves in the refrigerator for quick assembly throughout the week. This way, you can have a fresh, hot meal ready in just the baking time plus a few minutes of prep.
Professional Tips & Notes
- Pepper Selection: Choose peppers that are roughly the same size for even cooking. Red, yellow, and orange peppers tend to be sweeter than green ones, but all work wonderfully in this recipe.
- Cheese Melting Success: For the best melting results, bring cheese to room temperature before using. Cold cheese takes longer to melt and can result in overcooked peppers.
- Texture Control: For a smoother tuna filling, pulse the mixture briefly in a food processor. For more texture, mix by hand and leave some larger tuna chunks.
- Drainage Matters: Ensure tuna is well-drained to prevent watery filling. Press it gently with paper towels if needed to remove excess moisture.
- Storage Success: Leftover stuffed peppers keep in the refrigerator for up to 3 days and reheat beautifully in the microwave or oven.
Frequently Asked Questions
Can I use different types of fish?
Absolutely! Canned salmon, sardines, or even leftover cooked fish work wonderfully. Adjust the seasonings slightly to complement your chosen fish – salmon pairs beautifully with dill, while sardines work well with lemon and herbs.
What if I don’t like mayonnaise?
Greek yogurt makes an excellent substitute for mayonnaise, providing similar creaminess with added protein and fewer calories. You can also use avocado mashed with a bit of lemon juice for a healthier, dairy-free option.
How do I prevent the peppers from getting too soft?
For firmer peppers, reduce the baking time to 12-15 minutes or pre-bake the empty pepper halves for 5 minutes before adding the filling. Some people prefer their peppers with more bite, while others like them very tender.
Can I make these ahead for a party?
Yes! Assemble the stuffed peppers completely and refrigerate for up to 24 hours before baking. You may need to add 2-3 extra minutes to the baking time since they’ll be starting from cold.
What’s the best way to reheat leftovers?
For best results, reheat in a 350°F oven for 8-10 minutes until heated through. Microwave reheating works too – use 50% power for 1-2 minutes to prevent the cheese from becoming rubbery.
Can I make this recipe dairy-free?
Certainly! Use vegan mayonnaise and dairy-free cheese shreds. Nutritional yeast mixed into the tuna filling can also provide cheesy flavor without any dairy products.
Why is my tuna filling too dry or too wet?
Tuna packing liquid varies by brand. Start with the recommended amount of mayonnaise and adjust as needed. Well-drained tuna in water typically needs more mayo than tuna packed in oil.
Can I stuff other vegetables instead of peppers?
Yes! Large tomatoes, zucchini boats, or even portobello mushroom caps work beautifully with this filling. Adjust cooking times based on the vegetable you choose – tomatoes cook faster, while zucchini may take slightly longer.


