Growing up, Halloween wasn’t just about trick-or-treating for me—it was about creating memories in the kitchen with my grandmother. Every October, she’d pull out her worn recipe cards and transform our ordinary dining room into a haunted feast. Among all her spooky creations, one dessert always stole the show: her legendary Spiderweb Chocolate Cake. The way she’d carefully drizzle melted white chocolate and transform it into an intricate web pattern seemed like pure magic to my eight-year-old eyes.
Now, decades later, I’ve perfected her recipe and added my own touches to create this show-stopping dessert. This isn’t just any chocolate cake—it’s a rich, incredibly moist masterpiece that combines the deep, indulgent flavors of premium cocoa with an eye-catching spiderweb design that never fails to impress guests.
Why You’ll Fall Under This Cake’s Spell
Incredibly Moist Texture: The secret lies in adding boiling water to the batter, which blooms the cocoa powder and creates an impossibly tender crumb. Additionally, the combination of oil and milk ensures the cake stays moist for days.
Fool-Proof Spiderweb Design: Many people think creating the signature web pattern requires professional decorating skills. However, with just melted white chocolate and a toothpick, anyone can achieve this stunning effect in minutes.
Make-Ahead Friendly: This cake actually improves with time, making it perfect for party planning. Furthermore, the spiderweb design holds beautifully, so you can prepare it a day in advance without worry.
Essential Ingredients & Serving Details
Serves: 10-12 generous portions
For the Cake:
- 1¾ cups all-purpose flour
- 1½ cups granulated sugar
- ¾ cup unsweetened cocoa powder
- 1½ teaspoons baking powder
- 1½ teaspoons baking soda
- 1 teaspoon salt
- 2 large eggs, room temperature
- 1 cup whole milk
- ½ cup vegetable oil
- 2 teaspoons pure vanilla extract
- 1 cup boiling water
For Assembly & Decoration:
- 3 cups chocolate buttercream frosting (homemade or store-bought)
- ½ cup white chocolate chips
- 1 tablespoon coconut oil (optional, for smoother drizzling)
Perfect Serving Companions:
- Vanilla ice cream with a drizzle of caramel
- Fresh berries for color contrast
- Whipped cream dusted with cinnamon
- Hot apple cider or pumpkin spice coffee
Step-by-Step Instructions
Preparing the Cake Base
- Preheat and Prep: Set your oven to 350°F (175°C). Generously grease two 9-inch round baking pans with butter, then dust with cocoa powder instead of flour for extra chocolate flavor.
- Mix Dry Ingredients: In a large mixing bowl, whisk together flour, sugar, cocoa powder, baking powder, baking soda, and salt until well combined. Make sure to break up any cocoa clumps.
- Combine Wet Ingredients: In a separate bowl, beat eggs lightly, then add milk, vegetable oil, and vanilla extract. Mix until smooth and well incorporated.
Creating the Perfect Batter
- Marry Wet and Dry: Pour the wet ingredients into the dry mixture. Using an electric mixer on medium speed, beat for 2 minutes until the batter is completely smooth.
- The Magic Touch: Slowly stir in the boiling water. Don’t worry—the batter will be quite thin, which is exactly what creates that incredibly moist texture.
- Bake to Perfection: Divide the batter evenly between prepared pans. Bake for 30-35 minutes, or until a toothpick inserted in the center comes out with just a few moist crumbs.
Assembly and Decoration
- Cool Properly: Allow cakes to cool in pans for 10 minutes, then turn out onto wire racks. Let them cool completely before frosting—this prevents melting and ensures clean layers.
- Layer and Frost: Place one layer on your serving plate. Spread a generous amount of frosting on top, then add the second layer. Apply a crumb coat (thin layer of frosting), chill for 30 minutes, then apply the final frosting layer.
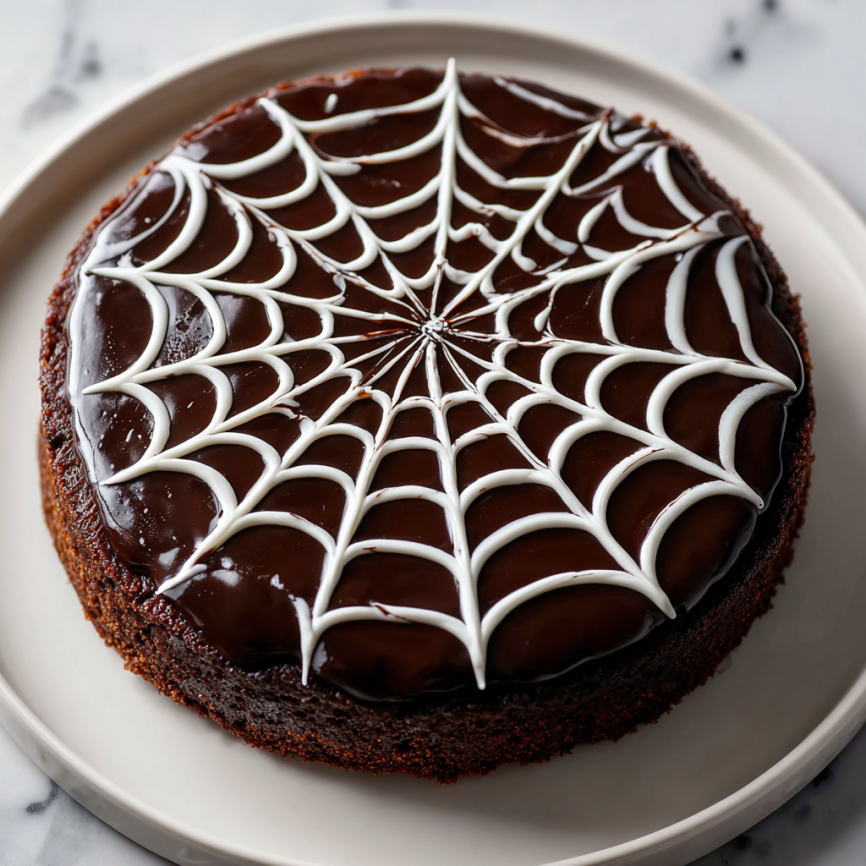
Creating the Spiderweb Design
- Prepare White Chocolate: Melt white chocolate chips with coconut oil in 30-second microwave intervals, stirring between each, until smooth.
- Draw the Web: Starting from the center, drizzle melted white chocolate in a spiral pattern, working outward to create 4-5 concentric circles.
- Create Web Lines: Using a toothpick, draw straight lines from the center to the edge, spacing them about 1 inch apart. Alternate directions with each line to create the classic web pattern.
Serving Suggestions That Wow
Transform this cake into the centerpiece of your Halloween celebration with these creative presentation ideas. Serve on a black cake stand surrounded by plastic spiders for maximum spookiness. Moreover, dim the lights and add battery-operated candles around the base to create an eerie glow.
For a more elegant approach, dust the serving plate with powdered sugar to mimic cobwebs, then garnish with fresh blackberries. The contrast between the dark cake and bright berries creates a stunning visual impact.
Creative Recipe Variations
Orange Spiderweb Twist
Replace half the white chocolate with orange-tinted white chocolate. This creates a vibrant, Halloween-colored web that’s perfect for autumn celebrations.
Peanut Butter Spider Cake
Add ½ cup of peanut butter to the frosting for a rich, nutty flavor. The combination of chocolate and peanut butter makes this variation irresistible to kids and adults alike.
Gluten-Free Version
Substitute the all-purpose flour with a 1:1 gluten-free baking blend. Additionally, ensure all other ingredients are certified gluten-free for those with dietary restrictions.
Mini Spiderweb Cupcakes
Divide the batter among 24 cupcake liners and bake for 18-20 minutes. Create individual spiderweb designs on each cupcake for a perfect party treat.
Make-Ahead Tips for Stress-Free Entertaining
Up to 3 Days Ahead: Bake the cake layers, wrap tightly in plastic wrap, and store at room temperature. This actually improves the texture and makes frosting easier.
Day Before Serving: Assemble and frost the entire cake, but save the spiderweb design for the day of serving. Store covered in the refrigerator, then bring to room temperature before decorating.
Freezer-Friendly Option: Wrapped cake layers freeze beautifully for up to 3 months. Thaw overnight in the refrigerator before assembling.
White Chocolate Prep: Melt the white chocolate up to 2 hours in advance and keep warm in a double boiler or thermos. This prevents the need for reheating, which can cause the chocolate to seize.
Important Notes (Notas)
Boiling Water Safety: Always add the hot water slowly and stir gently to prevent splattering. The thin batter is normal and creates the cake’s signature moisture.
Frosting Temperature: Ensure your cake is completely cool before frosting. Even slightly warm cake will cause the frosting to melt and slide off.
White Chocolate Quality: Use high-quality white chocolate chips or bars for the best flavor and smoothest melting. Avoid white chocolate morsels, which often contain stabilizers that affect melting.
Storage Considerations: This cake keeps well at room temperature for 3 days or refrigerated for up to a week. However, bring refrigerated cake to room temperature before serving for the best texture.
Frequently Asked Questions
Can I use dark chocolate frosting instead of milk chocolate? Absolutely! Dark chocolate frosting creates a more dramatic contrast with the white spiderweb design. Just ensure the frosting is smooth and not too stiff for easy spreading.
What if my spiderweb design doesn’t look perfect? Don’t worry—imperfect webs actually look more realistic! If you’re unhappy with the result, gently scrape off the white chocolate with a knife and start over while the frosting is still soft.
Can I make this cake in different pan sizes? Yes, but adjust baking times accordingly. For a 9×13 inch pan, bake for 35-40 minutes. For three 8-inch rounds, reduce baking time to 25-30 minutes.
How do I prevent the white chocolate from hardening too quickly? Work in a warm kitchen and add a tablespoon of coconut oil to the melted chocolate. This keeps it fluid longer and creates smoother lines.
Is there a dairy-free version of this recipe? Replace the milk with unsweetened almond milk or oat milk, and use dairy-free chocolate chips for the web design. The results are nearly identical to the original.
Can I add food coloring to the white chocolate? Yes! Gel food coloring works best and won’t affect the chocolate’s consistency. Add just a tiny amount—a little goes a long way with white chocolate.
What’s the best way to transport this cake? Use a cake carrier with a high dome to protect the spiderweb design. If transporting without a carrier, add the web design after arrival for best results.


