Yield: 16 cookies
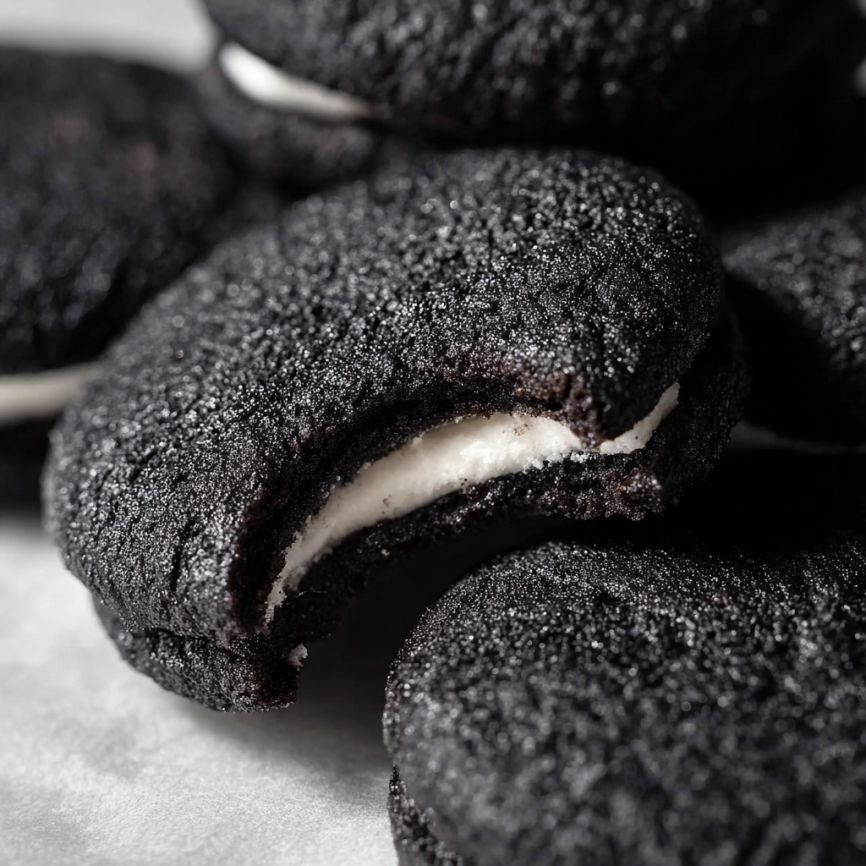
There’s something absolutely magical about biting into a cookie that looks mysterious on the outside but reveals a creamy, dreamy surprise within. These Black Velvet Cheesecake Cookies have become my go-to recipe whenever I want to create something that’s both visually stunning and incredibly delicious. Originally inspired by my love for red velvet cake and classic cheesecake, I decided to give them a spooky twist with deep black cocoa powder that transforms them into the perfect Halloween treat.
The first time I made these cookies, I was amazed at how they perfectly captured the essence of an Oreo cookie while offering something completely unique. Moreover, the combination of rich chocolate and tangy cheesecake filling creates a flavor profile that’s absolutely irresistible.
Why You’ll Fall in Love with This Recipe
Perfect Balance of Flavors
These cookies strike an incredible balance between the deep, rich chocolate flavor and the bright, tangy cheesecake center. Furthermore, the black cocoa powder gives them an intense chocolate taste that’s not overly sweet, making each bite perfectly satisfying.
Show-Stopping Appearance
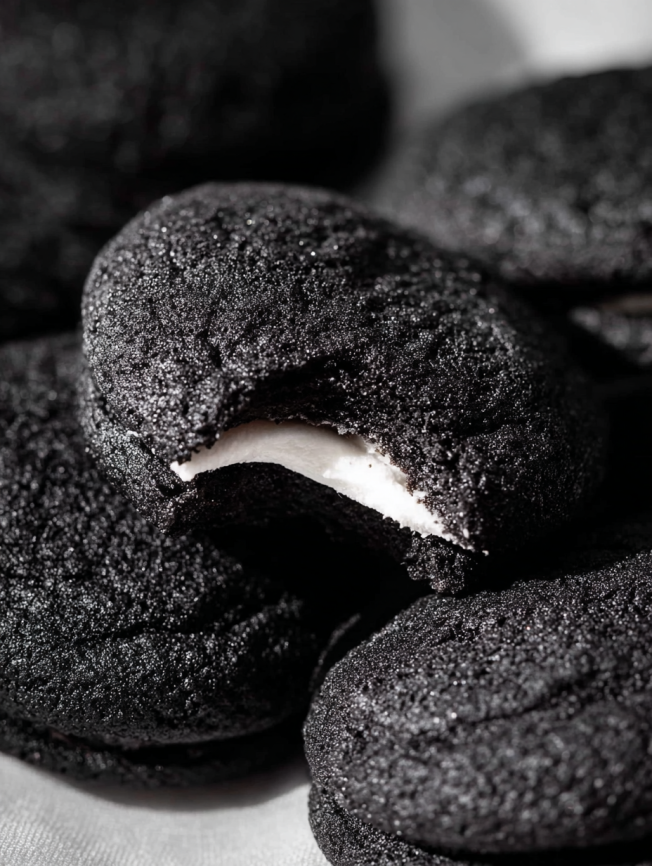
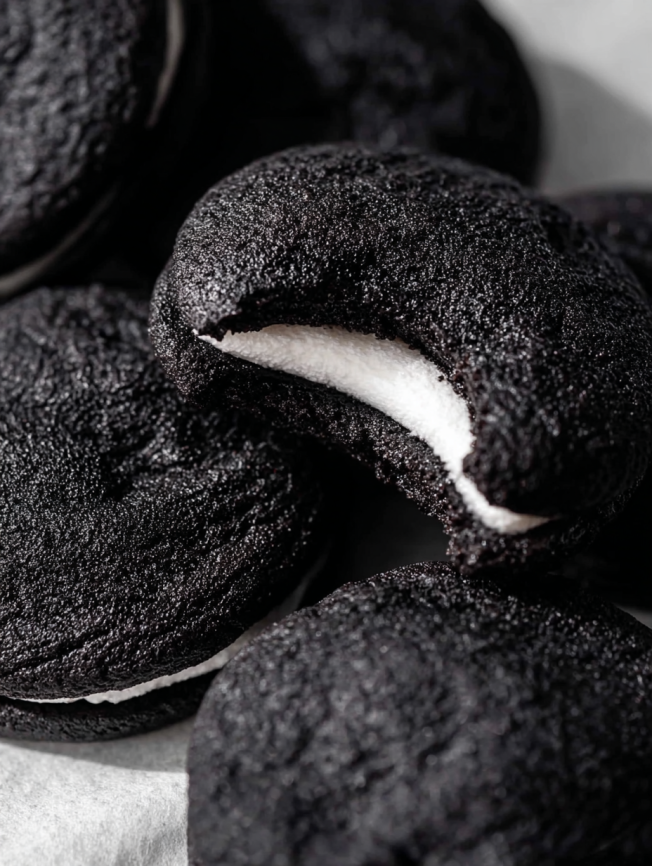
The dramatic black exterior rolled in black cocoa sugar creates an eye-catching treat that’s perfect for Halloween parties or any time you want to impress guests. Additionally, when you bite into them, the contrast between the dark cookie and white cheesecake filling is absolutely stunning.
Manageable Technique
While these cookies look complex, the technique is surprisingly straightforward. Even better, most of the components can be prepared ahead of time, making them perfect for busy bakers who want impressive results.
Essential Ingredients
For the Cheesecake Filling
- 6 oz (170 g) cream cheese, cold
- 3 tbsp (38 g) granulated white sugar
- 1/2 tsp vanilla extract
For the Black Cocoa Sugar Coating
- 1/4 cup (50 g) granulated white sugar
- 2 tsp (3 g) black cocoa powder
For the Black Cocoa Cookies
- 1 1/2 cups (188 g) all-purpose flour, spooned and leveled
- 1/2 cup (40 g) black cocoa powder
- 1/2 tsp baking powder
- 1/2 tsp salt
- 3/4 cup (168 g) unsalted butter, softened
- 3/4 cup (165 g) light brown sugar, packed
- 1/4 cup (50 g) granulated white sugar
- 2 egg yolks, at room temperature
- 1 1/2 tsp vanilla extract
Serving Suggestions
Serve these cookies with a tall glass of cold milk for the classic experience. Alternatively, pair them with vanilla ice cream for an elevated dessert, or enjoy them alongside a cup of hot coffee to balance the sweetness.
Step-by-Step Instructions
Preparing the Cheesecake Filling
Begin by lining a small cookie sheet with parchment paper. Next, add the cream cheese, sugar, and vanilla to a small bowl, then mix on medium-high speed with an electric mixer until fluffy and the sugar has completely dissolved, approximately 2 minutes.
Using a small cookie scoop or spoons, portion the cheesecake filling into 16 equal portions of about 2 teaspoons each onto the prepared baking sheet. Once portioned, place the cheesecake balls into the freezer until they become frozen and very firm, which typically takes about 30 minutes.
Creating the Black Cocoa Sugar
While the cheesecake balls are freezing, combine the granulated sugar and black cocoa powder in a small bowl. Whisk thoroughly to ensure even distribution, then set the mixture aside for later use.
Making the Cookie Dough
Start by preheating your oven to 350°F (175°C) and lining two baking sheets with parchment paper. In a medium bowl, whisk together the flour, black cocoa powder, baking powder, and salt until well combined. Set this dry mixture aside for now.
Using a large bowl, cream the softened butter with both the brown sugar and granulated white sugar. Beat with an electric hand mixer on high speed until the mixture becomes light and fluffy, which should take about 2 minutes. If you prefer, you can use a stand mixer fitted with a paddle attachment for this step.
Combining the Components
Add the egg yolks and vanilla extract to the butter mixture, then beat on medium speed for one minute until the mixture becomes pale and fluffy. Gradually add the dry ingredients to the wet mixture, combining on low speed until just incorporated.
Assembly Process
Using a 2-tablespoon cookie scoop, portion the dough into 16 equal portions and roll each into a ball. Gently flatten each dough ball, then place a frozen cheesecake ball in the center. Carefully wrap the cookie dough around the cheesecake filling, ensuring the filling is completely enclosed. Roll the assembled cookies into smooth balls, then roll each one in the black cocoa sugar mixture.
Transfer the coated cookie dough balls to the prepared baking sheets, spacing them adequately apart. Bake 6 cookies at a time for 10-11 minutes, watching carefully to prevent overbaking.
Final Touch
Immediately after removing the cookies from the oven, use a large, round cookie cutter to gently shape them into perfect circles while they’re still warm and pliable. Allow the cookies to cool on the baking sheet for 10 minutes before transferring them to a wire rack to cool completely.
Creative Variations
White Chocolate Version
Replace the black cocoa powder with regular cocoa powder and add 1/2 cup of white chocolate chips to the dough. Additionally, roll the cookies in regular granulated sugar instead of the black cocoa sugar mixture.
Strawberry Cheesecake Twist
Add 2 tablespoons of strawberry jam to the cheesecake filling and a few drops of pink food coloring. This creates a beautiful contrast when you bite into the dark cookies.
Double Chocolate Indulgence
Fold 1/2 cup of mini chocolate chips into the cookie dough before assembling. Furthermore, you can drizzle melted chocolate over the cooled cookies for extra decadence.
Make-Ahead Tips
Preparing Components in Advance
The cheesecake filling can be prepared and frozen up to one week ahead of time. Store the frozen cheesecake balls in an airtight container in the freezer until ready to use.
Cookie Dough Storage
Assembled but unbaked cookies can be frozen for up to one month. Simply place them on a baking sheet, freeze until solid, then transfer to freezer bags. Bake directly from frozen, adding an extra 1-2 minutes to the baking time.
Finished Cookie Storage
Baked cookies stay fresh for up to 5 days when stored in an airtight container at room temperature. For longer storage, freeze the baked cookies for up to 3 months.
Important Notes
Black Cocoa Powder: This special ingredient is what gives these cookies their distinctive dark color and intense chocolate flavor. Regular cocoa powder won’t provide the same dramatic appearance, though it will still taste delicious.
Temperature Matters: Keep the cheesecake filling frozen until you’re ready to assemble the cookies. This prevents the filling from melting and making the dough too sticky to handle.
Don’t Overbake: These cookies continue cooking on the hot pan after removal from the oven. Slightly underbaking ensures they remain soft and chewy rather than becoming hard and crispy.
Frequently Asked Questions
Can I use regular cocoa powder instead of black cocoa powder? While you can substitute regular cocoa powder, you won’t achieve the same dramatic black color that makes these cookies so striking. The flavor will still be delicious, but they’ll have a more traditional brown chocolate appearance.
How do I know when the cookies are done baking? The cookies are finished when they appear set around the edges but still look slightly soft in the center. They should not look wet or shiny on top, but they shouldn’t be completely firm either.
What if my cheesecake filling is too soft to work with? If your cheesecake filling isn’t firm enough after freezing, return it to the freezer for an additional 15-20 minutes. The filling needs to be completely solid to prevent it from melting into the cookie dough during assembly.
Can I make these cookies smaller or larger? Absolutely! Just adjust the portion sizes accordingly and keep the ratios consistent. Smaller cookies will bake faster (8-9 minutes), while larger cookies may need an extra 2-3 minutes in the oven.
Why do my cookies spread too much during baking? Excessive spreading usually occurs when the dough is too warm or the butter was over-softened. Try chilling the assembled cookies for 15 minutes before baking, and ensure your butter is softened but not melted.


