Total Time: 30 minutes | Yield: 36-40 cookies
Growing up, Halloween was always my favorite holiday – not just for the candy, but for the excitement of transforming ordinary treats into something magical and spooky. These Halloween Chocolate Chip Cookies capture that same childhood wonder I felt when my mom would let me help decorate sugar cookies with orange frosting and candy corn. However, I wanted to create something that combined the comfort of classic chocolate chip cookies with the festive spirit of Halloween.
The inspiration struck me during a particularly busy October when I needed to bring treats to multiple Halloween events. Instead of making different batches of cookies, I decided to take my tried-and-true chocolate chip recipe and give it a playful makeover. The result? These delightfully spooky cookies that maintain all the beloved qualities of the original while adding bursts of Halloween colors and whimsical candy eyes that make everyone smile.
Why These Cookies Will Become Your Halloween Tradition
Perfect Texture Every Time
These cookies deliver the ultimate combination of soft, chewy centers and perfectly crispy edges that cookie lovers crave. Moreover, the generous amount of butter ensures they stay tender even after cooling completely, making them ideal for gift-giving or storing for later enjoyment.
Crowd-Pleasing Appeal
With their playful appearance and familiar chocolate chip base, these cookies appeal to both kids and adults. Additionally, the doubled batch recipe means you’ll have plenty for trick-or-treaters, office parties, and family gatherings without needing multiple baking sessions.
Customizable Fun
The beauty of this recipe lies in its flexibility – you can adjust the Halloween elements based on your preferences or what you have available. Furthermore, the optional add-ins allow you to create unique variations that suit different tastes and dietary needs.
Make-Ahead Friendly
These cookies are perfect for busy Halloween schedules since the dough can be prepared ahead of time. Consequently, you can have fresh-baked cookies ready whenever unexpected guests arrive or when you need a quick treat.
Essential Ingredients and Substitutions
Base Cookie Components
- 2 cups unsalted butter, softened
- 2 cups brown sugar (packed)
- 1 cup granulated sugar
- 4 large eggs, room temperature
- 4 tsp vanilla extract
- 5 cups all-purpose flour
- 2 tsp baking soda
- 2 tsp salt
Halloween Magic Add-ins
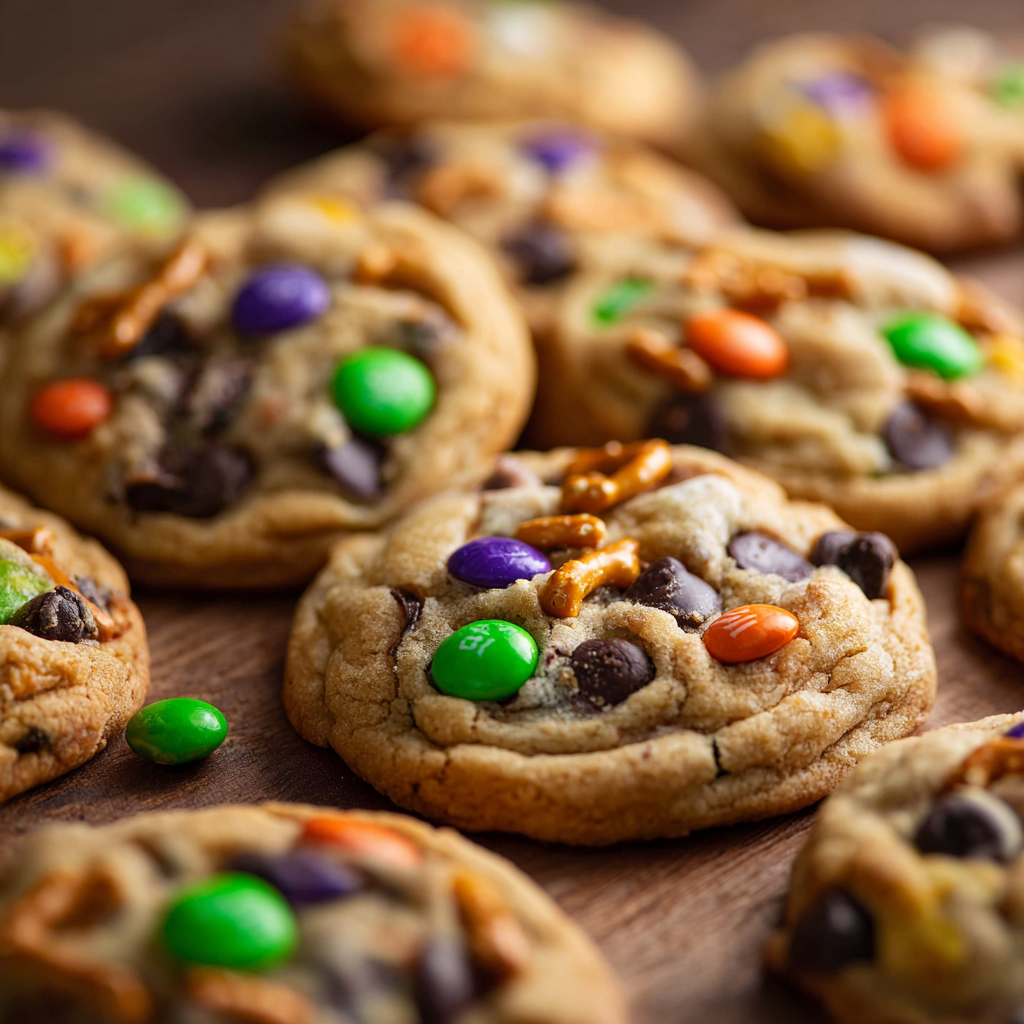
- 2½ cups semi-sweet chocolate chips
- 1½ cups Halloween M&Ms (orange, purple, green varieties)
- 1 cup candy eyeballs
Optional Flavor Enhancers
- ½ tsp cinnamon or pumpkin pie spice (for autumn warmth)
- 1 cup chopped pretzels (for salty crunch contrast)
- A few drops of orange or purple food coloring (for colored dough)
Smart Substitutions
If you can’t find Halloween M&Ms, regular M&Ms work perfectly fine, or you can substitute with other colorful candies like Reese’s Pieces or mini chocolate chips. For a healthier twist, try using half whole wheat flour, though this will create a slightly denser texture.
Step-by-Step Instructions
Preparation Phase
Begin by preheating your oven to 350°F (175°C) and lining your baking sheets with parchment paper. This prevents sticking and ensures even browning across the bottom of each cookie.
Creating the Base
In a large mixing bowl, cream together the softened butter, brown sugar, and granulated sugar using an electric mixer on medium speed. Continue beating until the mixture becomes light and fluffy, approximately 3-4 minutes. This creaming process is crucial for creating the perfect texture.
Next, beat in the eggs one at a time, ensuring each is fully incorporated before adding the next. Then add the vanilla extract and mix until well combined. The mixture should appear smooth and slightly pale at this stage.
Combining Dry Ingredients
In a separate bowl, whisk together the flour, baking soda, and salt until evenly distributed. Gradually add these dry ingredients to the wet mixture, mixing on low speed until a soft dough forms. Be careful not to overmix, as this can result in tough cookies.
Adding the Halloween Magic
Gently fold in the chocolate chips and Halloween M&Ms using a large spoon or spatula. If you’re using any optional add-ins like pretzels or food coloring, incorporate them at this stage. The dough should be thick and studded with colorful candies.
Shaping and Decorating
Using a cookie scoop or your hands, form the dough into 1.5-inch balls and place them on the prepared baking sheets, spacing them about 2 inches apart. Press 2-3 candy eyeballs into the top of each cookie, creating fun monster faces or spooky expressions.
Baking to Perfection
Bake the cookies for 10-12 minutes, or until the edges are golden brown but the centers still appear slightly soft. The cookies will continue cooking on the hot pan after removal, so avoid overbaking to maintain that perfect chewy texture.
Allow cookies to cool on the baking sheet for 5 minutes before transferring them to a wire rack to cool completely.
Creative Serving Ideas
Halloween Party Display
Arrange these cookies on a black or orange platter alongside other Halloween treats for an impressive dessert table. Consider creating a “monster cookie bar” where guests can add their own candy eyes to plain cookies.
Gift Packaging
Package these cookies in clear cellophane bags tied with orange and black ribbons for perfect Halloween gifts. They also look fantastic in themed cookie tins or boxes decorated with Halloween stickers.
Ice Cream Sandwiches
Use these cookies to create Halloween ice cream sandwiches with orange sherbet or vanilla ice cream. The combination of warm spices and cold ice cream creates an irresistible treat.
Exciting Variations to Try
Pumpkin Spice Version
Replace the optional cinnamon with a full teaspoon of pumpkin pie spice and add ½ cup of mini marshmallows for a s’mores-inspired twist. This variation captures the essence of fall in every bite.
White Chocolate Ghost Cookies
Substitute white chocolate chips for the semi-sweet variety and use only white candy eyes. Additionally, drizzle melted white chocolate over the cooled cookies for an elegant ghostly appearance.
Caramel Apple Twist
Fold in ½ cup of caramel bits and ½ cup of dried apple pieces along with a pinch of apple pie spice. This creates a delicious autumn flavor combination that pairs beautifully with the chocolate base.
Witch’s Brew Cookies
Add green food coloring to create eerie green dough, then mix in dark chocolate chips and black candies for a mysterious witch’s brew effect.
Make-Ahead and Storage Tips
Dough Preparation
Cookie dough can be prepared up to 3 days in advance and stored covered in the refrigerator. For longer storage, scoop the dough into balls and freeze them on baking sheets before transferring to freezer bags for up to 3 months.
Baked Cookie Storage
Store completely cooled cookies in an airtight container at room temperature for up to one week. Layer cookies between parchment paper to prevent sticking and maintain their shape.
Freezing Instructions
Baked cookies freeze beautifully for up to 3 months. Thaw them at room temperature for about 30 minutes before serving, and they’ll taste freshly baked.
Essential Baking Notes
Room Temperature Ingredients: Ensure eggs and butter are at room temperature for optimal mixing and texture. Cold ingredients won’t cream properly and can result in dense cookies.
Don’t Overbake: These cookies are best when slightly underbaked, as they continue cooking on the hot pan. The centers should look just set when you remove them from the oven.
Candy Placement: Press candy eyes gently but firmly into the dough before baking to ensure they stay in place during the baking process.
Uniform Sizing: Using a cookie scoop ensures consistent sizing, which means all cookies will bake evenly and be ready at the same time.
Frequently Asked Questions
Can I make these cookies smaller for little hands? Absolutely! Reduce the dough balls to 1-inch portions and decrease the baking time to 8-10 minutes. This creates perfect bite-sized treats that are easier for young children to handle.
What if I can’t find candy eyeballs? You can easily make your own using mini white chocolate chips with a dot of dark chocolate in the center. Alternatively, white M&Ms with a small dab of chocolate frosting work perfectly.
How can I make these cookies less sweet? Reduce the granulated sugar to ¾ cup and use dark chocolate chips instead of semi-sweet. You can also substitute some of the Halloween M&Ms with chopped nuts for added texture and less sweetness.
Why do my cookies spread too much during baking? Overly warm dough or butter that’s too soft can cause excessive spreading. Try chilling the shaped dough balls for 15 minutes before baking, and ensure your butter is softened but not melted.
Can I use this recipe for cut-out cookies? This dough is designed for drop cookies and may be too soft for rolling and cutting. For cut-out cookies, try chilling the dough for several hours and adding an extra ½ cup of flour for stability.
How do I prevent the candy eyes from melting? Press them gently into the dough just before baking, and avoid overbaking the cookies. The candy eyes are designed to hold their shape at normal baking temperatures, but excessive heat can cause them to lose their form.


