Servings: 24 cookies | Prep: 10 minutes | Cook: 10 minutes | Chill Time: 30 minutes | Total: 50 minutes
Sometimes the most delightful recipes come from moments of pure playfulness in the kitchen. Last spring, while helping my daughter plan a monster-themed birthday party, we stumbled upon this incredible recipe that transforms ordinary cake mix into the most wonderfully gooey, colorful creatures you’ve ever seen. What started as a simple baking project quickly became our family’s most requested cookie recipe, loved not just for Halloween but for birthday parties, rainy day activities, and any time we need a dose of pure joy.
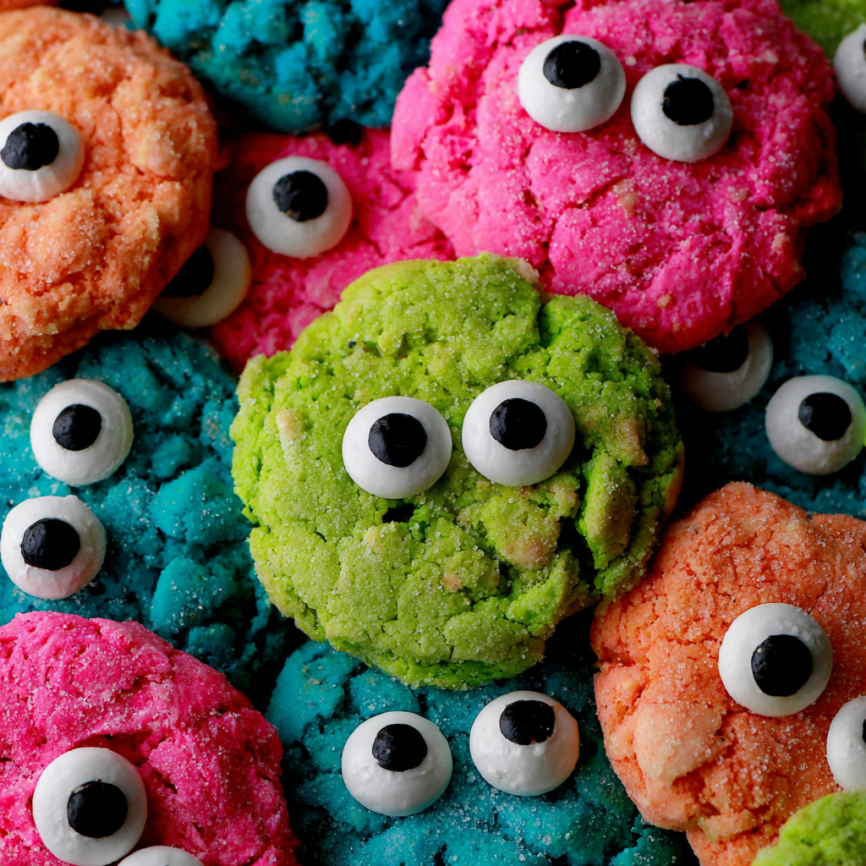
The magic of these cookies lies in their incredible texture – they’re impossibly soft and gooey thanks to the cream cheese addition, while the cake mix base makes them foolproof for bakers of any skill level. Watching children’s faces light up when they see these bright, googly-eyed monsters never gets old, and adults are equally charmed by their whimsical appearance and amazing taste.
Why These Monster Cookies Will Steal Everyone’s Heart
Incredibly Simple Technique
Using cake mix as the base eliminates the guesswork from cookie baking, ensuring perfect results every single time. Furthermore, the straightforward method means even young children can actively participate in the mixing and decorating process.
Amazingly Gooey Texture
The combination of cream cheese and butter creates an incredibly tender, almost cake-like cookie that stays soft for days. Additionally, this unique texture sets these cookies apart from typical crispy varieties, making them irresistibly satisfying.
Endless Color Possibilities
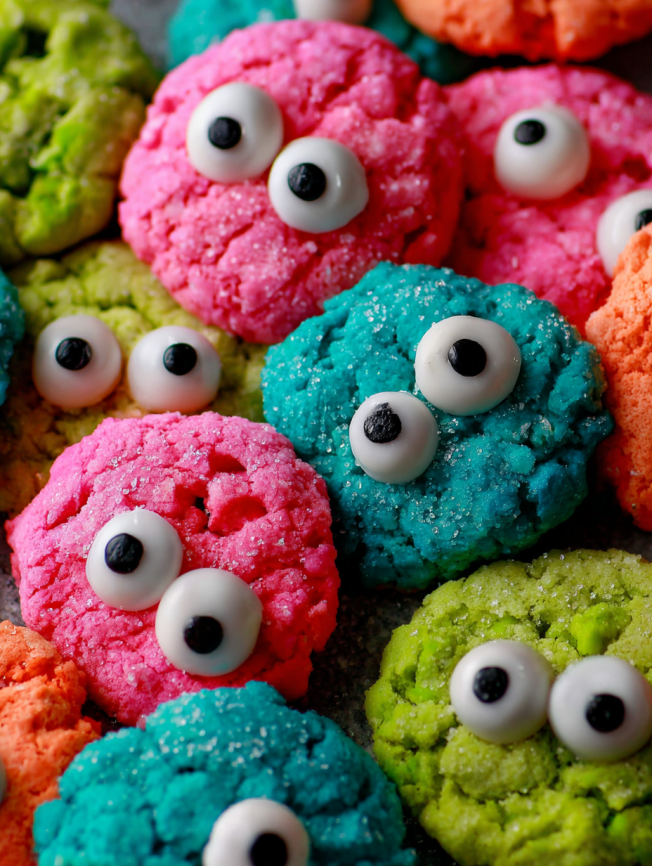
With neon food coloring, you can create any monster color imaginable – from electric purple to vibrant green to hot pink. Moreover, the bright colors make these cookies perfect for any celebration, not just Halloween gatherings.
Year-Round Appeal
Unlike many themed cookies, these monsters work beautifully for birthday parties, school events, or any time you want to bring smiles to people’s faces. Consequently, this recipe will become a go-to favorite throughout the year.
Essential Ingredients and Tips
Base Cookie Components
- 1 box white cake mix (any brand works well)
- ½ cup butter, softened to room temperature
- ½ teaspoon vanilla extract
- 8 oz cream cheese, softened completely
- 1 large egg, room temperature
Finishing Touches
- Powdered sugar for rolling
- Neon food coloring for vibrant colors
- Candy eyeballs for decoration
Ingredient Quality Notes
Choose high-quality neon food coloring for the most vibrant monster colors – gel coloring works better than liquid varieties. Ensure both butter and cream cheese are properly softened for smooth mixing. Room temperature ingredients blend more easily and create better texture.
Step-by-Step Monster Creation
Preparing the Base Mixture
Begin by beating the softened butter, vanilla extract, egg, and cream cheese together using an electric mixer on medium speed. Continue beating until the mixture becomes light and fluffy, approximately 2-3 minutes. This thorough mixing creates the foundation for the cookies’ incredible gooey texture.
Gradually add the cake mix to the creamy mixture, mixing on low speed until everything is just combined. Avoid overmixing at this stage, as it can result in tough cookies rather than the desired tender texture.
Creating Colorful Monsters
Divide the finished dough into separate bowls depending on how many different colored monsters you want to create. For a typical batch, 3-4 colors work beautifully and provide nice variety.
Add different colored food coloring to each bowl, starting with just a few drops and mixing thoroughly before adding more. Remember that neon colors require more dye than pastel shades, so don’t be afraid to add enough coloring to achieve vibrant, eye-catching hues.
Chilling and Shaping
Once all colors are mixed to your satisfaction, cover each bowl with plastic wrap and refrigerate for 30 minutes. This chilling step is crucial – it firms up the dough enough to handle while maintaining that characteristic gooey interior.
Preheat your oven to 350°F (175°C) and lightly grease your cookie sheets to prevent sticking.
Rolling and Baking Process
Working with one color at a time, roll the chilled dough into walnut-sized balls using your hands. Immediately roll each ball in powdered sugar, coating it completely. This creates a beautiful contrast and helps prevent spreading during baking.
Place the sugar-coated dough balls on the prepared cookie sheets, spacing them about 2 inches apart to allow for slight spreading. Gently pat each ball down just slightly – they should still be quite round and tall.
Bake for 10-12 minutes, or until the cookies appear set around the edges but still look soft in the center. They’ll continue cooking slightly on the hot pan after removal.
Final Monster Touch
While the cookies are still warm and slightly soft, gently press candy eyeballs into each cookie to create instant monster personalities. The warmth helps the eyes adhere naturally without any additional adhesive needed.
Allow cookies to cool on the baking sheet for 5 minutes before transferring to wire racks, giving the eyes time to set properly.
Creative Presentation Ideas
Monster Party Display
Create a “monster habitat” by arranging different colored cookies on a large platter surrounded by colorful streamers and silly monster decorations. Label each color with fun monster names like “Purple Pete” or “Green Gertie.”
Interactive Decorating Station
Set up a cookie decorating area with plain baked cookies and bowls of various candy eyes, allowing party guests to create their own unique monster personalities while socializing.
Gift Box Collections
Package assorted colored monster cookies in clear boxes with colorful tissue paper, creating delightful gifts for teachers, neighbors, or anyone who needs a smile in their day.
Exciting Recipe Variations
Chocolate Monster Version
Replace the white cake mix with chocolate cake mix and use darker food colorings to create rich, chocolatey monsters with deep purple, burgundy, or forest green hues.
Funfetti Monsters
Use funfetti cake mix for built-in sprinkles that add extra festive appeal and create party-ready cookies without any additional decorating.
Mini Monster Bites
Roll the dough into smaller balls to create bite-sized monster cookies perfect for parties where guests want to sample multiple colors without feeling too full.
Holiday Theme Monsters
Adapt the colors to match different holidays – red and green for Christmas, pastels for Easter, or patriotic colors for summer celebrations.
Storage and Make-Ahead Solutions
Dough Preparation
Mixed dough (before adding food coloring) can be prepared up to 2 days in advance and stored covered in the refrigerator. Add coloring and proceed with chilling when ready to bake.
Freezing Options
Shaped, unbaked cookie balls freeze beautifully for up to 3 months. Place them on baking sheets until solid, then transfer to freezer bags. Bake directly from frozen, adding 1-2 extra minutes to the baking time.
Finished Cookie Storage
Baked monster cookies maintain their gooey texture for up to one week when stored in airtight containers at room temperature. Their soft texture actually improves slightly over the first day or two.
Professional Baking Tips
Softened Ingredients: Properly softened cream cheese and butter are crucial for smooth mixing and the best texture. Take them out of the refrigerator 1-2 hours before baking.
Color Intensity: Neon food coloring creates the most vibrant monster colors, but start with less than you think you need – you can always add more, but you can’t take it away.
Chilling Importance: Don’t skip the chilling step, as it prevents the cookies from spreading too much and helps maintain their monster-like round shape during baking.
Eye Placement: Add candy eyes while cookies are still warm but not hot, ensuring they stick without melting or sliding off during cooling.
Frequently Asked Questions
Can I use a different flavor of cake mix? Absolutely! Chocolate, strawberry, or even funfetti cake mix work wonderfully in this recipe. Just keep in mind that darker cake mixes may affect how vibrant your food coloring appears.
How do I prevent my cookies from spreading too much? Ensure your dough is properly chilled before rolling, and don’t skip the powdered sugar coating step. Additionally, avoid overbaking, as the cookies continue cooking on the hot pan after removal.
What if my dough is too sticky to handle? If the dough feels too sticky after chilling, add a bit more cake mix (about 2-3 tablespoons) and mix until it reaches the right consistency for rolling. Alternatively, chill for an additional 15-20 minutes.
Can I make these cookies without food coloring? Certainly! The cookies are delicious in their natural vanilla color, and you can still add the candy eyes for a fun monster effect. You might also try natural coloring alternatives like cocoa powder for brown monsters.
How long do the candy eyes stay attached? When applied to warm cookies, candy eyes adhere naturally and stay put for the entire storage life of the cookies. If any come loose, simply press them back on – the cookies’ soft texture holds them well.
Can I use different types of eyes or decorations? Definitely! Try chocolate chips, mini marshmallows, or even small candies for different monster expressions. You can also add mouths using chocolate writing gel or small candy pieces for extra personality.


