Total Time: 30 minutes | Yield: 2 servings
There’s something incredibly satisfying about a meal that looks impressive but comes together in less time than it takes to order takeout. I discovered this recipe during a particularly hectic week when I was craving restaurant-quality food but couldn’t justify the delivery fees or the wait time. The combination of perfectly grilled chicken, crispy-tender broccoli, and that luxurious creamy garlic sauce became an instant favorite in my household.
What started as a desperate weeknight dinner solution has transformed into my go-to recipe for meal prep Sundays. The beauty of these bowls lies in their versatility—you can customize them based on what’s in your pantry, and they taste just as amazing on day four as they do fresh off the grill. My partner, who usually turns his nose up at “healthy” meals, requests these bowls at least twice a week.
Why You’ll Love These Grilled Chicken & Broccoli Bowls
They’re deceptively simple yet impressive – While this dish looks like something you’d order at an upscale grain bowl restaurant, it requires minimal cooking skills and just a handful of basic ingredients. The garlic cream sauce is what elevates everything from ordinary to extraordinary, making it taste far more complex than the simple five-minute preparation suggests.
Meal prep becomes effortless – Each component of this bowl can be prepared separately and stored for up to four days. This means you can grill all your chicken on Sunday, roast multiple pans of broccoli, and have the sauce ready to heat and drizzle throughout the week. Simply assemble when you’re ready to eat, and you’ve got a fresh, hot meal in minutes.
They satisfy without weighing you down – Unlike heavy cream-based pasta dishes that leave you feeling sluggish, these bowls provide sustained energy without the afternoon crash. The lean protein keeps you full, the vegetables add nutrients and fiber, while the modest amount of cream sauce delivers indulgence without guilt. It’s the perfect balance for anyone trying to eat healthier without sacrificing flavor.
Everyone can make them their own – Picky eaters in the family? No problem. The formula works with virtually any grain, protein, or vegetable combination you prefer. Kids who reject broccoli might love roasted carrots or green beans instead. The creamy garlic sauce acts as a universal flavor enhancer that makes even the plainest ingredients taste incredible.
Budget-friendly without tasting cheap – Chicken breasts and broccoli are among the most affordable proteins and vegetables at any grocery store. Yet when you prepare them this way, the result tastes like a premium meal worth twice what you’d spend at home. It’s an economical option that doesn’t compromise on taste or presentation.
Ingredients You’ll Need
Main Bowl Components
- 2 boneless, skinless chicken breasts – Look for breasts that are similar in size and thickness for even cooking. If one breast is significantly larger, consider butterflying it or pounding it to an even thickness. Organic or free-range chicken offers better flavor, though conventional works perfectly fine for this recipe.
- 2 cups broccoli florets – Fresh broccoli delivers the best texture when roasted, developing those crispy, caramelized edges that add so much character. Pre-cut florets from the produce section save prep time, but cutting your own from whole crowns is more economical and allows you to customize the size of each piece.
- 1 cup cooked grains – The choice is entirely yours here. Brown rice provides nutty flavor and hearty texture, quinoa adds extra protein and cooks quickly, while couscous offers a lighter alternative that’s ready in just five minutes. Farro or barley work beautifully if you’re looking for something more rustic and chewy.
Creamy Garlic Sauce Ingredients
- 3 cloves garlic, minced – Fresh garlic is non-negotiable for this sauce, as it provides aromatic depth that jarred minced garlic simply cannot match. Mince it finely so it distributes evenly throughout the sauce and mellows when sautéed. The amount listed creates a pronounced but not overwhelming garlic flavor.
- ½ cup heavy cream – This is what creates that silky, luxurious texture that coats everything beautifully. Heavy whipping cream works best because it won’t break or separate when simmered. For a lighter version, half-and-half can work, though the sauce will be slightly thinner.
- 2 tablespoons butter – Unsalted butter gives you better control over the final salt level. The butter adds richness and helps create a velvety sauce consistency. It also carries the garlic flavor throughout the dish in a way that oil alone cannot achieve.
- 2 tablespoons olive oil – Extra virgin olive oil brings a subtle fruity note and is used for both grilling the chicken and roasting the broccoli. Its higher smoke point compared to butter makes it ideal for high-heat cooking methods.
- Salt and black pepper, to taste – Kosher salt or sea salt provides better flavor than table salt. Freshly cracked black pepper adds aromatic spice that complements the creamy sauce perfectly. Season generously, as underseasoned healthy food is the main reason people think nutritious meals are boring.
- 1 tablespoon lemon juice – Fresh lemon juice brightens the roasted broccoli and cuts through the richness of the cream sauce. It adds a subtle acidity that balances all the flavors and prevents the dish from feeling too heavy.
Optional Garnishes and Add-ins
- Fresh parsley or chives, chopped
- Grated Parmesan cheese
- Toasted pine nuts or sliced almonds
- Red pepper flakes for heat
- Lemon zest for extra citrus brightness
- Crumbled bacon for added indulgence
- Sun-dried tomatoes for tang and color
Step-by-Step Instructions
Preparing the Grilled Chicken
Start by patting your chicken breasts completely dry with paper towels, which is crucial for achieving those beautiful grill marks. Moisture on the surface creates steam rather than the sear you’re after. Place the chicken on a plate and drizzle both sides with olive oil, using your hands to massage it evenly over the entire surface.
Season generously with salt and black pepper, remembering that some of the seasoning will fall off during grilling, so don’t be shy. If you enjoy additional spices, this is the time to add garlic powder, paprika, or Italian seasoning. Press the seasonings into the meat so they adhere better during cooking.
Preheat your grill to medium-high heat, around 400-425°F if using a gas grill. Clean the grates thoroughly and oil them lightly to prevent sticking. Place the chicken breasts on the grill and resist the urge to move them around—let them cook undisturbed for 6-7 minutes to develop a nice char and those coveted grill marks.
Flip the chicken only once, using tongs rather than a fork to avoid piercing the meat and losing those precious juices. Continue cooking for another 6-7 minutes until the internal temperature reaches 165°F when measured with an instant-read thermometer in the thickest part. Remove from heat and let the chicken rest for 5 minutes before slicing, which allows the juices to redistribute throughout the meat.
Roasting the Perfect Broccoli
While the chicken is grilling, you can simultaneously roast your broccoli. Preheat your oven to 400°F and line a baking sheet with parchment paper for easy cleanup. Spread the broccoli florets in a single layer, ensuring they’re not crowded—overcrowding causes steaming instead of roasting, resulting in soggy rather than crispy broccoli.
Drizzle the florets with olive oil and the tablespoon of lemon juice, then use your hands to toss everything together until each piece is lightly coated. The lemon juice not only adds flavor but also helps the broccoli develop better color during roasting. Season with a generous pinch of salt and a few cracks of black pepper.
Roast for 15-20 minutes, checking at the 15-minute mark for your preferred level of doneness. If you like your broccoli with crispy, almost charred edges and a tender center, go for the full 20 minutes. For a more crisp-tender texture, pull it out around 15 minutes. Give the pan a shake halfway through cooking to ensure even browning on all sides.
The broccoli is perfectly done when the florets have developed golden-brown edges and the stems are easily pierced with a fork. Some of the smaller florets might even get slightly crispy, adding wonderful texture variation to your bowl.
Cooking Your Choice of Grains
The grain preparation varies depending on your selection, but most follow a similar basic method. For rice, use a 2:1 water-to-rice ratio and simmer covered for about 15-18 minutes. Quinoa cooks in the same 2:1 ratio but only needs 12-15 minutes. Couscous is the speediest option, simply requiring an equal amount of boiling water poured over the grains, covered for 5 minutes.
Whatever grain you choose, add a pinch of salt to the cooking water for better flavor. Once cooked, remove from heat and let it sit covered for a few minutes before fluffing with a fork. This resting period allows the grains to firm up slightly and become fluffy rather than mushy.
If you’re meal prepping or preparing this for a crowd, cook extra grains as they reheat beautifully and can be used for other meals throughout the week. Store them separately from the other components to maintain the best texture.
Creating the Creamy Garlic Sauce
This sauce comes together quickly, so have all your ingredients measured and ready before you start. In a small saucepan, melt the butter over medium heat until it’s just bubbling but not browning. Add the minced garlic and sauté for 30-45 seconds, stirring constantly to prevent burning. The garlic should become fragrant and slightly golden but not dark brown, which would make it bitter.
Pour in the heavy cream and stir to combine everything smoothly. Season with salt and black pepper—start conservatively with about ¼ teaspoon of salt since you can always add more later. Bring the mixture to a gentle simmer, then reduce the heat to low.
Let the sauce simmer gently for 3-4 minutes, stirring occasionally, until it thickens enough to coat the back of a spoon. The sauce will continue to thicken slightly as it cools, so don’t worry if it seems a bit thin at first. Taste and adjust the seasoning as needed, adding more salt, pepper, or even a squeeze of lemon juice if it needs brightness.
Remove from heat and cover to keep warm until you’re ready to assemble. If the sauce thickens too much while sitting, simply whisk in a tablespoon or two of milk or cream to return it to the desired consistency.
Assembling Your Perfect Bowl
Now comes the fun part—building your beautiful, nourishing bowl. Start with your choice of grains as the foundation, creating a bed in the bottom of each serving bowl. Spread them evenly rather than mounding them in the center, which makes room for the other components and ensures every bite has a good grain-to-topping ratio.
Slice the rested chicken breasts on a diagonal into strips about ½-inch thick. The diagonal cut not only looks more elegant but also creates more surface area for the sauce to cling to. Arrange the chicken slices over one portion of the grains, slightly overlapping them for an appealing presentation.
Add the roasted broccoli to another section of the bowl, positioning the florets so their beautiful caramelized edges are visible. The visual contrast between the golden chicken, vibrant green broccoli, and neutral grains makes the bowl Instagram-worthy while also signaling the variety of flavors and textures to come.
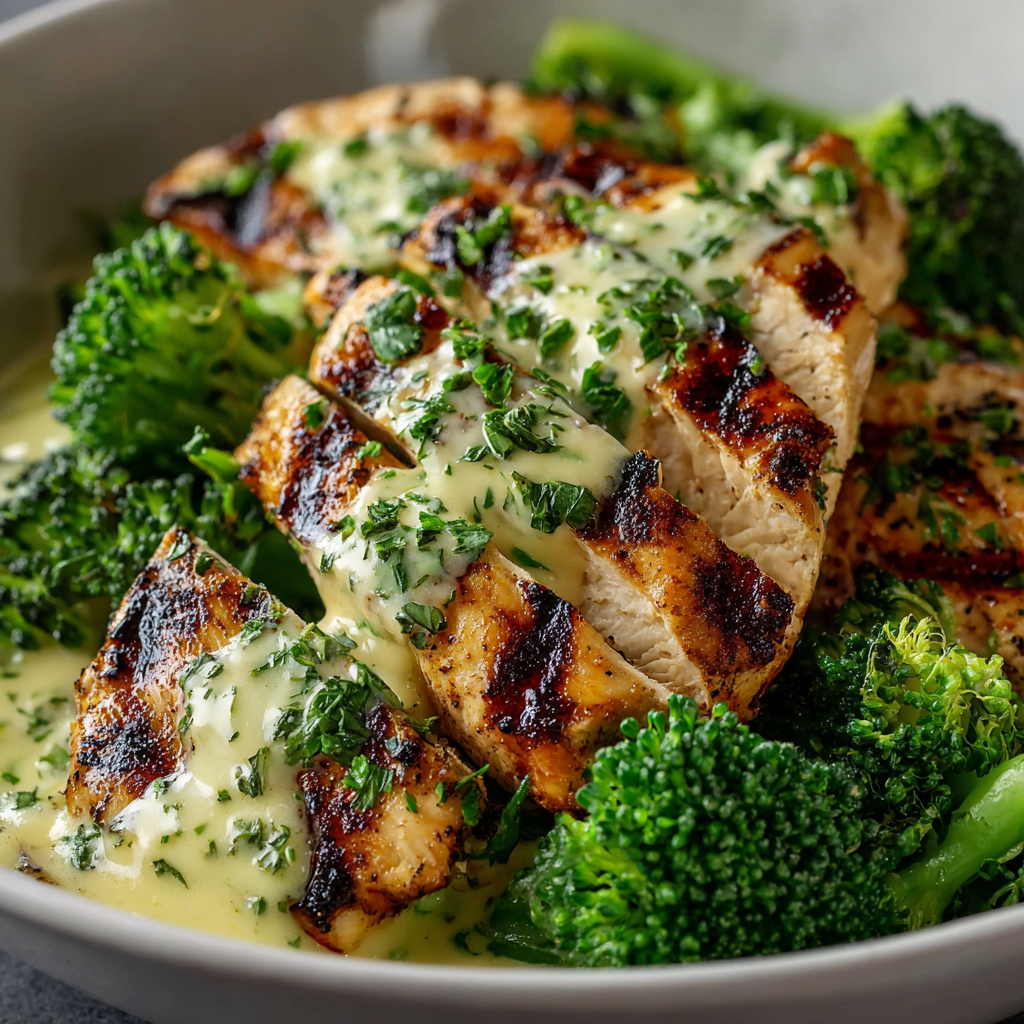
Drizzle the warm creamy garlic sauce generously over everything, allowing it to pool slightly around the grains and coat the chicken and broccoli. Don’t drown the bowl—you want enough sauce to flavor everything without making it soupy. Finish with your choice of garnishes, such as chopped fresh parsley, chives, or a sprinkle of Parmesan cheese.
Serving Suggestions
These bowls are satisfying enough to serve as a complete meal on their own, but certain accompaniments can enhance the experience. A simple side salad with a light vinaigrette provides additional freshness and helps balance the richness of the cream sauce. Mixed greens with cucumber, cherry tomatoes, and a lemon-herb dressing work particularly well.
For a heartier meal, serve with crusty whole grain bread or garlic bread to soak up any extra sauce. The bread turns those last bits of creamy garlic goodness into a treat rather than something left behind in the bowl. Warm pita or naan also work wonderfully, especially if you enjoy a Mediterranean twist.
If you’re entertaining, arrange all the components on a large platter family-style and let guests build their own bowls. Set out the grains in a large serving bowl, arrange the sliced chicken on a platter, pile the broccoli in a separate dish, and serve the sauce in a small pitcher or gravy boat. This interactive approach makes the meal feel more casual and allows everyone to customize their portions.
These bowls also pair beautifully with a crisp white wine like Sauvignon Blanc or Pinot Grigio. The wine’s acidity cuts through the cream sauce while complementing the garlic flavors. For non-alcoholic options, sparkling water with lemon or a light iced green tea works wonderfully.
Recipe Variations to Try
Protein Alternatives
Grilled shrimp version – Swap the chicken for large shrimp marinated in olive oil, garlic, and lemon juice. Grill for just 2-3 minutes per side until pink and slightly charred. The quicker cooking time makes this variation even faster, and the seafood pairs beautifully with the garlic cream sauce.
Salmon upgrade – Use grilled or pan-seared salmon fillets for a heart-healthy omega-3 boost. The rich, buttery fish stands up wonderfully to the cream sauce, creating a more luxurious version perfect for date nights or special occasions. Season the salmon with dill and lemon for complementary flavors.
Vegetarian option – Replace chicken with grilled tofu, tempeh, or crispy chickpeas. For the tofu, press it well and marinate in soy sauce and garlic before grilling. Chickpeas tossed with olive oil and spices, then roasted until crispy, add wonderful texture and are packed with plant-based protein.
Vegetable Variations
Rainbow veggie bowl – Instead of just broccoli, roast a colorful medley of vegetables including bell peppers, zucchini, cherry tomatoes, and red onion. The variety of colors makes the bowl even more visually appealing while adding different nutrients and flavors. Each vegetable roasts at a similar temperature and time, making preparation easy.
Green goddess version – Increase the vegetable content by adding roasted asparagus, green beans, or Brussels sprouts alongside the broccoli. Toss everything with the garlic sauce and top with fresh herbs, creating a vibrant green bowl that’s as nutritious as it is beautiful.
Mediterranean twist – Roast eggplant, zucchini, and red bell peppers, then add Kalamata olives, sun-dried tomatoes, and artichoke hearts. Swap the regular cream sauce for one infused with oregano and finish with crumbled feta cheese. This version brings sunny Mediterranean flavors to your bowl.
Sauce Variations
Spicy garlic cream – Add red pepper flakes, cayenne, or diced jalapeños to the cream sauce for a kick. The heat plays beautifully against the cooling richness of the cream, creating a more complex flavor profile. Start with a small amount and adjust to your heat preference.
Herb-infused cream sauce – Stir fresh chopped basil, thyme, or dill into the sauce just before serving. Each herb brings a different character—basil offers sweet, aromatic notes, thyme adds earthiness, while dill provides a fresh, slightly tangy quality. This simple addition makes the sauce feel more gourmet.
Lemon-parmesan sauce – Add extra lemon zest and juice plus freshly grated Parmesan cheese to the cream sauce for a brighter, tangier version. The cheese helps thicken the sauce naturally while adding savory depth. This variation is particularly delicious with chicken and pairs well with pasta if you prefer that base.
Make-Ahead Tips and Storage
This recipe is a meal prep champion when you understand how to store each component properly. The grilled chicken stays moist and flavorful for up to four days when stored in an airtight container in the refrigerator. Let it cool completely before storing to prevent condensation, which can make the chicken soggy. Slice it just before serving rather than storing it pre-sliced to maintain moisture.
Roasted broccoli keeps well for three to four days, though it loses some crispness over time. Store it separately from the other ingredients, and if you prefer, you can refresh it slightly by reheating in a hot oven for a few minutes before assembling your bowl. The vegetables actually absorb flavors overnight, making them even more delicious the next day.
Cook your grains in larger batches and store them in portion-sized containers for grab-and-go ease. Both rice and quinoa freeze beautifully for up to three months, so you can always have a base ready for quick meals. Reheat frozen grains by microwaving with a tablespoon of water to restore moisture and fluffiness.
The creamy garlic sauce presents the only storage challenge, as cream-based sauces can separate when refrigerated and reheated. Make the sauce fresh when possible, as it only takes five minutes. If you must make it ahead, store it in a jar in the fridge for up to three days. Reheat gently on the stovetop over low heat, whisking constantly, and add a splash of cream if needed to restore the smooth consistency.
For ultimate meal prep efficiency, dedicate one evening to preparing all components. Grill multiple chicken breasts, roast several pans of broccoli, and cook a large batch of grains. Store everything separately in the refrigerator, then simply reheat and assemble when you’re ready to eat. This approach gives you four to five ready-to-go meals in under an hour of prep time.
Notes and Pro Tips
Achieving perfect grill marks – For those coveted restaurant-quality grill marks, place your chicken at a 45-degree angle to the grill grates. After 3-4 minutes, rotate it 90 degrees without flipping to create a crosshatch pattern. Then flip and repeat on the other side. Additionally, make sure your grill grates are clean and well-oiled to prevent sticking.
Preventing dry chicken – The single biggest mistake people make with chicken breasts is overcooking them. Invest in an instant-read thermometer and remove the chicken as soon as it hits 165°F. Carryover cooking will bring it up a few degrees while resting. Brining the chicken in saltwater for 30 minutes before cooking also ensures juicy results every time.
Getting crispy broccoli edges – The secret to those caramelized, crispy broccoli edges lies in proper spacing and high heat. Crowding the pan creates steam, resulting in mushy vegetables. Spread the florets out with space between them, and don’t skip preheating your oven. A hot oven from the start ensures immediate sizzling when the vegetables hit the pan.
Sauce consistency troubleshooting – If your sauce seems too thin, let it simmer a bit longer to reduce and thicken naturally. Conversely, if it becomes too thick, whisk in cream or milk one tablespoon at a time until you reach the desired consistency. The sauce will thicken more as it cools, so err on the side of slightly thinner when hot.
Grain cooking shortcuts – Keep pre-cooked grains in your freezer or use quick-cooking options like instant rice, quick-cooking quinoa, or couscous when time is tight. You can also use pre-cooked rice or quinoa from the grocery store’s refrigerated or frozen section. Many grocery stores now offer microwaveable grain pouches that are ready in 90 seconds.
Scaling the recipe – This recipe doubles or triples easily for meal prep or feeding a crowd. When cooking multiple chicken breasts, they may need a few extra minutes on the grill depending on thickness. Similarly, if roasting more broccoli, use multiple pans rather than crowding everything onto one sheet to ensure proper roasting.
Frequently Asked Questions
Can I use frozen broccoli instead of fresh?
While fresh broccoli delivers the best texture and those crispy caramelized edges, frozen broccoli can work in a pinch. The key is to thaw it completely and pat it very dry with paper towels before roasting, as frozen broccoli contains excess moisture that can prevent browning. Roast at a slightly higher temperature (425°F) to help evaporate moisture and achieve some color. However, the texture will be softer and less crispy than fresh broccoli.
How do I reheat the bowls without drying out the chicken?
The best method for reheating is to warm each component separately. Microwave the grains with a tablespoon of water or broth covered with a damp paper towel for 1-2 minutes. Heat the broccoli separately for 30-45 seconds. For the chicken, microwave it covered with a damp paper towel at 50% power in 30-second intervals to prevent drying. Alternatively, reheat everything in a covered pan on the stovetop with a splash of water or broth to create steam and maintain moisture.
What’s the best way to grill chicken indoors if I don’t have an outdoor grill?
A grill pan on your stovetop works beautifully and creates similar grill marks and flavor. Preheat the grill pan over medium-high heat until very hot, then cook the chicken following the same timing as outdoor grilling. You can also use a regular skillet or even bake the chicken in a 400°F oven for 20-25 minutes until it reaches 165°F. While you won’t get the charred exterior, the flavor will still be excellent.
Can I make this recipe dairy-free?
Absolutely! Use plant-based butter and coconut cream or cashew cream in place of dairy butter and heavy cream. Full-fat canned coconut milk (use just the thick cream from the top) creates a wonderfully rich sauce. Cashew cream made by blending soaked cashews with water produces a neutral flavor that won’t overwhelm the garlic. Both alternatives create silky, creamy sauces that taste just as indulgent as the dairy version.
Is this recipe suitable for meal prep lunches?
Yes, these bowls are excellent for meal prep! Portion everything into individual containers, keeping the sauce separate in small containers to prevent sogginess. When stored properly, the components stay fresh for 3-4 days. Bring the sauce to work in a separate container and drizzle it on just before eating, or warm it slightly in the microwave. The bowls can be eaten cold or reheated, making them versatile for different workplace situations.
What grain alternatives work best for low-carb diets?
Cauliflower rice is the most popular low-carb grain substitute and works perfectly in these bowls. Simply sauté it with a bit of olive oil until tender, or microwave it following package directions. Other options include spiralized zucchini noodles, shirataki rice, or simply doubling the amount of broccoli and skipping grains entirely. You can also use a bed of mixed greens for a salad bowl version that’s naturally grain-free.
How can I add more vegetables to this bowl?
The formula is incredibly flexible for adding more vegetables. Roast cherry tomatoes, bell peppers, or carrots alongside the broccoli using the same method. Add raw spinach or arugula under the hot ingredients, allowing them to wilt slightly from the heat. Sautéed mushrooms, grilled zucchini, or roasted sweet potato cubes all complement the creamy garlic sauce beautifully. Just maintain the same cooking temperatures and adjust timing based on the vegetable’s density.
Can I use pre-cooked rotisserie chicken to save time?
Definitely! Rotisserie chicken is a fantastic shortcut for busy weeknights. Remove the skin, shred or slice the meat, and warm it gently before assembling your bowls. The chicken is already seasoned and cooked, saving you 15-20 minutes of prep and cooking time. This makes the entire recipe come together in about 15 minutes total. Just adjust the amount of seasoning you add to other components since rotisserie chicken tends to be well-seasoned already.


