Introduction
There are certain foods that instantly transport you to a place of pure comfort, and for me, chicken pot pie has always been one of those dishes. But what if you could take that classic comfort food and elevate it with one of the most beloved restaurant staples—those irresistible Red Lobster cheddar bay biscuits? That’s exactly what this recipe does, and the result is nothing short of magical.
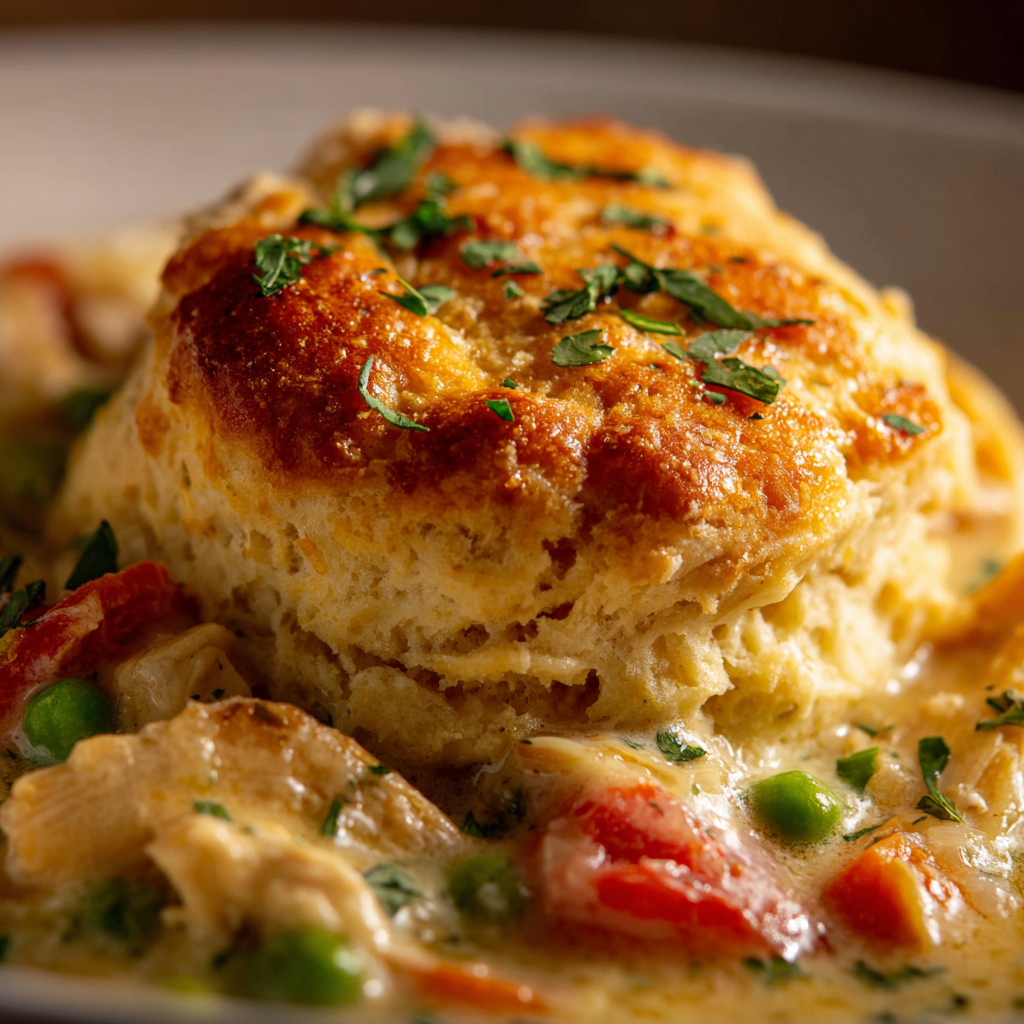
I created this dish on a rainy Sunday afternoon when I was craving something warm and satisfying but wanted to put a creative spin on the traditional pot pie. The moment I pulled it from the oven and saw those golden, cheesy biscuits sitting atop the bubbling creamy filling, I knew I had a winner. Each bite delivers tender chicken and vegetables in a rich, savory sauce, crowned with fluffy, garlic-infused cheddar biscuits that are simultaneously crispy on the outside and tender within. It’s the kind of meal that makes everyone gather around the table with anticipation, and it never fails to deliver on its promise of pure comfort.
Why You’ll Love This Recipe
Two Comfort Foods in One: This recipe brilliantly combines the hearty satisfaction of chicken pot pie with the addictive appeal of Red Lobster’s famous cheddar bay biscuits. Instead of choosing between two favorites, you get both in a single, cohesive dish that’s greater than the sum of its parts.
Easier Than Traditional Pot Pie: Forget about rolling out pie dough or worrying about soggy bottom crusts. The drop-biscuit topping is incredibly forgiving and comes together in minutes, making this pot pie accessible even for novice bakers. There’s no blind baking, no crimping edges, and no stress—just simple, delicious results.
Perfect for Using Leftovers: This recipe is a fantastic way to use up leftover roasted or rotisserie chicken, transforming yesterday’s dinner into today’s completely different meal. It’s also flexible enough to accommodate whatever vegetables you have on hand, making it both economical and practical.
Make-Ahead Friendly: Busy weeknights become manageable when you can assemble this entire dish ahead of time. Pop it in the refrigerator until you’re ready to bake, then come home to the incredible aroma of garlic, cheese, and buttery biscuits filling your kitchen.
Prep Time: 20 minutes
Cook Time: 40 minutes
Total Time: 1 hour
Yield: 4 servings
Category: Main Course
Method: Baking
Cuisine: American
Ingredients
For the Chicken Pot Pie Filling:
- 3 cups cooked chicken, diced
- 1 cup frozen mixed vegetables (peas, carrots, and corn)
- 1 cup cream of chicken soup
- ½ cup chicken broth
- 1 teaspoon garlic powder
- 1 teaspoon onion powder
- Salt and black pepper, to taste
For the Red Lobster-Style Biscuit Topping:
- 2½ cups all-purpose flour
- 1 tablespoon baking powder
- 1 teaspoon salt
- ½ cup unsalted butter, cold and cubed
- 1 cup shredded cheddar cheese
- ¾ cup milk
- 1 tablespoon garlic powder
Equipment Needed:
- Large mixing bowl
- Whisk
- Large skillet (optional)
- Oven-safe casserole dish or pie dish (9×13 or similar)
- Pastry cutter or fork
- Measuring cups and spoons
- Ladle or large spoon
Step-by-Step Instructions
Step 1: Prepare Your Oven and Gather Ingredients
Preheat your oven to 375°F (190°C) to ensure it’s at the perfect temperature when your pot pie is ready to bake. While the oven heats, gather all your ingredients and equipment. If you’re using rotisserie chicken, this is the time to remove the meat from the bones and dice it into bite-sized pieces—aim for roughly ½-inch cubes for even distribution throughout the filling.
Step 2: Create the Creamy Filling
In a large mixing bowl, combine your diced cooked chicken with the frozen mixed vegetables. There’s no need to thaw the vegetables first; they’ll cook perfectly in the oven. Add the cream of chicken soup, chicken broth, garlic powder, onion powder, and a generous seasoning of salt and black pepper. Using a large spoon or spatula, stir everything together until the ingredients are thoroughly combined and the chicken and vegetables are evenly coated in the creamy mixture.
The consistency should be thick but pourable—similar to a chunky gravy. If it seems too thick, add a splash more chicken broth; if it’s too thin, don’t worry, as it will thicken during baking.
Step 3: Assemble the Base Layer
Transfer your prepared chicken and vegetable mixture into an oven-safe casserole dish or deep pie dish, spreading it evenly across the bottom. Use a spatula to level the surface, creating a flat foundation for the biscuit topping. This ensures even cooking and makes for a beautiful presentation when you serve it.
Step 4: Make the Biscuit Dough
In a separate large bowl, whisk together the flour, baking powder, and salt until well combined. Add the cold, cubed butter to the flour mixture. Using a pastry cutter, two forks, or your fingertips, work the butter into the flour until the mixture resembles coarse crumbs with pea-sized butter pieces throughout. These butter pockets are what create those wonderfully flaky layers in the finished biscuits.
Stir in the shredded cheddar cheese and garlic powder, distributing them evenly throughout the flour mixture. The cheese adds richness and that signature Red Lobster flavor, while the garlic powder provides aromatic depth.
Step 5: Bring the Dough Together
Pour the milk into the flour mixture gradually, stirring gently with a wooden spoon or spatula just until the ingredients come together into a shaggy dough. This is crucial: do not overmix! Overworking the dough develops gluten, which results in tough, dense biscuits instead of the tender, fluffy texture you’re after. The dough should be slightly sticky and look somewhat rough—that’s exactly what you want.
Step 6: Top the Pot Pie
Using a large spoon or ice cream scoop, drop generous portions of the biscuit dough over the chicken filling. Aim for 8-10 biscuits depending on how large you make them, spacing them relatively evenly across the surface. It’s perfectly fine if they don’t completely cover the filling—they’ll spread and puff up during baking, eventually creating a beautiful golden canopy. Some visible filling between the biscuits is actually desirable, as it creates pockets of bubbling sauce that look and taste incredible.
Step 7: Bake to Golden Perfection
Place your assembled pot pie in the preheated oven and bake for 30-40 minutes. You’ll know it’s done when the biscuit topping turns a gorgeous golden brown and the filling is visibly bubbling around the edges and between the biscuits. The biscuits should feel firm to the touch and spring back slightly when pressed gently.
Step 8: Rest and Serve
Remove the pot pie from the oven and let it rest for 5-10 minutes before serving. This brief cooling period allows the filling to thicken slightly, making it easier to serve neat portions. However, the wait is admittedly difficult when your kitchen smells this incredible! Scoop generous servings into bowls, making sure each person gets plenty of both the creamy filling and those glorious cheesy biscuits.
Serving Suggestions
This Red Lobster Biscuit Chicken Pot Pie is hearty enough to be a complete meal on its own, but it pairs wonderfully with simple sides that don’t compete for attention. A fresh green salad with a light vinaigrette provides a crisp, refreshing contrast to the rich, creamy pot pie. The acidity in the dressing cuts through the butter and cheese beautifully, cleansing your palate between bites.
For a more traditional comfort food spread, serve alongside roasted or steamed green beans, glazed carrots, or honey-roasted Brussels sprouts. Cranberry sauce on the side adds a sweet-tart element that complements the savory dish surprisingly well, especially during fall and winter months.
If you’re feeding a crowd, consider setting up a pot pie bar where guests can customize their bowls with additional toppings. Offer crispy bacon bits, extra shredded cheese, hot sauce, fresh herbs like parsley or chives, or even a drizzle of gravy. This interactive element makes the meal feel special and allows everyone to tailor their portion to their preferences.
Don’t forget the beverages! This dish pairs beautifully with a crisp white wine like Chardonnay or Sauvignon Blanc, though apple cider (hot or cold depending on the season) also makes a lovely accompaniment. For kids, sparkling apple juice served in fancy glasses makes dinner feel like an occasion.
Recipe Variations
Seafood Pot Pie Version
Transform this into a seafood lover’s dream by replacing the chicken with a combination of cooked shrimp, crab meat, and white fish like cod or halibut. This variation channels Red Lobster’s seafood expertise while maintaining that signature biscuit topping. Add a splash of white wine to the filling and consider including corn for a New England-inspired twist.
Vegetarian Garden Pot Pie
Create a satisfying meatless version by substituting the chicken with extra vegetables and plant-based protein. Use a medley of mushrooms, zucchini, bell peppers, broccoli, and cauliflower, along with chickpeas or white beans for substance. Swap the cream of chicken soup for cream of mushroom, and use vegetable broth instead of chicken broth.
Spicy Cajun Twist
Add some Louisiana flair by incorporating Cajun seasoning into both the filling and the biscuit topping. Dice up some andouille sausage to mix with the chicken, add diced bell peppers and celery to the vegetables, and include a few dashes of hot sauce in the filling. This variation brings exciting heat and complexity to the classic comfort food.
Herb-Loaded Version
Elevate the flavor profile by adding fresh or dried herbs throughout. Stir chopped fresh thyme, rosemary, and sage into the filling, and add dried parsley or Italian seasoning to the biscuit dough. A bay leaf added to the filling (removed before serving) infuses subtle aromatic depth.
Individual Pot Pies
For a fun presentation that’s perfect for portion control or entertaining, divide the filling among individual ramekins or oven-safe bowls. Top each with a single large biscuit or two smaller ones. These personal pot pies look adorable and make serving a breeze, plus everyone gets their own perfectly golden biscuit crown.
Make-Ahead Tips
One of the best features of this recipe is how beautifully it accommodates advance preparation, making it perfect for busy schedules. You can assemble the entire pot pie up to 48 hours before baking—simply prepare both the filling and the biscuit topping, arrange everything in your casserole dish, cover tightly with plastic wrap or aluminum foil, and refrigerate.
When you’re ready to bake, remove the dish from the refrigerator and let it sit at room temperature for about 15-20 minutes while your oven preheats. This takes the chill off and ensures more even baking. Add an additional 10-15 minutes to the baking time if going directly from cold, and make sure the filling is bubbling hot throughout before removing from the oven.
For longer-term storage, you can freeze the assembled but unbaked pot pie for up to 2 months. Wrap it extremely well in plastic wrap followed by aluminum foil to prevent freezer burn. Thaw overnight in the refrigerator before baking, then follow the regular baking instructions, potentially adding a few extra minutes if the center is still cold.
Leftover baked pot pie keeps beautifully in the refrigerator for up to 4 days in an airtight container. Reheat individual portions in the microwave for 2-3 minutes, or warm the entire dish covered with foil in a 350°F oven for 20-25 minutes until heated through.
Notes
Time-Saving Chicken Options: Rotisserie chicken from your local grocery store is the ultimate shortcut for this recipe, saving you at least 30 minutes of cooking time. Alternatively, use leftover roasted chicken, poached chicken breasts, or even canned chicken in a pinch (though fresh tastes significantly better).
Vegetable Flexibility: While the recipe calls for frozen mixed vegetables, feel free to customize based on your family’s preferences or what’s in your freezer. Fresh vegetables work equally well—just dice them small enough to cook through during baking. Consider adding mushrooms, green beans, diced potatoes, or pearl onions.
Biscuit Texture Tips: The secret to tender, fluffy biscuits is handling the dough minimally and keeping the butter cold. If your kitchen is warm, chill the flour mixture in the freezer for 10 minutes before adding the butter. Cold ingredients create steam pockets during baking, resulting in lighter, flakier biscuits.
Soup Alternatives: Don’t have cream of chicken soup? You can substitute cream of mushroom, cream of celery, or even make a simple white sauce using butter, flour, and milk or cream. For a lighter version, use low-fat cream soup and reduce the butter in the biscuits.
Pan Size Matters: A 9×13-inch baking dish works perfectly for this recipe. If using a deeper dish, you may need to increase the baking time slightly. Conversely, a shallower dish may require a few minutes less. The filling should be bubbling and the biscuits golden brown regardless of dish size.
Frequently Asked Questions
Can I use canned biscuits instead of making them from scratch?
Absolutely! While homemade biscuits with the garlic-cheddar twist taste incredible, you can use store-bought refrigerated biscuits in a time crunch. Brush them with melted butter mixed with garlic powder and sprinkle with cheddar cheese before baking for that Red Lobster flavor.
How do I prevent the biscuits from getting soggy?
Make sure your filling isn’t too liquidy before adding the biscuit topping. The mixture should be thick and creamy but not soup-like. Additionally, drop the biscuits directly onto the filling without pressing them down, allowing air to circulate underneath as they bake.
Can I make this gluten-free?
Yes! Use a 1:1 gluten-free flour blend for the biscuits and ensure your cream of chicken soup is gluten-free (or make your own roux-based sauce with gluten-free flour). The texture will be slightly different but still delicious.
What if I don’t have cream of chicken soup?
Make a simple substitute by creating a roux: melt 3 tablespoons of butter, whisk in 3 tablespoons of flour, cook for 1 minute, then gradually whisk in 1 cup of chicken broth and ½ cup of heavy cream. Season with salt, pepper, and a pinch of poultry seasoning.
Can I add more vegetables?
Definitely! This recipe is very forgiving. Just keep the total volume of filling similar to what’s called for, so the biscuits have proper space to bake. Popular additions include diced potatoes, celery, mushrooms, and green beans.
How do I know when it’s done?
The pot pie is ready when the biscuits are golden brown (not pale), feel firm when gently touched, and the filling is bubbling around the edges. If the biscuits brown too quickly before the filling heats through, tent the dish loosely with foil and continue baking.
Can I double this recipe?
Absolutely! Simply double all ingredients and use two baking dishes or one very large roasting pan. Keep in mind that a larger volume may require a few extra minutes of baking time. Check that the center is hot and bubbling before removing from the oven.
Nutrition Information (per serving)
Serving Size: ¼ of recipe (approximately 2 cups)
Calories: 450 kcal
Sugar: 4g
Sodium: 980mg
Fat: 22g
- Saturated Fat: 12g
- Unsaturated Fat: 8g
- Trans Fat: 0g
Carbohydrates: 38g
Fiber: 3g
Protein: 26g
Cholesterol: 95mg
Red Lobster Biscuit Chicken Pot Pie is proof that you can honor tradition while adding a creative, delicious twist. The combination of classic comfort food with those iconic, addictive cheddar bay biscuits creates something truly special—a dish that feels both familiar and excitingly new. Whether you’re looking for the perfect cozy dinner, need to use up leftover chicken, or want to impress your family with minimal effort, this pot pie delivers on every level. Give it a try, and prepare for it to become a regular in your dinner rotation!


