Total Time: 30 minutes | Yield: 8 rolls
Introduction
Some of my fondest childhood memories revolve around my mom’s kitchen on busy weeknight evenings. She had this magical ability to transform simple ingredients into something that made us all rush to the dinner table. These cheesy chicken crescent rolls remind me of those comforting meals—warm, cheesy, and utterly satisfying. I discovered this particular recipe during a particularly hectic week when I needed something quick yet impressive for unexpected guests, and it’s been a lifesaver ever since.
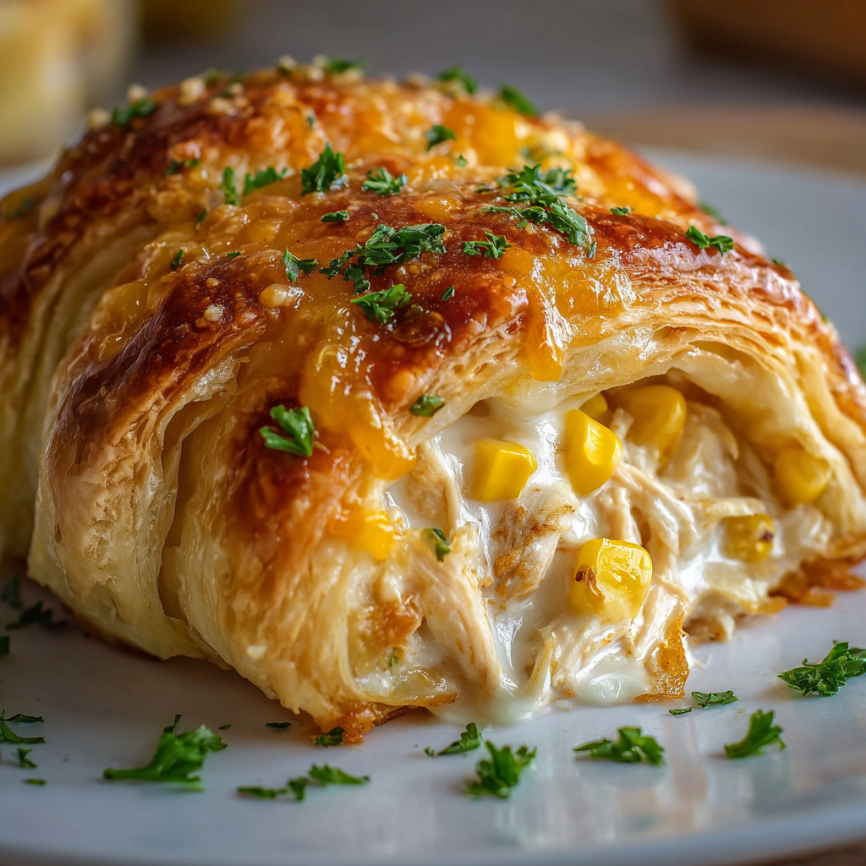
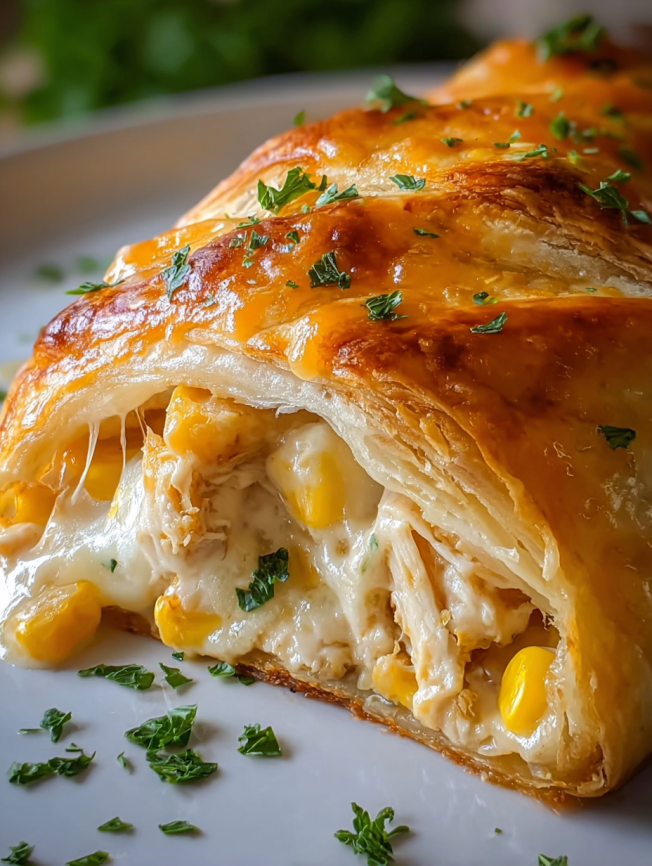
What I absolutely love about these crescent rolls is their versatility and foolproof nature. The flaky, golden crescent dough encases a creamy, cheesy chicken filling that delivers comfort in every bite. Whether you’re feeding hungry kids after school, hosting a casual game night, or looking for an easy appetizer that doesn’t sacrifice flavor, these rolls hit the sweet spot. They look fancy enough to impress but are surprisingly simple to pull together, even on your busiest days.
Why You’ll Love This Recipe
Lightning-Fast Preparation: With just 30 minutes from start to finish, these crescent rolls are perfect for those hectic evenings when you need dinner on the table quickly. Most of that time is hands-off baking, giving you time to prep sides or simply relax.
Crowd-Pleasing Flavor: The combination of tender chicken, melty cheddar, and creamy cheese wrapped in buttery crescent dough appeals to virtually everyone. Even picky eaters find these irresistible.
Budget-Friendly: Using affordable ingredients like canned crescent dough and leftover chicken, this recipe delivers maximum flavor without breaking the bank. It’s an economical way to feed a family or a crowd.
Incredibly Versatile: These rolls work beautifully as appetizers, snacks, lunch box additions, or even a light dinner. Serve them at parties, pack them for picnics, or enjoy them fresh from the oven on a quiet evening at home.
Make-Ahead Magic: You can prepare these rolls hours or even days in advance, making them ideal for meal prep or stress-free entertaining. Simply assemble, refrigerate or freeze, and bake when ready.
Ingredients
Main Components:
- 1 can (8 oz) crescent roll dough
- 2 cups cooked chicken, shredded
- 4 oz cream cheese, softened
- 1 cup shredded cheddar cheese
- 1 teaspoon garlic powder
- 1 tablespoon fresh or dried parsley, chopped
- Salt and pepper to taste
- Olive oil or cooking spray for greasing
Optional Enhancements:
- ½ teaspoon onion powder
- Pinch of red pepper flakes for heat
- 2 tablespoons melted butter for brushing
- Sesame seeds or everything bagel seasoning for topping
Step-by-Step Instructions
Preparing Your Workspace
Step 1: Preheat and Prep Begin by preheating your oven to 375°F (190°C). While it heats, line a baking sheet with parchment paper or lightly grease it with cooking spray. Preparing your workspace before you start assembling makes the process much smoother and prevents the dough from warming up too much.
Making the Filling
Step 2: Combine the Filling Ingredients In a medium mixing bowl, add the softened cream cheese. Using a fork or spatula, break it up until it’s smooth and creamy. Add the shredded chicken, cheddar cheese, garlic powder, and chopped parsley. Mix everything together thoroughly until you have a cohesive, well-combined filling. The cream cheese should coat all the chicken pieces evenly.
Step 3: Season to Perfection Taste the filling and season with salt and pepper according to your preference. Remember that the crescent dough has some salt, so don’t overdo it. The filling should be flavorful on its own since it’s the star of these rolls.
Assembling the Crescent Rolls
Step 4: Prepare the Dough Carefully open the can of crescent roll dough and unroll it onto a clean, lightly floured surface. You’ll notice the dough is perforated into triangles. Gently separate each triangle along the perforations, being careful not to tear the dough.
Step 5: Fill Each Triangle Place approximately 2 tablespoons of the chicken mixture at the wide end of each triangle. Don’t overfill, as this will make rolling difficult and can cause the filling to leak out during baking. Leave a small border around the edges to ensure a good seal.
Step 6: Roll with Care Starting from the wide end where you placed the filling, carefully roll the dough toward the pointed tip. As you roll, gently tuck in the sides to keep the filling contained. The roll should be snug but not so tight that it squeezes out the filling.
Step 7: Arrange on Baking Sheet Place each completed roll on the prepared baking sheet with the pointed tip facing down. This helps prevent the rolls from unraveling during baking. Space them about 2 inches apart to allow for expansion as they bake and to ensure even browning.
Baking to Golden Perfection
Step 8: Optional Butter Brush For extra richness and a beautiful golden sheen, brush the tops of each roll with melted butter. This step is optional but adds an irresistible flavor and helps any toppings adhere better.
Step 9: Add Finishing Touches If desired, sprinkle the tops with sesame seeds, everything bagel seasoning, or a light dusting of garlic powder. These small touches elevate the presentation and add extra flavor dimension.
Step 10: Bake Until Golden Transfer the baking sheet to the preheated oven and bake for 12-15 minutes. Watch for the rolls to puff up beautifully and turn a gorgeous golden brown color. The cheese inside should be melted and bubbly, and the dough should be cooked through with no raw spots.
Step 11: Cool and Serve Remove the rolls from the oven and let them cool on the baking sheet for about 5 minutes. This brief resting period allows the filling to set slightly, making them easier to handle and preventing burnt mouths. Transfer to a serving platter while still warm.

Serving Suggestions
These versatile crescent rolls shine in numerous serving scenarios. For a casual family dinner, serve them alongside a crisp garden salad and tomato soup for a comforting, complete meal that feels like a warm hug.
As party appetizers, arrange them on a platter with small bowls of ranch dressing, honey mustard, or marinara sauce for dipping. The interactive element makes them perfect for game day gatherings or cocktail parties.
Pack them in lunch boxes with carrot sticks, grapes, and a cheese stick for a balanced meal that kids actually get excited about. They’re delicious at room temperature, making them ideal for on-the-go eating.
Create a brunch spread by serving these rolls alongside scrambled eggs, fresh fruit, and mimosas. The savory rolls provide a nice counterpoint to sweeter breakfast items and work wonderfully for late-morning entertaining.
Recipe Variations
Buffalo Chicken Crescents
Replace half the cheddar with crumbled blue cheese and mix 2 tablespoons of buffalo sauce into the filling. Serve with ranch or blue cheese dressing for an appetizer with serious kick.
Veggie-Loaded Version
Add finely diced bell peppers, mushrooms, and spinach to the filling for extra nutrition and flavor. Sauté the vegetables first to remove excess moisture that could make the rolls soggy.
Pizza-Style Rolls
Mix in diced pepperoni, Italian seasoning, and substitute mozzarella for cheddar. Serve with warm marinara sauce for dipping to create a pizza-inspired treat.
BBQ Chicken Crescents
Add 2 tablespoons of your favorite BBQ sauce to the filling and substitute pepper jack cheese for cheddar. Top with crispy bacon bits for an irresistible smoky-sweet combination.
Breakfast Version
Use scrambled eggs instead of chicken, add cooked crumbled sausage, and include diced green onions. These breakfast crescents are perfect for weekend brunch or meal prep.
Make-Ahead Tips
Refrigerator Storage: Assemble the rolls completely and place them on a parchment-lined baking sheet. Cover tightly with plastic wrap and refrigerate for up to 24 hours before baking. This makes entertaining stress-free and allows flavors to meld.
Freezer-Friendly: For longer storage, arrange unbaked rolls on a baking sheet and freeze until solid (about 2 hours). Transfer to a freezer-safe container or bag, separating layers with parchment paper. They’ll keep for up to 3 months.
Baking from Frozen: When ready to bake frozen rolls, there’s no need to thaw. Simply add 3-5 minutes to the baking time and watch for golden-brown perfection. The centers should be hot and bubbly.
Filling Prep: Make the chicken and cheese filling up to 3 days ahead and store it in an airtight container in the refrigerator. This cuts assembly time significantly when you’re ready to make the rolls.
Reheating Leftovers: Store baked rolls in an airtight container in the refrigerator for up to 3 days. Reheat in a 325°F oven for 8-10 minutes to restore their crispy exterior, or microwave for 30-45 seconds for a quick warm-up.
Notes
Chicken Shortcuts: Rotisserie chicken from the grocery store is perfect for this recipe and saves significant prep time. Simply remove the skin, shred the meat, and you’re ready to go. Canned chicken also works in a pinch.
Cream Cheese Consistency: Make sure your cream cheese is fully softened to room temperature before mixing. Cold cream cheese won’t incorporate smoothly and will leave lumps in your filling.
Dough Temperature: Work quickly with crescent dough, as it becomes sticky and difficult to handle when warm. If your kitchen is hot, consider chilling the unopened can for 15 minutes before using.
Preventing Leaks: Don’t overfill the triangles, and make sure to seal the edges well by pressing gently. Any gaps in the dough can allow filling to escape during baking.
Even Sizing: Try to keep your rolls roughly the same size so they bake evenly. Using a tablespoon or small cookie scoop for the filling ensures consistent portions.
Frequently Asked Questions
Can I use puff pastry instead of crescent dough? Absolutely! Puff pastry creates an even flakier, more elegant result. Cut it into triangles similar to crescent dough and follow the same assembly process. Baking time may need to be extended by 2-3 minutes.
What’s the best way to shred chicken? Use two forks to pull the chicken apart, or place warm chicken in a stand mixer with the paddle attachment and mix on low for about 30 seconds. The mixer method is incredibly quick and creates perfect, uniform shreds.
Can I make these dairy-free? Yes! Substitute dairy-free cream cheese and shredded cheese alternatives. Many plant-based cheese options melt beautifully and taste delicious in this application.
How do I know when they’re fully cooked? The rolls should be golden brown all over with no pale, doughy spots. If you’re unsure, insert a toothpick into the center—it should come out hot to the touch, indicating the filling is heated through.
Can I add vegetables to the filling? Definitely! Just make sure to cook and drain any vegetables first to remove excess moisture. Spinach, bell peppers, and mushrooms all work wonderfully when properly prepared.
Why did my rolls unravel during baking? This usually happens when the dough isn’t sealed properly or when there’s too much filling. Make sure the pointed end is tucked underneath and press the edges gently to seal before baking.
Can I use different types of cheese? Of course! Monterey Jack, Swiss, pepper jack, or a Mexican blend all taste fantastic. Experiment with your favorite cheeses to create custom flavor combinations.
Are these really gluten-free as listed? Standard crescent roll dough contains gluten. To make this recipe truly gluten-free, you’ll need to use a gluten-free crescent roll alternative or gluten-free puff pastry. Check all ingredient labels carefully.
Prep Time: 15 minutes | Cook Time: 15 minutes | Category: Appetizer/Snack | Method: Baking | Cuisine: American
Nutrition Information (Per Roll)
- Serving Size: 1 roll
- Calories: 250
- Sugar: 1g
- Sodium: 400mg
- Fat: 15g
- Saturated Fat: 7g
- Unsaturated Fat: 5g
- Trans Fat: 0g
- Carbohydrates: 20g
- Fiber: 1g
- Protein: 10g
- Cholesterol: 40mg
Note: Standard crescent roll dough contains gluten. For a gluten-free version, use certified gluten-free crescent dough alternatives.


