Total Time: 4 hours 20 minutes
Yield: 8 servings
Introduction
I’ll never forget the first time I tasted Biscoff cookies during a flight to Europe. Those crispy, caramelized speculoos biscuits with their warm spice notes instantly won my heart. Years later, when I was brainstorming ways to elevate classic banana pudding for a potluck dinner, inspiration struck—what if I combined those beloved cookies with the creamy comfort of traditional Southern banana pudding and added a luxurious caramel drizzle?
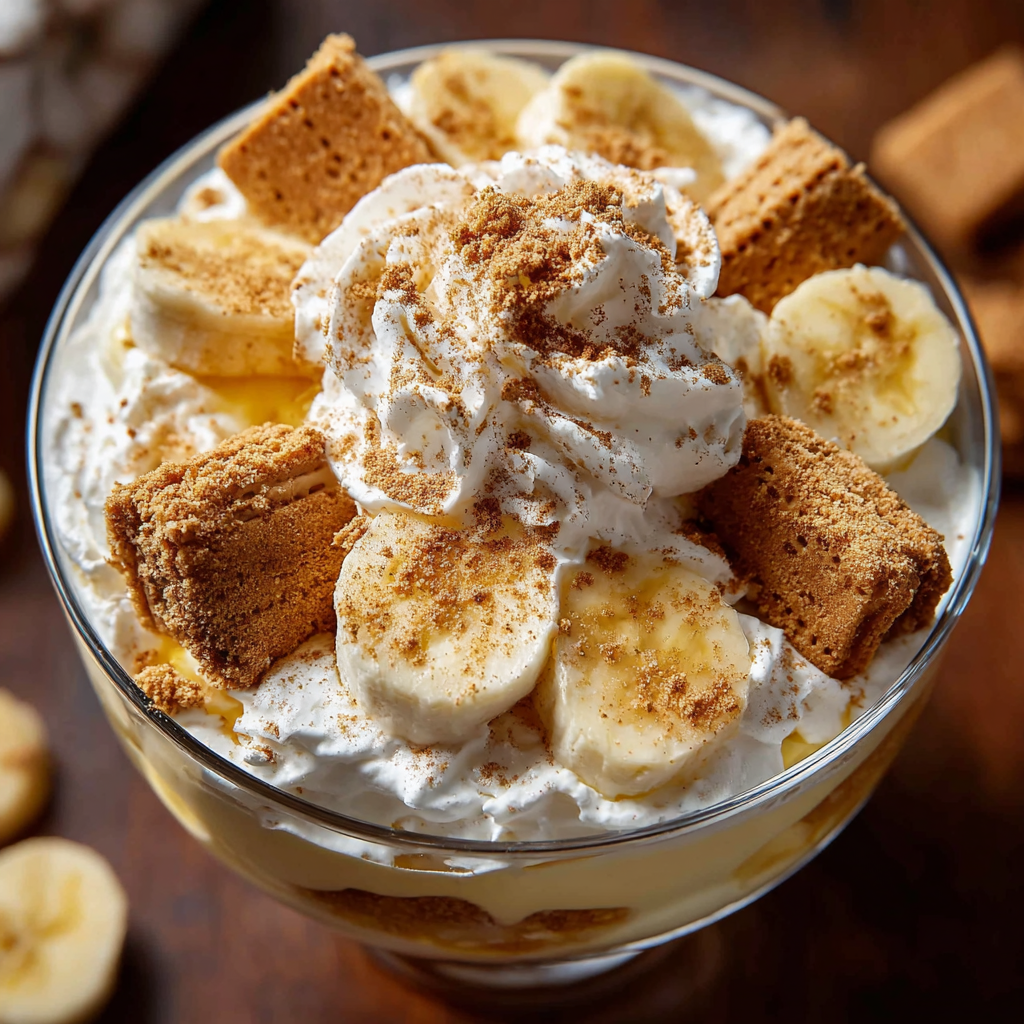
The result was this absolutely divine Biscoff Banana Pudding with Caramel, and it’s become my most requested dessert ever since. There’s something magical about how the spiced cookies soften into the luscious pudding layers, creating pockets of flavor that melt on your tongue. Combined with fresh banana slices and that gorgeous caramel cascade, each spoonful delivers pure bliss. Best of all, there’s no baking required, which means you can create this show-stopping dessert even on the busiest days.
Why You’ll Love This Recipe
It’s ridiculously easy despite looking impressive. This no-bake dessert requires only simple mixing and layering—no oven, no precise temperatures to worry about, and no complicated techniques. Yet when you present this beautiful layered creation dripping with caramel, everyone will think you spent hours in the kitchen.
The flavor combination is absolutely addictive. Biscoff cookies bring that distinctive caramelized, slightly spiced flavor that elevates banana pudding from familiar comfort food to something truly extraordinary. The addition of homemade caramel sauce adds depth and richness that ties all the flavors together perfectly.
It’s a crowd-pleaser across all age groups. Kids love the sweet, creamy layers and the fun cookie crunch. Adults appreciate the sophisticated flavor profile and nostalgic banana pudding vibes. I’ve served this at children’s birthday parties and elegant dinner parties with equal success.
Make-ahead convenience is a game-changer. This dessert actually improves as it sits in the refrigerator, making it perfect for stress-free entertaining. Prepare it the night before your gathering, and you’ll have one less thing to worry about when guests arrive. The flavors meld beautifully, and the cookies soften to the perfect texture.
It’s endlessly customizable. Once you master the basic technique, you can adapt this recipe in countless ways. Swap ingredients, adjust sweetness levels, or add extra toppings based on your preferences. The forgiving nature of layered desserts means you can make it your own without fear of failure.
Ingredients
For the Whipped Cream Layer:
- 1 cup heavy whipping cream
- 1/4 cup powdered sugar
- 1 teaspoon vanilla extract
For the Pudding Base:
- 1 (8 oz) package cream cheese, softened
- 1 (14 oz) can sweetened condensed milk
- 1 cup whole milk
- 1 (3.4 oz) package instant vanilla pudding mix
For Assembly:
- 1 box of Biscoff cookies (about 30-35 cookies)
- 3-4 ripe bananas, sliced
- 1 cup caramel sauce (store-bought or homemade)
Optional Garnishes:
- Extra Biscoff cookie crumbles
- Additional caramel drizzle
- Whipped cream rosettes
- Sliced almonds or pecans
Step-by-Step Instructions
Preparing the Whipped Cream
Step 1: Start by ensuring your heavy whipping cream is very cold—this is crucial for achieving those perfect stiff peaks. Pour the cream into a large mixing bowl, preferably one that’s been chilled in the refrigerator for about 15 minutes. Cold equipment helps the cream whip faster and more effectively.
Step 2: Add the powdered sugar and vanilla extract to the cream. Using an electric mixer on medium speed, begin beating the mixture. Watch carefully as it transforms from liquid to soft, billowy peaks. This usually takes about 2-3 minutes.
Step 3: Continue beating until stiff peaks form. You’ll know you’ve reached the right consistency when you lift the beaters and the cream stands up in firm points without drooping. Be careful not to overbeat, or you’ll end up with butter instead of whipped cream. Set this bowl aside in the refrigerator while you prepare the other components.
Creating the Creamy Base
Step 4: In a separate large bowl, beat the softened cream cheese with an electric mixer until it’s completely smooth and fluffy, about 2 minutes. Make sure there are no lumps remaining, as these won’t blend well with the other ingredients. Room temperature cream cheese is essential here—cold cream cheese will create a lumpy mixture.
Step 5: Gradually pour in the sweetened condensed milk while continuing to beat the cream cheese. Mix until the two ingredients are completely incorporated and the mixture is silky smooth. The sweetened condensed milk adds richness and sweetness while helping to stabilize the pudding layers.
Step 6: In a medium bowl, prepare the instant vanilla pudding by whisking it vigorously with the whole milk for about 2 minutes. The mixture will start thin but will quickly begin to thicken. Let it sit undisturbed for 5 minutes—this resting period allows the pudding to reach its full thickness and ensures your dessert won’t be runny.
Combining Everything Together
Step 7: Once your pudding has thickened properly, fold it into the cream cheese mixture. Use a rubber spatula and gentle folding motions rather than stirring, which helps maintain the light, airy texture. Fold until you can no longer see any streaks of cream cheese mixture.
Step 8: Retrieve your whipped cream from the refrigerator. Add about one-third of it to the pudding mixture first, folding gently to lighten the base. Then add the remaining whipped cream, continuing to fold with light, sweeping motions. The goal is to incorporate everything while preserving as much air as possible, creating that signature fluffy texture.
Step 9: Your pudding mixture should now be light, creamy, and gorgeously smooth. Cover the bowl and set it aside while you prepare your bananas and organize your layering station.
Assembling Your Masterpiece
Step 10: Slice your bananas into rounds about 1/4 inch thick. Choose bananas that are ripe but still firm—yellow with just a few brown spots is perfect. Overly ripe bananas will become mushy and can make your dessert watery, while underripe bananas lack the sweet flavor that makes this dessert shine.
Step 11: Select your serving dish—a clear trifle bowl or glass dish works beautifully because it showcases the gorgeous layers. Begin by arranging a layer of Biscoff cookies on the bottom. You can leave them whole or break them slightly to fit snugly together, creating a solid base.
Step 12: Spread about one-third of your pudding mixture over the cookie layer, smoothing it gently with an offset spatula or the back of a spoon. Make sure the layer is even so your finished dessert looks polished and professional.
Step 13: Arrange a generous layer of banana slices over the pudding. Try to cover the pudding surface as completely as possible. The bananas add moisture, natural sweetness, and that classic banana pudding flavor everyone loves.
Step 14: Repeat the layering process—cookies, pudding, bananas—until you’ve used all your ingredients. Depending on the depth of your dish, you should get 2-3 complete layers. End with a final layer of pudding on top for the smoothest presentation.
The Grand Finale
Step 15: Warm your caramel sauce slightly if it’s thick—this makes it easier to drizzle. Pour it generously over the top layer, allowing it to cascade down the sides naturally. Use the back of a spoon to spread it if needed, creating that gorgeous, glossy finish.
Step 16: If desired, crush a few extra Biscoff cookies and sprinkle them artistically over the caramel. This adds visual appeal and gives guests a hint of what deliciousness awaits beneath the surface.
Step 17: Cover your masterpiece tightly with plastic wrap, being careful not to let the wrap touch the caramel surface. Refrigerate for at least 4 hours, though overnight is even better. This chilling time allows the cookies to soften, the flavors to meld, and the pudding to set to the perfect consistency.
Step 18: When ready to serve, remove from the refrigerator about 10 minutes beforehand. This brief rest at room temperature makes the dessert easier to scoop and enhances all the flavors. Serve in generous portions with an extra drizzle of caramel sauce if desired.
Serving Suggestions
This Biscoff Banana Pudding is stunning enough to serve as-is, but a few thoughtful touches can elevate it even further. Consider topping each serving with a dollop of freshly whipped cream and a whole Biscoff cookie standing upright for that wow factor.
For a more dramatic presentation at dinner parties, serve individual portions in small mason jars or parfait glasses. Layer the components in the same order, and guests will love having their own personal dessert. These individual servings are also perfect for buffet-style gatherings where people can easily grab and go.
Coffee lovers will appreciate pairing this dessert with a strong espresso or cappuccino. The slight bitterness of coffee beautifully balances the sweet caramel and pudding, creating a harmonious flavor experience. Alternatively, a glass of cold milk makes this feel like the ultimate comfort food treat.
For special occasions, consider garnishing with edible flowers, gold leaf, or a dusting of cocoa powder for added elegance. Fresh berries like strawberries or raspberries can be tucked between layers or used as a garnish, adding a pop of color and a tart contrast to the sweet pudding.
Recipe Variations
Chocolate Biscoff Dream: Add 1/2 cup of melted dark chocolate to the cream cheese mixture before combining with the pudding. Layer in some chocolate shavings between the pudding layers for extra decadence. You can also use chocolate pudding instead of vanilla for a completely different flavor profile.
Peanut Butter Paradise: Swirl 1/2 cup of creamy peanut butter into the pudding mixture before layering. The combination of peanut butter, banana, and Biscoff is absolutely heavenly. Top with chopped peanuts for added crunch and visual appeal.
Salted Caramel Version: Use salted caramel sauce instead of regular caramel, and sprinkle a tiny pinch of flaky sea salt on top of each layer. The sweet-salty combination is incredibly sophisticated and addictive.
Berry Biscoff Twist: Alternate banana slices with fresh strawberry or raspberry layers. The tartness of berries provides a wonderful contrast to the sweet pudding and caramel. This version is especially beautiful with its pops of red color throughout.
Espresso Infusion: Add 2 tablespoons of instant espresso powder to the pudding mix for a coffee-flavored version. The coffee notes complement the Biscoff cookies’ caramelized flavor perfectly, creating a tiramisu-like experience.
Boozy Adult Version: Add 2-3 tablespoons of rum or bourbon to the pudding mixture for a grown-up twist. You can also spike the caramel sauce with a splash of whiskey for extra depth and warmth.
Make-Ahead Tips
This dessert is actually better when made ahead, making it an absolute dream for party planning. Prepare the entire dessert up to 2 days in advance and keep it covered in the refrigerator. The extended chilling time allows the Biscoff cookies to soften perfectly while the flavors develop and deepen.
If you want to prep components separately, you can make the pudding mixture up to 24 hours ahead and store it in an airtight container. The whipped cream can be prepared 6-8 hours in advance if you use stabilized whipped cream. However, for the lightest texture, I recommend whipping the cream fresh on assembly day.
Slice your bananas no more than 4-6 hours before assembling to prevent browning. If you must slice them earlier, toss them gently with a little lemon juice to slow oxidation. Pat them dry with paper towels before layering to avoid adding excess moisture to your dessert.
The caramel drizzle can be added up to 24 hours before serving without any issues. However, if you’re adding crushed Biscoff cookies on top, wait until just before serving to maintain their crunch. Store-bought caramel sauce lasts for weeks in the refrigerator, so you can always have it on hand for this recipe.
For the freshest appearance, add any whipped cream garnishes, whole cookies, or fresh toppings within an hour of serving. These finishing touches are quick to add and make a big impact on the final presentation.
Notes
Cookie Softening Is Key: Don’t worry if your cookies seem hard when you first assemble the dessert. The magic happens during the chilling time when moisture from the pudding softens them to a cake-like texture. This is what creates that signature layered dessert experience.
Banana Selection Matters: Use bananas that are ripe but still slightly firm. They should be sweet and fragrant but not so soft that they’re mushy. Overly ripe bananas can release excess moisture and make your pudding watery. Conversely, green bananas lack sweetness and have an unpleasant starchy texture.
Temperature Timing: All your dairy ingredients (cream cheese, whipping cream, milk) should start at the right temperature. Cream cheese must be at room temperature for smooth mixing, while whipping cream should be ice cold for proper whipping. Plan accordingly by taking cream cheese out 1-2 hours before starting.
Caramel Sauce Options: While store-bought caramel sauce is convenient and delicious, homemade caramel adds an extra special touch. If making your own, prepare it first and let it cool to room temperature before drizzling to avoid melting the whipped cream layers.
Storage Guidelines: This dessert will keep in the refrigerator for 3-4 days when properly covered. The cookies will continue to soften over time, which many people prefer. However, the bananas may begin to brown slightly after day two, so it’s best enjoyed within the first 48 hours.
Serving Size Flexibility: This recipe easily serves 8 generous portions, but you can stretch it to 10-12 smaller servings for a lighter dessert course. Alternatively, reduce the recipe by half for a smaller gathering or intimate dinner.
Texture Control: If you prefer a firmer pudding, refrigerate it for an extra 2-4 hours beyond the minimum chilling time. For a creamier, softer texture, serve it right at the 4-hour mark when everything is perfectly chilled but still supremely smooth.
Frequently Asked Questions
Can I use homemade pudding instead of instant pudding mix?
Absolutely! Homemade vanilla pudding creates an even more luxurious dessert with richer flavor. Cook your pudding according to your favorite recipe, let it cool completely, then proceed with folding in the cream cheese mixture and whipped cream. Just make sure it’s thoroughly chilled before assembling to prevent melting the whipped cream.
What can I substitute for Biscoff cookies if I can’t find them?
Graham crackers are the most common substitute and work beautifully in this recipe. You can also use vanilla wafers, gingersnaps for extra spice, or even chocolate graham crackers for a different twist. Each cookie type will give you a slightly different flavor profile but equally delicious results.
How do I prevent my bananas from turning brown?
The best prevention is using fresh bananas and assembling the dessert no more than 24 hours before serving. You can also brush banana slices lightly with lemon or pineapple juice before layering. The pudding mixture itself provides some protection by limiting air exposure, but some slight browning is natural and doesn’t affect the taste.
Can I freeze this dessert?
While you technically can freeze it, I don’t recommend it. The texture of the pudding and whipped cream changes significantly upon thawing, becoming grainy and separated. The bananas also don’t freeze well in this application. This is a dessert best enjoyed fresh from the refrigerator.
My pudding mixture seems too thick. What should I do?
If your pudding feels too thick to spread easily, you can thin it slightly by folding in an additional 2-3 tablespoons of milk. Add it gradually, mixing gently until you reach your desired consistency. Remember that the mixture will firm up more in the refrigerator, so slightly loose is better than too thick.
Can I make this dairy-free?
Yes, with some substitutions! Use coconut cream or a plant-based heavy cream alternative for whipping. Substitute vegan cream cheese and non-dairy milk for their dairy counterparts. Many instant pudding mixes work with non-dairy milk, though you may need to adjust the ratio slightly. Check that your caramel sauce and cookies are also dairy-free.
How far in advance can I slice the bananas?
For best results, slice bananas no more than 4-6 hours before assembly. Store them in an airtight container in the refrigerator with a light coating of lemon juice if needed. However, slicing them fresh right before layering gives you the best color and texture.
The caramel sauce is too thick to drizzle. How do I fix it?
Warm it gently in the microwave in 10-15 second intervals, stirring between each heating. You can also thin it with a tablespoon or two of heavy cream or milk until it reaches your desired drizzling consistency. Just make sure it’s not hot when you add it to the dessert, or it will melt the whipped cream layers.
Prep Time: 20 minutes
Chill Time: 4 hours
Total Time: 4 hours 20 minutes
Calories: 380 kcal per serving
Servings: 8
Perfect For:
- Potluck dinners
- Holiday gatherings
- Birthday celebrations
- Sunday family desserts
- No-bake summer treats


