There’s something magical about October that brings out the baker in all of us. A few years ago, my daughter asked if we could make “the scariest cake ever” for her Halloween party. What started as a simple chocolate cake transformed into this spectacular creation with vibrant orange frosting and spooky decorations. The best part? Watching her friends’ eyes light up when they saw it—and then devour every last crumb.
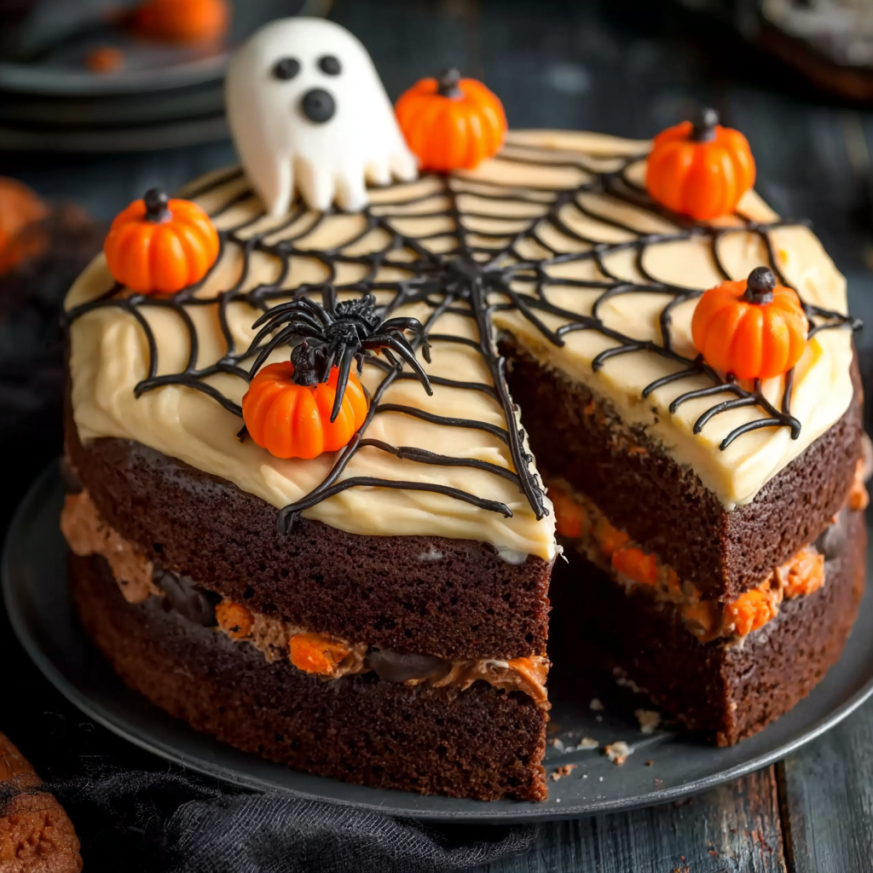
This Halloween cake combines everything you want in a celebration dessert: rich, moist chocolate layers that practically melt on your tongue, silky buttercream frosting in that perfect jack-o’-lantern orange, and endless opportunities for creative, spooky decorations. Whether you’re hosting a Halloween bash, bringing treats to a school party, or simply embracing the season’s festive spirit, this cake delivers both visual impact and delicious flavor that everyone will love.
Why You’ll Love This Recipe
Showstopping presentation with easy execution. Despite its impressive appearance, this cake uses straightforward techniques that even novice bakers can master. The vibrant orange frosting and creative decorations make it look like something from a professional bakery.
Incredibly moist chocolate cake. The secret ingredient—boiling water—might seem unusual, but it creates the most tender, velvety crumb you’ve ever tasted. This cake stays moist for days, making it perfect for advance preparation.
Customizable decorations for any skill level. Whether you’re a decorating pro or working with simple store-bought candies, you can create something spectacular. Candy eyes, licorice spiders, and sprinkles transform a basic frosted cake into Halloween magic.
Feeds a crowd perfectly. This two-layer 9-inch cake serves 10-12 people generously, making it ideal for parties and gatherings. No one will leave disappointed or still hungry.
Kid-friendly but sophisticated enough for adults. The rich chocolate flavor appeals to grown-up palates while the fun decorations delight children. It’s truly a dessert that bridges all ages at your Halloween celebration.
Ingredients You’ll Need
For the Chocolate Cake Layers
- 1 ¾ cups all-purpose flour – Provides structure without heaviness
- ¾ cup unsweetened cocoa powder – Use high-quality cocoa for deep chocolate flavor
- 1 ½ teaspoons baking powder – Helps create lift and fluffiness
- 1 ½ teaspoons baking soda – Works with the baking powder for even rise
- 1 teaspoon salt – Balances and enhances the sweetness
- 2 cups granulated sugar – Sweetens and adds moisture
- 2 large eggs, at room temperature – Binds ingredients smoothly
- 1 cup whole milk – Creates tender, moist crumb
- ½ cup vegetable oil – Ensures soft texture that lasts
- 2 teaspoons vanilla extract – Adds warmth and depth
- 1 cup boiling water – The secret to ultra-moist cake
For the Orange Buttercream Frosting
- 1 cup unsalted butter, softened – Must be room temperature for proper texture
- 4 cups powdered sugar – Sweetens and stabilizes the frosting
- 2-3 tablespoons heavy cream – Adjusts consistency to your preference
- 1 teaspoon vanilla extract – Complements the cake’s flavor
- Orange food coloring – Gel colors work best for intensity without thinning
For Spooky Decorations
- Candy eyes – Create adorable or creepy characters
- Black licorice – Perfect for spider legs or cobwebs
- Halloween sprinkles – Adds festive flair and color
- Optional extras: Chocolate chips, gummy worms, orange and black M&Ms, candy corn
Step-by-Step Instructions
Prepare Your Baking Setup
Begin by preheating your oven to 350°F (175°C). This gives the oven plenty of time to reach the proper temperature while you prepare the batter. Meanwhile, thoroughly grease two 9-inch round cake pans with butter or non-stick spray, then line the bottoms with parchment paper circles.
This double protection ensures your cake layers release perfectly without sticking. The parchment paper is especially important for chocolate cakes, which can be more delicate than vanilla varieties.
Mix the Dry Ingredients
In a large mixing bowl, sift together the all-purpose flour, unsweetened cocoa powder, baking powder, baking soda, and salt. Sifting serves two important purposes: it breaks up any lumps in the cocoa powder and aerates the flour, resulting in a lighter, more tender cake.
Some people skip this step, but I promise it makes a noticeable difference in the final texture. Set this bowl aside while you prepare the wet ingredients.
Combine the Wet Ingredients
In a separate large bowl, combine the granulated sugar, room-temperature eggs, whole milk, vegetable oil, and vanilla extract. Using an electric mixer on medium speed, beat everything together for about 2 minutes until the mixture looks smooth, glossy, and slightly thickened.
The sugar should be mostly dissolved, and the mixture should have increased slightly in volume. Room-temperature eggs are crucial here—they blend more easily and create a more uniform batter than cold eggs straight from the refrigerator.
Bring the Batter Together
Gradually add your dry ingredient mixture to the wet ingredients, stirring gently just until incorporated. Don’t overmix at this stage—stop as soon as you no longer see streaks of flour. Overmixing develops gluten, which can make your cake tough instead of tender.
Now comes the unusual part: slowly pour in the cup of boiling water while mixing on low speed. The batter will become very thin—almost like chocolate milk—but don’t worry! This liquid consistency is exactly what creates that incredibly moist, velvety texture when baked.
Continue mixing just until the boiling water is fully incorporated, being careful to avoid splatters.
Bake to Perfection
Divide the thin batter evenly between your prepared cake pans. A kitchen scale helps ensure equal layers, but eyeballing works fine too. Carefully transfer the pans to your preheated oven, positioning them on the center rack with space between them for air circulation.
Bake for 30-35 minutes, checking at the 30-minute mark. The cakes are done when a toothpick inserted into the center comes out clean or with just a few moist crumbs (but no wet batter). The tops should spring back lightly when touched.
Remove the pans from the oven and let the cakes cool in their pans for 10 minutes. This brief rest period allows them to firm up slightly, making them less likely to break when you remove them. After 10 minutes, carefully invert the cakes onto a wire cooling rack and peel away the parchment paper.
Allow the layers to cool completely—at least 1 hour—before frosting. Frosting warm cake causes the buttercream to melt and slide off, creating a messy disaster.
Create the Orange Buttercream
While your cakes cool, prepare the vibrant orange frosting. Place the softened butter in a large mixing bowl and beat it with an electric mixer on medium speed for about 2 minutes until it’s light, fluffy, and pale in color.
Gradually add the powdered sugar, one cup at a time, beating on low speed after each addition to prevent a sugar cloud in your kitchen. Once all the sugar is incorporated, add the heavy cream and vanilla extract.
Increase the mixer speed to high and whip for 2-3 minutes until the frosting becomes light, fluffy, and increased in volume. Add your orange food coloring—start with a few drops and gradually add more until you achieve your desired shade. Gel food coloring provides the most vibrant results without thinning the frosting.
Taste and adjust as needed. If the frosting seems too thick, add an extra tablespoon of heavy cream. Conversely, if it’s too thin, add more powdered sugar a quarter cup at a time.
Assemble and Decorate Your Cake
Once your cake layers are completely cool, place one layer on your serving plate. If the tops are domed, use a serrated knife to carefully level them for a more professional appearance and easier stacking.
Spread a generous layer of orange buttercream (about 1 cup) over the first layer, creating an even coating that goes right to the edges. Place the second layer on top, pressing down gently to secure it.
Apply a thin “crumb coat” of frosting all over the entire cake—this initial layer traps any loose crumbs. Refrigerate for 15-20 minutes to set this layer, then apply the final, thicker coat of frosting. Use an offset spatula or butter knife to create smooth sides and top, or go for a rustic, textured look if you prefer.
Now comes the fun part—decorating! Press candy eyes into the frosting to create monster or ghost faces. Arrange black licorice pieces to look like spider legs. Scatter Halloween sprinkles around the edges or create patterns. Let your creativity run wild, and don’t be afraid to get the kids involved in this step.
Serving Suggestions
Classic Party Presentation: Place the finished cake on a cake stand or decorative platter. Surround the base with candy corn, chocolate spiders, or artificial spider webs for a complete spooky scene.
Individual Slices with Ice Cream: Serve warm slices with a scoop of vanilla ice cream for a temperature and texture contrast that everyone loves. The cold ice cream melting into the warm chocolate cake is pure heaven.
Dessert Table Centerpiece: Make this cake the star of your Halloween dessert spread, surrounded by complementary treats like cupcakes, cookies, and candy bowls. The vibrant orange color makes it an instant focal point.
Coffee Shop Pairing: Enjoy slices with hot apple cider, pumpkin spice lattes, or classic coffee. The rich chocolate pairs beautifully with warm autumn beverages.
Themed Character Cake: Use the frosting and decorations to create specific characters—a jack-o’-lantern face, a friendly ghost, a black cat, or even a mummy wrapped in white fondant strips.
Recipe Variations
Vanilla Pumpkin Cake
Replace the chocolate cake with a spiced pumpkin cake by swapping the cocoa powder for an additional ¾ cup flour and adding 1 cup pumpkin puree, 2 teaspoons pumpkin pie spice, and 1 teaspoon cinnamon to the wet ingredients.
Cream Cheese Frosting Alternative
Instead of buttercream, make a tangy cream cheese frosting by beating 8 oz softened cream cheese with ½ cup butter, then gradually adding 4 cups powdered sugar. Tint it orange for the same festive effect.
Black and Orange Marble Cake
Divide the chocolate batter into two bowls. Leave one as-is, and tint the other with orange food coloring. Alternate spoonfuls of each color in the pans, then swirl with a knife for a marbled effect.
Triple Layer Showstopper
Divide the batter among three 9-inch pans (reducing bake time to 25-28 minutes). Stack all three layers with frosting between each for an even more impressive presentation.
Cupcake Conversion
Pour the batter into lined muffin tins instead of cake pans. Bake for 18-22 minutes. This recipe makes about 24 standard cupcakes, perfect for school parties where individual servings are easier.
Make-Ahead Tips
This Halloween cake is wonderfully accommodating when it comes to advance preparation. Bake the cake layers up to 2 days ahead and store them tightly wrapped at room temperature, or freeze them for up to 3 months. Frozen layers should be thawed completely before frosting.
The buttercream frosting can be made up to 1 week in advance and stored in an airtight container in the refrigerator. Before using, bring it to room temperature and re-whip it for 2-3 minutes to restore its fluffy texture.
Fully assembled and decorated cakes stay fresh covered at room temperature for 2-3 days, or refrigerated for up to 5 days. If refrigerating, bring the cake to room temperature 30 minutes before serving for the best flavor and texture.
For the absolute best make-ahead strategy, bake and freeze the layers a week early. Make the frosting 2-3 days ahead and refrigerate. Then assemble and decorate the day before your event. This spreads out the work while ensuring everything tastes fresh.
Notes
The thin batter is normal. Don’t be alarmed when the boiling water makes your batter incredibly liquid. This is exactly what creates the moist, tender crumb. Resist the urge to add more flour to thicken it.
Room temperature matters. Eggs and butter should be at room temperature for optimal mixing. Cold ingredients don’t emulsify properly, resulting in a denser cake and lumpy frosting.
Quality cocoa makes a difference. Dutch-processed cocoa powder provides a deeper, more complex chocolate flavor than natural cocoa. Either works, but Dutch-processed is worth seeking out for special occasions.
Gel food coloring is superior. Liquid food coloring works but requires much more to achieve vibrant colors, which can thin your frosting. Gel or paste colors provide intense hues with just a tiny amount.
Level your layers for stability. If your cake layers dome during baking, trimming them flat prevents sliding and creates cleaner lines. Save the scraps for snacking or making cake pops!
Crumb coat prevents mess. That thin first layer of frosting seals in crumbs, making the final coat smooth and professional-looking. Don’t skip this step if appearance matters.
Frequently Asked Questions
Can I make this cake without eggs?
Yes! Replace each egg with ¼ cup unsweetened applesauce or a “flax egg” (1 tablespoon ground flaxseed mixed with 3 tablespoons water, left to gel for 5 minutes). The texture will be slightly different but still delicious.
Why did my cake sink in the middle?
This usually indicates underbaking or opening the oven door too early, causing a temperature drop. Make sure your oven is properly preheated and avoid opening the door before the 25-minute mark.
Can I use a different size pan?
Absolutely! This batter works in a 9×13-inch pan (bake for 35-40 minutes), three 8-inch rounds (30 minutes), or a bundt pan (45-50 minutes). Adjust baking times accordingly and test for doneness.
How do I fix grainy buttercream?
Grainy frosting usually means the butter was too cold or the powdered sugar wasn’t fully incorporated. Continue beating on high speed for several more minutes—the friction warms everything and smooths it out.
Can I make this dairy-free?
Yes! Use dairy-free milk (almond, oat, or soy), dairy-free butter substitute, and coconut cream instead of heavy cream. The flavor will be slightly different but still tasty.
Why is my frosting too soft?
If your frosting won’t hold its shape, it’s likely too warm or you’ve added too much liquid. Refrigerate it for 15-20 minutes, then re-whip. Alternatively, add more powdered sugar to thicken it.
How far in advance can I decorate?
You can fully decorate the cake up to 24 hours before serving. However, if using delicate decorations that might wilt or melt, add them just a few hours before your event for the freshest appearance.
Prep Time: 30 minutes
Bake Time: 35 minutes
Cooling Time: 1 hour
Total Time: 2 hours 5 minutes
Course: Dessert
Cuisine: American
Servings: 10-12 slices
Keywords: Halloween cake, chocolate layer cake, orange frosting, Halloween dessert, spooky cake, party cake
Nutrition (per slice):
- Calories: 520 kcal
- Carbohydrates: 72g
- Protein: 5g
- Fat: 25g
- Saturated Fat: 12g
- Cholesterol: 75mg
- Sodium: 380mg
- Potassium: 180mg
- Fiber: 2g
- Sugar: 56g
- Vitamin A: 450 IU
- Calcium: 60mg
- Iron: 2mg


