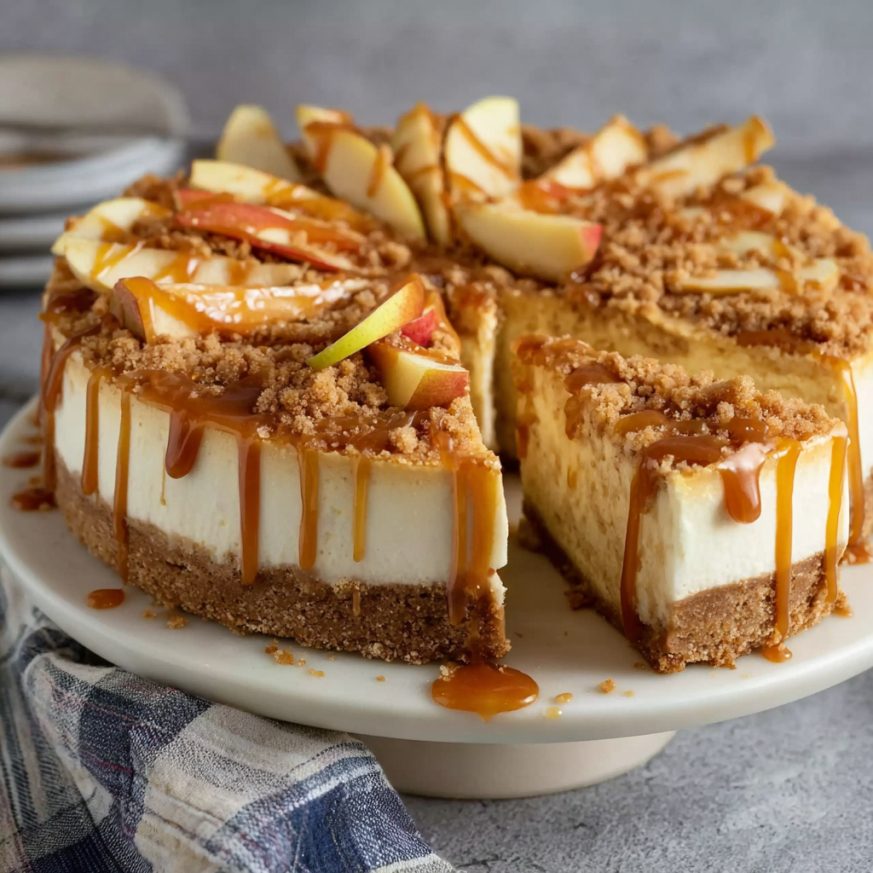
Two years ago, I couldn’t decide between making apple pie or cheesecake for Thanksgiving dessert. My sister suggested making both, which seemed excessive until I had a revelation—why not combine them? That evening, I created this Salted Caramel Apple Pie Cheesecake, and it instantly became the most requested dessert in my family. The combination of creamy cheesecake, spiced cinnamon apples, and silky salted caramel creates a dessert so spectacular that guests always ask for seconds before they’ve even finished their first slice.
This isn’t just another fusion dessert thrown together haphazardly. Each layer serves a purpose, creating a harmonious blend of textures and flavors. The buttery graham cracker crust provides the perfect foundation, while the velvety cheesecake offers richness without overwhelming. Meanwhile, the cinnamon-spiced apples add warmth and brightness, and the salted caramel brings everything together with its sweet-savory complexity.
Why This Dessert Will Steal the Show
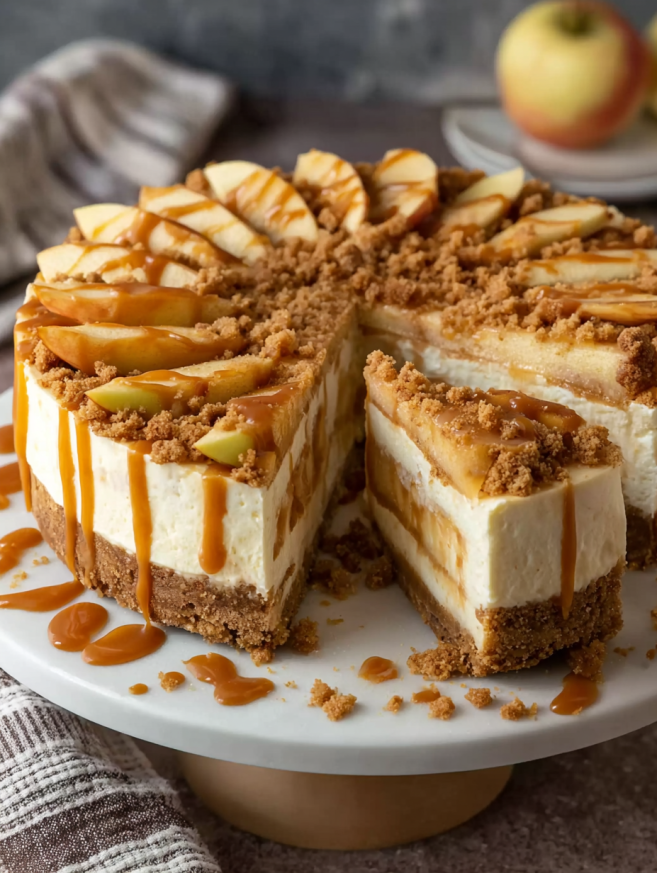
This showstopping cheesecake combines the best elements of two beloved desserts into something even more extraordinary. First and foremost, it delivers on every level—visually stunning, incredibly delicious, and surprisingly achievable for home bakers. When you present this at your next gathering, prepare for an audible gasp from your guests.
The flavor profile offers incredible depth and complexity. Each component complements the others beautifully, creating a dessert that’s greater than the sum of its parts. The tangy cream cheese balances the sweet caramel, while the tart apples cut through the richness perfectly. That touch of sea salt in the caramel elevates everything, preventing the dessert from becoming cloyingly sweet.
Perfect for Special Occasions
While this recipe does require some time and attention, the actual hands-on work is quite manageable. Most of the time involves baking and chilling, which means you can spread the preparation across a day or even make components ahead. This flexibility makes it ideal for holiday gatherings when your schedule is packed.
Furthermore, this dessert serves a crowd generously. A single cheesecake yields 12-16 slices, making it perfect for large family dinners or parties. Unlike individual desserts that require endless repetition, this one-pan wonder feeds everyone with style.
Essential Equipment
Having the right tools makes this recipe much easier to execute successfully. You’ll need a 9-inch springform pan—the removable sides are essential for presenting the finished cheesecake beautifully. A large roasting pan accommodates the water bath, which ensures your cheesecake bakes evenly without cracks.
Keep a hand mixer or stand mixer ready for achieving that perfectly smooth cream cheese mixture. A medium skillet cooks the apple topping, while a heavy-bottomed saucepan is crucial for making caramel safely. Don’t forget parchment paper for lining the pan and aluminum foil for wrapping the springform during the water bath.
Ingredients You’ll Need
For the Graham Cracker Crust
- 1½ cups graham cracker crumbs – About 10-12 full graham crackers
- ¼ cup granulated sugar – Adds sweetness to the base
- ½ cup unsalted butter, melted – Binds everything together
For the Cheesecake Filling
- 24 ounces cream cheese, softened – Must be at room temperature
- 1 cup granulated sugar – Sweetens without overpowering
- 3 large eggs – Creates that signature creamy texture
- 1 teaspoon vanilla extract – Enhances all flavors
- ½ cup sour cream – Adds tang and prevents dryness
For the Cinnamon Apple Topping
- 3 medium apples, peeled and diced – Granny Smith or Honeycrisp work best
- 2 tablespoons unsalted butter – Creates a luscious coating
- 2 tablespoons brown sugar – Adds caramel-like sweetness
- 1 teaspoon ground cinnamon – Essential autumn spice
- ¼ teaspoon ground nutmeg – Adds warmth and complexity
For the Salted Caramel Sauce
- 1 cup granulated sugar – The foundation of caramel
- 6 tablespoons unsalted butter, cubed – Adds richness
- ½ cup heavy cream – Creates silky smoothness
- 1 teaspoon sea salt – The magic ingredient that balances sweetness
Using quality ingredients makes a noticeable difference in this recipe. Full-fat cream cheese and real butter create superior texture and flavor compared to low-fat alternatives.
Building the Perfect Graham Cracker Crust
Begin by preheating your oven to 325°F (163°C). This moderate temperature ensures even baking without burning the crust. Generously grease your 9-inch springform pan with butter or non-stick spray, paying special attention to the corners where the sides meet the bottom.
In a medium bowl, combine the graham cracker crumbs, sugar, and melted butter. Stir everything together until the mixture resembles wet sand and all the crumbs are evenly coated with butter. The mixture should clump together when squeezed but still crumble apart easily.
Pour the crumb mixture into your prepared springform pan. Using the bottom of a flat measuring cup or glass, press the mixture firmly and evenly into the bottom of the pan. Apply steady, firm pressure to create a compact layer that won’t crumble when you slice the finished cheesecake.
Bake the crust for 10 minutes until it’s lightly golden and fragrant. This pre-baking step sets the crust and creates a barrier that prevents the cheesecake filling from making it soggy. Remove from the oven and let it cool slightly while you prepare the filling.
Creating the Silky Cheesecake Filling
Step 1: Beat the Cream Cheese
This step is crucial for achieving that signature smooth, creamy texture. In a large bowl using your hand mixer or stand mixer, beat the softened cream cheese on medium speed for 2-3 minutes until it’s completely smooth and fluffy. Stop occasionally to scrape down the sides and bottom of the bowl.
The cream cheese must be at room temperature—this cannot be emphasized enough. Cold cream cheese creates lumps that are nearly impossible to eliminate. If you forgot to set out your cream cheese in advance, cut it into chunks and microwave it in 10-second intervals until softened but not melted.
Step 2: Add Sugar and Mix Thoroughly
Add the granulated sugar to the beaten cream cheese. Mix on medium speed until the sugar is completely incorporated and the mixture looks light and fluffy. This takes about 2 minutes. The sugar should be fully dissolved with no graininess remaining when you rub a small amount between your fingers.
Proper mixing at this stage ensures your cheesecake has a smooth texture without lumps. However, be careful not to incorporate too much air, which can cause cracks during baking.
Step 3: Incorporate Eggs Carefully
Add the eggs one at a time, mixing on low speed after each addition. Wait until each egg is fully incorporated before adding the next one. This gradual addition helps prevent overmixing while ensuring everything combines evenly.
Mix just until each egg disappears into the batter—about 30 seconds per egg. Overmixing at this stage incorporates excess air, which expands during baking and can cause your cheesecake to crack or develop a grainy texture.
Step 4: Finish with Vanilla and Sour Cream
Add the vanilla extract and sour cream to the mixture. Mix on low speed just until combined, stopping as soon as no white streaks remain visible. The sour cream adds tanginess that balances the sweetness and creates an incredibly creamy texture.
Pour this luscious filling over your cooled graham cracker crust, using a spatula to smooth the top into an even layer. Gently tap the pan on the counter a few times to release any air bubbles trapped in the filling.
The Water Bath Method for Perfect Results
Water bath baking, also called a bain-marie, is the secret to achieving that perfectly smooth, crack-free cheesecake. Wrap the outside of your springform pan tightly with heavy-duty aluminum foil, covering the bottom and extending up the sides. This prevents water from seeping into the pan during baking.
Place the wrapped springform pan into a large roasting pan. Carefully pour hot water into the roasting pan until it comes halfway up the sides of the springform. The hot water creates a humid baking environment that prevents the cheesecake surface from drying out and cracking.
Carefully transfer the entire setup to your preheated oven. Bake for 55-65 minutes. The cheesecake is done when the edges are set but the center still has a slight jiggle—about the size of a quarter. The center should wobble gently when you shake the pan, similar to Jell-O that’s just set.
The Gradual Cooling Process
This might be the hardest part of the entire recipe—waiting. Turn off the oven, crack the door open about 4 inches, and let the cheesecake cool in the oven for 1 hour. This gradual temperature change prevents the dramatic shift that causes cracks.
After an hour in the cooling oven, remove the cheesecake and the water bath setup. Carefully remove the aluminum foil and run a thin knife around the edges of the pan to loosen the cheesecake. This prevents it from cracking as it cools and contracts.
Let the cheesecake cool to room temperature on a wire rack, which takes about 2 hours. Once completely cool, cover it loosely with plastic wrap and refrigerate for at least 4 hours, though overnight is ideal. During this chilling period, the filling sets completely and the flavors meld together beautifully.
Making the Cinnamon Apple Topping
While your cheesecake chills, prepare the spiced apple topping that gives this dessert its apple pie character. Peel and dice your apples into roughly ½-inch pieces. Granny Smith apples provide the best flavor—their tartness balances the sweet caramel and rich cheesecake perfectly. Honeycrisp also works wonderfully if you prefer slightly sweeter apples.
Melt the butter in a large skillet over medium heat. Once the butter is foaming, add the diced apples. Stir to coat them evenly in the butter, then sprinkle in the brown sugar, cinnamon, and nutmeg. Stir everything together until the sugar dissolves and coats the apples.
Cook the mixture for about 8 minutes, stirring occasionally. During this time, the apples will soften and release their juices, which will combine with the sugar and butter to create a luscious, syrupy coating. The apples should be tender but still hold their shape—not mushy.
Remove the skillet from heat and transfer the apple mixture to a bowl. Let it cool to room temperature before using. Warm apples will melt the cheesecake surface, so patience is crucial here. The cooled topping can be made a day ahead and stored in the refrigerator.
Creating Homemade Salted Caramel Sauce
Making caramel from scratch might seem intimidating, but it’s surprisingly straightforward when you understand the process. Pour the granulated sugar into a heavy-bottomed medium saucepan in an even layer. Place it over medium heat without stirring—just let the sugar melt on its own.
As the sugar begins to melt around the edges, you can gently swirl the pan to promote even melting. Continue cooking until the sugar transforms into a deep amber liquid. This takes about 8-10 minutes. Watch carefully—the line between perfect caramel and burnt caramel is thin.
Adding Butter and Cream
Once your caramel reaches that beautiful amber color, carefully add the cubed butter. The mixture will bubble vigorously, so stand back slightly. Stir constantly until the butter melts completely and incorporates into the caramel.
Remove the pan from heat and slowly pour in the heavy cream while whisking constantly. The mixture will bubble dramatically and may seize up temporarily—this is normal. Keep whisking until the cream is fully incorporated and the caramel is smooth.
Return the pan to medium heat and bring the mixture to a boil. Let it boil for exactly 1 minute without stirring, then remove from heat. Stir in the sea salt, mixing until it dissolves completely. The salt transforms the caramel from good to spectacular, adding depth and preventing it from tasting one-dimensional.
Let the caramel cool for at least 30 minutes before using. It will thicken as it cools, reaching a pourable yet substantial consistency that’s perfect for drizzling.
Assembling Your Masterpiece
Once your cheesecake has chilled completely and is thoroughly set, it’s time for the exciting final assembly. Remove the cheesecake from the refrigerator and carefully release the springform pan clasp. Run an offset spatula or butter knife under hot water, dry it, and carefully run it around the edges if needed.
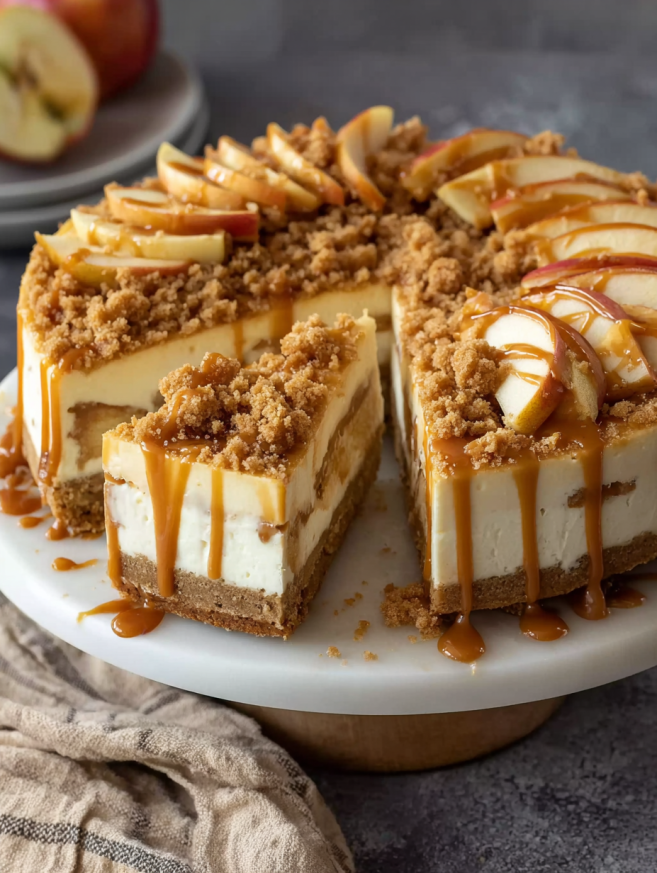
Spoon the cooled cinnamon apple mixture evenly over the top of the cheesecake, spreading it to create a uniform layer that covers the entire surface. The contrast between the white cheesecake and golden apples looks absolutely stunning.
Drizzle the salted caramel sauce over the apple topping in a decorative pattern. You can use a spoon for rustic drizzles or transfer the caramel to a squeeze bottle for more precise designs. Don’t use all the caramel—save some for drizzling on individual slices when serving.
Serving Your Show-Stopping Dessert
This cheesecake tastes best when served chilled, so keep it refrigerated until just before serving time. Use a sharp knife dipped in hot water and wiped clean between each cut to create neat, professional-looking slices. The hot knife glides through the layers effortlessly.
Serve each slice with an extra drizzle of salted caramel sauce and perhaps a small dollop of whipped cream. The dessert is rich, so portions can be modest—this cheesecake is incredibly satisfying. A light dusting of cinnamon over the whipped cream adds a beautiful finishing touch.
Beverage Pairings
This rich dessert pairs wonderfully with hot beverages that can cut through the sweetness. Strong coffee, espresso, or chai tea all work beautifully. For special occasions, try serving it with dessert wine, bourbon, or even a caramel-flavored liqueur for an adults-only treat.
Creative Variations
Pecan Praline Addition
Sprinkle ½ cup of toasted, chopped pecans over the apple layer before drizzling with caramel. The nuts add wonderful crunch and complement both the apples and caramel beautifully. Toast the pecans in a dry skillet for maximum flavor.
Gingersnap Crust Alternative
Replace the graham crackers with gingersnap cookies for a spicier, more complex crust. The ginger flavor pairs exceptionally well with the cinnamon apples and enhances the autumn character of this dessert.
Bourbon Caramel Upgrade
Add 2 tablespoons of bourbon to the cooled caramel sauce for a sophisticated, grown-up twist. The bourbon’s warmth and complexity take the caramel to new heights without making the dessert taste boozy.
Mixed Berry Version
For a summer variation, replace the apples with mixed berries cooked with sugar until jammy. Keep the salted caramel—it works surprisingly well with berries. Blueberries and blackberries are particularly delicious.
Mini Cheesecake Option
Divide the crust and filling among 12 muffin cups lined with paper liners to create individual mini cheesecakes. Reduce the baking time to 20-25 minutes. Top each one with a spoonful of apples and a drizzle of caramel for perfect single servings.
Make-Ahead Strategy
This dessert is ideal for making ahead, which reduces stress when entertaining. The cheesecake itself can be baked up to 3 days in advance. Keep it covered in the refrigerator without the toppings, which preserves the texture perfectly.
Make the apple topping up to 2 days ahead and store it in an airtight container in the refrigerator. The salted caramel sauce keeps for up to 1 week refrigerated. Simply warm it gently in the microwave or on the stovetop before using, stirring until smooth.
Assemble the complete dessert the day of serving, or up to 4 hours ahead if you prefer. The apples and caramel soften the cheesecake surface slightly over time, so fresher assembly produces the best texture contrast.
Storage Instructions
Cover leftover cheesecake loosely with plastic wrap or aluminum foil and store it in the refrigerator. It will keep well for 2-3 days, though the crust may soften slightly and the apples will release more juice over time. The flavors actually intensify after a day, making leftovers particularly delicious.
Freezing this assembled cheesecake isn’t recommended because the apple topping and caramel don’t freeze well. However, you can freeze the plain, unfrosted cheesecake for up to 1 month. Wrap it tightly in plastic wrap and aluminum foil. Thaw overnight in the refrigerator and add toppings before serving.
Important Notes for Success
Room Temperature Ingredients Are Crucial: Cold cream cheese and eggs create lumps and prevent proper mixing. Set all dairy products on the counter at least 1 hour before beginning. This single step makes the biggest difference in achieving smooth, creamy texture.
Don’t Skip the Water Bath: While it seems like extra work, the water bath prevents cracks and ensures even baking. Without it, the edges overcook while the center remains underdone. Wrapping the pan tightly in foil prevents water from seeping in.
Chill Thoroughly Before Serving: The cheesecake must chill for at least 4 hours to set properly. Cutting into it too early results in a soft, messy filling that doesn’t hold its shape. Overnight chilling produces the best texture and allows flavors to develop fully.
Watch the Caramel Carefully: Sugar can go from perfect to burned in seconds. Stay at the stove and watch the color carefully. If your caramel burns, there’s no saving it—you’ll need to start over. It’s better to pull it from heat slightly early than risk burning.
Choose the Right Apples: Firm, tart apples maintain their texture during cooking and provide necessary flavor balance. Soft, sweet varieties like Red Delicious turn to mush and make the dessert too sweet. Granny Smith is the gold standard for this recipe.
Cool Everything Completely: Warm apples or caramel will melt the cheesecake surface. Always let components cool to room temperature before assembly. Plan your timing accordingly.
Use Quality Vanilla Extract: Since vanilla plays a supporting role in the cheesecake, using pure vanilla extract rather than imitation makes a noticeable difference in flavor depth.
Frequently Asked Questions
Can I make this without a springform pan?
While a springform pan is ideal for easy removal, you can use a regular 9-inch cake pan lined with parchment paper. Leave long parchment “handles” hanging over the sides to lift out the cheesecake. The presentation won’t be quite as polished, but it will taste just as delicious.
My cheesecake cracked. Can I fix it?
Absolutely! The beauty of this recipe is that the apple topping and caramel completely hide any cracks. Even if your cheesecake cracks dramatically, the toppings will conceal all imperfections. Consider cracks a happy accident that nobody will ever see.
Can I use store-bought caramel sauce?
Yes, though homemade tastes significantly better. If you use store-bought, choose a high-quality brand and add an extra pinch of sea salt to enhance the flavor. Warm the sauce slightly before drizzling for easier pouring.
The center of my cheesecake is still jiggly after baking. Is it done?
Yes! A slightly jiggly center is exactly what you want. The cheesecake continues cooking as it cools, and that jiggle will set into perfect creaminess during chilling. If you bake until the center is completely firm, you’ll end up with an overbaked, dry cheesecake.
Can I make this dairy-free?
Dairy is fundamental to cheesecake, making substitutions very challenging. Dairy-free cream cheese alternatives exist, but they behave differently and won’t produce the same texture. If you need dairy-free, consider searching for a recipe specifically designed for alternative ingredients.
How do I prevent water from leaking into my springform pan?
Wrap the pan tightly with heavy-duty aluminum foil, creating multiple layers if needed. Some bakers place the wrapped springform inside a slightly larger cake pan as extra insurance. Another option is using a special silicone springform pan wrap designed specifically for water bath baking.
My caramel crystallized. What went wrong?
Crystallization happens when sugar crystals form during cooking. This can occur if you stir the sugar while it’s melting or if any impurities are present. To prevent this, avoid stirring and ensure your pan is completely clean. If crystallization occurs, you’ll need to start over.
Can I use sour cream instead of cream cheese?
No, they’re not interchangeable. Cream cheese is the foundation of cheesecake and provides the necessary structure and texture. Sour cream plays a supporting role but cannot replace cream cheese. However, you can substitute Greek yogurt for the sour cream if needed.
How do I know when the caramel is the right color?
Aim for a deep amber color similar to an old penny. It should be darker than honey but not approaching black. The darker you go (without burning), the more complex and less sweet your caramel will taste. Practice and careful watching are key.
Can I add other spices to the apple topping?
Absolutely! Ground ginger, cardamom, or a pinch of cloves all complement the cinnamon beautifully. Start with small amounts—¼ teaspoon of stronger spices like cloves or cardamom is plenty. You can also add a teaspoon of vanilla extract for extra depth.
Recipe Details:
- Prep Time: 40 minutes
- Cook Time: 1 hour 30 minutes
- Total Time: 2 hours 10 minutes (plus 4+ hours chilling time)
- Yield: 12-16 servings
- Best Served: Chilled, within 2-3 days of preparation
Pro Tips:
- Make components ahead to spread out the work
- Keep the cheesecake refrigerated until ready to serve
- Save extra caramel for drizzling on individual slices
- Use a hot, clean knife for neat slices
- This dessert is rich—small slices are perfectly satisfying


