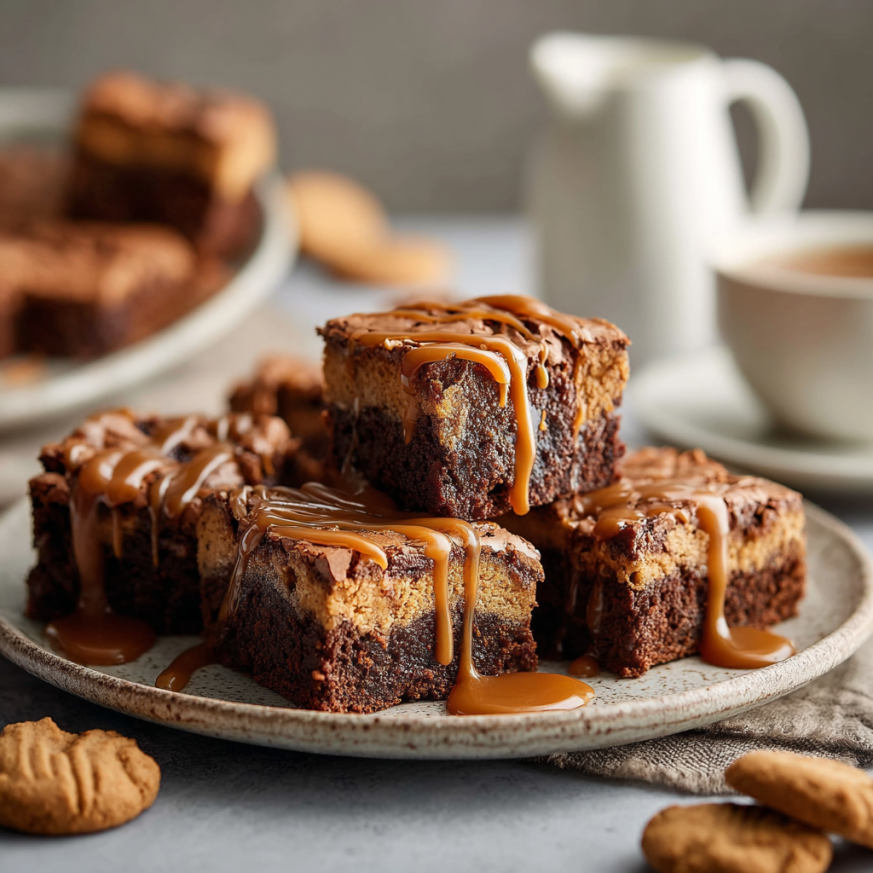
Last month, I brought a tray of these Biscoff blondies to my book club, not expecting much fanfare. Within minutes, the entire batch had vanished, and I was bombarded with requests for the recipe. One friend literally took a photo of me and said, “You’re the Biscoff queen now!” These blondies have since become my signature dessert, the one everyone begs me to make. The combination of caramelized cookie butter flavor, chunks of white chocolate, and that signature chewy texture creates something truly irresistible.
What makes these blondies special is how they capture everything we love about Biscoff cookies in a completely new format. The creamy Biscoff spread melts into the batter, creating pockets of intense flavor throughout. Meanwhile, crushed cookie pieces add textural contrast and boost that distinctive spiced flavor. White chocolate chips provide sweetness that balances the warm spices perfectly.
Why These Blondies Will Become Your Go-To Dessert
These Biscoff blondies represent everything a great dessert should be—easy to make, impressive to serve, and absolutely delicious. First and foremost, they require no mixer and come together in a single bowl. This simplicity makes them perfect for spontaneous baking when the craving hits or you need a last-minute contribution to a gathering.
The flavor profile offers something unique in the world of bar desserts. While brownies dominate the chocolate category and traditional blondies lean vanilla, these bring the warm, caramelized spice of Biscoff to center stage. The result is a dessert that tastes familiar yet exciting, comforting yet special.
Bakery-Quality Results Without the Effort
Despite their impressive appearance and taste, these blondies are remarkably forgiving. The recipe doesn’t demand precise technique or expensive equipment. Even beginning bakers can achieve bakery-worthy results on their first attempt. The one-bowl method eliminates complicated steps while still producing that perfect chewy-yet-gooey texture everyone loves.
Furthermore, these blondies transport and store beautifully. They don’t crumble like cookies or require refrigeration like many fancy desserts. Cut them into squares, stack them in a container, and you have portable treats perfect for gifting, potlucks, or bake sales.
Essential Equipment
You’ll need minimal equipment to create these show-stopping blondies. An 8×8-inch baking pan is perfect for achieving the ideal thickness—not too thin and crispy, not too thick and cakey. Lining it with parchment paper ensures easy removal and perfectly clean edges.
A single large mixing bowl handles the entire recipe. Keep a rubber spatula or wooden spoon handy for stirring—no electric mixer needed. Measuring cups and spoons ensure accuracy, while a butter knife or skewer creates those beautiful swirls on top. Having everything ready before you start makes the process smooth and enjoyable.
Ingredients You’ll Need
For the Base
- ½ cup (115g) unsalted butter, melted – Creates rich, buttery flavor
- ¾ cup (150g) brown sugar – Adds moisture and caramel notes
- ¼ cup (50g) granulated sugar – Balances texture and sweetness
- 1 large egg, room temperature – Binds everything together
- 1 teaspoon vanilla extract – Enhances all other flavors
- ½ cup (120g) Biscoff spread – The star ingredient (smooth or crunchy)
For the Dry Ingredients
- 1 cup (125g) all-purpose flour – Provides structure
- ½ teaspoon baking powder – Creates slight lift
- ¼ teaspoon salt – Balances sweetness and enhances flavor
For Mix-Ins and Toppings
- ½ cup (90g) white chocolate chips or chunks – Adds creamy sweetness
- 6-8 Biscoff cookies, crushed or halved – Double Biscoff goodness
- Optional: sea salt flakes – Enhances sweet-savory balance
- Optional: chopped nuts – Adds extra crunch
- Optional: extra Biscoff for drizzling – Creates stunning presentation
The combination of brown and granulated sugar creates the perfect chewy texture while the Biscoff spread infuses every bite with that signature spiced flavor.
Creating the Perfect Blondie Batter
Step 1: Prepare Your Pan
Begin by preheating your oven to 350°F (175°C). This moderate temperature ensures the blondies bake evenly without burning the edges before the center sets. While the oven heats, line your 8×8-inch pan with parchment paper, leaving some overhang on two sides. These “handles” make removing the finished blondies incredibly easy.
Lightly grease the parchment paper with butter or cooking spray. While not strictly necessary, this extra step guarantees nothing sticks and your blondies release perfectly.
Step 2: Mix the Wet Base
In your large mixing bowl, combine the melted butter with both sugars. Stir vigorously with your spatula or wooden spoon until the mixture becomes smooth and the sugars begin to dissolve. This should take about a minute of steady stirring. The mixture will look slightly grainy but should be well combined.
Add the room-temperature egg and vanilla extract. Mix thoroughly until everything is fully incorporated and the mixture becomes smooth and glossy. Room temperature eggs blend more easily into the butter mixture, creating a uniform batter without lumps.
Step 3: Incorporate the Biscoff Spread
Now for the magic ingredient—stir in the Biscoff spread. Mix until it’s completely blended into the batter, creating a creamy, caramel-colored mixture. The spread will melt slightly from the warmth of the melted butter, making it easy to incorporate smoothly.
This step infuses the entire blondie base with that distinctive Biscoff flavor. Don’t rush it—make sure the cookie butter is evenly distributed throughout for consistent flavor in every bite.
Step 4: Add Dry Ingredients Carefully
Sprinkle the flour, baking powder, and salt over your wet ingredients. Using gentle folding motions, mix just until no dry streaks remain visible. This is crucial—overmixing develops gluten in the flour, resulting in tough, cakey blondies instead of the desired chewy texture.
Stop mixing the moment the flour disappears. A few small lumps are perfectly fine and will bake out. Your batter should be thick and somewhat sticky, similar to cookie dough consistency.
Step 5: Fold in the Good Stuff
Add the white chocolate chips and half of your crushed Biscoff cookies to the batter. Fold them in with a few gentle strokes, distributing them evenly throughout. Save the remaining cookie pieces for topping—they’ll create visual appeal and add extra crunch.
The white chocolate provides pockets of creamy sweetness that contrast beautifully with the spiced Biscoff flavor. As they melt during baking, they create those irresistible gooey spots everyone loves.
Assembling and Baking
Pour the thick batter into your prepared pan. Using your spatula, spread it into an even layer, pushing it all the way to the corners. The batter will be quite thick, so take your time to distribute it evenly. An even layer ensures uniform baking.
Now for the beautiful finishing touches. Dollop extra Biscoff spread randomly across the top of the batter—about 2-3 tablespoons worth. Using a butter knife or skewer, swirl the dollops into the batter, creating marble patterns. Don’t overmix; you want distinct swirls rather than everything blending together.
Sprinkle the remaining crushed Biscoff cookies over the top, pressing them gently into the batter so they stick during baking. If you’re using sea salt flakes or chopped nuts, add those now too. These toppings create a gorgeous, bakery-style presentation.
Baking to Perfection
Slide the pan into your preheated oven and bake for 25-30 minutes. The edges should turn golden brown and pull away slightly from the sides of the pan. The center should look just set—it will still jiggle very slightly when you gently shake the pan, but shouldn’t look wet or liquidy.
A toothpick inserted into the center should come out with a few moist crumbs attached. If it comes out completely clean, the blondies are overbaked and will be dry rather than gooey. Remember that blondies continue cooking from residual heat after you remove them from the oven.
For extra gooey blondies, pull them from the oven at the 25-minute mark when the center is barely set. They’ll firm up as they cool but maintain that fudgy, almost underbaked texture that makes blondies so addictive.
Cooling and Cutting
Here’s where patience becomes crucial. Remove the pan from the oven and place it on a wire rack. Let the blondies cool completely in the pan—this takes at least an hour, though waiting 2 hours produces even better results. Cooling allows the texture to set properly, making cutting much easier.
Resist the temptation to cut into warm blondies. They’ll fall apart, creating a crumbly mess instead of neat squares. As frustrating as the wait feels, it makes an enormous difference in the final presentation.
Once completely cool, use the parchment paper handles to lift the entire block of blondies out of the pan. Place it on a cutting board. Using a sharp knife, cut into 12 equal squares. Wipe the knife clean between cuts for the neatest edges.
For extra indulgence, drizzle the cut blondies with melted Biscoff spread or white chocolate. Warm the Biscoff in the microwave for 15-20 seconds until pourable, then use a spoon to drizzle it artistically over the squares. This optional step creates a professional bakery appearance.
Serving Suggestions
These blondies are delicious at room temperature, straight from the container. However, warming them slightly brings out even more flavor. Microwave individual blondies for 10-15 seconds until just warm—not hot—and serve with vanilla ice cream for an outstanding dessert.
For a truly decadent treat, create a blondie sundae. Place a warm blondie in a bowl, top with a scoop of vanilla or caramel ice cream, drizzle with caramel sauce, and add a dollop of whipped cream. This transforms a simple blondie into an impressive restaurant-quality dessert.
Perfect for Any Occasion
These blondies work beautifully for countless occasions. Pack them in lunch boxes for a special treat, serve them at birthday parties, or bring them to potlucks where they’ll disappear faster than anything else on the table. Their portable nature and universal appeal make them incredibly versatile.
They also make wonderful gifts. Stack them in a decorative tin or package them in clear cellophane bags tied with ribbon. The beautiful swirled tops and visible cookie pieces make them look professionally made, yet the homemade touch makes them feel personal and special.
Creative Variations
Dark Chocolate Lover’s Version
Replace the white chocolate chips with dark chocolate chunks for a less sweet, more sophisticated flavor. The slight bitterness of dark chocolate creates an interesting contrast with the sweet Biscoff spread. Add a sprinkle of flaky sea salt on top to enhance this combination.
Cream Cheese Swirl Addition
Dollop spoonfuls of sweetened cream cheese (4 oz cream cheese mixed with 2 tablespoons sugar and ½ teaspoon vanilla) on top of the batter before swirling. This creates a cheesecake-like element that pairs beautifully with the Biscoff flavor.
Nutty Crunch Enhancement
Fold ½ cup of chopped pecans or walnuts into the batter along with the chocolate chips. Toast the nuts first for maximum flavor. Alternatively, sprinkle chopped nuts on top before baking for extra crunch without affecting the interior texture.
Salted Caramel Upgrade
Swirl salted caramel sauce into the batter along with the Biscoff spread. The combination of caramel and Biscoff creates an intensely rich, toffee-like flavor. Drizzle more caramel over the cooled blondies for extra impact.
Espresso Enhancement
Add 1 teaspoon of instant espresso powder to the dry ingredients. Coffee enhances the warm spices in the Biscoff spread without making the blondies taste like coffee. This subtle addition deepens the overall flavor complexity.
Make-Ahead and Storage Tips
These blondies actually improve after a day, as the flavors meld and the texture becomes even chewier. Make them up to 3 days ahead and store in an airtight container at room temperature. They’ll stay soft and delicious, making them perfect for stress-free entertaining.
For longer storage, these blondies freeze exceptionally well. Cut them into squares and wrap each one individually in plastic wrap. Place wrapped blondies in a freezer-safe bag or container and freeze for up to 2 months. Thaw at room temperature for about an hour before serving.
You can also freeze the batter if you want fresh-baked blondies with minimal effort later. Pour the prepared batter into your lined pan, cover tightly with plastic wrap and aluminum foil, and freeze. When ready to bake, let it thaw in the refrigerator overnight, then bake as directed.
Keeping Them Fresh
Store cut blondies in an airtight container with parchment or wax paper between layers to prevent sticking. They keep well at room temperature for up to 5 days, maintaining their chewy texture beautifully. Placing a slice of bread in the container helps maintain moisture.
If your blondies become slightly dry (though this rarely happens with this recipe), warm them briefly in the microwave. The heat will soften them back to that perfect gooey texture. Ten seconds is usually plenty.
Important Notes for Success
Room Temperature Eggs Matter: Cold eggs don’t blend as smoothly into the butter mixture, potentially creating an uneven texture. Set your egg on the counter for 30 minutes before baking, or place it in warm water for 5 minutes to bring it to room temperature quickly.
Don’t Overmix the Batter: Once you add the flour, mix just until combined. Overmixing develops gluten, resulting in dense, cakey blondies instead of the desired chewy texture. A few lumps in the batter are perfectly fine.
Measure Flour Correctly: Spoon flour into your measuring cup and level it off with a knife. Don’t scoop directly from the bag or tap the cup, which packs in too much flour. Too much flour creates dry, dense blondies.
Trust the Underbake: The center should look barely set when you remove the pan from the oven. It will firm up as it cools. Overbaking creates dry blondies that lack that signature gooey texture.
Cool Completely Before Cutting: This isn’t optional if you want neat squares. Warm blondies are too soft to cut cleanly. Patience during cooling makes all the difference in presentation.
Line Your Pan Properly: Parchment paper is essential for easy removal. Greasing alone doesn’t work as well, and you risk tearing the blondies when trying to remove them from the pan.
Use Quality Biscoff Spread: The cookie butter is the star ingredient, so use authentic Biscoff brand for the best flavor. Generic cookie butter spreads don’t taste quite the same.
Frequently Asked Questions
Can I use crunchy Biscoff spread instead of smooth?
Absolutely! Crunchy Biscoff spread adds even more texture and cookie pieces throughout the blondies. Both versions work perfectly, so choose based on your texture preference. Some people even use half smooth and half crunchy for the best of both worlds.
My blondies turned out cakey instead of chewy. What happened?
Cakey texture usually results from too much flour, overmixing, or overbaking. Make sure you measure flour correctly by spooning and leveling. Mix just until combined once flour is added, and pull the blondies from the oven when the center still jiggles slightly.
Can I make these in a 9×9-inch pan?
You can, but the blondies will be thinner and will bake faster—check them at 20 minutes. The 8×8 pan creates the ideal thickness for that perfect chewy texture. If using a 9×9 pan, you might want to increase the recipe by 50% for better results.
What if I don’t have white chocolate chips?
Regular chocolate chips, butterscotch chips, or even peanut butter chips all work beautifully. You could also omit chips entirely for pure Biscoff flavor. The recipe is very forgiving and adapts well to different mix-ins.
Can I make these gluten-free?
Use a 1:1 gluten-free flour blend in place of all-purpose flour. The texture will be slightly different but still delicious. Make sure your Biscoff spread is gluten-free (most brands are, but always check labels).
The Biscoff swirl on top sank into the batter. How do I prevent this?
This happens if the dollops are too large or if you swirl too vigorously. Use smaller dollops of Biscoff and swirl gently with just a few strokes. Some sinking is normal and doesn’t affect taste—it just creates a less dramatic visual effect.
Can I double this recipe?
Yes! Double all ingredients and bake in a 9×13-inch pan. The baking time will increase to 30-35 minutes. This larger batch is perfect for parties or potlucks where you need to feed a crowd.
How do I know when they’re done baking?
The edges should be golden and pulling away slightly from the pan sides. The center should look set but will jiggle very gently when you shake the pan. A toothpick inserted in the center should come out with moist crumbs, not wet batter.
Why do my blondies stick to the pan?
Always use parchment paper for foolproof removal. Greasing alone isn’t sufficient—the sugar in the batter can caramelize and stick. Parchment paper ensures easy removal every time.
Can I add other spices to enhance the Biscoff flavor?
A pinch of cinnamon, cardamom, or ginger complements the Biscoff beautifully. Start with ¼ teaspoon of additional spice and adjust to taste. Don’t add too much or you’ll overwhelm the signature Biscoff flavor.
Recipe Details:
- Prep Time: 15 minutes
- Bake Time: 25-30 minutes
- Cooling Time: 1+ hours
- Total Time: 1 hour 15 minutes (minimum)
- Yield: 12 blondies (from an 8×8-inch pan)
- Course: Dessert, Snack
- Cuisine: American / Belgian-inspired
- Calories: 280 kcal per blondie
Why These Blondies Stand Out:
- No mixer required—everything comes together in one bowl
- Ready in 30 minutes of active time
- Loaded with authentic Biscoff flavor from spread and cookies
- Perfect chewy-gooey texture every time
- Beautiful swirled presentation looks bakery-professional
- Incredibly versatile for variations and customization
- Stores and transports beautifully
- Universally loved by kids and adults alike
Pro Tips Summary:
- Use room temperature ingredients for smooth mixing
- Don’t overmix once flour is added
- Slightly underbake for extra gooey texture
- Cool completely for clean cuts
- Line pan with parchment for easy removal
- Store in airtight container to maintain chewiness
- Warm slightly before serving for maximum flavor


