Growing up, Butterfingers were always my favorite Halloween candy. That crispy, peanut-buttery center covered in chocolate was absolutely irresistible. However, as an adult who became more conscious about ingredients and nutrition, I found myself missing that nostalgic treat. That’s when I decided to create a healthier version that captures all the magic of the original without the processed ingredients.
This homemade version delivers that same satisfying crunch and rich flavor using just five simple ingredients you probably already have in your pantry. What makes these bars truly special is their simplicity—no complicated candy-making techniques, no thermometers, and absolutely no mystery ingredients. Instead, you’ll find wholesome components like natural peanut butter, pure maple syrup, and real chocolate coming together to create something truly magical.
Whether you’re preparing treats for a party, satisfying a sweet craving, or looking for a healthier option to share with kids, these homemade butterfingers hit all the right notes. They’re gluten-free, dairy-free when using the right chocolate, and naturally sweetened without refined sugars. Best of all, they taste so good that no one will believe they’re actually better for you.
Why You’ll Love This Healthy Butterfingers Recipe
Incredibly Simple to Make
With only five ingredients and minimal hands-on time, this recipe proves that healthy treats don’t have to be complicated. There’s no baking involved, no candy thermometer required, and no tricky techniques to master. Even if you’ve never made homemade candy before, you’ll find this recipe foolproof and approachable.
Clean, Wholesome Ingredients
Unlike store-bought candy bars loaded with artificial flavors and preservatives, these butterfingers contain only real food. Natural peanut butter provides protein and healthy fats, while maple syrup or honey offers gentle sweetness. Additionally, you can pronounce every single ingredient, which is always a good sign when it comes to treats.
Customizable for Dietary Needs
This recipe easily adapts to various dietary preferences and restrictions. Choose dairy-free chocolate chips to keep them completely plant-based, swap almond butter for peanut allergies, or use certified gluten-free corn flakes if needed. The flexibility means everyone can enjoy these delicious bars.
Perfect Make-Ahead Treat
These butterfingers store beautifully in the freezer for up to three months, making them ideal for meal prep or having treats ready whenever cravings strike. Furthermore, they taste amazing straight from the freezer, maintaining that satisfying crunch without becoming rock-hard.
Kid-Approved Goodness
Children absolutely love these bars, and parents can feel good about serving them. They’re perfect for lunchboxes, after-school snacks, or birthday party treats. Moreover, kids can help make them, turning the recipe into a fun family activity.
Equipment You’ll Need
Before getting started, gather these simple kitchen tools:
- 1 large bowl – For mixing your peanut butter base
- 1 9×4-inch loaf pan – Creates perfectly sized bars
- 1 small bowl – For melting your chocolate coating
- Parchment paper – Essential for easy removal and non-stick coating
- Large zip-top bag – For crushing the corn flakes
- Cutting board – For slicing your bars evenly
- Sharp knife – To create clean cuts through the frozen mixture
Ingredients You’ll Need
Main Components
- 1 cup peanut butter – Use natural peanut butter without added sugars for the healthiest option; creamy works best for smooth texture
- 1/3 cup maple syrup or honey – Natural sweeteners that bind everything together while adding subtle flavor notes
- 2 cups corn flakes – The secret to that signature crispy, crunchy texture; use gluten-free if needed
- 1 cup chocolate chips – Choose dark chocolate for a more sophisticated flavor or semi-sweet for classic taste; dairy-free options work perfectly
- 2 teaspoons coconut oil – Helps the chocolate coating become smooth and glossy
Optional Add-Ins and Variations
- Sea salt flakes for sprinkling on top
- Vanilla extract for enhanced flavor
- Mini chocolate chips mixed into the peanut butter layer
- Crushed peanuts for extra crunch
- A pinch of cinnamon for warmth
Step-by-Step Instructions
Preparing the Corn Flakes
Start by adding your corn flakes to a large zip-top bag, ensuring you seal it completely to prevent any pieces from escaping. Using your hands or a rolling pin, gently crush the cereal into small pieces. You’re aiming for a mixture of fine crumbs and slightly larger pieces—this variety creates the perfect texture. The crushing process should take just a minute or two, and it’s actually quite therapeutic!
Don’t pulverize the corn flakes into powder; instead, leave some texture for that authentic Butterfinger crunch. Think of it as creating a range of sizes from breadcrumb-sized pieces to small pebbles. This textural variety is what makes each bite interesting and satisfying.
Creating the Peanut Butter Base
In your large bowl, combine the peanut butter with your choice of maple syrup or honey. Using a sturdy spoon or spatula, mix these ingredients thoroughly until they’re completely smooth and well-incorporated. Initially, the mixture might seem a bit thick, but keep stirring—it will come together beautifully.
Once your peanut butter mixture is smooth, add the crushed corn flakes directly to the bowl. Fold them in gently but thoroughly, making sure every piece of cereal gets coated with the peanut butter mixture. This step requires a bit of elbow grease, as the mixture becomes quite thick. However, this density is exactly what creates those sturdy, candy bar-like pieces.
Shaping and Freezing
Line your loaf pan with parchment paper, leaving some overhang on the sides—this makes removal much easier later. Transfer your corn flake mixture into the prepared pan, then use the back of a spoon or your hands to press it down firmly. Creating an even, compact layer is crucial for bars that hold together well when cut.
Press down with significant pressure to eliminate any air pockets and create a dense, uniform layer. The mixture should be about an inch thick and completely level across the pan. Place the pan in your freezer and let it harden for at least one hour. This freezing time is essential; it transforms the soft mixture into something firm enough to cut and coat with chocolate.
Cutting Your Bars
After the mixture has frozen solid, remove the pan from the freezer and use the parchment paper overhang to carefully lift the entire block out. Place it on a cutting board and let it sit for just a minute or two—this slight softening makes cutting easier without causing the mixture to crumble.
Using a sharp knife, cut the block into 12 equal bars. For the cleanest cuts, wipe your knife between slices. If the mixture seems too hard to cut smoothly, let it sit at room temperature for another minute. Conversely, if it’s getting too soft, pop it back in the freezer briefly.
Creating the Chocolate Coating
In a small, microwave-safe bowl, combine your chocolate chips and coconut oil. Microwave in 30-second intervals, stirring between each heating, until the chocolate is completely melted and smooth. The coconut oil helps create a thinner, more manageable coating that hardens beautifully without being too thick.
Alternatively, you can use a double boiler for melting the chocolate if you prefer more controlled, gentle heat. Whisk the melted mixture until it’s silky smooth and glossy. Let it cool for just a minute or two before coating—this prevents the chocolate from being so hot that it melts the frozen bars.
Dipping and Final Freezing
Working with one bar at a time, carefully dip it into the melted chocolate, using a fork to turn it and ensure complete coverage. Lift the bar out, letting excess chocolate drip back into the bowl, then place it on a parchment-lined plate or baking sheet. The parchment prevents sticking and makes cleanup effortless.
Repeat this dipping process with all remaining bars, working relatively quickly to prevent the chocolate from hardening in the bowl. If your chocolate does start to thicken, simply reheat it for a few seconds. Once all bars are coated, transfer the plate to the freezer for about 10 minutes, or until the chocolate shell has completely hardened and developed that satisfying snap.
Serving Suggestions
Straight from the Freezer
These butterfingers are absolutely perfect enjoyed directly from the freezer. The cold temperature enhances the crispy texture and makes the chocolate coating extra snappy. This is my personal favorite way to enjoy them, especially on warm days.
Party Platter Presentation
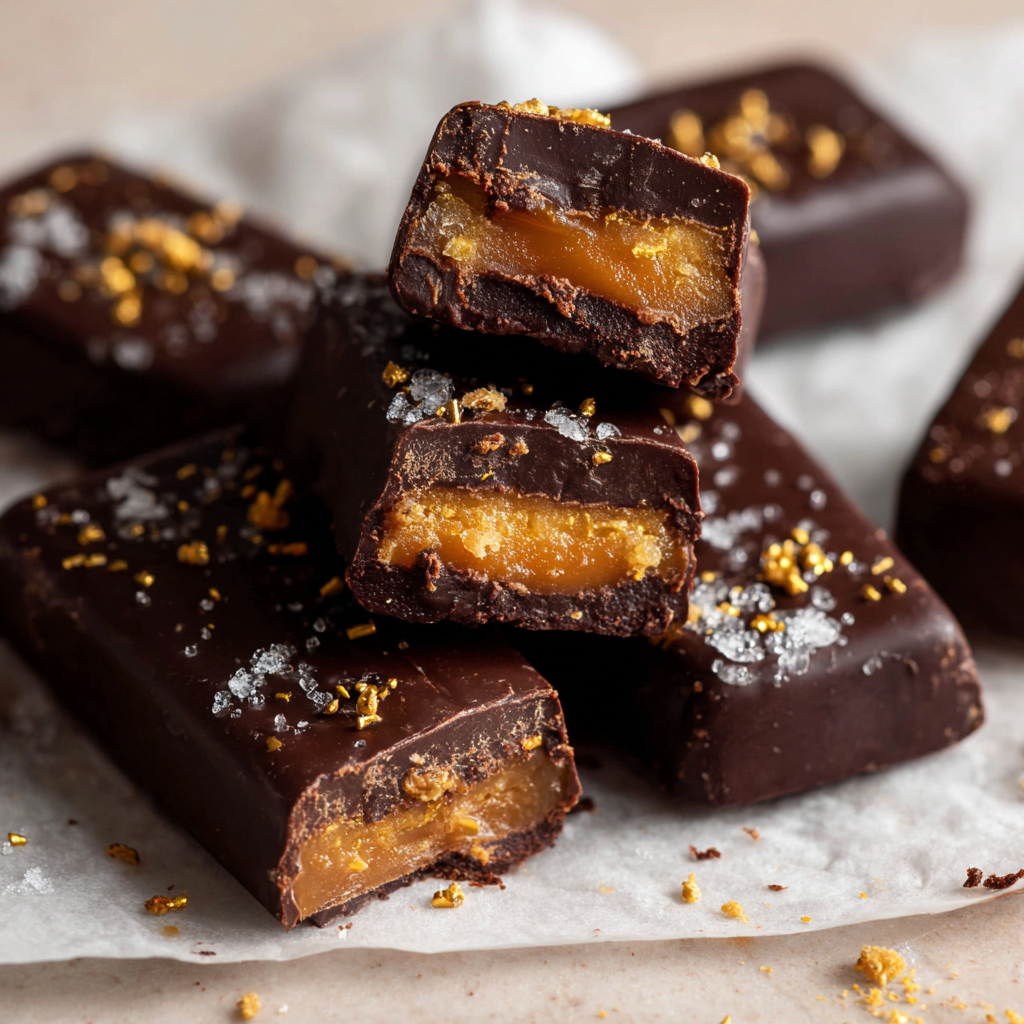
Arrange your butterfingers on a decorative platter for parties or gatherings. They look impressive and professional, making them conversation starters at any event. Sprinkle some sea salt flakes on top before the chocolate sets for an elegant, gourmet touch.
Gift Giving
Package these bars in cellophane bags tied with ribbons for thoughtful homemade gifts. They’re perfect for holidays, teacher appreciation, or just because. Moreover, they ship well when packed carefully with cold packs, making them great for sending to distant friends and family.
Dessert Charcuterie Addition
Include these butterfingers on a dessert board alongside fresh fruit, nuts, and other treats. Their compact size makes them ideal for grazing, and they add a homemade element that elevates the entire presentation.
Recipe Variations to Try
Almond Butter Version
Swap the peanut butter for almond butter to create a slightly more sophisticated flavor profile. Almond butter offers a milder, sweeter taste that some people prefer. This variation also works wonderfully for anyone avoiding peanuts due to allergies or preferences.
Dark Chocolate Lovers’ Edition
Use 70% or higher dark chocolate for a more intense, less sweet chocolate coating. This version appeals to adult palates and reduces the overall sugar content. Additionally, dark chocolate provides more antioxidants and a richer, more complex flavor.
Salted Caramel Twist
Drizzle melted caramel over the chocolate coating and sprinkle with flaky sea salt. This addition transforms the bars into a sweet-and-salty masterpiece that’s irresistibly decadent. The caramel adds another layer of complexity that makes these bars even more special.
Protein-Boosted Bars
Mix a scoop of your favorite vanilla protein powder into the peanut butter mixture for extra nutrition. This variation makes the bars more satisfying and perfect for post-workout snacks. Just add an extra tablespoon of maple syrup to compensate for the protein powder’s dryness.
White Chocolate Coating
Replace the regular chocolate chips with white chocolate for a sweeter, creamier coating. This variation looks stunning and offers a different flavor experience. Drizzle some regular chocolate over the white coating for a decorative, two-toned effect.
Crunchy Peanut Addition
Fold in a half cup of chopped roasted peanuts along with the corn flakes for extra nutty crunch. This enhancement creates even more texture variation and intensifies the peanut flavor. It’s perfect for serious peanut lovers who want maximum nuttiness.
Make-Ahead Tips and Storage
Freezer Storage Excellence
These butterfingers store exceptionally well in the freezer for up to three months, though they rarely last that long in my house! Store them in an airtight container with parchment paper between layers to prevent sticking. Label your container with the date so you know when you made them.
The freezer is actually the ideal storage location for these bars because it maintains their perfect texture. Room temperature storage will cause them to soften too much, while refrigerator storage doesn’t keep them quite as crispy as the freezer does.
Batch Preparation
Consider doubling or tripling this recipe when making them—the effort is essentially the same, and you’ll have treats ready for weeks. Use multiple loaf pans or a larger baking dish, adjusting your cutting accordingly. Having a stash of homemade butterfingers means you’re always prepared for unexpected sweet cravings.
Gifting and Meal Prep
Prepare these bars on a Sunday for healthy treats throughout the week. They’re perfect for packing in lunchboxes, grabbing before workouts, or having as afternoon pick-me-ups. Wrap individual bars in parchment paper for grab-and-go convenience.
Thawing Recommendations
No thawing required—these bars are designed to be enjoyed straight from the freezer! However, if you prefer a slightly softer texture, let them sit at room temperature for 2-3 minutes before eating. They’ll still maintain their structure while becoming a bit easier to bite through.
Important Notes for Success
Choosing the Right Peanut Butter
Natural peanut butter works best for this recipe because it doesn’t contain added oils or sugars that can affect texture. Look for varieties with just peanuts and perhaps a touch of salt. If your peanut butter has separated, make sure to stir it thoroughly before measuring.
Avoid using the ultra-processed, no-stir varieties that contain hydrogenated oils. While they might seem more convenient, they can make your butterfingers overly soft and prevent them from setting properly. Natural peanut butter’s texture is ideal for creating that authentic candy bar consistency.
Corn Flakes Alternatives
If you can’t find corn flakes or need a certified gluten-free option, rice cereal works as an excellent substitute. The texture will be slightly different but still delicious and crunchy. Other options include gluten-free crispy rice cereal or even quinoa flakes for a more nutritious twist.
Chocolate Quality Matters
Use good-quality chocolate chips for the best-tasting coating. Cheaper chocolate often contains more additives and doesn’t melt as smoothly. Dark chocolate chips typically contain fewer ingredients and offer a more sophisticated flavor profile.
Temperature Considerations
Working in a cool kitchen makes the chocolate coating process much easier. If your kitchen is particularly warm, the chocolate might not set as quickly or as smoothly. Consider turning on the air conditioning or working near a fan during hot weather.
Pressing Technique
The firmness of your pressed layer directly affects how well your bars hold together. Don’t be shy about applying significant pressure when pressing the mixture into the pan. Using the bottom of a measuring cup or a flat spatula can help create an even, compact layer.
Frequently Asked Questions
Can I use crunchy peanut butter instead of creamy?
While you certainly can use crunchy peanut butter, creamy works better for achieving that smooth, candy bar-like texture. Crunchy peanut butter adds extra texture, which some people love, but it makes the bars a bit more rustic and less like traditional Butterfingers. If you do use crunchy, you’ll get extra peanut pieces throughout, which isn’t necessarily a bad thing!
How do I prevent the chocolate from cracking when I bite into the bars?
Chocolate cracking usually happens when there’s a significant temperature difference between the frozen center and the chocolate coating. To minimize cracking, let your bars sit at room temperature for 1-2 minutes before eating. Additionally, adding the coconut oil to your melted chocolate helps create a more flexible coating that’s less prone to cracking.
Can I make these nut-free for allergies?
Absolutely! Substitute sunflower seed butter or soy nut butter for the peanut butter to create completely nut-free versions. These alternatives work wonderfully and create almost identical results. Just make sure to check that all your other ingredients are processed in nut-free facilities if you’re dealing with severe allergies.
Why did my bars fall apart when I tried to cut them?
Crumbly bars typically result from either not pressing the mixture firmly enough or not freezing them long enough. Make sure you’re applying significant pressure when forming the layer in the pan, and allow at least a full hour of freezing time. If they’re still crumbly, try stirring an extra tablespoon of maple syrup into the mixture before pressing—this adds more binding power.
Can I use honey instead of maple syrup?
Yes, honey and maple syrup are interchangeable in this recipe! The flavor will be slightly different—honey is a bit sweeter and has floral notes, while maple syrup offers a more caramel-like depth. Both work equally well for binding the ingredients together.
What’s the best way to melt chocolate without burning it?
The microwave method works well if you use short bursts and stir frequently. Heat for 30 seconds, stir, then repeat until almost completely melted. Remove from the microwave when there are still a few unmelted chips and stir—the residual heat will finish melting them without risking burning. Alternatively, use a double boiler for more controlled, gentle melting.
Can I add protein powder to make these more filling?
Definitely! Vanilla or chocolate protein powder works great mixed into the peanut butter base. Start with 1-2 tablespoons and add an extra tablespoon of maple syrup or a splash of milk to compensate for the dryness. This addition boosts the protein content significantly and makes the bars more satisfying as post-workout snacks.
How can I make the chocolate coating thicker?
For a thicker chocolate shell, dip each bar twice. After the first coating sets in the freezer, dip them again in freshly melted chocolate. This double-coating technique creates a more substantial chocolate layer similar to store-bought candy bars. Just remember that this will increase the overall sweetness and chocolate-to-filling ratio.
Are these suitable for kids’ lunchboxes?
These bars are perfect for lunchboxes! They’re made with wholesome ingredients parents can feel good about, and kids love the candy bar taste. Just include a small ice pack in the lunchbox to keep them from getting too soft, especially during warmer months. Wrap them individually in parchment paper for easy, mess-free eating.
Nutrition Information (per serving):
- Serving Size: 1 bar
- Calories: 241 kcal
- Carbohydrates: 22g
- Protein: 6g
- Fat: 15g
- Sugar: 12g
Recipe Details:
- Prep Time: 5 minutes
- Freezing Time: 1 hour
- Total Time: 1 hour 5 minutes
- Yield: 12 servings
- Category: Dessert, Snack
- Method: No-Bake, Freeze
- Cuisine: American
- Diet: Gluten-Free, Dairy-Free (with appropriate chocolate), Vegetarian
These healthy homemade butterfingers have become a staple in my kitchen, bridging the gap between childhood nostalgia and adult nutritional awareness. They prove that you don’t have to sacrifice taste for health, and that the best treats are often the ones you make yourself. Whether you’re avoiding certain ingredients, trying to eat cleaner, or simply looking for a fun kitchen project, this recipe delivers on all fronts. Enjoy creating your own batch of these delicious, better-for-you candy bars!


