The first time I ordered crispy chili beef at my favorite Chinese takeout, I was completely hooked. Those impossibly crispy strands of beef coated in a glossy, sweet-spicy sauce became my regular order for years—until I decided to crack the code and make it at home. After plenty of experimentation, I’ve developed a recipe that rivals any restaurant version, and honestly, it might even be better. There’s something incredibly satisfying about creating those golden, crunchy beef strips in your own kitchen, then tossing them in a sauce so addictive you’ll want to lick the plate. This dish has become my go-to when I’m craving takeout but want the satisfaction of homemade cooking, and it never fails to impress dinner guests who can’t believe it didn’t come from a restaurant.
Why You’ll Love This Recipe
This dish delivers everything you could want in a show-stopping meal. First and foremost, the texture is absolutely phenomenal—crispy, crunchy beef on the outside with tender, flavorful meat on the inside, all enveloped in a sticky, glossy sauce that clings to every piece. The contrast between the crispy coating and the succulent beef is pure perfection.
Moreover, the flavor profile hits all the right notes. The sauce combines sweet, savory, tangy, and spicy elements in perfect harmony, with garlic providing that aromatic backbone that makes it utterly irresistible. Additionally, while it looks and tastes like something from a professional kitchen, it’s surprisingly achievable at home with basic ingredients and straightforward techniques.
What makes this recipe even more appealing is its versatility—serve it over steamed rice for a complete meal, toss it with noodles for an Asian fusion feast, or serve it as part of a larger spread with other dishes. Best of all, the entire dish comes together in under an hour, making it perfect for weeknight dinners when you want something special without spending all evening in the kitchen.
Equipment You’ll Need
Essential Tools
Wok or Large Deep Skillet – Ideal for stir-frying and reducing the sauce to that perfect glossy consistency. A wok’s sloped sides make tossing easier, but a large skillet works just as well.
Deep Frying Pan or Pot – Necessary for achieving that signature crispy texture. A cast iron pan retains heat beautifully and ensures consistent frying temperature.
Wire rack or paper towels – For draining excess oil after frying, keeping the beef crispy rather than greasy.
Tongs or slotted spoon – Essential for safely removing beef from hot oil without splashing or burning yourself.
Mixing bowls – You’ll need at least two for dredging and coating the beef thoroughly.
Sharp knife – Critical for slicing the beef thinly against the grain, which ensures tender, easy-to-eat pieces.
Cooking thermometer – Optional but highly recommended for maintaining the ideal frying temperature of 350°F (175°C).
Ingredients You’ll Need
For the Crispy Beef
- 1 lb flank steak or sirloin, cut into thin strips – flank is preferred for its texture and tenderness
- ½ cup cornstarch – creates that signature crispy coating
- ¼ cup all-purpose flour – adds structure to the coating
- ¼ teaspoon baking soda – helps tenderize the beef and increases crispiness
- ½ teaspoon salt – seasons the meat
- ½ teaspoon white pepper – provides subtle heat
- 1 egg, lightly beaten – binds the coating to the beef
- Vegetable oil for deep frying – neutral oil with a high smoke point
For the Sticky Garlic Sauce
- 4 cloves garlic, minced – the aromatic star of the sauce
- 2 tablespoons soy sauce (light) – provides savory depth
- 1 tablespoon dark soy sauce – adds color and richness
- 2 tablespoons rice vinegar – brings balancing acidity
- 3 tablespoons sweet chili sauce – delivers sweetness and mild heat
- 1 tablespoon hoisin sauce – contributes umami complexity
- 2 tablespoons brown sugar – enhances the sticky sweetness
- ¼ cup water – helps achieve the right sauce consistency
- 1 teaspoon sesame oil – adds nutty aroma
- 1 tablespoon cornstarch mixed with 1 tablespoon water – the slurry that thickens the sauce
For Garnish
- 2 green onions, finely sliced – adds fresh, sharp flavor
- 1 red chili, thinly sliced – optional for extra heat and visual appeal
- Toasted sesame seeds – provides nutty crunch and restaurant-style presentation
Step-by-Step Instructions
Preparing the Beef for Maximum Crispiness
The foundation of this dish starts with proper beef preparation. Begin by placing your flank steak in the freezer for about 20-30 minutes before slicing—this firms it up and makes cutting thin, uniform strips much easier. Using a sharp knife, slice the beef thinly against the grain. This is crucial because cutting against the grain shortens the muscle fibers, resulting in tender pieces rather than chewy ones.
Once sliced, transfer the beef strips to a large mixing bowl. Add the cornstarch, all-purpose flour, baking soda, salt, and white pepper. Toss everything together until the beef is evenly coated with the dry mixture. The baking soda is your secret weapon here—it not only tenderizes the meat but also helps create an incredibly crispy exterior by raising the pH of the surface.
Next, pour in the lightly beaten egg and mix thoroughly with your hands or a fork. The mixture will become sticky and thick, almost paste-like. Don’t worry—this seemingly heavy coating is exactly what creates those gorgeously crunchy strands you’re after. Make sure every piece is completely covered; any bare spots won’t crisp up properly.
Achieving Perfect Crispy Beef
Fill your deep frying pan or pot with about 2 inches of vegetable oil. Attach a thermometer if you have one and heat the oil to 350°F (175°C) over medium-high heat. Maintaining the right temperature is essential—too cool and your beef will absorb oil and become greasy; too hot and it will burn before cooking through.
Test the oil by dropping in a small piece of battered beef. It should sizzle immediately and float to the surface. Working in small batches (never overcrowd the pan or the temperature will drop), carefully add the beef strips using tongs or a slotted spoon. Fry for 3-4 minutes, turning occasionally to ensure even browning.
You’ll know the beef is ready when it turns a beautiful golden brown and sounds crispy when you tap it with your spoon. Remove the fried pieces with a slotted spoon, shaking off excess oil, and transfer them to a wire rack set over a baking sheet or to a plate lined with paper towels. The wire rack is preferable because it allows air circulation all around, keeping the bottom as crispy as the top.
Allow the oil to return to temperature between batches—this usually takes just a minute or two. Continue frying until all the beef is cooked, crispy, and draining on your rack.
Creating the Sticky Garlic Sauce
While your beef rests, prepare the sauce that will transform these crispy strips into an unforgettable dish. Heat 1 tablespoon of oil in a clean wok or large skillet over medium heat. Once the oil shimmers, add the minced garlic and sauté for about 30 seconds, stirring constantly.
Watch the garlic carefully—you want it fragrant and just barely beginning to color, but not browned or burned, which would make it bitter. As soon as you can smell that wonderful garlic aroma wafting up, it’s time to add the liquids.
Pour in both soy sauces, rice vinegar, sweet chili sauce, hoisin sauce, brown sugar, water, and sesame oil. Stir everything together and bring the mixture to a gentle simmer. Let it bubble away for 2-3 minutes, stirring occasionally. During this time, the sauce will begin to reduce slightly and the sugar will dissolve completely, creating a harmonious blend of flavors.
Thickening to Glossy Perfection
This is where the magic happens. Give your cornstarch slurry (the tablespoon of cornstarch mixed with a tablespoon of water) a quick stir to recombine it, then pour it into the simmering sauce while stirring continuously. You’ll notice an almost immediate transformation as the sauce thickens and develops a beautiful, glossy sheen.
Continue cooking for another minute, stirring constantly to prevent lumps and ensure even thickening. The sauce is ready when it coats the back of a spoon and leaves a clear trail when you run your finger through it. It should have a syrupy consistency—thick enough to cling to the beef but not so thick that it’s gloppy.
The Final Toss
Here comes the most satisfying part. Add your crispy fried beef directly into the sticky garlic sauce. Using tongs or two spatulas, toss everything together quickly but thoroughly, ensuring every single strand gets coated in that gorgeous, glossy sauce.
Work swiftly during this step—the longer the beef sits in the sauce, the more the coating will soften. You want that perfect balance where the sauce clings to the crispy exterior without completely soaking through. The result should be beef that’s still got some crunch but is beautifully glazed and flavorful.
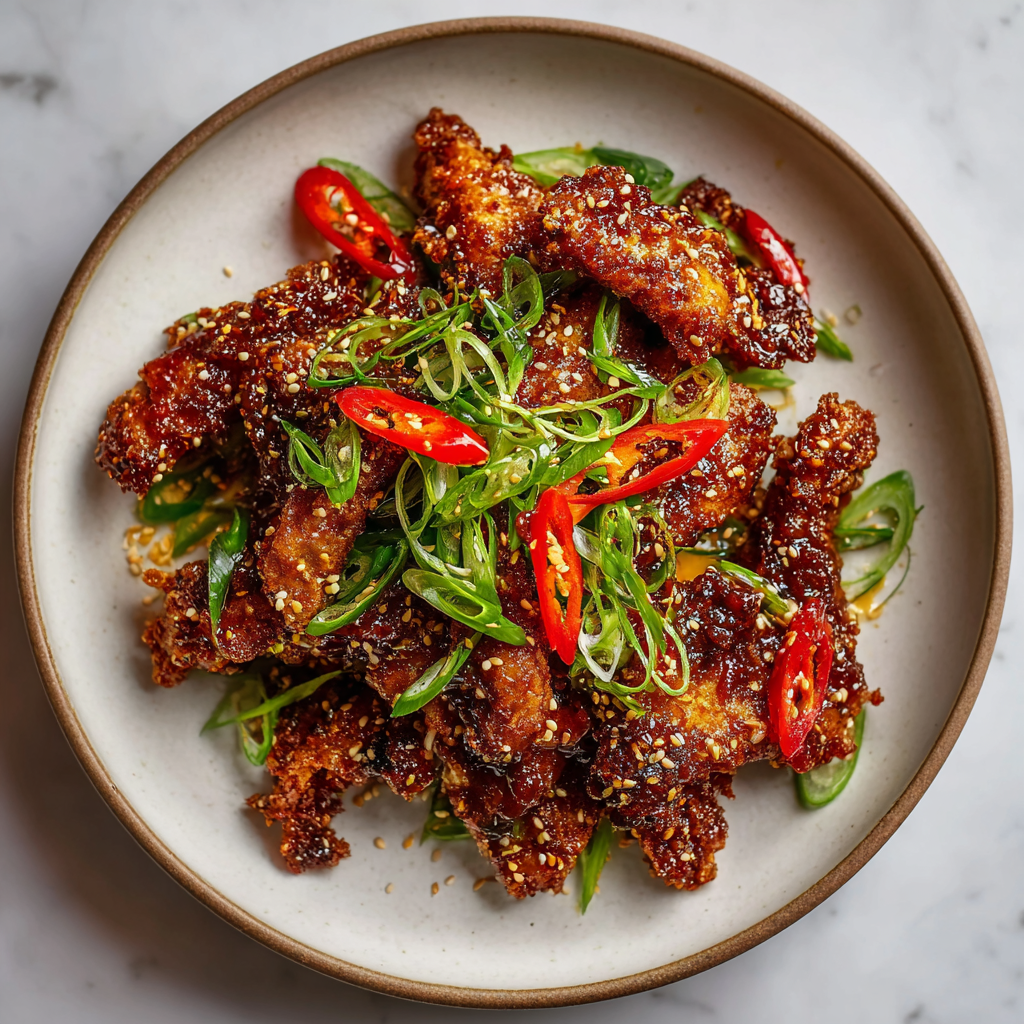
Transfer immediately to your serving plate and garnish generously with sliced green onions, toasted sesame seeds, and thin slices of red chili if you’re using them. The bright green onions and spicy red chili not only add flavor but also create a beautiful presentation that looks restaurant-quality.
Serving Suggestions
This versatile dish pairs beautifully with various accompaniments. The classic serving method is over a bed of fluffy steamed jasmine or basmati rice, which soaks up all that incredible sauce. For a more substantial meal, serve alongside fried rice or egg fried rice for a complete takeout-style feast.
Alternatively, toss the sauced beef with freshly cooked noodles—chow mein, rice noodles, or even ramen work wonderfully. The noodles absorb the sauce while adding their own satisfying chew. For a lighter option, serve the beef over a bed of crisp lettuce cups, creating a fun, interactive meal where diners can wrap their own portions.
Round out the meal with traditional Chinese side dishes like steamed bok choy, stir-fried green beans with garlic, or egg drop soup. Spring rolls or pot stickers make excellent starters. For beverages, pair with cold beer, iced green tea, or even a slightly sweet Riesling that complements the sauce’s sweet-spicy profile.
Recipe Variations
Protein Alternatives
While beef is traditional, this recipe works brilliantly with other proteins. Try chicken breast or thigh cut into thin strips for a lighter version—the coating and sauce work identically. Pork tenderloin creates a deliciously tender alternative with a slightly sweeter flavor that complements the sauce beautifully.
For seafood lovers, firm white fish cut into chunks or large shrimp work wonderfully, though they’ll need slightly less frying time (about 2-3 minutes). You can even make a vegetarian version using firm tofu, tempeh, or seitan cut into strips and coated the same way.
Sauce Modifications
Adjust the heat level to your preference by increasing or decreasing the sweet chili sauce, or adding sriracha or fresh chilies to the sauce. For a more authentic Szechuan flavor, add ½ teaspoon of Szechuan peppercorns to the sauce for that distinctive numbing heat.
Create an orange beef version by adding 2 tablespoons of orange juice and 1 teaspoon of orange zest to the sauce. For honey garlic beef, replace the brown sugar with honey and increase the garlic to 6 cloves. A teriyaki twist works well too—just substitute teriyaki sauce for the hoisin and add fresh ginger.
Vegetable Additions
While this recipe focuses on the beef, you can absolutely add vegetables. Bell peppers, snap peas, or broccoli florets stir-fried separately and added at the end provide color, nutrition, and textural variety. Just make sure to cook them before adding the beef so everything stays crispy.
Make-Ahead Tips
This dish is best served immediately for maximum crispiness, but you can definitely prep components ahead. The beef can be sliced and stored in the refrigerator up to 24 hours in advance. Keep it covered tightly to prevent drying out.
The sauce can be prepared up to 3 days ahead and stored in an airtight container in the refrigerator. Just reheat it gently before using, and you may need to add a splash of water if it’s thickened too much. Similarly, you can mix together all the dry coating ingredients in advance and store in an airtight container.
For the best results with leftovers, store the beef and sauce separately if possible. Refrigerate in airtight containers for up to 2 days. Reheat the beef in a 375°F oven for 5-7 minutes to restore crispiness, then toss with reheated sauce just before serving. Microwaving will make the coating soggy, so oven reheating is strongly recommended.
If you must freeze, do so before coating and frying the beef. Freeze the sliced raw beef for up to 3 months, then thaw, coat, and fry when ready to use. The fried beef doesn’t freeze well as the coating becomes soggy when thawed.
Notes
Beef selection matters: Flank steak is ideal because of its grain structure and tenderness when sliced against the grain. Sirloin works as a substitute, but avoid tougher cuts like chuck or round steak—they won’t be tender even when sliced properly.
Temperature control is crucial: Maintaining consistent oil temperature ensures crispy, not greasy beef. If you don’t have a thermometer, test with a wooden chopstick—when inserted into the oil, small bubbles should immediately form around it at the right temperature.
Don’t skip the baking soda: This ingredient is key for both tenderizing the meat and creating maximum crispiness. It might seem like a tiny amount, but it makes a significant difference in the final texture.
Work quickly when tossing: Once you add the crispy beef to the sauce, work fast. The longer it sits, the more the coating softens. Aim to toss and serve within 30 seconds for optimal crispiness retention.
Cornstarch slurry technique: Always mix cornstarch with cold water before adding it to hot liquid. If you add it directly, it will clump immediately. Also, stir the slurry right before adding it as the cornstarch settles quickly.
Resting the fried beef: Don’t skip letting the beef rest on the wire rack. This allows excess oil to drip away and helps the coating set, making it even crispier. Going straight from fryer to sauce results in a greasy dish.
Frequently Asked Questions
Can I bake the beef instead of frying it?
While you can bake the coated beef strips at 425°F for 15-20 minutes, flipping halfway through, the texture won’t be quite as crispy as deep-fried. For better results when baking, spray the coated beef with cooking oil before baking and use a wire rack on the baking sheet to allow air circulation. It’s a healthier alternative, though you sacrifice some of that signature crunch.
Why is my coating falling off the beef?
This usually happens when the beef is too wet before coating or when the oil isn’t hot enough. Make sure to pat the beef dry before dredging, and ensure your oil has reached 350°F before adding the beef. Also, don’t disturb the pieces too much in the first minute of frying—let them form a crust before turning.
My sauce is too thick/thin. How do I fix it?
If your sauce is too thick, simply add water a tablespoon at a time while stirring until you reach the desired consistency. If it’s too thin, make an additional small cornstarch slurry (½ teaspoon cornstarch mixed with ½ teaspoon water) and add it while simmering, cooking for an additional minute until thickened.
Can I make this less spicy?
Absolutely! Simply omit the red chili garnish and use a mild sweet chili sauce. You can also substitute the sweet chili sauce with ketchup mixed with a little honey for a completely mild version. The dish will still be delicious, just without the heat.
What’s the best way to slice beef thinly?
Partially freezing the beef for 20-30 minutes makes it much easier to slice thinly and evenly. Use a very sharp knife and slice against the grain (perpendicular to the direction the muscle fibers run). Aim for strips about ¼-inch thick—any thinner and they’ll overcook, any thicker and they won’t be as tender.
My beef came out tough and chewy. What happened?
The most common cause is slicing with the grain instead of against it. Always identify which direction the muscle fibers run and cut perpendicular to them. Also, make sure you’re using a tender cut like flank steak. Finally, don’t overcook the beef—3-4 minutes at 350°F should be sufficient for thin strips.
Can I use a different type of vinegar?
Rice vinegar is preferred for its mild, slightly sweet flavor, but you can substitute with white wine vinegar or apple cider vinegar if needed. Avoid balsamic or red wine vinegar as they’re too strong and will overpower the other flavors. If using regular white vinegar, use slightly less as it’s more acidic.
How do I prevent the oil from splattering everywhere?
Ensure your beef strips aren’t too wet before frying—excess moisture causes dangerous splattering. Pat them dry if needed before coating. Don’t drop beef into the oil from high up; lower it in gently with tongs. You can also use a splatter screen over the pan to contain any oil splashes while still allowing steam to escape.
Nutrition Information (per serving, based on 4 servings): Calories: 485 kcal | Total Fat: 22g | Saturated Fat: 4g | Cholesterol: 95mg | Sodium: 920mg | Total Carbohydrates: 42g | Dietary Fiber: 1g | Sugars: 16g | Protein: 28g
Prep Time: 25 minutes | Cook Time: 20 minutes | Total Time: 45 minutes | Course: Main Course | Cuisine: Chinese-American | Servings: 4


