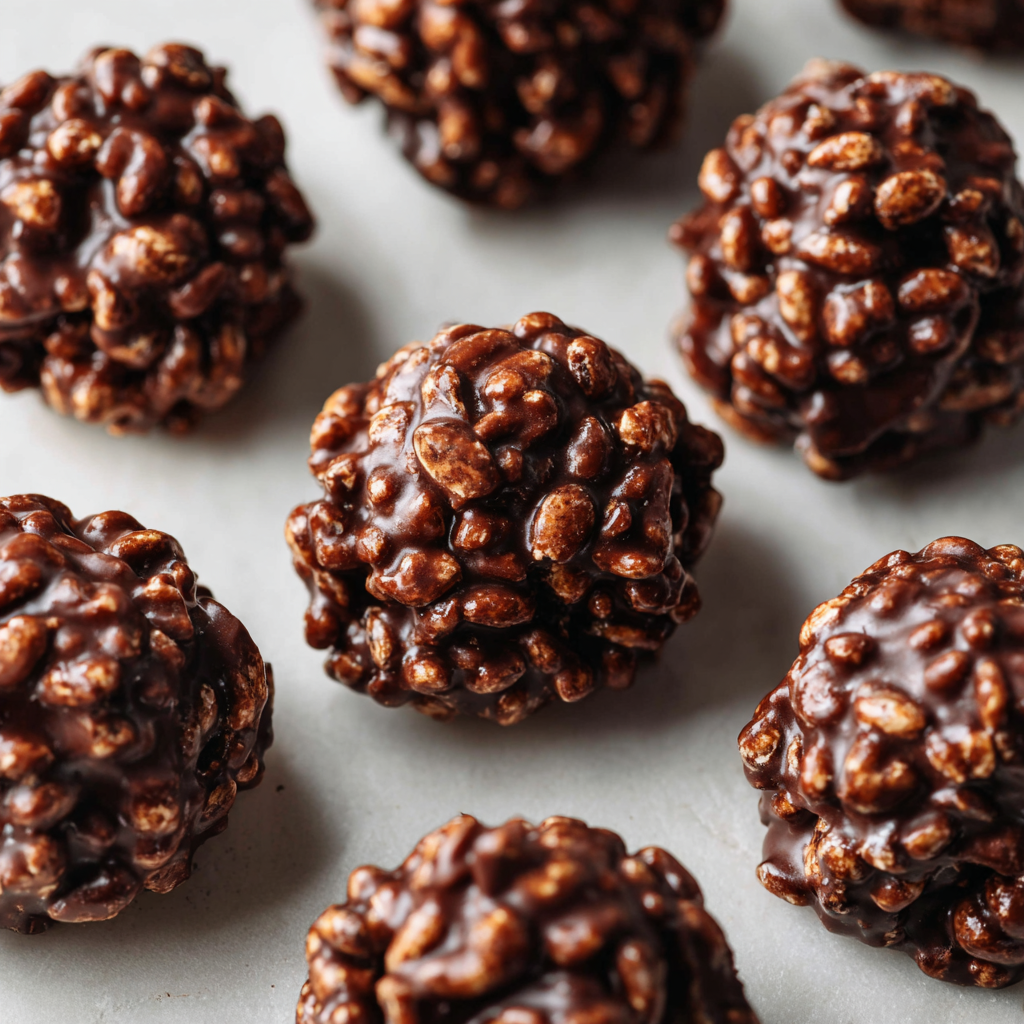
I stumbled upon these dark chocolate quinoa crisps during one of those late-night snack attacks when I wanted something sweet but didn’t have the energy for elaborate baking. With just three ingredients sitting in my pantry, I created what has become my most-requested treat among friends and family. These little clusters are deceptively sophisticated—they look like something from an artisan chocolate shop, taste incredibly indulgent, and somehow feel virtuous thanks to the protein-packed quinoa. The first bite delivers that satisfying snap of dark chocolate followed by the unexpected crunch of puffed quinoa, creating an addictive texture that’s impossible to resist. What started as a quick fix for chocolate cravings has evolved into my secret weapon for impressive last-minute gifts, dinner party desserts, and those moments when I want to treat myself without the guilt.
Why You’ll Love This Recipe
These chocolate quinoa crisps are absolute perfection for so many reasons. First and foremost, they require only three basic ingredients and literally zero baking—just melting, mixing, and chilling. If you can stir a spoon, you can make these, which makes them ideal for cooking beginners, kids’ kitchen projects, or anyone who wants impressive results without complicated techniques.
Moreover, they strike that rare balance between indulgent and wholesome. Dark chocolate delivers rich flavor along with antioxidants, while puffed quinoa adds plant-based protein and that irresistible Rice Krispies-like crunch. The combination feels decadent without being heavy, making them perfect for satisfying sweet cravings without the sugar crash.
What makes these even more appealing is their incredible versatility. Enjoy them as a sophisticated after-dinner treat, pack them in lunchboxes, bring them to potlucks, or wrap them beautifully as homemade gifts that look far more expensive than they actually are. Additionally, they’re naturally gluten-free and can easily be made vegan, accommodating various dietary preferences.
Best of all, they’re ready in just 40 minutes from start to finish, with only 10 minutes of actual hands-on work. The rest is simply waiting for them to set in the fridge while you go about your day.
Equipment You’ll Need
Essential Tools
Double boiler or microwave-safe bowl – For melting chocolate smoothly without burning.
Mixing bowl – If using a microwave, this doubles as your melting and mixing vessel.
Rubber spatula or wooden spoon – For folding the quinoa into the chocolate thoroughly.
Baking sheet or large plate – To hold your parchment paper and formed crisps.
Parchment paper – Prevents sticking and makes cleanup effortless.
Spoon or small cookie scoop – For portioning the mixture into uniform clusters.
Airtight container – Essential for storage and maintaining crispness.
Ingredients You’ll Need
Main Components
- 1 cup puffed quinoa – provides that signature light, crispy texture
- 1½ cups dark chocolate chips or chopped chocolate bar – delivers rich chocolate flavor and structure
- Optional: 1 tablespoon coconut oil – creates a smoother, glossier chocolate coating
Ingredient Notes and Selection Tips
When choosing your chocolate, quality matters significantly. Look for dark chocolate with at least 60% cacao for the best balance of rich flavor and sweetness. Higher percentages (70-85%) create more sophisticated, less sweet crisps that pair beautifully with coffee. If using a chocolate bar rather than chips, chop it into small, uniform pieces to ensure even melting.
For puffed quinoa, check the bulk bins at health food stores or the cereal aisle of well-stocked supermarkets. It resembles tiny puffed rice and should be light, airy, and crispy. Make sure it hasn’t gone stale—fresh puffed quinoa should crunch audibly when you bite into it.
The coconut oil is truly optional, but it serves multiple purposes. It makes the chocolate easier to work with, creates a glossier finish, and helps the chocolate set with that satisfying snap. If you’re not a coconut fan, don’t worry—refined coconut oil has virtually no coconut flavor.
Step-by-Step Instructions
Melting the Chocolate to Silky Perfection
If you’re using the double boiler method, fill a saucepan with about 2 inches of water and bring it to a gentle simmer. Place your heat-safe bowl on top, making sure the bottom doesn’t touch the water. Add your chocolate chips or chopped chocolate and stir occasionally as it melts into liquid silk.
Alternatively, microwave melting is quick and convenient. Place your chocolate in a microwave-safe bowl and heat in 30-second bursts, stirring thoroughly between each interval. This prevents hot spots that can scorch the chocolate and create a grainy texture. Continue this process until about 80% of the chocolate is melted, then stir vigorously—the residual heat will melt the remaining pieces.
Once your chocolate is completely smooth and glossy, add the coconut oil if you’re using it. Stir until it’s fully incorporated and the mixture looks even more luxurious and shiny. The chocolate should flow easily off your spoon in ribbons.
Folding in the Crunch
Pour the puffed quinoa directly into the melted chocolate. Using a rubber spatula or wooden spoon, fold gently but thoroughly, making sure every single grain gets coated in that gorgeous chocolate. The quinoa is so light that it wants to float to the top, so use a folding motion—scooping from the bottom and turning over the top—to ensure even distribution.
Take your time with this step. You want complete coverage because any uncoated quinoa will taste bland and detract from the finished product. The mixture should look uniformly chocolate-brown with no white or tan quinoa visible. Admire how it transforms from separate ingredients into a cohesive, cluster-ready mixture.
Shaping Your Crisps
Line your baking sheet or large plate with parchment paper, making sure it lies flat. Using a regular spoon or small cookie scoop (about 1-2 tablespoons capacity), portion out the chocolate-quinoa mixture onto the prepared surface. Drop small mounds, spacing them about an inch apart—they won’t spread, so you can fit quite a few on one sheet.
Here’s where you can express your personal style. For neat, uniform crisps that look professionally made, use the back of the spoon to shape each mound into a tight dome or disc. Press gently to compact the mixture, which helps the crisps hold together better once set. Alternatively, embrace the rustic aesthetic and leave them slightly irregular and craggy—this homemade look has its own charm and creates more textural variety with crispy edges.
If your chocolate mixture starts to thicken while you’re working, that’s normal as it cools. Simply work a bit faster, or briefly rewarm the bowl over your double boiler or in the microwave for 10-15 seconds.
Setting for Perfect Texture
Carefully transfer your parchment-lined tray to the refrigerator, keeping it level so the crisps don’t slide around. Let them chill for at least 30 minutes, though 45 minutes to an hour ensures they’re completely firm and set. You’ll know they’re ready when they feel solid to the touch and lift easily from the parchment without leaving chocolate behind.
The cold temperature allows the chocolate to crystallize properly, giving you that satisfying snap when you bite into them. Don’t rush this step—partially set crisps will be messy to handle and won’t have the right texture.
Storage for Optimal Freshness
Once fully set, transfer your crisps to an airtight container, layering them with parchment paper if you’re stacking them. Store in the refrigerator if you prefer that snappy, firm texture that shatters satisfyingly when you bite into it. This storage method also extends their shelf life to about 2 weeks.
Room temperature storage is fine too, especially in cooler months. The crisps will be slightly softer with a more melt-in-your-mouth quality. However, avoid this in warm weather or humid climates where chocolate can soften too much or even melt. At room temperature, they’ll keep well for about a week in a cool, dry place.
Serving Suggestions
These versatile crisps shine in countless serving scenarios. For an elegant dessert presentation, arrange them on a slate or wooden board alongside fresh berries, nuts, and perhaps a selection of cheeses for a sophisticated sweet-and-savory spread. They pair beautifully with after-dinner coffee or espresso, making them perfect for dinner parties.
During the day, enjoy them as a midday pick-me-up with your afternoon tea or coffee. The combination of dark chocolate and protein-rich quinoa provides sustained energy without the crash you’d get from pure sugar. They’re also wonderful crumbled over Greek yogurt, oatmeal, or smoothie bowls, adding crunch and chocolatey goodness to breakfast.
For special occasions, package them in clear cellophane bags tied with ribbon, or arrange them in small gift boxes lined with tissue paper. They make thoughtful homemade gifts for teachers, neighbors, or anyone who appreciates artisan-style treats. During the holidays, include them in cookie platters or gift baskets—their elegant appearance belies their simple preparation.
Kids love finding these in their lunchboxes, though you might want to include an ice pack in warm weather to prevent melting. They’re also perfect for movie nights, road trips, or anytime you want a portable sweet treat that won’t make a mess.
Recipe Variations
Chocolate Alternatives
While dark chocolate is sublime, feel free to experiment with other varieties. Milk chocolate creates sweeter, more kid-friendly crisps with a creamier mouthfeel. White chocolate offers a completely different experience—sweeter and more vanilla-forward, though it lacks the antioxidant benefits of dark chocolate. For an elegant twist, try using ruby chocolate if you can find it, which has a unique berry-like flavor and gorgeous pink color.
You can also create a marbled effect by melting dark and white chocolate separately, then swirling them together before adding the quinoa. This creates visually stunning crisps with complex flavor.
Flavor Enhancements
Transform these basic crisps into gourmet creations with simple additions. Stir 1-2 tablespoons of smooth peanut butter, almond butter, or cashew butter into the melted chocolate for a nutty, Reese’s-style version. Add ½ teaspoon of peppermint extract for refreshing peppermint chocolate crisps perfect for the holidays.
For sophisticated adult flavors, stir in 1 teaspoon of instant espresso powder to intensify the chocolate flavor, or add ½ teaspoon of orange zest for a classic chocolate-orange combination. A pinch of sea salt sprinkled on top before the chocolate sets creates trendy salted chocolate crisps.
Mix-In Magic
Take these from simple to spectacular by folding in additional ingredients. Chopped toasted almonds, pecans, or hazelnuts add crunch and healthy fats. Dried cranberries, cherries, or goji berries contribute chewy sweetness and bright color. For a fun twist, add mini marshmallows and crushed graham crackers to create rocky road-style crisps.
Shredded coconut brings tropical flair, while cacao nibs add extra chocolate intensity and crunch. Seeds like pepitas or sunflower seeds work wonderfully for nut-free versions. Just remember not to overload—about ½ cup of total mix-ins is ideal so the quinoa remains the star.
Dietary Modifications
Make these vegan by using dairy-free chocolate chips and ensuring your puffed quinoa doesn’t contain any animal-derived ingredients (most brands are naturally vegan). For keto-friendly crisps, use sugar-free dark chocolate sweetened with stevia or erythritol. Those avoiding coconut can substitute the coconut oil with grass-fed butter, ghee, or simply omit it entirely.
Make-Ahead Tips
These crisps are ideal for advance preparation, making them perfect for planned entertaining or gift-giving. They can be made up to 2 weeks ahead and stored in the refrigerator in an airtight container. In fact, they actually improve slightly after a day as the flavors meld together.
For longer storage, freeze them for up to 3 months. Layer the crisps between parchment paper in a freezer-safe container to prevent them from sticking together. When you’re ready to enjoy them, there’s no need to thaw—eat them straight from the freezer for an extra-firm, candy bar-like texture, or let them sit at room temperature for 5-10 minutes to soften slightly.
If you’re making these for gifts during the holidays, prepare them weeks in advance and freeze until you’re ready to package them. This spreads out your holiday baking workload and ensures you always have homemade treats on hand for unexpected guests or last-minute gift needs.
The mixture itself can be made ahead too. If your melted chocolate-quinoa mixture starts to set before you’ve finished scooping, simply rewarm it gently until workable again. However, it’s best to shape and set the crisps the same day you mix them for optimal texture.
Notes
Chocolate quality matters: The chocolate is the dominant flavor here, so using good-quality chocolate makes a noticeable difference. Avoid chocolate chips with added stabilizers if possible—they can create a waxy texture. Real chocolate bars melted down typically produce the best results.
Puffed quinoa freshness: Stale puffed quinoa loses its crunch and can taste slightly off. If you’re unsure about your quinoa’s freshness, taste a few grains—they should be crispy and neutral-flavored, not chewy or bitter.
Don’t skip the stirring: When melting chocolate in the microwave, those 30-second intervals with stirring are crucial. Chocolate can look solid but actually be scorched underneath if you heat it too long without stirring. It’s better to use more intervals with shorter times.
Size consistency: Try to make your crisps roughly the same size so they set at the same rate and look uniform. Using a cookie scoop is the easiest way to achieve this consistency.
Humidity considerations: If you live in a humid climate, these are best stored in the refrigerator rather than at room temperature. Humidity can cause chocolate to develop bloom (white streaks) and can make it soften too much.
Coconut oil is optional but helpful: While you can absolutely skip it, the small amount of coconut oil makes the chocolate easier to work with and helps it set with a better snap. Refined coconut oil has no coconut flavor, so even coconut skeptics won’t notice it.
Frequently Asked Questions
Can I use regular cooked quinoa instead of puffed quinoa?
Unfortunately, no. Cooked quinoa is soft and wet, which wouldn’t provide the crispy texture that makes these crisps so addictive. Puffed quinoa is a completely different product—it’s been heated under pressure until the grains pop like popcorn, creating a dry, crispy texture similar to Rice Krispies. You can find it at health food stores or online.
My chocolate seized up and became grainy. What happened?
Chocolate seizes when even a tiny drop of water gets into it, or when it’s overheated. To prevent this, make sure all your tools are completely dry before starting. If your chocolate does seize, you can sometimes save it by stirring in a tablespoon of coconut oil or vegetable oil—this can bring it back to a smooth consistency, though the texture won’t be quite as perfect.
Can I use puffed rice or Rice Krispies instead?
Absolutely! While puffed quinoa adds nutritional benefits and a slightly nuttier flavor, puffed rice or Rice Krispies cereal work beautifully as substitutes. Use the same amount (1 cup) and follow the recipe exactly. The result will be very similar to classic chocolate crunch bars.
Why are my crisps falling apart?
This usually happens when the chocolate-to-quinoa ratio is off, or when the crisps weren’t compacted enough when shaped. Make sure you’re measuring the puffed quinoa correctly (it should be loosely packed), and really press the mixture together when forming the crisps. The chocolate needs to fully coat and bind all the quinoa together.
How do I prevent chocolate bloom (white streaks)?
Chocolate bloom occurs when fat or sugar crystals rise to the surface, usually due to temperature fluctuations. To prevent it, store your crisps consistently—either always refrigerated or always at room temperature, not switching back and forth. Bloom is harmless and doesn’t affect taste, but it does look less appealing.
Can I add protein powder to make these more nutritious?
You can try adding 1-2 tablespoons of unflavored or chocolate protein powder to the melted chocolate, but be aware that protein powder can make chocolate seize or become grainy. If you want to try it, add the protein powder very gradually while stirring constantly, and be prepared for the texture to be slightly different.
What’s the best way to gift these?
For an impressive presentation, arrange 4-6 crisps in a small gift box lined with tissue paper, or stack them in clear cellophane bags tied with decorative ribbon. You can also pack them in small mason jars or tins. Always include a note mentioning they should be kept refrigerated, especially in warm weather.
My crisps are too sweet. How can I fix this?
Use darker chocolate with a higher cacao percentage (70% or above) for less sweetness and more intense chocolate flavor. You can also add a pinch of sea salt to the melted chocolate or sprinkle flaky salt on top before setting—salt balances sweetness beautifully and adds complexity.
Can I make these in fun shapes like bars or cups?
Definitely! For bars, press the mixture into a parchment-lined loaf pan, refrigerate until set, then cut into rectangles. For cups, use silicone mini muffin molds—press the mixture into the cups, creating an indentation in the center if desired, then refrigerate. Mini muffin molds are especially cute and portion-controlled.
Nutrition Information (per crisp, based on 15 servings): Calories: 95 kcal | Total Fat: 6g | Saturated Fat: 3.5g | Cholesterol: 0mg | Sodium: 2mg | Total Carbohydrates: 10g | Dietary Fiber: 2g | Sugars: 7g | Protein: 2g
Prep Time: 10 minutes | Chilling Time: 30 minutes | Total Time: 40 minutes | Course: Dessert | Difficulty: Easy | Yield: 12-15 crisps


