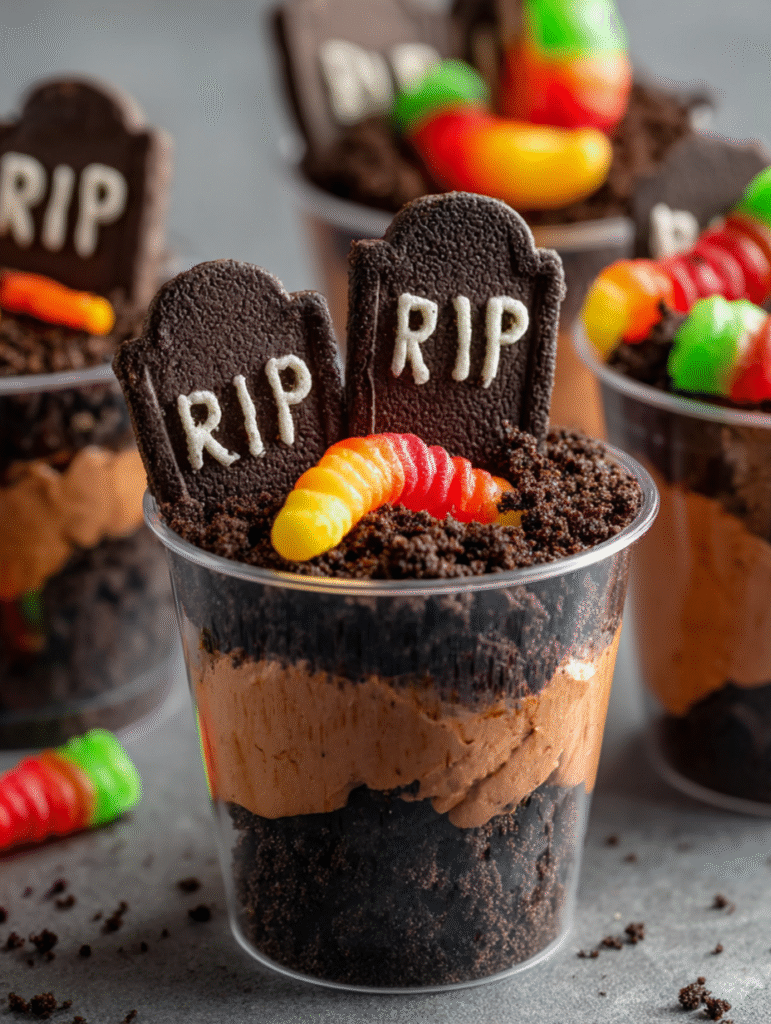
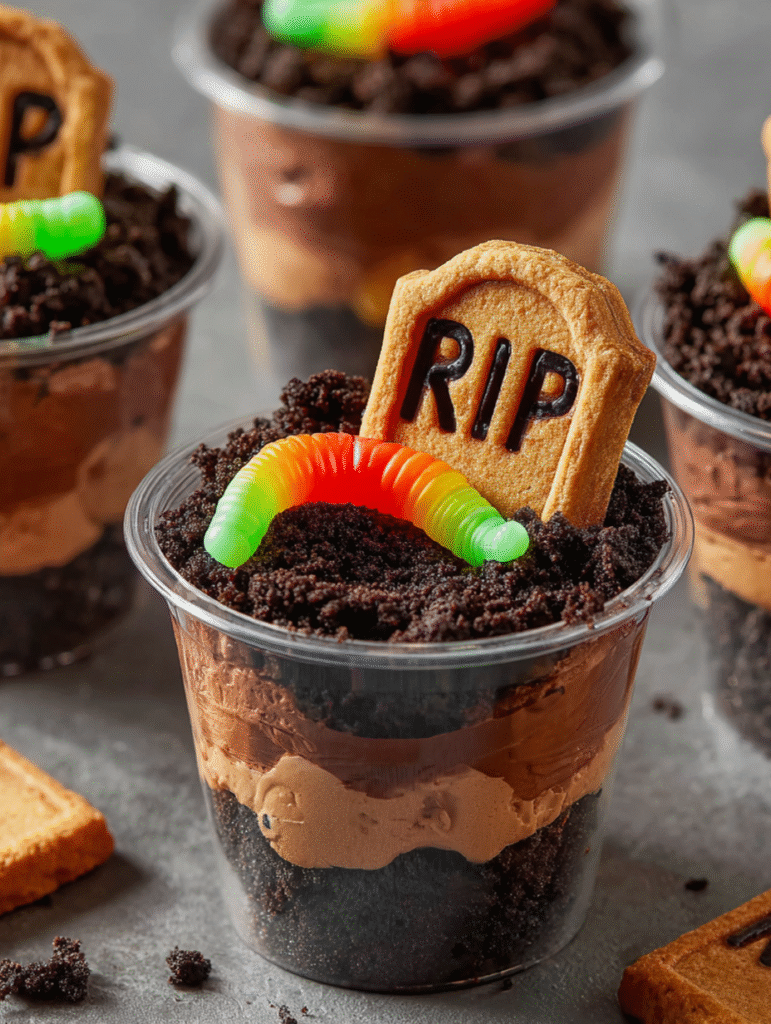
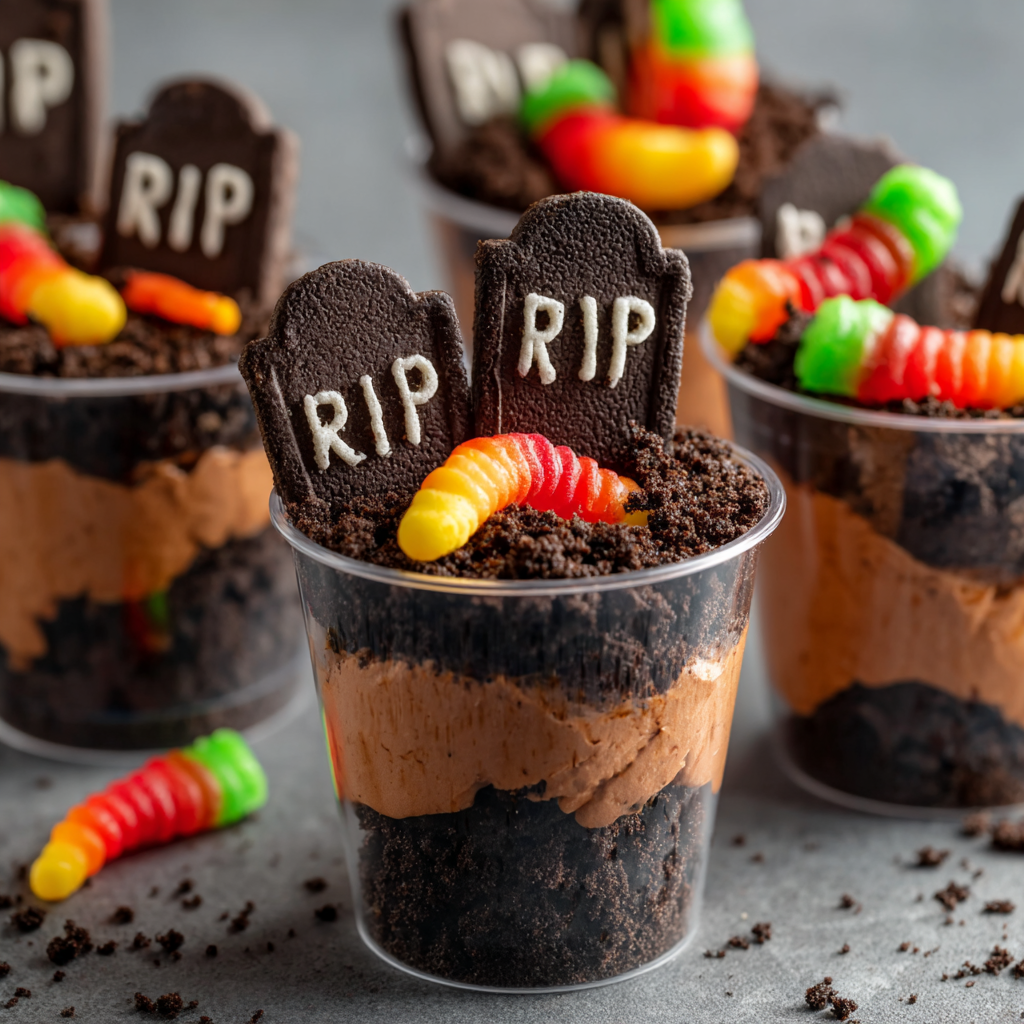
I still remember the look on my nephew’s face when he first saw these dirt cups at our Halloween party three years ago. His eyes went wide, and he squealed with delight at the gummy worms “crawling” out of the chocolate dirt. Since that moment, these have become our most-requested Halloween dessert, beloved by both kids and adults who appreciate a good dose of nostalgia with their treats.
These individual dessert cups combine rich chocolate pudding with crushed Oreos to create an eerily realistic graveyard scene. What makes them truly special is how they balance being genuinely spooky with completely delicious. Nobody can resist digging into their own personal graveyard!
Why You’ll Love These Halloween Dirt Cups
Incredibly Simple Assembly – With no baking required and just a handful of ingredients, these dirt cups come together in under 20 minutes. Even kitchen novices can create impressive results that look like they came from a fancy bakery.
Kid-Friendly Fun – Children absolutely adore helping make these spooky treats. From crushing the cookies to placing gummy worms, there are plenty of tasks that little hands can handle. Furthermore, the assembly process feels more like craft time than cooking, which keeps kids engaged and excited.
Individual Servings – Each person gets their own cup, which eliminates the mess of slicing and serving. This also makes portion control easier and reduces cleanup time significantly. Additionally, guests appreciate having their own dedicated dessert rather than sharing from a communal dish.
Make-Ahead Convenience – You can prepare these completely ahead of time and store them in the refrigerator until your party begins. In fact, they actually taste better after the flavors have had time to meld together for a few hours.
Customizable Decorations – While the basic recipe is fantastic on its own, you can easily adapt the decorations to match your party theme. Change up the colors, add different candies, or create unique tombstone messages for each guest.
Ingredients You’ll Need
Main Components
Cold Milk (2 cups) – The colder your milk, the better your pudding will set. Use whole milk for the richest flavor and creamiest texture, though 2% milk works well too.
Instant Chocolate Pudding Mix (3.9 oz package) – Instant pudding is essential here since you need it to set quickly. Regular cook-and-serve pudding won’t work for this recipe because it requires different proportions and preparation methods.
Oreo Cookies (1 package) – These create the realistic “dirt” effect that makes these cups so convincing. You’ll need about 15-20 cookies depending on how many cups you’re making. Regular Oreos work best, but you could experiment with Double Stuf for extra richness.
Whipped Topping (1 cup) – Cool Whip or similar products work perfectly. You can also use homemade whipped cream if you prefer, though it won’t hold up quite as long in the refrigerator.
Gummy Worms – These provide the creepy-crawly effect that kids especially love. Look for ones with good color contrast—the bright colors really pop against the dark “dirt.”
Milano or Biscoff Cookies – These serve as edible tombstones. Their rectangular shape is perfect for standing upright, and their firm texture holds up well in the pudding without getting soggy.
Optional Decorations
- Black or orange decorating icing for writing “RIP” on tombstones
- Plastic spiders or skeleton decorations
- Candy pumpkins or candy corn
- Mini plastic shovels (available at party stores)
- Green-tinted coconut flakes for “grass”
How to Make Halloween Dirt Cups
Step 1: Prepare the Chocolate Pudding
Pour the cold milk into a large mixing bowl. Add the entire package of instant chocolate pudding mix. Using a wire whisk, beat the mixture vigorously for about 2 minutes until it thickens noticeably. The pudding should coat the back of a spoon when it’s ready. Once whisked, place the bowl in the refrigerator for at least 10 minutes to allow it to set completely. This resting time ensures your pudding layers will hold their shape.
Step 2: Crush the Oreos
While your pudding chills, prepare the “dirt” by crushing your Oreos. For the easiest method, place whole Oreos (cream filling and all) into a food processor and pulse until they reach your desired consistency. Some people prefer fine crumbs for a more uniform dirt look, while others like larger chunks for added texture.
Alternatively, if you don’t have a food processor, place the cookies in a large ziplock bag, seal it while removing as much air as possible, then crush them with a rolling pin. This method requires a bit more effort but works perfectly well. Just keep rolling and crushing until you achieve a dirt-like texture.
Step 3: Set Up Your Assembly Station
Gather your serving cups—clear plastic cups work best because they show off the layers beautifully. You’ll also need spoons for layering, your chilled pudding, crushed Oreos, whipped topping, and all your decorative elements. Having everything within reach makes the assembly process much smoother and more enjoyable.
Step 4: Layer the Pudding and “Dirt”
Start by spooning a layer of chocolate pudding into the bottom of each cup, filling them about one-third full. Next, add a generous layer of crushed Oreos on top of the pudding. Repeat this process, adding another layer of pudding followed by more Oreo crumbs, until you reach near the top of the cup. Most cups will accommodate 2-3 layers of each component.
The key here is making sure your top layer is Oreo crumbs—this creates the realistic dirt surface that makes these treats so visually appealing. Reserve some extra crushed Oreos for the final topping.
Step 5: Add Whipped Topping and Final “Dirt” Layer
Spoon a small dollop of whipped topping onto the center of each cup. Don’t worry if it’s not perfectly smooth—in fact, a slightly uneven surface looks more like disturbed graveyard dirt! Then, sprinkle more crushed Oreo crumbs over the whipped topping, allowing some of the white to peek through for added visual interest.
Step 6: Create and Insert Tombstones
Using Milano or Biscoff cookies as tombstones, carefully press one cookie into each cup, pushing it down through the layers until it stands upright. If desired, use black or orange decorating icing to write “RIP” or other spooky messages on each tombstone before inserting them. Let the icing dry for a few minutes so it doesn’t smudge when you place them in the cups.
Step 7: Add Gummy Worms and Final Touches
Finally, drape 1-2 gummy worms over the edge of each cup so they appear to be crawling out of the dirt. You can also partially bury some worms in the Oreo crumbs for added effect. If you’re using additional decorations like plastic spiders or candy pumpkins, add them now.
Once decorated, cover the cups loosely with plastic wrap and refrigerate until you’re ready to serve. These taste best when they’ve been chilled for at least 1-2 hours, allowing all the flavors to come together.

Serving Suggestions
These Halloween Dirt Cups work beautifully as a casual dessert at Halloween parties, where their individual portions make serving a breeze. Set them out on a black tablecloth or a decorative tray surrounded by battery-operated tea lights for an eerie graveyard ambiance.
For school parties or classroom celebrations, these are ideal because they’re nut-free (assuming you check all package labels) and easy for kids to grab and eat. Consider sending along plastic spoons decorated with Halloween stickers to complete the theme.
When hosting an adult Halloween gathering, elevate the presentation by using glass dessert cups instead of plastic. Add a small “RIP” tag tied around each cup with black ribbon for a sophisticated touch. You can also serve them alongside Halloween-themed cocktails for a fun dessert course.
For a buffet-style setup, arrange the cups on a tiered stand to create visual height and make them more accessible to guests. Intersperse the dessert cups with small decorative elements like artificial cobwebs, miniature pumpkins, or skeleton figurines to enhance the spooky atmosphere.
Recipe Variations to Try
White Chocolate Ghost Graveyard
Replace chocolate pudding with white chocolate or vanilla pudding. Use crushed vanilla wafers for lighter-colored “sand,” and add candy ghosts or marshmallow ghosts on top instead of gummy worms.
Pumpkin Patch Version
Make vanilla pudding and add a few drops of orange food coloring. Use crushed graham crackers instead of Oreos for golden “dirt,” and top with candy pumpkins and green-tinted coconut for grass.
Monster Mash Cups
Layer chocolate and vanilla pudding for a striped effect. Use colorful Oreo varieties (like orange-filled Halloween Oreos) in the crushing, and add monster-themed candies like candy eyeballs and monster-shaped gummies.
Vampire’s Delight
Use chocolate pudding but add a layer of raspberry or strawberry sauce between the pudding layers for a “bloody” effect. Top with vampire teeth candies and red gummy worms.
Spiderweb Surprise
After adding the whipped topping, drizzle chocolate syrup in concentric circles on top, then drag a toothpick from the center outward to create a spiderweb pattern. Add a plastic spider to complete the look.
Adults-Only Boozy Version
Add 2 tablespoons of coffee liqueur or Irish cream to the prepared pudding for a grown-up twist. These should be clearly labeled if you’re serving regular versions alongside them at a mixed-age party.
Make-Ahead Tips
Halloween Dirt Cups are exceptionally make-ahead friendly, which makes party planning so much easier. You can prepare them completely up to 24 hours in advance and store them covered in the refrigerator. In fact, making them the night before allows the flavors to meld beautifully and gives the Oreo crumbs time to soften slightly, creating an even more dessert-like texture.
If you’re preparing them more than a few hours ahead, wait to add the gummy worms until closer to serving time. Gummy candies can sometimes weep moisture when refrigerated for extended periods, which can make them look less appealing. Simply keep them in a separate container and add them 1-2 hours before your guests arrive.
The tombstone cookies can also be decorated with icing messages ahead of time. Prepare them on a separate sheet of parchment paper, write your messages, and let the icing dry completely. Store them in an airtight container at room temperature, then insert them into the cups just before serving to prevent them from softening.
For the crushed Oreos, you can prepare them up to 3 days in advance and store them in an airtight container at room temperature. This advance prep makes the final assembly incredibly quick and stress-free on party day.
If you need to transport these to another location, keep them upright in a shallow box or carrier designed for cupcakes. The individual cups travel remarkably well as long as they remain vertical and don’t slide around during transit.
Important Notes
Cup Selection – Clear plastic cups showcase the layers best and are most commonly used. However, you can also use small glass tumblers, mason jars, or even hollowed-out mini pumpkins for a creative twist. Whatever container you choose, make sure it’s at least 8 ounces to accommodate all the layers comfortably.
Pudding Consistency – The pudding must be properly set before layering, or your dirt cups will be too runny. If your pudding seems thin after the initial 2-minute whisking, refrigerate it for a full 15-20 minutes rather than just 10. Different brands of instant pudding can vary slightly in their setting times.
Oreo Crushing Consistency – Aim for a texture that resembles actual dirt—mostly fine crumbs with some slightly larger pieces mixed in. If the crumbs are too fine, they can become paste-like when mixed with the pudding. Conversely, if they’re too chunky, they won’t create that realistic dirt appearance.
Tombstone Stability – To ensure your cookie tombstones stand upright, make sure you press them down through at least two layers of the cup’s contents. The combination of pudding and Oreo crumbs provides enough support to keep them vertical. If they’re leaning, gently press them deeper into the cup.
Gummy Worm Freshness – Fresh gummy worms work best because they’re more pliable and easier to position. Older, harder gummies can crack when you try to drape them over the cup edges.
Allergy Considerations – Always check ingredient labels if serving to guests with allergies. While this recipe is naturally nut-free when made with standard ingredients, some cookie brands may be processed in facilities that handle nuts.
Storage Temperature – These must be kept refrigerated until serving time. The pudding can spoil if left at room temperature for extended periods. If you’re serving them outdoors or at a party, consider setting them out in batches rather than all at once.

Frequently Asked Questions
Can I use homemade pudding instead of instant?
While you technically can, instant pudding works much better for this recipe. Homemade cooked pudding requires cooling time and has a softer consistency that doesn’t layer as well. If you do use homemade pudding, make sure it’s completely cold and firm before attempting to layer.
How many dirt cups does this recipe make?
This recipe typically yields 6-8 dirt cups, depending on the size of your containers. Eight-ounce cups are standard, but you can adjust the quantity by using larger or smaller containers.
Can I make these dairy-free?
Yes! Use non-dairy milk (like almond, oat, or coconut milk) with dairy-free instant pudding mix. Substitute the whipped topping with coconut whipped cream, and check that your Oreos and gummy worms are vegan-friendly if that’s a concern.
What if I don’t have a food processor?
No problem! The ziplock bag method works perfectly. You can also place the cookies in a large bowl and crush them with the bottom of a heavy glass or mug. It takes a bit longer but achieves the same result.
Can kids really help make these?
Absolutely! This is one of the best recipes for involving children. They can help crush the Oreos (especially using the ziplock bag method), layer the ingredients, and decorate the tops. Just supervise the pudding whisking step since it requires some vigor.
Why is my pudding not thickening?
The most common reasons are using milk that’s not cold enough or not whisking vigorously enough. Make sure your milk comes straight from the refrigerator, and whisk continuously for the full 2 minutes. Also, check your pudding mix’s expiration date—old pudding mix doesn’t set properly.
Can I use different cookies for the dirt?
Yes! Chocolate graham crackers, chocolate teddy grahams, or even chocolate chip cookies can work. However, Oreos provide the darkest, most realistic dirt color and the best flavor combination with chocolate pudding.
How do I write on the tombstone cookies without it smudging?
Use a decorating icing with a small tip for best results. Let each letter dry for a minute before moving to the next one. Once the complete message is written, allow 10-15 minutes of drying time before inserting into the cups. You can also use edible markers designed for writing on cookies.
Will the cookies get soggy?
The tombstone cookies will gradually soften over time, but they remain intact for 12-24 hours in the refrigerator. If you’re making these more than a day ahead, insert the tombstones right before serving to maintain their crispness.
Can I freeze these dirt cups?
Freezing isn’t recommended. The pudding texture changes when frozen and thawed, becoming grainy and separated. The Oreos can also become unpleasantly hard. These are best enjoyed fresh or refrigerated for up to 2 days.
Recipe Details:
- Prep Time: 15 minutes
- Chill Time: 10 minutes (plus additional 1-2 hours for optimal serving)
- Total Time: 25 minutes (plus chilling)
- Yield: 6-8 servings
- Course: Dessert
- Cuisine: American
- Diet: Vegetarian (can be made vegan with substitutions)
- Occasion: Halloween, Kids’ Parties


