Every October, my kitchen transforms into a cookie decorating studio, and these Jack-O’-Lantern Cookies have become the centerpiece of that tradition. I started making them when my kids were little, and now they’re teenagers who still insist on helping decorate. There’s something magical about watching plain sugar cookies transform into cheerful (or spooky!) pumpkin faces with just a few colors of frosting and some creative piping.
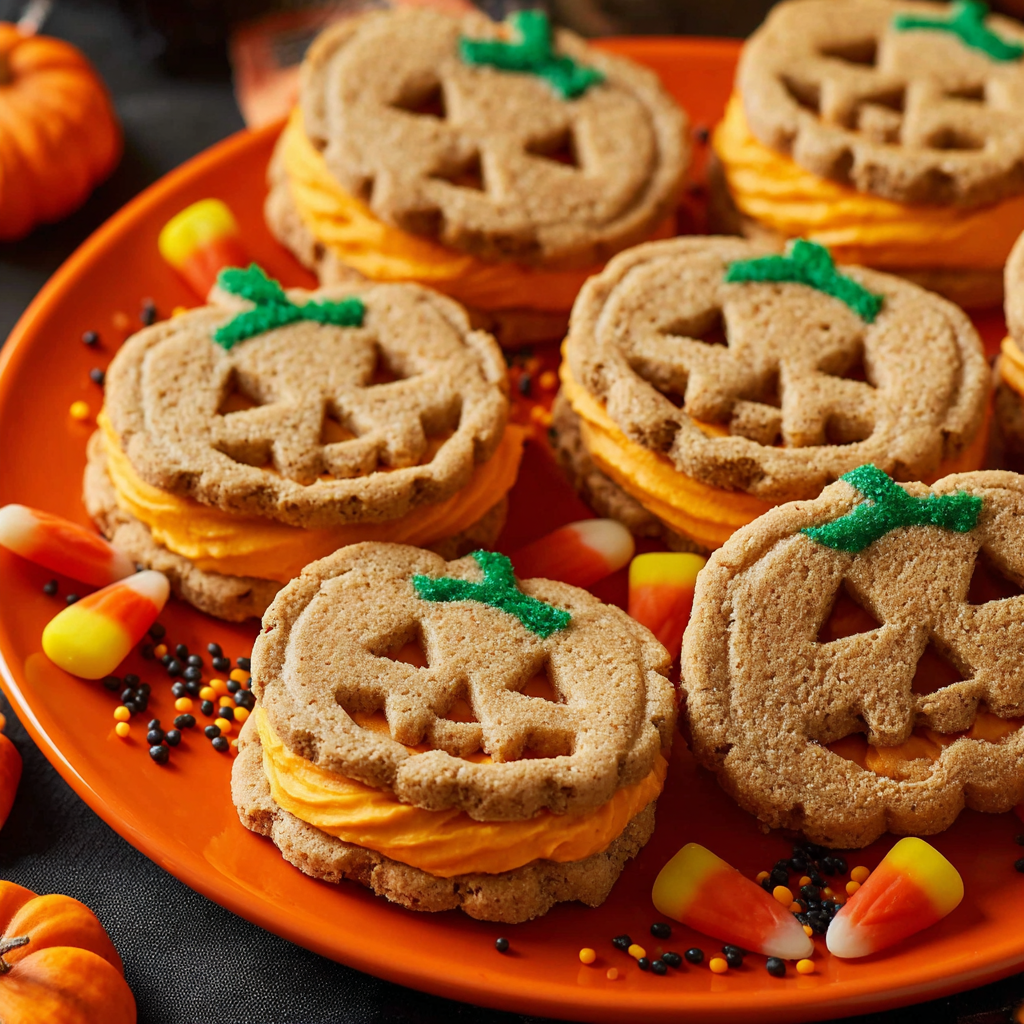
These classic sugar cookies feature a tender, buttery base that holds its shape beautifully during baking. Once decorated with vibrant orange, green, and black frosting, they become adorable edible jack-o’-lanterns that look almost too cute to eat—almost!
Why You’ll Love These Jack-O’-Lantern Cookies
Classic Sugar Cookie Perfection – This recipe produces cookies with just the right texture—soft and tender with slightly crisp edges. They’re sturdy enough to decorate elaborately but never dry or crumbly like some sugar cookies can be.
Fun for the Whole Family – Cookie decorating is one of those rare activities that genuinely appeals to all ages. Young children can help with sprinkles, while older kids and adults can tackle the more detailed piping work. Everyone gets to express their creativity!
Impressive Yet Achievable – While these cookies look professionally decorated, the technique is actually quite forgiving. Even if your piping skills aren’t perfect, the finished cookies still look festive and charming.
Perfect Party Centerpiece – Arranged on a platter, these colorful cookies create an instant focal point at any Halloween gathering. Their vibrant colors and cheerful faces immediately set a festive mood that guests appreciate.
Customizable Expressions – Each cookie can have its own unique personality! Create happy faces, scary grins, surprised expressions, or silly looks. This variety keeps the decorating process entertaining and makes your final display more interesting.
Ingredients You’ll Need
For the Cookie Dough
Butter (2 cups) – Use unsalted butter at room temperature for the best texture and flavor control. The generous amount creates that rich, melt-in-your-mouth quality that makes these cookies irresistible.
Granulated Sugar (2 cups) – Provides sweetness and helps create the cookies’ slightly crispy exterior. Make sure to cream it thoroughly with the butter for optimal texture.
Eggs (2 large) – These bind the dough together and add richness. Room temperature eggs incorporate more easily into the butter mixture than cold ones.
Vanilla Extract (3 teaspoons) – This generous amount infuses the cookies with warm, aromatic flavor that complements the sweet frosting perfectly.
All-Purpose Flour (5 cups) – The foundation of your cookie dough. Adding it gradually prevents overmixing and ensures the proper texture develops.
For the Frosting
Powdered Sugar (2 cups) – Also called confectioner’s sugar, this creates a smooth frosting that pipes beautifully and dries with a lovely finish.
Milk (2 tablespoons) – Provides the liquid needed to thin the powdered sugar into spreadable frosting. Whole milk creates the richest flavor, though any milk works.
Vanilla Extract (½ teaspoon) – Enhances the sweetness and adds depth to the otherwise simple frosting.
Food Coloring Gel – Orange, green, and black are essential for creating authentic jack-o’-lantern faces. Gel colors produce more vibrant hues than liquid varieties and won’t thin your frosting.
Halloween Sprinkles – Optional but delightful! They add texture and extra festive flair, especially on the pumpkin stems.
Essential Equipment
- Pumpkin-shaped cookie cutters in desired sizes
- Rolling pin
- Piping bags (disposable ones make cleanup easy)
- Small mixing bowls or ramekins for dividing frosting
- Wire cooling racks
- Baking sheets lined with parchment paper
How to Make Jack-O’-Lantern Cookies
Step 1: Prepare Your Oven and Ingredients
Preheat your oven to 350°F (175°C). Line your baking sheets with parchment paper or silicone baking mats to prevent sticking and ensure even baking. Make sure your butter and eggs are at room temperature, which helps them incorporate smoothly into the dough.
Step 2: Create the Cookie Dough
Add the butter, sugar, eggs, and vanilla to the bowl of your stand mixer fitted with the paddle attachment. Beat on medium speed for 3-4 minutes until the mixture becomes light, fluffy, and noticeably paler in color. Scrape down the sides of the bowl at least once to ensure even mixing.
Reduce the mixer speed to low and begin adding the flour one cup at a time. Allow each cup to fully incorporate before adding the next one. This gradual addition prevents flour clouds and helps you avoid overmixing. Continue until all five cups have been added and a soft, cohesive dough forms. The dough should pull away from the sides of the bowl and not feel overly sticky.
Step 3: Roll and Cut the Cookies
Lightly flour a clean work surface and your rolling pin. Divide your dough into quarters—working with smaller portions makes the rolling process more manageable and keeps the dough at a good temperature. Take one quarter and place it on your floured surface, returning the rest to the refrigerator to stay cool.
Roll the dough to approximately ¼-inch thickness, turning it occasionally and adding more flour as needed to prevent sticking. Using your pumpkin-shaped cookie cutter, cut out as many cookies as possible from the rolled dough. Carefully transfer each cookie to your prepared baking sheet, spacing them about 1 inch apart.
Gather the scraps, re-roll them once, and cut out additional cookies. Repeat this entire process with the remaining dough quarters until all the dough has been used.
Step 4: Bake the Cookies
Place the baking sheets in your preheated oven and bake for 8-10 minutes. The cookies are done when the edges just barely begin to turn golden—the centers may still look slightly underdone, but they’ll firm up as they cool. Avoid overbaking, which creates dry, hard cookies instead of tender ones.
Remove the baking sheets from the oven and let the cookies rest on the pan for 2-3 minutes. This brief resting period allows them to set without breaking. Then, carefully transfer them to wire cooling racks where they’ll cool completely. The cookies must be fully cool before decorating, or the frosting will melt and slide off.
Step 5: Prepare the Frosting
While your cookies cool, make the frosting. Combine the powdered sugar, milk, and vanilla in a clean mixing bowl. Mix on low speed initially to prevent powdered sugar from flying everywhere, then increase to medium-high speed and beat for 2-3 minutes until the frosting is smooth and slightly glossy.
The consistency should be thick enough to hold its shape when piped but fluid enough to spread slightly. If it seems too thick, add milk by the teaspoon until you reach the desired consistency. Conversely, if it’s too thin, add more powdered sugar a tablespoon at a time.
Step 6: Color and Prepare the Frosting
Divide your frosting evenly among three small bowls or ramekins. Add a few drops of orange food coloring gel to one bowl, green to another, and black to the third. Stir each one thoroughly until you achieve your desired color intensity. Remember that colors often look slightly different once dried, so test a small amount if you’re uncertain.
Transfer each colored frosting to its own piping bag. If you don’t have proper piping bags, ziplock bags work well—just snip a small corner off each one. Start with a tiny opening; you can always make it larger if needed, but you can’t make it smaller once cut.
Step 7: Decorate the Jack-O’-Lantern Faces
Begin by piping the black frosting to create eyes and mouth openings on each cookie. You can make traditional triangle eyes and jagged-tooth smiles, or get creative with different expressions. If desired, immediately sprinkle black sanding sugar over the wet frosting for extra dimension and sparkle. Use a small, dry brush to sweep away any excess sugar that landed outside your intended areas.
Next, pipe orange frosting around the entire perimeter of each cookie, creating a border that will contain your fill-in frosting. Then, fill in the rest of the cookie with orange frosting, carefully working around the black face features you’ve already created. A small offset spatula or butter knife can help spread the frosting evenly if needed.
Step 8: Add the Stem and Finishing Touches
Pipe green frosting onto the stem portion of each cookie at the top. While the green frosting is still wet, sprinkle Halloween-themed sprinkles or green sanding sugar over it for texture and visual interest.
Finally, use your orange frosting to pipe thin vertical lines down each cookie, starting from near the stem and extending toward the bottom. These lines mimic the natural ridges found on real pumpkins and add authentic detail. Space them relatively evenly—most cookies will have 4-6 lines depending on size.
Allow the decorated cookies to sit undisturbed for at least 30 minutes so the frosting can set and dry. This prevents smudging when you stack or package them.
Serving Suggestions
These delightful cookies look spectacular arranged on a large platter or tiered stand at your Halloween party. Mix different facial expressions for visual variety and to give your display personality. Consider placing them on black or orange tissue paper or a decorative doily for added elegance.
For children’s parties, set up a cookie decorating station where young guests can create their own jack-o’-lantern faces. Provide the baked cookies, bowls of different colored frostings, various sprinkles, and let their imaginations run wild. This activity keeps kids entertained while creating party favors they can take home.
Package individual cookies in clear cellophane bags tied with orange or black ribbon to create charming Halloween gifts for teachers, neighbors, or party guests. You can also arrange several cookies in a decorative tin or box lined with festive tissue paper for a more substantial gift.
Serve these cookies alongside hot apple cider, pumpkin spice lattes, or warm chocolate milk for the ultimate autumn refreshment pairing. The combination of sweet cookies with warm beverages creates a cozy atmosphere perfect for fall gatherings.
At Halloween potlucks or school events, these cookies travel beautifully in a single layer in a covered container. Place parchment paper between layers if you need to stack them to prevent the frosting from smudging.
Recipe Variations to Try
Chocolate Jack-O’-Lanterns
Replace 1 cup of the flour with unsweetened cocoa powder to create chocolate pumpkin cookies. The dark base makes the orange frosting pop even more dramatically and appeals to chocolate lovers.
Spiced Pumpkin Cookies
Add 1 teaspoon of cinnamon, ½ teaspoon of ginger, and ¼ teaspoon of nutmeg to your cookie dough for warm, autumn spices. This creates a more complex flavor profile that pairs beautifully with the sweet frosting.
Lemon-Glazed Version
Add 1 tablespoon of lemon zest to the cookie dough and replace the milk in the frosting with fresh lemon juice. This creates bright, citrusy cookies with a refreshing twist on the traditional recipe.
Mini Cookie Bites
Use mini pumpkin cookie cutters (about 1½ inches) to create bite-sized treats. Reduce the baking time to 6-8 minutes and adjust your frosting amounts accordingly. These adorable mini cookies are perfect for dessert buffets.
Cream Cheese Frosting
Replace the simple sugar frosting with cream cheese frosting for richer, tangier flavor. Combine 4 oz cream cheese, 2 cups powdered sugar, and 1 teaspoon vanilla, then divide and color as directed.
Glitter Glamour
Instead of or in addition to sprinkles, brush edible gold or silver luster dust over the dried orange frosting for glamorous, shimmering pumpkins perfect for adult parties.
Make-Ahead Tips
These cookies are wonderfully accommodating for advance preparation, making party planning significantly less stressful. The unbaked cookie dough can be made up to 3 days ahead and stored tightly wrapped in the refrigerator, or frozen for up to 3 months. When ready to use frozen dough, thaw it overnight in the refrigerator before rolling and cutting.
Baked but undecorated cookies stay fresh at room temperature in an airtight container for up to 5 days. This allows you to bake during one session and decorate during another, spreading out the work. You can also freeze baked cookies for up to 2 months—just make sure they’re completely cool before freezing in airtight containers or freezer bags.
The frosting can be prepared up to 2 days ahead and stored in airtight containers in the refrigerator. Before using, let it come to room temperature and give it a good stir to restore its smooth consistency. You may need to add a few drops of milk if it has thickened during storage.
Fully decorated cookies keep well in a single layer in an airtight container at room temperature for up to 1 week. The frosting will harden over time, creating a firm finish that actually makes them easier to stack and transport after 24 hours. For longer storage, freeze decorated cookies in a single layer on a baking sheet until solid, then transfer to freezer containers with parchment paper between layers.
When packaging cookies as gifts or party favors, wait until the frosting has completely dried (at least 4-6 hours or overnight) to prevent smudging during wrapping.
Important Notes
Room Temperature Ingredients – Butter and eggs at room temperature incorporate much more smoothly into your dough, creating better texture. Take them out of the refrigerator at least 1 hour before baking.
Don’t Overmix – Once you begin adding flour, mix only until just combined. Overmixing develops too much gluten, resulting in tough, dense cookies instead of tender ones.
Consistent Thickness – Roll your dough to an even ¼-inch thickness throughout. Uneven rolling creates cookies that bake unevenly—thicker areas remain doughy while thinner spots become overdone.
Watch Baking Time Carefully – These cookies bake quickly, and the difference between perfectly baked and overdone is just a minute or two. Start checking at 8 minutes, especially if using darker baking sheets which conduct more heat.
Cool Completely Before Decorating – This cannot be stressed enough! Even slightly warm cookies will cause your frosting to melt and slide off, ruining your beautiful decorating work. Be patient and wait for complete cooling.
Frosting Consistency Matters – If your frosting is too thick, it won’t pipe smoothly. Too thin, and it will run off the cookies. The perfect consistency coats the back of a spoon and slowly drips off when lifted.
Color Intensity – Gel food colors produce the most vibrant results with minimal product. Start with less than you think you need—you can always add more, but you can’t remove excess color.
Frequently Asked Questions
Can I use cookie cutters other than pumpkin shapes?
Absolutely! While pumpkin shapes are traditional for jack-o’-lanterns, you could use round cutters and decorate them as pumpkins, or get creative with ghost, bat, or witch hat shapes using different color schemes.
Why did my cookies spread during baking?
Cookie spreading usually happens when the dough is too warm or the butter was too soft when mixed. Make sure to chill your dough if it feels soft, and always use room temperature (not melted or overly soft) butter.
Can I make these gluten-free?
Yes! Substitute a 1:1 gluten-free baking flour blend for the all-purpose flour. The texture may be slightly different, but they’ll still be delicious. Make sure all other ingredients are certified gluten-free if needed.
How do I prevent my frosting colors from bleeding together?
Allow each color to dry for at least 10-15 minutes before piping adjacent colors. The black facial features should be completely dry before filling in with orange frosting around them.
What if I don’t have piping bags?
Ziplock bags work perfectly! Fill each bag about halfway with frosting, squeeze it toward one corner, and snip off a tiny piece of that corner. You can also use a small offset spatula or butter knife to spread frosting, though the results won’t be as precise.
Can I use regular food coloring instead of gel?
You can, but you’ll need significantly more to achieve vibrant colors, which may thin your frosting too much. If using liquid coloring, start with small amounts and add extra powdered sugar if the frosting becomes too thin.
How long do decorated cookies stay fresh?
Properly stored in an airtight container at room temperature, these cookies remain fresh and delicious for up to 1 week. The frosting hardens over time, which actually helps preserve them.
Can kids help make these cookies?
Definitely! Children can help with cutting shapes, transferring cookies to baking sheets, mixing frosting colors, and decorating (with supervision for piping). It’s a wonderful family activity that creates lasting memories.
Why is my frosting grainy?
Grainy frosting usually means the powdered sugar wasn’t fully dissolved. Beat the frosting for a full 2-3 minutes, and make sure you’re using fresh powdered sugar that hasn’t developed lumps.
Can I freeze decorated cookies?
Yes! Freeze them in a single layer on a baking sheet until solid, then carefully stack them with parchment paper between layers in an airtight container. They’ll keep for up to 2 months. Thaw at room temperature still covered to prevent condensation from forming on the frosting.
Recipe Details:
- Prep Time: 10 minutes
- Cook Time: 8 minutes per batch
- Additional Time: 10 minutes (cooling)
- Total Time: 28 minutes (plus decorating time)
- Yield: Approximately 24-30 cookies (depending on cutter size)
- Course: Dessert, Snack
- Cuisine: American
- Diet: Vegetarian
- Occasion: Halloween, Kids’ Parties, Baking Projects


